GitBucket2.2がリリースされたようです。
最近地道に社内に広めている身としてはありがたい事に、プラグイン機能が実装された事を@takezoeさんのblogで知りました。
とはいえ、プラグインシステムはまだまだ試行錯誤を繰り返している状態なので、APIを含め今後大幅な変更が入る可能性が高いです。現状はあくまでお試し版といったところです。
と書かれていますが、試しにちょっと遊んでみました。
注意事項
勝手にソースを弄ってごにょごにょしているので自己責任でお願いします。
GitBucketの開発向けの起動の仕方や、Scalaの開発環境構築に関してはここでは触れません。
for Developers辺りを参考に構築してください。
前準備
デフォルトでは、https://github.com/takezoe/gitbucket_plugins.git がセントラルリポジトリとして設定されているようです。
ただ遊ぶだけなのに、gitbucket_pluginsにPullRequestを取り込んでもらうのも面倒なので、
ソースを書き換えて自分リポジトリをプラグインとして認識させます。
// src/main/scala/plugin/PluginSystem.scala#L51

// デフォルトはこれだけが定義されている
repositoriesList += PluginRepository("central", "https://github.com/takezoe/gitbucket_plugins.git")

// ローカルリポジトリを追加
// git://は駄目な模様
repositoriesList += PluginRepository("local", "https://github.com/hikaruworld/test")
あわせて、コメントアウトされていたadmin/plugins/consoleのURLもアクセス可能にしておきます。
GitBucketのプラグインはjavascriptで書けるのですが、実体がRhinoなので、通常のjsのつもりで書いてもちょこちょこ引っかかるのでアプリ上から実行可能にします。
// src/main/scala/app/SystemSettingsController.scala#L114-L122

//コメントアウトを戻す
get("/admin/plugins/console")(adminOnly {
   admin.plugins.html.console()
})
post("/admin/plugins/console")(adminOnly {
   val script = request.getParameter("script")
   val result = plugin.JavaScriptPlugin.evaluateJavaScript(script)
   Ok(result)
})
これで、http://localhost:8080/admin/plugins/console にアクセスすることでjavascriptの検証が可能になります。
プラグインの作成
基本的にはgitbucket_plugins.gitのサンプルと、src/main/scala/plugin/JavaScriptPlugin.scala辺りを見ながら拡張していきます。
今回は試しに、githubやbitbucketにあるこれを実装してみます。
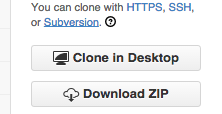
理由は『Githubにある簡単にSourceTreeを起動するアレがGitBucketにはない』と言われたので....
提供される拡張ポイント
現時点では、以下の4つが提供されているようです。
今回はサンプルに従って、addRepositoryActionの拡張を行ないます。
| 拡張メソッド | 概要 | 必要なプロパティ | functionの引数 |
|---|---|---|---|
| addRepositoryMenu | リポジトリのメニューを拡張(試してない) | label,name,url,icon,condition | context |
| addGlobalMenu | 全体のメニューを拡張(試してない) | label,url,icon,condition | context |
| addGlobalAction | 全体のアクションを拡張 | path,function | request, response |
| addRepositoryAction | リポジトリのアクションを拡張 | path,function | request, response, repository |
また、function内部では、plugin.db()を通してselect句がサポートされていました。
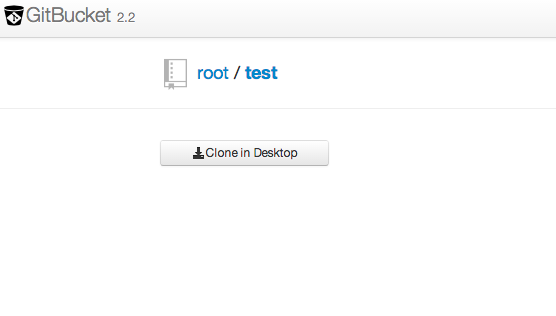
完成図
http://localhost:8080/root/test/desktop-clone にアクセスすると以下が表示されるようにします。

必要なファイルの作成と設定
plugin.jsとplugin.propertiesの2つが必要になるようです。
| ファイル名 | 概要 |
|---|---|
| plugin.js | 実装されるプラグインのソース |
| plugin.properties | 設定ファイル |
設定を記述
plugin.propertiesに設定を書きます。サンプルを参考にこんな感じで書きました。
id=desktop-clone
version=1.0.0
author=hikaruworld
url=https://github.com/hikaruworld/test
description=destop clone support(source tree).
実装を記述
plugin.propertiesに定義された情報にアクセスできるようです。
最初にJavaScriptPlugin#defineでインスタンスを生成し、JavaScriptPlugin#addRepositoryActionを利用して、拡張ポイントを定義します。
最後にPluginSystem#installを利用して実際にプラグインを有効化します(と言った流れでしょうか)。
var plugin = JavaScriptPlugin.define(id, version, author, url, description);

// REPOSITORY/desktop-cloneにアクセスされた場合に動く実装を定義
plugin.addRepositoryAction('/desktop-clone', function(request, response){

  // UserAgent情報からOSを切り分け
  var userAgent = request.getHeader("User-Agent") + "";
  var platform = "";
  if (userAgent.indexOf("Mac") >= 0) {
    platform = "mac";
  } else if (userAgent.indexOf("Linux") >= 0) {
    platform = "linux";
  } else if (userAgent.indexOf("Win") >= 0) {
    platform = "windows";
  } else {
    platform = "";
  }

  // requestはJavaのHttpServletRequestなので、getRequestURLで現在のURLを取得
  // 色々加工して、Clone用のURLを構築
  var endpoint = request.getRequestURL() + "";
  var ary = endpoint.split("/");
  ary.pop();
  ary.splice(-2, 0, "git");
  endpoint = ary.join("/") + ".git";
  // 画面に表示するためHTMLを返す。JSON形式でformat指定を返す事も可能な模様。
  return '<div style="margin-top: 10px;">' +
         '   <a href="github-' + platform + '://openRepo/' + endpoint + '" class="btn btn-small" style="width: 147px;"><i class="icon-download-alt"></i>Clone in Desktop</a>' +
         '</div>';
});

PluginSystem.install(plugin);
公開とインストール
- 先ほど登録したローカルリポジトリにpushします。
- gitbucketを再起動します。
- 管理者権限でログインし、
AdministrationからPluginsを選択し、Available pluginsタグから今回作成したプラグインを選択してインストールする。
毎回インストールが面倒な時
インストールしたプラグインは、GITBUCKET_HOME/plugins以下に配備されます。
これを直接弄れば、いちいちプラグインのアップデートをしなくても挙動の確認が出来ます
プラグインの更新を認識してくれない
画面表示時に最新を取ってくれる訳ではないようなので、sbtを起動してcontainer:restartで認識されます。
出来たらいいな
- 設定画面でプラグイン用の設定を個別にユーザが行なえるようにしたい
- 設定情報やユーザー情報にアクセスできるようにしたい(db経由はちょっと面倒なので)
調べたい事
-
ScalaPlugin.scalaが気になる。Scalaでも書ける? -
jQueryなども活用して書きたい
オチ
別にプラグインとして実装する必要はない機能だったりする訳です。
本体側に取り込んでもらうようにPullRequestしたいかも....

