サーバーレスでイベントドリブンなWEBクローラーを作ってみる
今ElasticSearchを勉強中なので、ESを使って何かできないかなと思い、Kinesis+Lambdaを使ったイベントドリブンなWebクローラーを書いてみました。
- 実行環境
- CentOS7
- python 2.7
ワークフロー
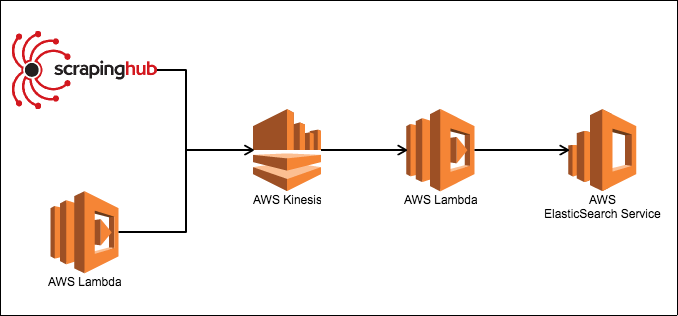
大まかな流れは以下の通りです。
- Scrapy(ScrapingHub or AWS Lambda)でURLを抽出、KinesisストリームにPUT
- KinesisストリームからAWS Lambdaに発火させる
- Lambda関数からURLへ巡回し、データをElasticSearch Serviceへ流す
IAMユーザーの作成
KinesisとElasticSearchを使う上で、権限が必要になるので、
それぞれにアクセスキーIDとシークレットアクセスキーを用意しておく。
また、ユーザーのARNも必要になるのでひかえておく(arn:aws:iam::**********:user/*******)
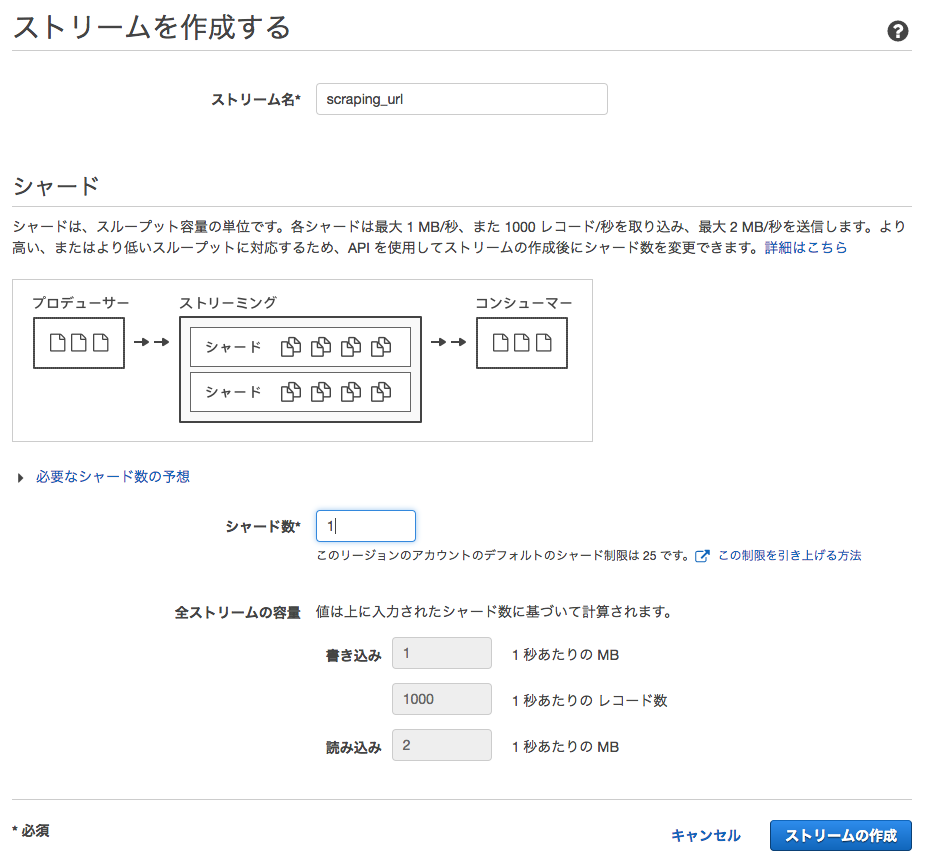
AWS Kinesisでストリームを作成する
まずはKinesisストリームを作成します。
AWS ElasticSearch Serviceを作成する
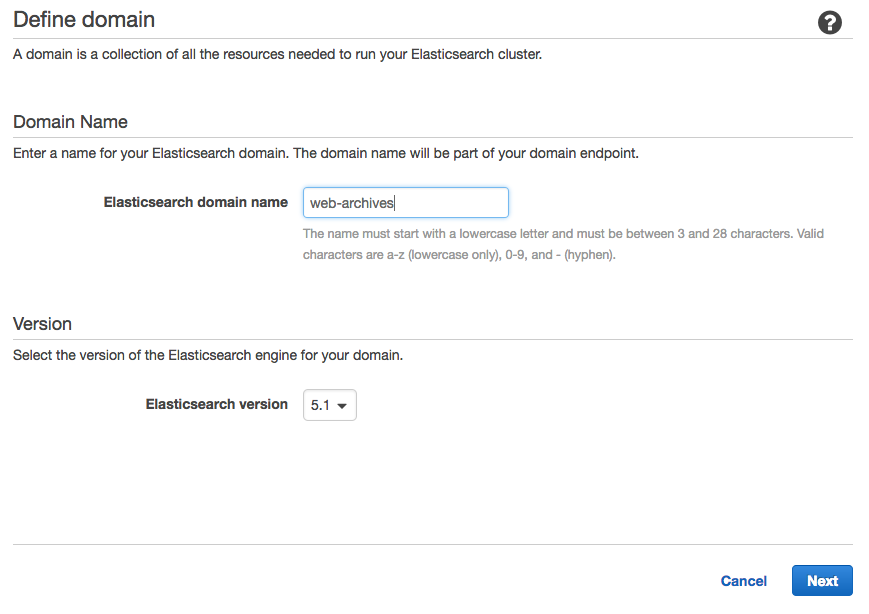
次にAmazon ElasticSearch ServiceでESを作成します。
AWSでの操作
-
Create a new domain
-
Elasticsearch domain nameに適当なドメイン名を入力 (仮にweb-archives)
-
Configure clusterでInstance typeを[t2.small]にしておく。[Next]押す (テストなので小さいインスタンスで)

-
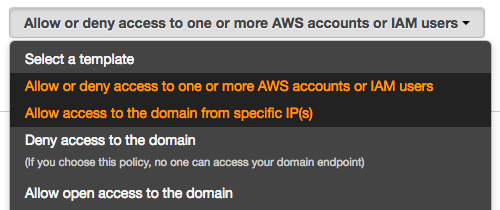
Set up access policyで[Allow or deny access to one or more AWS accounts or IAM users]を選択
-
[Confirm and create]で作成
ElasticSearchにインデックス作成とマッピングをする
記事保存用にURL,タイトル,記事内容を保存するマッピングデータを作成します。
{
    "mappings": {
        "article": {
            "properties" : {
                "url" : {
                    "type": "string",
                    "index" : "not_analyzed"
                },
                "title" : {
                    "type": "string",
                    "index" : "analyzed"
                },
                "contents" : {
                    "type": "string",
                    "index" : "analyzed"
                }
            }
        }
    }
}
次に上記マッピングデータと、インデックス作成をするスクリプトを作成します。
予めローカルに以下のパッケージをインストールしておきます
$ pip install requests_aws4auth elasticsearch
# -*- coding: utf-8 -*-
import elasticsearch
from requests_aws4auth import AWS4Auth
import json

if __name__ == '__main__':
    # ESのエンドポイントを指定
    host='search-***************.ap-northeast-1.es.amazonaws.com'
    awsauth = AWS4Auth(
            # AWSユーザーのアクセスキーIDとシークレットアクセスキー
            'ACCESS_KRY_ID',
            'SECRET_ACCESS_KEY',
            'ap-northeast-1', 'es')

    es = elasticsearch.Elasticsearch(
            hosts=[{'host': host, 'port': 443}],
            http_auth=awsauth,
            use_ssl=True,
            verify_certs=True,
            connection_class=elasticsearch.connection.RequestsHttpConnection
            )

    f = open('mapping.json', 'r')
    mapping = json.load(f)

    es.indices.create(index='website')
    es.indices.put_mapping(index='website', doc_type='article', body=mapping['mappings'])
$ python es-mapping.py
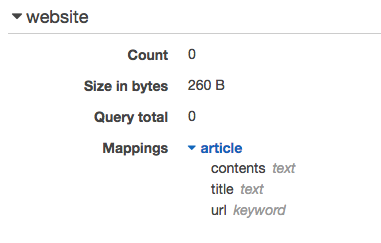
スクリプトを実行すると、AWS ES上にインデックスが作成されているはずです。
AWS Lambdaを作成する
ElasticSearchを作成したので、次にLambda Functionを作成します。
Lambda関数の作成
ローカルにLambda関数を作成します。
$ mkdir web_crawler
$ cd web_crawler
$ vim lambda_function.py
# -*- coding: utf-8 -*-
import os
import base64
from readability import Document
import html2text
import requests
import elasticsearch
from elasticsearch import helpers
from requests_aws4auth import AWS4Auth

def lambda_handler(event, context):
    host = os.environ['ES_HOST']
    # ElasticSearch Serviceへの認証にIAM Roleを利用する
    awsauth = AWS4Auth(
            os.environ['ACCESS_ID'],
            os.environ['SECRET_KEY'], 'ap-northeast-1', 'es')

    es = elasticsearch.Elasticsearch(
            hosts=[{'host': host, 'port': 443}],
            http_auth=awsauth,
            use_ssl=True,
            verify_certs=True,
            connection_class=elasticsearch.connection.RequestsHttpConnection
    )

    articles = []

    # Kinesis Streamからイベントを取得
    for record in event['Records']:
        payload = base64.b64decode(record['kinesis']['data'])
        try:
            response = requests.get(payload)
            if response.ok:
                article = Document(response.content).summary()
                titleText = html2text.html2text(Document(response.content).title())
                contentsText = html2text.html2text(article)
                res = es.search(index="website", body={"query": {"match": {"url": payload}}})
                # ESにURLが既に登録されているか
                if res['hits']['total'] is 0:
                    doc = {
                        'url': payload,
                        'title': titleText.encode('utf-8'),
                        'contents': contentsText.encode('utf-8')
                    }
                    articles.append({'_index':'website', '_type':'scraper', '_source':doc})
        except requests.exceptions.HTTPError as err:
            print("HTTPError: " + err)
    # Bulk Insert
    helpers.bulk(es, articles)
Lambda関数を作成したら、必要なライブラリを同一階層へインストール
$ pip install readability-lxml html2text elasticsearch requests_aws4auth requests -t /path/to/web_crawler
zipで固めます
$ zip -r web_crawler.zip .
AWSにLambda関数をデプロイする
-
[Lamnda 関数の作成]
-
[ブランク関数]を選択
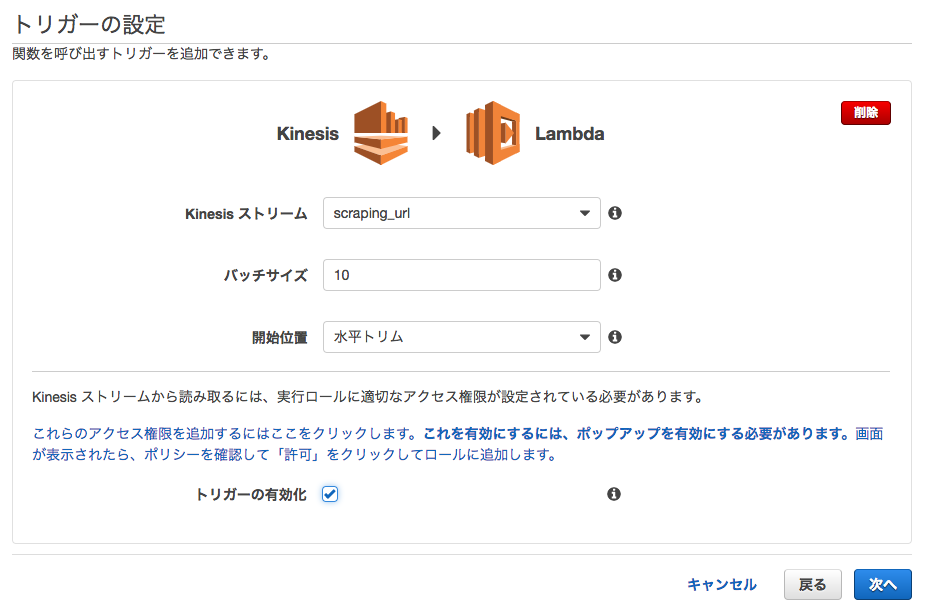
-
[トリガーの設定]で先ほど作成したKinesisストリームを選択する
-
[バッチサイズ]は10程度
-
[開始位置]は水平トリム
-
[関数の設定]で[名前]を入力する(ここでは仮にWebCrawler)
-
[ランタイム]はPython 2.7を選択
-
[コード エントリ タイプ]で.ZIPファイルをアップロードを選択
-
[関数パッケージ]から先ほど作成したzipファイルを指定
-
[環境変数]にElasticSearchへのアクセス用に3つ設定する
1. ACCESS_IDにアクセスキーID
1. SECRET_KEYにシークレットアクセスキー
1. ES_HOSTにElasticSearchのエンドポイント

-
[ハンドラ]はlambda_function.lambda_handlerのまま
-
ロールは適宜作成
-
[詳細設定]の[タイムアウト]を2分くらいにする
-
[関数の作成]
ScrapyでURL抽出、Kinesisストリームへ送信する
次は最終段階、Scrapyを使って一覧ページからURLを抽出し、Kinesisストリームへデータを送信してみます。
一覧ページは、はてなブックマークのホットエントリーを使います。Scrapyを使えばRSSの方が簡単にデータを取れそうなのですが、あえてWebページからスクレイピングしてみました。Scrapyは高度なWebクローラーを作る際、便利で強力なフレームワークなので、興味があれば触ってみてください。
プロジェクトの作成
まずはScrapyをインストール
$ pip install scrapy
$ scrapy startproject hotentry
$ vim hotentry/hotentry/spiders/hotentry.py
以下のコードを入力します。
# -*- coding: utf-8 -*-
import scrapy
from scrapy.conf import settings
import boto3
import json

kinesis = boto3.client(
        'kinesis',
        aws_access_key_id=settings['AWS_ACCESS_KEY_ID'],
        aws_secret_access_key=settings['AWS_SECRET_ACCESS_KEY'],
        region_name='ap-northeast-1')

class HotEntrySpider(scrapy.Spider):
    name = "hotentry"
    allowed_domains = ["b.hatena.ne.jp"]
    start_urls = ['http://b.hatena.ne.jp/hotentry/general']

    def parse(self, response):
        for sel in response.css("li.hb-entry-unit-with-favorites"):
            url = sel.css("a.entry-link::attr('href')").extract_first()
            if url is None:
                continue
            kinesis.put_record(
                    StreamName = "scraping_url",
                    Data = sel.css("a.entry-link::attr('href')").extract_first(),
                    PartitionKey = "scraper"
            )
$ vim hotentry/hotentry/settings.py
settings.pyにアクセスキーIDとシークレットアクセスキーを追記
AWS_ACCESS_KEY_ID = 'AKI******************'
AWS_SECRET_ACCESS_KEY = '************************************'
これでKinesisストリームへPUTすることができるようになりました。試しにこのコードを実行してみます。
$ scrapy crawl hotenty
これで「Scrapy -> Kinesis -> AWS Lambda -> ElasticSearch」とデータが投入できたはずです。
ScrapyをScrapinghubへデプロイする
ScrapyでURLを抽出し、Kinesisへ送る事ができましたが、このままではローカルバッチになってしまいますので、ScrapyのコードをScrapinghubというクラウドサービスへデプロイします。
導入方法は以下の記事が詳しいので、こちらを見てください。
ユーザー登録からデプロイまでは簡単に出来てしまうので端折ります。
最後に
当初はSQSやDynamoDB使いLambda関数も複数にわけていたのですが、複雑になってエラーが追えず挫折しました。やはりシンプルイズベスト。Lambdaのトリガーはもっと対応サービス増やしてほしいなぁ。
※ このコードはテストで書いたものなので、エラーハンドリングなどを厳密に行っていません。このコードで何かしら不利益があったとしても自己責任でお願いします。
