PhantomJS Lambda Templateの開発者が phantomjs-lambda-pack を新しくリリースしていたので、これを使ってLambda上でPhantomJSを動作させてみます。
環境構築と初期設定
$ mkdir lambda-phantomjs && cd  lambda-phantomjs
$ npm init
$ npm install phantomjs-lambda-pack --save
index.jsはREADME.md のusageに書かれている内容でまずは試します。
% cat index.js
'use strict';
const phantomjsLambdaPack = require('phantomjs-lambda-pack');
const exec = phantomjsLambdaPack.exec;

exports.handler = (event, context, callback) => {
    exec('-v', (error, stdout, stderr) => {
        if (error) {
            console.error(`exec error: ${error}`);
            return;
        }

        console.log(`phantom version: ${stdout}`);
        console.log(`Should have no error: ${stderr}`);

        callback(error, 'fin!!');
    });
};
Lambda Functionの設定と実行
Function Packageをアップロードしたら以下のように設定します。
(使用するスクリプトは、Code entry typeで、『Upload a .ZIP file』を選択してアップロードすることができるサイズ(10MB以下)になっているかと思います。)
| 設定項目 | 設定値 |
|---|---|
| Runtime | Node.js 4.3 |
| Handler | lambda-phantomjs/index.handler |
| Memory(MB) | 1024 |
| Timeout | 5 min |
初回実行時は 1min だと Timeout エラーが発生したので、5min としています。
実行結果を見ると2分ぐらいを見ておけば大丈夫かもしれません。
(2回目以降の実行時は 4000 ms 前後ぐらいで安定します。)
実行結果
Log output を確認すると以下のように実行されたことがわかります。
2016-11-24T10:02:46.845Z	f39f30db-b22c-11e6-94f0-653737dc93be	exec phantom:  -v
2016-11-24T10:02:47.105Z	f39f30db-b22c-11e6-94f0-653737dc93be	phantom version: 2.1.1

2016-11-24T10:02:47.105Z	f39f30db-b22c-11e6-94f0-653737dc93be	Should have no error:
END RequestId: f39f30db-b22c-11e6-94f0-653737dc93be
REPORT RequestId: f39f30db-b22c-11e6-94f0-653737dc93be	Duration: 75160.69 ms	Billed Duration: 75200 ms 	Memory Size: 1024 MB	Max Memory Used: 401 MB	PhantomJS
phantomjs-lambda-pack を使うと PhantomJS の 2.1.1 が使われていることがわかります。
内部では phantomjs-prebuilt が使われているので、phantomjs-prebuilt が対応しているバージョンの PhantomJS が使われることになります。
実際にPhantomJSを使ってScraping
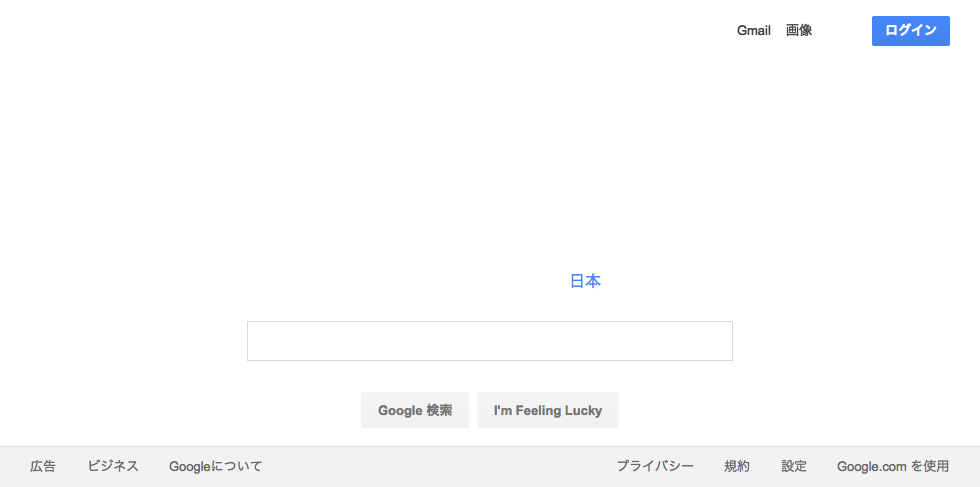
GoogleにアクセスしてPageのTitleを取得、および表示したページのスクリーンショットをS3にアップロードしてみます。
ディレクトリ構造は下記の通りです。
index.js と同じディレクトリ階層に phantomjs-script.js というスクリプトを作成しています。
.
├── index.js
├── node_modules
│   ├── aws-sdk
│   └── phantomjs-lambda-pack
│
├── package.json
└── phantomjs-script.js
事前に aws-sdk のインストールおよび、Lambdaの実行ロールにS3 への書き込み権限を付与しておきます。
handler の中で phantomjs-script.js を呼び出しています。
'use strict';
const phantomjsLambdaPack = require('phantomjs-lambda-pack');
const exec = phantomjsLambdaPack.exec;
const path = require('path');
const fs = require('fs');
const AWS = require('aws-sdk');
AWS.config.region = 'ap-northeast-1';

exports.handler = (event, context, callback) => {
    const scriptPath = path.join(__dirname, 'phantomjs-script.js');
    exec(scriptPath, (error, stdout, stderr) => {
        if (error) {
            console.error(`exec error: ${error}`);
            return;
        }

        console.log(`Result: ${stdout}`);
        console.log(`Should have no error: ${stderr}`);

       // スクリーンショットをS3にアップロードする
       const tmp_file_path = path.join(__dirname, 'google.png');
       const params = {Bucket: 'bucketName', Key: 'screen/google.png', Body: fs.createReadStream(tmp_file_path),};
       new AWS.S3().upload(params, (error, data) => {
           callback(error, 'fin!!');
       });
    })
}
// headlessブラウザを作成
var page = require('webpage').create();
page.settings.userAgent = 'Mozilla/5.0 (Windows NT 10.0; WOW64) AppleWebKit/537.36 (KHTML, like Gecko) Chrome/44.0.2403.157 Safari/537.36';
page.settings.javascriptEnabled = true;
page.settings.loadImages = false;//Script is much faster with this field set to false
phantom.cookiesEnabled = true;
phantom.javascriptEnabled = true;

//URLを開く
page.open('http://www.google.com', function(status) {
  //ブラウザ内でJSを介してデータを取得
  var title = page.evaluate(function() {
    return document.title;
  });
  page.render('google.png');
  console.log('Page title is ' + title);
  phantom.exit();
});
実行結果として Log output に Result: Page title is Google が出力され、以下のようなスクリーンショットが確認できれば、問題なく実行されたことになります。
Tipsとか
jQueryを使いたい
jQueryを使ってDOMをパースしたいときは以下のように includeJs を使って書けます。
//省略

page.open('http://www.google.com', function(status) {
    page.includeJs('https://code.jquery.com/jquery-3.1.1.slim.min.js', function() {
        //ブラウザ内でJSを介してデータを取得
        var title = page.evaluate(function() {
            return $('title').text();
        });
        console.log('Page title is ' + title);
        phantom.exit();
    });
});
PhantomJSのスクリプトにパラメータを渡したい
execの引数として配列を渡し、PhantomJSのスクリプトで system.args を利用できるようにしておくことでパラメータが渡せます。
// 省略

exports.handler = (event, context, callback) => {
    const scriptPath = path.join(__dirname, 'phantomjs-script.js');
    const childArgs = [
        scriptPath,
        'args1',
    ];
    exec(childArgs, (error, stdout, stderr) => {
        if (error) {
            console.error(`exec error: ${error}`);
            return;
        }

        console.log(`Result: ${stdout}`);
        console.log(`Should have no error: ${stderr}`);
    });
var system = require('system');
var args = system.args;

console.log(args.length);
console.log(args[1]);

// 省略
evaluateに外部で定義した変数を使用する
外部で定義した変数を使う場合は以下のようにします。
  var hoge = 'fuga';
  var title = page.evaluate(function(s) {
    console.log(s);
    return document.title;
  }, hoge);
