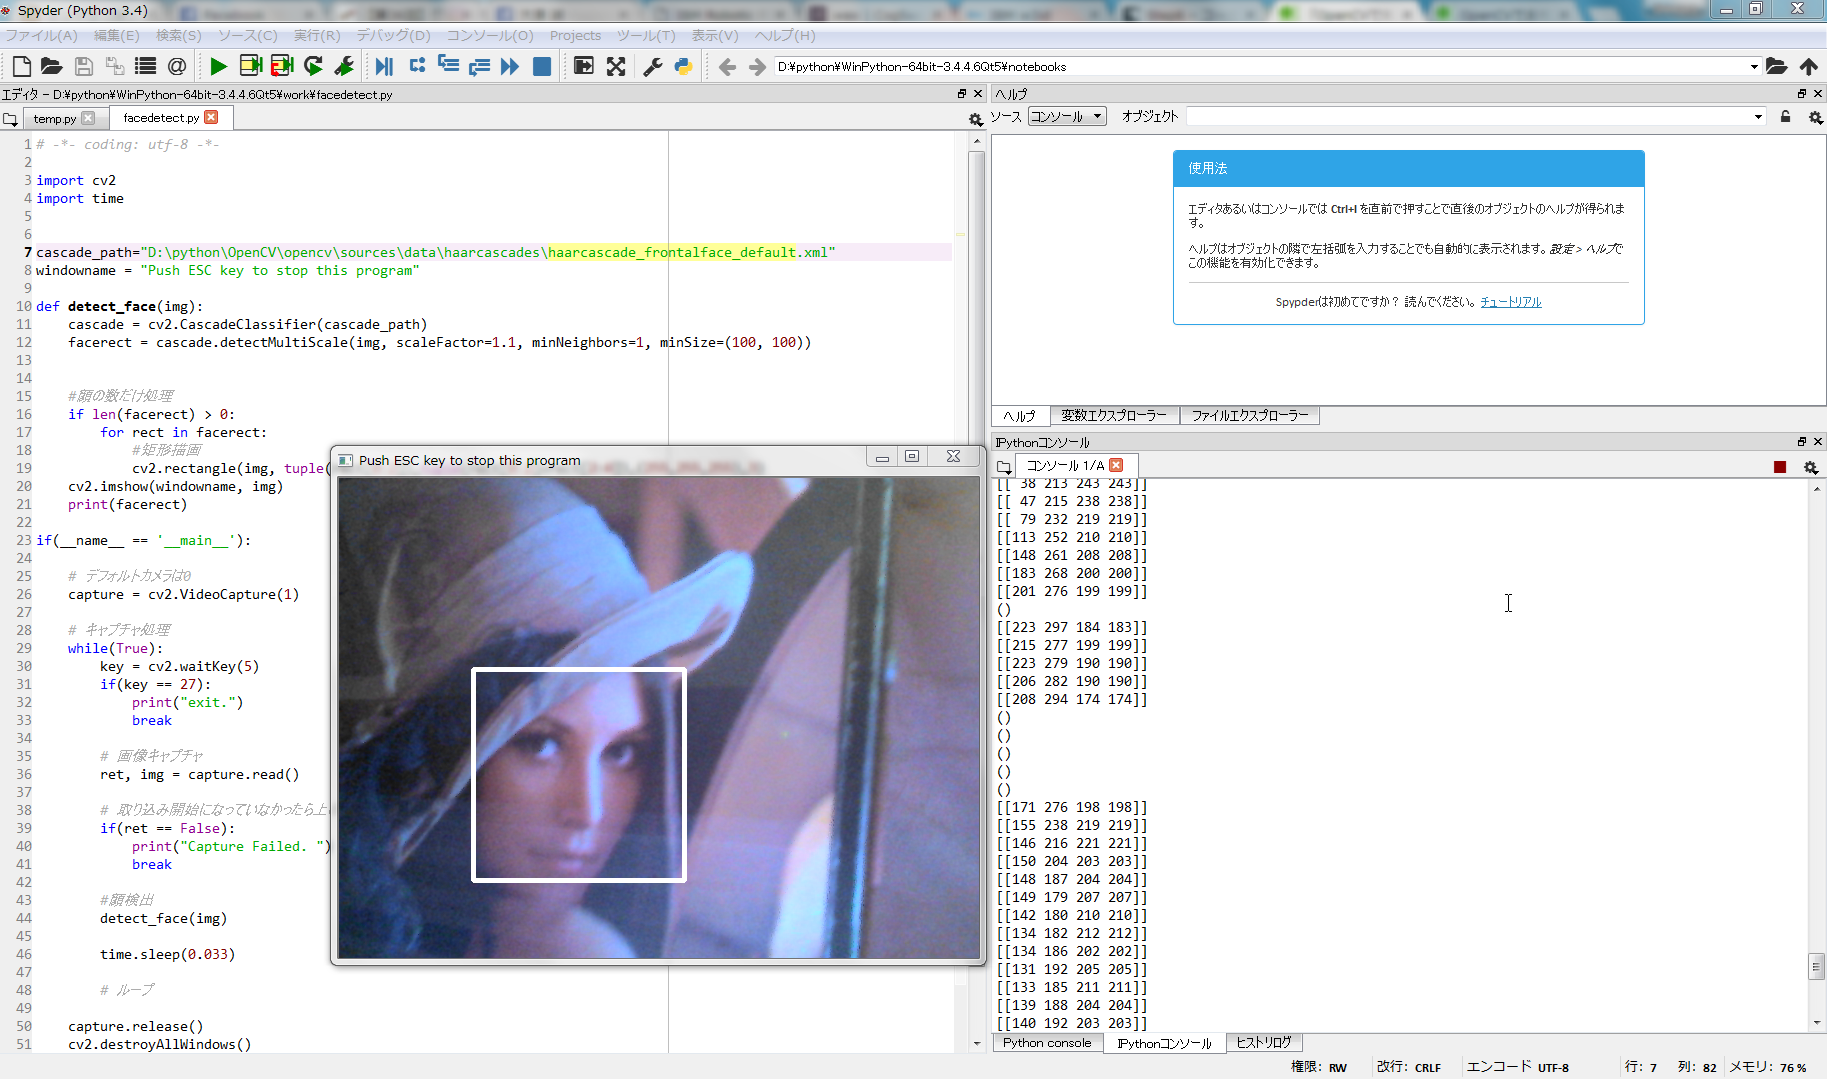
さて、前回はWindows上に構築したOpenCV+Pythonの環境でカメラの画像から顔を認識するところまでやってみました。今回は、認識した顔を四角で囲って表示してみたいと思います。
矩形表示
OpenCVでは簡単に画像上に矩形を表示するメソッドが用意されています。その名もrectangle()です。(しかし、OpenCVのドキュメントは分かりにくいですね、、、)
cv2.rectangle(img,pt1,pt2,color,thickness)
これで、img上にpt1を左上の頂点、pt2を右下の頂点とする矩形をthicknessの太さの線でcolorの色で表示します。
一方、顔認識の結果は以下のような配列で返されます。
[[258 224 217 217]]
左から、x,y,width,heightです。
pythonを初めて触るのでどうやってやるのが正しいのかなかなか分からなかったのですが、以下のようなコードに落ち着きました。
 for rect in facerect
    cv2.rectangle(img, tuple(rect[0:2]),tuple(rect[0:2]+rect[2:4]),(255,255,255),3)
これで、cv2.rectangle(img,(258,224),(475,441),(255,255,255),3)と同じことになります。
もう少しスマートなやり方がありそうですが、とりあえず良しとします。
最終的には以下のコードになりました。
# -*- coding: utf-8 -*-

import cv2
import time


cascade_path="D:\python\OpenCV\opencv\sources\data\haarcascades\haarcascade_frontalface_default.xml"
window = "Push ESC key to stop this program"

def detect_face(img):
    cascade = cv2.CascadeClassifier(cascade_path)
    facerect = cascade.detectMultiScale(img, scaleFactor=1.1, minNeighbors=1, minSize=(100, 100))

    #顔の数だけ処理
    if len(facerect) > 0:
        for rect in facerect:
            #矩形描画
            cv2.rectangle(img, tuple(rect[0:2]),tuple(rect[0:2]+rect[2:4]),(255,255,255),3)
    cv2.imshow(window, img)
    print(facerect)

if(__name__ == '__main__'):

    # デフォルトカメラは0
    capture = cv2.VideoCapture(1)

    # キャプチャ処理
    while(True):
        key = cv2.waitKey(5)
        if(key == 27):
            print("exit.")
            break

        # 画像キャプチャ
        ret, img = capture.read()

        # 取り込み開始になっていなかったら上の処理に戻る
        if(ret == False):
            print("Capture Failed. ")
            break

        #顔検出
        detect_face(img)
        time.sleep(0.050)

    capture.release()
    cv2.destroyAllWindows()
スマホに有名なlennaさんの写真を移してカメラにかざしてみましたが、見事に認識し、四角で囲まれました!
まとめ
今回は、認識した顔の上に四角を表示しました。OpenCVを用いることでこのようなことが簡単にできます。次回は単なる矩形表示ではなく、顔にモザイクをかけてみたいと思います。
