三行でまとめると
- Docker Registry w/ Google Cloud Storage driver を利用し、イメージは GCS 経由で共有する
- Push: ビルドサーバに Docker Registry を立てて、そこにビルドしたイメージを push
- Pull: Google Container Engine の pod の1つとして Docker Registry を立てて、そこから service の portalIP 経由で Pull
以下、手順詳細
事前準備
- ビルドサーバに gcloud SDK をインストールし、認証が終わっていること
- デフォルトの GCP の PROJECT_ID が設定してあること(下記のコマンドでは --projectId オプションを全て省略しているため)
- GCS に Docker registry 用のバケットを作成していること
ビルドサーバ で Push
イメージのビルド
ここでは例として、dockerfile/nginx を例として使います。
$ git clone git@github.com:dockerfile/nginx.git
$ cd nginx
$ docker build -t localhost:5000/nginx .
ビルド時にタグ名に localhost:5000/ を付けておくことがポイントです。
google/docker-registry を起動
Google が本家 docker-registry をカスタマイズしたイメージを提供してくれているのでそれを利用します。
$ docker pull google/docker-registry
$ echo "GCP_OAUTH2_REFRESH_TOKEN=$(gcloud auth print-refresh-token)" > registry-params.env
$ echo "GCS_BUCKET=<your-bucket>" >> registry-params.env
$ docker run --env-file=registry-params.env -p 5000:5000 google/docker-registry
docker-registry に Push
ビルド時に指定したタグ名で docker push します。しばらく待つと GCS にイメージがアップロードされます。
(2015/1/11 push 時のオプションに --insecure-registry localhost:5000 を追加)
$ docker push localhost:5000/nginx --insecure-registry localhost:5000
The push refers to a repository [localhost:5000/nginx] (len: 1)
Sending image list
Pushing repository localhost:5000/nginx (1 tags)
...
{http://localhost:5000/v1/repositories/nginx/tags/latest}
これでイメージの push は完了です。
Google Container Engine で Pull
環境変数の設定
export GKE_CLUSTER=<your-cluster-name>
export GKE_ZONE=<your-zone>
export GKE_NETWORK=<your-network>
Network の作成
GCE には AWS でいうと、VPC + Security Group 的な機能を持つ Network というのがあります。指定しないと default という名前の Network が使われるのですが、今回はポート制御などもあるので、新規に作り、http(80) 用のポートを開放します。
$ gcloud compute networks create $GKE_NETWORK --range 10.241.0.0/16
$ gcloud compute firewall-rules create $GKE_NETWORK-allow-ssh \
    --allow tcp:22 \
    --network $GKE_NETWORK \
    --source-ranges 0.0.0.0/0
$ gcloud compute firewall-rules create $GKE_NETWORK-allow-http \
    --allow tcp:80 \
    --network $GKE_NETWORK \
    --source-ranges 0.0.0.0/0
ちなみに firewall の rule 名はプロジェクトで共有されているので、重複しないように自分は [network name]-{allow|deny}-[service] という命名規則でつけてます。
cluster の作成
$ gcloud preview container clusters create $GKE_CLUSTER \
    --zone $GKE_ZONE \
    --network $GKE_NETWORK \
    --num-nodes 2 \
    --machine-type n1-standard-1 \
    --no-set-default
docker registory pod を立ち上げ
以下の内容で registry-pod.json というファイルを作成します。
ホントは YAML で書きたかったんですが、なぜかエラーになったので仕方なしに JSON です。
{
  "kind": "Pod",
  "apiVersion": "v1beta1",
  "id": "registry-pod",
  "desiredState": {
    "manifest": {
      "version": "v1beta1",
      "id": "registry-pod",
      "containers": [
        {
          "name": "registry",
          "image": "google/docker-registry",
          "ports": [
            {
              "name": "registry-server",
              "containerPort": 5000,
            }
          ],
          "env": [
            {
              "name": "GCS_BUCKET",
              "value": "<your-bucket>"
            }
          ]
        }
      ]
    }
  },
  "labels": {
    "name": "registry"
  }
}
これを使って、docker registry 用の pod を立ち上げます。
$ gcloud preview container pods create \
    --cluster $GKE_CLUSTER \
    --zone $GKE_ZONE \
    --config-file registry-pod.json
docker registory service を立ち上げ
以下の内容で registry-service.json というファイルを作成します。
{
  "kind": "Service",
  "apiVersion": "v1beta1",
  "id": "registry-service",
  "port": 5000,
  "containerPort": "registry-server",
  "selector": {
    "name": "registry"
  }
}
これを使って、docker registry 用の pod を立ち上げます。
$ gcloud preview container services create \
    --cluster $GKE_CLUSTER \
    --zone $GKE_ZONE \
    --config-file registry-service.json
これで cluster 内の全てのサーバから http://<repository-service の IP>:5000 で registry にアクセスすることができるようになります。
repository-service の IP アドレスは以下のコマンドで取得できます。
$ gcloud preview container kubectl --cluster $GKE_CLUSTER --zone $GKE_ZONE get services -o json | jq -r '.items[] | select(.id == "registry-service") | .portalIP'
gcloud preview container services describe でも同様の情報が取得できるのですが、現状 JSON 形式で取得できない(--format json しても invalid な JSON が返ってくる)ので、kubectl を直接使っています。beta が取れる頃には改善しているはず。
nginx の立ち上げ
registory-service の portalIP が取得できたので、あとはこの IP を利用するようにするように pod もしくは replicationcontroller の設定ファイルを書けば OK です。
今回は pod でやってみます。以下の内容で、nginx-pod.json と nginx-service.json を作成します。
- nginx-pod.json
{
  "kind": "Pod",
  "apiVersion": "v1beta1",
  "id": "nginx-pod",
  "desiredState": {
    "manifest": {
      "version": "v1beta1",
      "id": "nginx-pod",
      "containers": [
        {
          "name": "nginx",
          "image": "<your-registry-service-ip>:5000/nginx",
          "ports": [
            {
              "name": "nginx-http",
              "containerPort": 80,
              "hostPort": 80
            }
          ]
        }
      ]
    }
  },
  "labels": {
    "name": "nginx"
  }
}
hostPort は service を作成するのでホントは書かなくて良いと思うのだが、書かなかったら動かなかったのでとりあえず指定してます。今回の主旨とは外れるのでとりあえずこれで、あとで調べる。
- nginx-service.json
{
  "kind": "Service",
  "apiVersion": "v1beta1",
  "id": "nginx-service",
  "port": 80,
  "containerPort": "nginx-http",
  "selector": {
    "name": "nginx"
  },
  "createExternalLoadBalancer": true
}
あとは、pod と service を作成して終わりです。
$ gcloud preview container pods create \
    --cluster $GKE_CLUSTER \
    --zone $GKE_ZONE \
    --config-file nginx-pod.json

$ gcloud preview container services create \
    --cluster $GKE_CLUSTER \
    --zone $GKE_ZONE \
    --config-file nginx-service.json
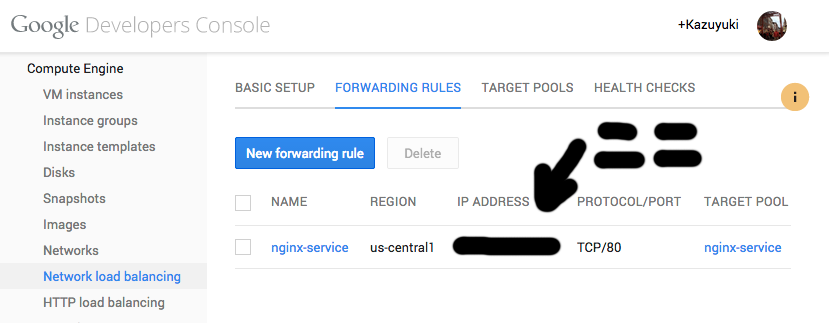
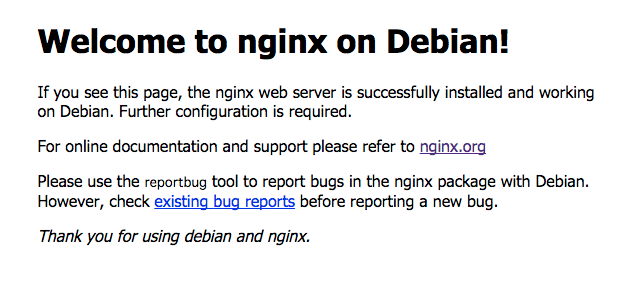
createExternalLoadBalancer を指定しているので Network Load Balancer が自動で作成されています。Developer Consoler から Network Load Balancer の IP アドレスにアクセスしてみましょう。
無事、nginx の画面が表示できたら成功。
感想
- Private Repository が Repository サーバの管理なしに実現できるので運用にも優しく便利。Push/Pull 両方がローカルネットワークに閉じているので、セキュリティ的にも安心。
- GCS と GCEの間のネットワークが速いのか、恐ろしい速度で Docker Image が取得されて立ち上がります。よく使う公式イメージを Private Repository に push しておくと、起動が速くなるんじゃなりますね。
- 正直、これくらい Google の公式ガイドに書いておいて欲しいです。日本語の情報がないといならまだしも、英語の情報すらほぼないので初心者には優しくないんじゃないかと思いました。

