本記事はRaspberry PiでおうちKubernetes構築【物理編】の続きです。
おうちKubernetesの論理面を組み上げていきます。
おうちKubernetes

大まかな作業は以下の順番になります。
1. Raspberry PiへのOSインストール
2. Dockerインストール
3. Kubernetesインストール
4. Kubernetesクラスタ構築
構築にあたって、記事は下記を大いに参考にさせて頂きました。
スラスラ行くかと思いきや、結構躓きました・・・(何回か作業をやり直しています)
Raspberry PI と kubeadm で自宅 Kubernetes クラスタを構築する
kubernetesのラズパイ包みが美味しそうだったので、kubeadmを使って作ってみた
Raspberry Pi OSイメージの設定 by MacOS
Raspberry Pi OSイメージのダウンロード
MacPCを利用してセットアップしていきます。
MacPCはOS:Mojaveを使用しました。
まずはイメージをダウンロードします。
イメージはここからダウンロードできます。
LITE版(CUI)とデスクトップ版(GUI)があるようですが、ここではRaspbian Stretch LiteをZipでダウンロードしました。
12/31現時点の最新は2018-11-13版のようです。
$ cd ~/Downloads/
# zipファイルの解凍
$ unzip 2018-11-13-raspbian-stretch-lite.zip
Archive:  2018-11-13-raspbian-stretch-lite.zip
  inflating: 2018-11-13-raspbian-stretch-lite.img
SDへのOSイメージ書込み by MacOS
SDカードにOSイメージを書き込みます。
MacPCでSDカードスロットがない機種はカードリーダーが別途必要になります。
私は下記を使いました。
参考までに。
OneOdio USB C ハブUSB Type C ハブ
イメージの書き込みの詳細はRaspberryPi公式ドキュメント(Mac版)を参照してください。
SDカードのマウント先はdiskutil listで分かります。
# MicroSDカード差し込み前
$ diskutil list
/dev/disk0 (internal):
   #:                       TYPE NAME                    SIZE       IDENTIFIER
   0:      GUID_partition_scheme                         251.0 GB   disk0
   1:                        EFI EFI                     314.6 MB   disk0s1
   2:                 Apple_APFS Container disk1         150.0 GB   disk0s2
   3:       Microsoft Basic Data BOOTCAMP                100.7 GB   disk0s3

/dev/disk1 (synthesized):
   #:                       TYPE NAME                    SIZE       IDENTIFIER
   0:      APFS Container Scheme -                      +150.0 GB   disk1
                                 Physical Store disk0s2
   1:                APFS Volume Macintosh HD            80.0 GB    disk1s1
   2:                APFS Volume Preboot                 44.9 MB    disk1s2
   3:                APFS Volume Recovery                512.8 MB   disk1s3
   4:                APFS Volume VM                      3.2 GB     disk1s4
# MicroSDカード差し込み後
$ diskutil list
/dev/disk0 (internal):
   #:                       TYPE NAME                    SIZE       IDENTIFIER
   0:      GUID_partition_scheme                         251.0 GB   disk0
   1:                        EFI EFI                     314.6 MB   disk0s1
   2:                 Apple_APFS Container disk1         150.0 GB   disk0s2
   3:       Microsoft Basic Data BOOTCAMP                100.7 GB   disk0s3

/dev/disk1 (synthesized):
   #:                       TYPE NAME                    SIZE       IDENTIFIER
   0:      APFS Container Scheme -                      +150.0 GB   disk1
                                 Physical Store disk0s2
   1:                APFS Volume Macintosh HD            80.0 GB    disk1s1
   2:                APFS Volume Preboot                 44.9 MB    disk1s2
   3:                APFS Volume Recovery                512.8 MB   disk1s3
   4:                APFS Volume VM                      3.2 GB     disk1s4

/dev/disk2 (external, physical):
   #:                       TYPE NAME                    SIZE       IDENTIFIER
   0:     FDisk_partition_scheme                        *31.5 GB    disk2
   1:             Windows_FAT_32 boot                    45.9 MB    disk2s1
   2:                      Linux                         2.9 GB     disk2s2
/dev/disk2がSDカードの模様です。
早速アンマウントしようとするとエラーになりました。
どうやらパーテーションがすでに切られていて、マウントされているSDカード部分を指定しないといけない模様です(無知でした)
sudo diskutil umount /dev/disk2
Password:
disk2 was already unmounted or it has a partitioning scheme so use "diskutil unmountDisk" instead
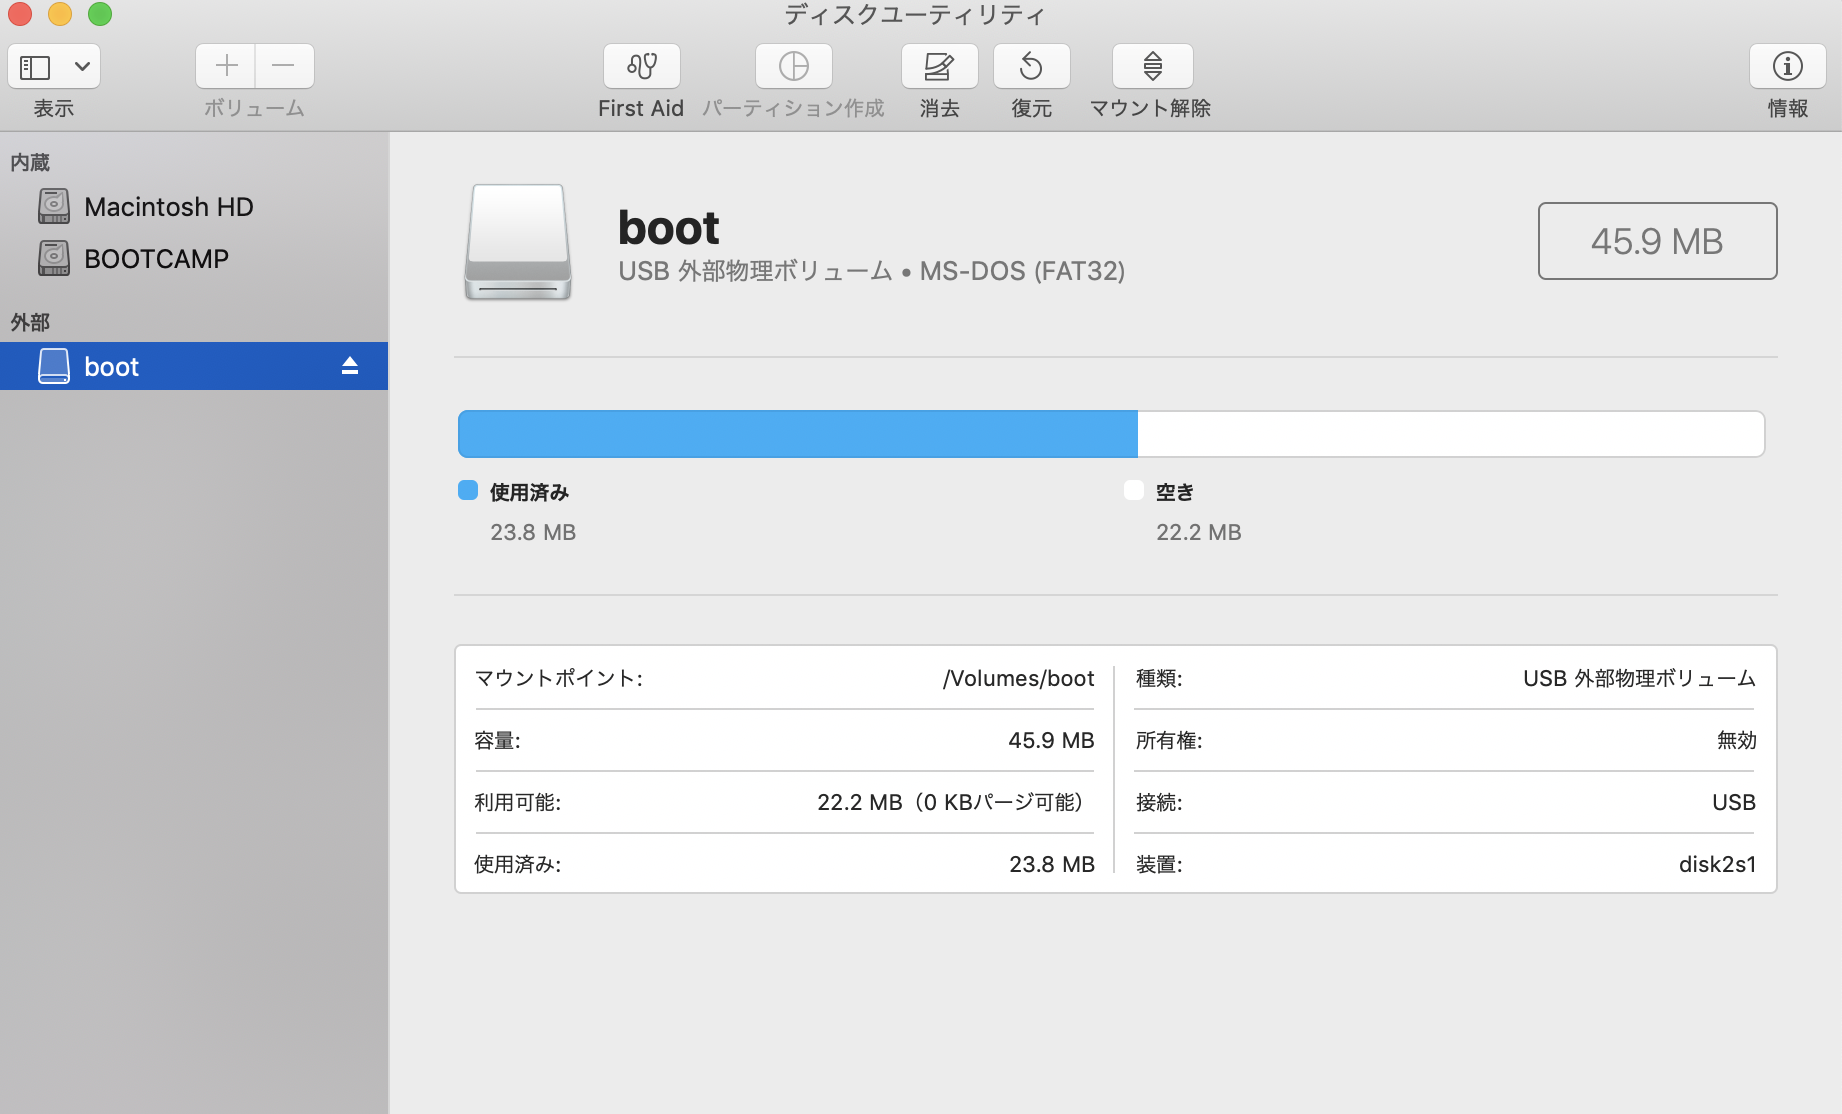
マウント先はMacの「ディスクユーティリティ」からも調べられます。
装置の箇所が該当の箇所です。
$ sudo diskutil umount /dev/disk2s1
Volume boot on disk2s1 unmounted
続いて、MacOSでのイメージ書込みの注意書きですが、こちらに書いてあります。
以下は上記リンクからの抜粋です。
Using the device name of the partition, work out the raw device name for the entire disk by omitting the final s# and replacing disk with rdisk. This is very important, as you will lose all data on the hard drive if you provide the wrong device name. Make sure the device name is the name of the whole SD card as described above, not just a partition of it, for example, rdisk3, not rdisk3s1. Similarly, you might have another SD drive name/number like rdisk2 or rdisk4. You can check again by using the df -h command, both before and after you insert your SD card reader into your Mac. For example: /dev/disk3s1 becomes /dev/rdisk3.
今回は「disk2s1」がSDカードの場所なので、「rdisk2」に書き込む必要があります。
※ここを間違えると既存データが消えてしまうので注意が必要です
(手を震わせながら)下記コマンドでイメージを書込みます。
ifとofは自分の環境に合わせて変えてください。
終わるまで数分かかります。あとプログレスは出ないので、応答が返るまで待ちます。
$ sudo dd bs=1m if=2018-11-13-raspbian-stretch-lite.img of=/dev/rdisk2 conv=sync
1780+0 records in
1780+0 records out
1866465280 bytes transferred in 93.421984 secs (19978866 bytes/sec)
Raspberry Pi SSHの設定 by MacOS
Raspberry PiはデフォルトではSSHができないようになっています。
そのため設定を加えます。
詳細は下記リンクを参照してください。
参考: A security update for Raspbian PIXEL
Unfortunately, hackers are increasingly exploiting loopholes such as these in other products to enable them to invisibly take control of devices. In general, this has not been a problem for Pis. If a Pi is on a private network in your home, it’s unlikely that an attacker can reach it; if you’re putting a Pi on a public network, we’ve hoped that you know enough about the issues involved to change the default password or turn off SSH.
(省略)
The boot partition on a Pi should be accessible from any machine with an SD card reader, on Windows, Mac, or Linux. If you want to enable SSH, all you need to do is to put a file called ssh in the /boot/ directory
SDカードのマウント先に空ファイルsshを作成します。
$ cd /Volumes/boot
$ touch ssh
Raspberry Pi cgroupsの設定 by MacOS
cgroupsの設定をするために、カーネルパラメータを編集します。
cgroup_enable=cpuset cgroup_enable=memory cgroup_memory=1を加える必要があります。
公式フォーラムに載っていますが、cgroup_enable=memoryを加えないとkubeadm initでエラーが発生します。
私も同じ事象に遭遇して、kubeadm init後にcmdlineを書き換え直しました・・・
cd /Volumes/boot/
vim cmdline.txt
-dwc_otg.lpm_enable=2 console=serial0,115200 console=tty1 root=PARTUUID=7ee80803-02 rootfstype=ext4 elevator=deadline fsck.repair=yes rootwait quiet init=/usr/lib/raspi-config/init_resize.sh
+dwc_otg.lpm_enable=2 console=serial0,115200 console=tty1 root=PARTUUID=7ee80803-02 rootfstype=ext4 cgroup_enable=cpuset cgroup_memory=memory cgroup_memory=1 elevator=deadline fsck.repair=yes rootwait quiet init=/usr/lib/raspi-config/init_resize.sh
RaspberriPiの起動
さて、上の手順でOS設定したSDカードを差し込みます。
差し込みます・・・どこに?
見た目からは差し込めそうな箇所が見当たらず、30分ほど検索し、
こちらのサイトからようやく見つけました。
あっ、裏側にあるのね・・・

念の為、電源を一度切ってからSDカードを差し込みます。
SSH前のRaspberriPiの電源オン・オフはPWRランプのオン・オフが光っているか否かだと思っています。
USB充電器からUSBケーブルを取り外して電源をオフにしました
$ slogin pi@raspberrypi.local
# パスワードのデフォルトは「raspberry」
ログインするとデフォルトパスワードは変更するよう警告が出ます。
ここは警告に従ってパスワードを変えるか、piユーザでログインできないようにしましょう。
私はパスワード変更だけしました。
sudo passwd pi
ライブラリの更新を行っておきます。
$ sudo apt-get -y upgrade
@hatotakaの記事と@shirot61さんの記事を参考に、おまじないをかけておきました。
$ sudo dphys-swapfile swapoff
$ sudo dphys-swapfile uninstall
$ sudo update-rc.d dphys-swapfile remove
3台ともにホスト名が「raspberrypi」になっているので、変更をします。
@hatotakaさんの記事に便乗して、raspi[001-003]の命名にしました。
$ sudo vi /etc/hostname
hostnameを修正したら/etc/hostsも合わせて修正します。
$ cat /etc/hosts
127.0.0.1   localhost
::1     localhost ip6-localhost ip6-loopback
ff02::1     ip6-allnodes
ff02::2     ip6-allrouters

127.0.1.1   raspberrypi

$ sudo vi /etc/hosts
-127.0.1.1  raspberrypi
+127.0.1.1  raspiXXX
ホスト名を変えたら再起動をかけます。
sudo reboot
これを台数分繰り返します。
同一ホスト名(raspberrypi.local)が使われているため、sshやslogin時にワーニングが出たら、その際は下記コマンドを実行します。
ssh-keygen -R raspberrypi.local
余談その1
raspiにsshした際に、3機中2機がsshできませんでした
Pingを打っても、ARPでも解決できず。。。
接触不良を疑って、電源をオン・オフを繰り返したところ上手くいきました。
(やっぱり接触不良だったのかな?)
精密機械なのでデリケートに扱いましょう。
# host is downになっている
ping 192.168.13.3
PING 192.168.13.3 (192.168.13.3): 56 data bytes
ping: sendto: Host is down
ping: sendto: Host is down
Request timeout for icmp_seq 0
ping: sendto: Host is down
Request timeout for icmp_seq 1
ping: sendto: Host is down
Request timeout for icmp_seq 2
ping: sendto: Host is down
Request timeout for icmp_seq 3
ping: sendto: Host is down
Request timeout for icmp_seq 4
ping: sendto: Host is down
Request timeout for icmp_seq 5
--- 192.168.13.3 ping statistics ---
7 packets transmitted, 0 packets received, 100.0% packet loss
# incompletenになっている
arp -a
? (192.168.13.1) at 60:84:bd:4a:a9:fa on en0 ifscope [ethernet]
? (192.168.13.4) at (incomplete) on en0 ifscope [ethernet]
? (192.168.13.5) at b8:27:eb:ad:db:db on en0 ifscope [ethernet]
? (192.168.13.6) at (incomplete) on en0 ifscope [ethernet]
? (224.0.0.251) at 1:0:5e:0:0:fb on en0 ifscope permanent [ethernet]
? (239.255.255.250) at 1:0:5e:7f:ff:fa on en0 ifscope permanent [ethernet]
余談その2
ケーブルの抜き差しを繰り返しても3機中1機だけどうしても接続が確認できませんでした。
(スイッチングハブのランプとRaspberry PiのLANポートのランプが点滅していない状態)
すわ故障かと思い、電源を落として、まさかと思ってSDカードの中身を見てみたらsshファイルがなかったという・・・
SDカードは初期化してもう一度セットアップをやりました。
参考: Mac ― SDカードを消去(フォーマット)する方法
これで動いてくれた時は思わずガッツポーズしました。以上、余談でした
Dockerインストール
Dockerをインストールします。
Dockerのバージョンにもedge版とstable版がありますが、今回は最新版をインストールしました。
今のところ、エラーは出ていません
KubernetesとDockerのバージョンが合わないと、kubeadm init時にワーニングが出ますので、
公式ドキュメントを参考にしてください。
今回のインストール方法の詳細はDocker公式ドキュメントを参考にしてください。
# SSHログイン
slogin raspiXXX.local

# 必要なパッケージのインストール
$ sudo apt-get install apt-transport-https ca-certificates curl software-properties-common

# GPGキーの追加
$ curl -fsSL https://download.docker.com/linux/$(. /etc/os-release; echo "$ID")/gpg | sudo apt-key add -
# リポジトリの追加
$ echo "deb [arch=armhf] https://download.docker.com/linux/$(. /etc/os-release; echo "$ID") \
     $(lsb_release -cs) stable" | \
    sudo tee /etc/apt/sources.list.d/docker.list

# Dockerエンジンのインストール
$ sudo apt-get update
$ sudo apt-get install docker-ce
これを台数分繰り返します。
Kubernetesインストール
kubeadm, kubelet, kubectlをインストールします。
rootでないとエラーが出ることがあります。
その際はsu - rootでやり直すかsudoをつけて実行してください。
インストールの詳細はKubernetes公式ドキュメントを参考にしてください。
$ curl -fsSL https://packages.cloud.google.com/apt/doc/apt-key.gpg|sudo apt-key add -
$ echo "deb http://apt.kubernetes.io/ kubernetes-xenial main" | sudo tee /etc/apt/sources.list.d/kube.list

$ sudo apt-get update
$ sudo apt-get install kubelet kubeadm kubectl
これを台数分繰り返します。
Kubernetesクラスタの構築
Masterノードの構築
いよいよラストスパートのKubernetesクラスタを構築していきます。
クラスタの構成は
Masterノード × 1
Workerノード × 2
で構築します。
MasterノードにSSHログインしてkubeadm initを実施します。
$ sudo kubeadm init --pod-network-cidr=10.244.0.0/16
I1230 15:19:52.954139   27195 version.go:94] could not fetch a Kubernetes version from the internet: unable to get URL "https://dl.k8s.io/release/stable-1.txt": Get https://storage.googleapis.com/kubernetes-release/release/stable-1.txt: net/http: request canceled while waiting for connection (Client.Timeout exceeded while awaiting headers)
I1230 15:19:52.956768   27195 version.go:95] falling back to the local client version: v1.13.1
[init] Using Kubernetes version: v1.13.1
[preflight] Running pre-flight checks
    [WARNING SystemVerification]: this Docker version is not on the list of validated versions: 18.09.0. Latest validated version: 18.06
[preflight] Pulling images required for setting up a Kubernetes cluster
[preflight] This might take a minute or two, depending on the speed of your internet connection
[preflight] You can also perform this action in beforehand using 'kubeadm config images pull'
[kubelet-start] Writing kubelet environment file with flags to file "/var/lib/kubelet/kubeadm-flags.env"
[kubelet-start] Writing kubelet configuration to file "/var/lib/kubelet/config.yaml"
[kubelet-start] Activating the kubelet service
[certs] Using certificateDir folder "/etc/kubernetes/pki"
[certs] Generating "front-proxy-ca" certificate and key
[certs] Generating "front-proxy-client" certificate and key
[certs] Generating "etcd/ca" certificate and key
[certs] Generating "etcd/healthcheck-client" certificate and key
[certs] Generating "etcd/server" certificate and key
[certs] etcd/server serving cert is signed for DNS names [raspi001 localhost] and IPs [192.168.13.7 127.0.0.1 ::1]
[certs] Generating "etcd/peer" certificate and key
[certs] etcd/peer serving cert is signed for DNS names [raspi001 localhost] and IPs [192.168.13.7 127.0.0.1 ::1]
[certs] Generating "apiserver-etcd-client" certificate and key
[certs] Generating "ca" certificate and key
[certs] Generating "apiserver" certificate and key
[certs] apiserver serving cert is signed for DNS names [raspi001 kubernetes kubernetes.default kubernetes.default.svc kubernetes.default.svc.cluster.local] and IPs [10.96.0.1 192.168.13.7]
[certs] Generating "apiserver-kubelet-client" certificate and key
[certs] Generating "sa" key and public key
[kubeconfig] Using kubeconfig folder "/etc/kubernetes"
[kubeconfig] Writing "admin.conf" kubeconfig file
[kubeconfig] Writing "kubelet.conf" kubeconfig file
[kubeconfig] Writing "controller-manager.conf" kubeconfig file
[kubeconfig] Writing "scheduler.conf" kubeconfig file
[control-plane] Using manifest folder "/etc/kubernetes/manifests"
[control-plane] Creating static Pod manifest for "kube-apiserver"
[control-plane] Creating static Pod manifest for "kube-controller-manager"
[control-plane] Creating static Pod manifest for "kube-scheduler"
[etcd] Creating static Pod manifest for local etcd in "/etc/kubernetes/manifests"
[wait-control-plane] Waiting for the kubelet to boot up the control plane as static Pods from directory "/etc/kubernetes/manifests". This can take up to 4m0s
[kubelet-check] Initial timeout of 40s passed.
[apiclient] All control plane components are healthy after 74.019873 seconds
[uploadconfig] storing the configuration used in ConfigMap "kubeadm-config" in the "kube-system" Namespace
[kubelet] Creating a ConfigMap "kubelet-config-1.13" in namespace kube-system with the configuration for the kubelets in the cluster
[patchnode] Uploading the CRI Socket information "/var/run/dockershim.sock" to the Node API object "raspi001" as an annotation
[mark-control-plane] Marking the node raspi001 as control-plane by adding the label "node-role.kubernetes.io/master=''"
[mark-control-plane] Marking the node raspi001 as control-plane by adding the taints [node-role.kubernetes.io/master:NoSchedule]
[bootstrap-token] Using token: 0uks9a.34o38r5uj3pm1bww
[bootstrap-token] Configuring bootstrap tokens, cluster-info ConfigMap, RBAC Roles
[bootstraptoken] configured RBAC rules to allow Node Bootstrap tokens to post CSRs in order for nodes to get long term certificate credentials
[bootstraptoken] configured RBAC rules to allow the csrapprover controller automatically approve CSRs from a Node Bootstrap Token
[bootstraptoken] configured RBAC rules to allow certificate rotation for all node client certificates in the cluster
[bootstraptoken] creating the "cluster-info" ConfigMap in the "kube-public" namespace
[addons] Applied essential addon: CoreDNS
[addons] Applied essential addon: kube-proxy

Your Kubernetes master has initialized successfully!

To start using your cluster, you need to run the following as a regular user:

  mkdir -p $HOME/.kube
  sudo cp -i /etc/kubernetes/admin.conf $HOME/.kube/config
  sudo chown $(id -u):$(id -g) $HOME/.kube/config

You should now deploy a pod network to the cluster.
Run "kubectl apply -f [podnetwork].yaml" with one of the options listed at:
  https://kubernetes.io/docs/concepts/cluster-administration/addons/

You can now join any number of machines by running the following on each node
as root:

  kubeadm join 192.168.13.7:6443 --token xxxxxxxxxxxxxxxxx --discovery-token-ca-cert-hash sha256:xxxxxxxxxxxxxxxxxxxxxxxxxxxxxxxxxxxxxxxxxxxxxxxxxxxxxxxxxxxxxxxxxxxxxx
コンソール出力された下記の3つのコマンドを実施します。
$ mkdir -p $HOME/.kube
$ sudo cp -i /etc/kubernetes/admin.conf $HOME/.kube/config
$ sudo chown $(id -u):$(id -g) $HOME/.kube/config
ネットワークプラグインを適用します。
公式ドキュメントを参考に下記コマンドを実施します。
バージョンが上がるとコマンド中のgitリビジョンもアップデートされると思うので、公式ドキュメントの最新かどうか注意してください
$ kubectl apply -f https://raw.githubusercontent.com/coreos/flannel/bc79dd1505b0c8681ece4de4c0d86c5cd2643275/Documentation/kube-flannel.yml
kube-system namespaceにflannelのDaemonSetが追加されます。
下記はクラスターが構築された時の出力例です。
$ kubectl get pods -n kube-system -o wide | grep flannel
kube-flannel-ds-arm-8wbtp          1/1     Running   0          4h3m    192.168.13.3   raspi003   <none>           <none>
kube-flannel-ds-arm-r7tlr          1/1     Running   0          4h4m    192.168.13.5   raspi002   <none>           <none>
kube-flannel-ds-arm-vgpvp          1/1     Running   0          4h5m    192.168.13.7   raspi001   <none>           <none>
kubectl versionコマンドを見ると、サーバーの情報と応答も確認できます。
$ kubectl version
Client Version: version.Info{Major:"1", Minor:"13", GitVersion:"v1.13.1", GitCommit:"eec55b9ba98609a46fee712359c7b5b365bdd920", GitTreeState:"clean", BuildDate:"2018-12-13T10:39:04Z", GoVersion:"go1.11.2", Compiler:"gc", Platform:"linux/arm"}
Server Version: version.Info{Major:"1", Minor:"13", GitVersion:"v1.13.1", GitCommit:"eec55b9ba98609a46fee712359c7b5b365bdd920", GitTreeState:"clean", BuildDate:"2018-12-13T10:31:33Z", GoVersion:"go1.11.2", Compiler:"gc", Platform:"linux/arm"}
Workerノードの構築
続いてWorkerノードを構築します。
Masterノードでkubeadm initを実施した際のコンソール出力に出ていたコマンドをWorkerノード上で実施します。
これはrootユーザで実施する必要があります。
$ kubeadm join 192.168.13.7:6443 --token xxxxxxxxxxxxxxxxx --discovery-token-ca-cert-hash sha256:xxxxxxxxxxxxxxxxxxxxxxxxxxxxxxxxxxxxxxxxxxxxxxxxxxxxxxxxxxxxxxxxxxxxxx
[preflight] Running pre-flight checks
    [WARNING SystemVerification]: this Docker version is not on the list of validated versions: 18.09.0. Latest validated version: 18.06
[discovery] Trying to connect to API Server "192.168.13.7:6443"
[discovery] Created cluster-info discovery client, requesting info from "https://192.168.13.7:6443"
[discovery] Requesting info from "https://192.168.13.7:6443" again to validate TLS against the pinned public key
[discovery] Cluster info signature and contents are valid and TLS certificate validates against pinned roots, will use API Server "192.168.13.7:6443"
    client-key-data: LS0tLS1CRUdJTiBSU0EgUFJJVkFURSBLRVktLS0tLQpNSUlFb3dJQkFBS0NBUUVBdE92eHRsNURLbW1mQm9NbjYxcFpMV3NkUnRvL1BNbmlIdExpSjYyeGR0K0F3Yi9GCjR5eVJrRThyZ1VLeFZWUU95UDVGMDN2eXROSHlzQjdIOEVGTU1YV2R1L2lWZkx[discovery] Successfully established connection with API Server "192.168.13.7:6443"
[join] Reading configuration from the cluster...
[join] FYI: You can look at this config file with 'kubectl -n kube-system get cm kubeadm-config -oyaml'
[kubelet] Downloading configuration for the kubelet from the "kubelet-config-1.13" ConfigMap in the kube-system namespace
[kubelet-start] Writing kubelet configuration to file "/var/lib/kubelet/config.yaml"
[kubelet-start] Writing kubelet environment file with flags to file "/var/lib/kubelet/kubeadm-flags.env"
[kubelet-start] Activating the kubelet service
[tlsbootstrap] Waiting for the kubelet to perform the TLS Bootstrap...
[patchnode] Uploading the CRI Socket information "/var/run/dockershim.sock" to the Node API object "raspi002" as an annotation

This node has joined the cluster:
* Certificate signing request was sent to apiserver and a response was received.
* The Kubelet was informed of the new secure connection details.

Run 'kubectl get nodes' on the master to see this node join the cluster.
これをWorker台数分繰り返します。
kubectlでノードの状態を見ると、3台追加できていることが確認できます。
$ kubectl get nodes
NAME       STATUS   ROLES    AGE     VERSION
raspi001   Ready    master   13m     v1.13.1
raspi002   Ready    <none>   2m15s   v1.13.1
raspi003   Ready    <none>   100s    v1.13.1
WorkerノードのROLESが"none"になっているので、ラベルを追加します。
$ kubectl label node raspi002 node-role.kubernetes.io/worker=worker
node/raspi002 labeled
$ kubectl label node raspi003 node-role.kubernetes.io/worker=worker
node/raspi003 labeled
これでノードの状態を見ると・・・
$ kubectl get nodes
NAME       STATUS   ROLES    AGE     VERSION
raspi001   Ready    master   17m     v1.13.1
raspi002   Ready    worker   5m52s   v1.13.1
raspi003   Ready    worker   5m17s   v1.13.1
になりました。
以上で、Kubernetesクラスタは完了です!!
一家に一台おうちKubernetesが完成しました。
とうとう我が家にもおうちKubernetesがあると思うと感無量です。
これで検証が捗ります。

余談その3(kubeadm initでの失敗①振り返り)
cmdlinenに「cgroup_enable=memory」がない時にkubeadm initした際に、
下記のチェックで失敗になりました。
CGROUPS_MEMORY: missing
[preflight] Some fatal errors occurred:
    [ERROR SystemVerification]: missing cgroups: memory
文字通り、cgroups: memoryがenableになっていないのが原因ですが、
リカバリ方法を備忘として残しておきます。
①コマンドでRaspberry Piをシャットダウン
sudo shutdown -h now
②電源供給USBケーブルをスイッチングハブから抜く
③SDカードをRaspberry Piから抜く
④MacのカードリーダーでSDカードを繋いで、cmdlineを編集
⑤安全にMacから取り出したSDカードをRaspberry Piに差し込む
⑥電源供給USBケーブルをスイッチングハブにつけて、電源を入れる
余談その4(kubeadm initでの失敗②振り返り)
flannelの適用を失敗して、一度kubeadmで構成したクラスターをリセットして再度クラスターを作り直す、
ということをしていました。
その備忘録も残しておきます。
ちなみに失敗したのは公式ドキュメントに書いてあったやり方ではなく、勝手にv0.10.0のyamlを使ったことです。
最新の方がいいかな、と根拠なく思ってしまった結果です・・・
flannelを適用するとネットワークインターフェース「flannel.1」が追加されています。
クラスターのリセットは、kubeadm resetでできますが、このネットワークインターフェースは残り続けてしまうため下記の作業が必要です。
①Workerノードでkubeadm resetを実施 × 2台
この作業はrootユーザで行う必要があります。
$ kubeadm reset
②Workerノードでネットワークインタフェース「flannel.1」を除外します × 2台
$ ifconfig flannel.1 down

$ ip link delete flannel.1
③Masterノードでkubeadm resetを実施
$ kubeadm reset
④Masterノードでネットワークインタフェース「flannel.1」を除外します
$ ifconfig flannel.1 down

$ ip link delete flannel.1
以上でクラスタのリセットは完了です。
私はこの後、またkubeadm initでクラスタを再構築しました。
余談その他
ポエムです。
Kubernetesクラスタが出来上がって、感動を共有しようと興奮して友人に見せました。
友人(非IT業界)に見せたところ、以下の評価をいただきました。
私「見てみて! Kubernetesクラスタができたよ!!」
友「なんでそれを作ったの? それで何ができるの?」
私「...」
何って...Kubernetesクラスタが組めるんだよ!
何ができるって...Kubernetes(で何か)が動かせるんだよ!!
友「Kubernetesクラスタは何をやっているの?」
と聞かれて
私「Kubernetesクラスタが動いている」
と答えるも、哲学的な問答になってしまいました。
私の中では回答になっていましたが、友人を納得させる回答にはなりませんでした。
せっかく作ったクラスタなので、今後何か動かせたらなーと思います。
それはまたの機会に。