注意
このチュートリアルの最初のページはこちらになります。
手順4 Realmの永続化処理および、todoの機能を実装します。
ソースコード
import UIKit
import RealmSwift

class ViewController: UIViewController {

  @IBOutlet var todoNameText: UITextField!

  @IBOutlet var tableView: UITableView!

  var toDoItems:Results<ToDo>?{
    do{
      let realm = try Realm()
      return realm.objects(ToDo)
    }catch{
      print("エラー")
    }
    return nil
  }

  override func viewDidLoad() {
    super.viewDidLoad()
    // Do any additional setup after loading the view, typically from a nib.
  }

  override func didReceiveMemoryWarning() {
    super.didReceiveMemoryWarning()
    // Dispose of any resources that can be recreated.
  }

  @IBAction func addToDo(sender: UIButton) {
    // 入力チェック
    if isValidateInputContents() == false{
      return
    }

    // ToDoデータを作成する処理
    let toDo = ToDo()
    toDo.name = todoNameText.text!

    // ToDoデータを永続化する処理
    do{
      let realm = try Realm()
      try realm.write{
        realm.add(toDo)
      }
      todoNameText.text = ""
    }catch{
      print("失敗")
    }
    tableView.reloadData()
  }

  private func isValidateInputContents() -> Bool{
    // ToDo名のデータ入力
    if let name = todoNameText.text{
      if name.characters.count == 0{
        return false
      }
    }else{
      return false
    }
    return true
  }
}

extension ViewController: UITableViewDataSource{
  func tableView(tableView: UITableView, numberOfRowsInSection section: Int) -> Int {

    return toDoItems?.count ?? 0
  }

  func tableView(tableView: UITableView, cellForRowAtIndexPath indexPath: NSIndexPath) -> UITableViewCell {

    let toDo = toDoItems?[indexPath.row]

    let cell = tableView.dequeueReusableCellWithIdentifier("Cell") as! ToDoTableViewCell
    // Realmに登録したデータをラベルに値設定
    cell.nameLabel.text = toDo?.name

    print(toDo?.name)

    return cell
  }
}
Realmの書き込み処理抜粋
    // ToDoデータを永続化する処理
    do{
      let realm = try Realm()
      try realm.write{
        realm.add(toDo)
      }
      todoNameText.text = ""
    }catch{
      print("失敗")
    }
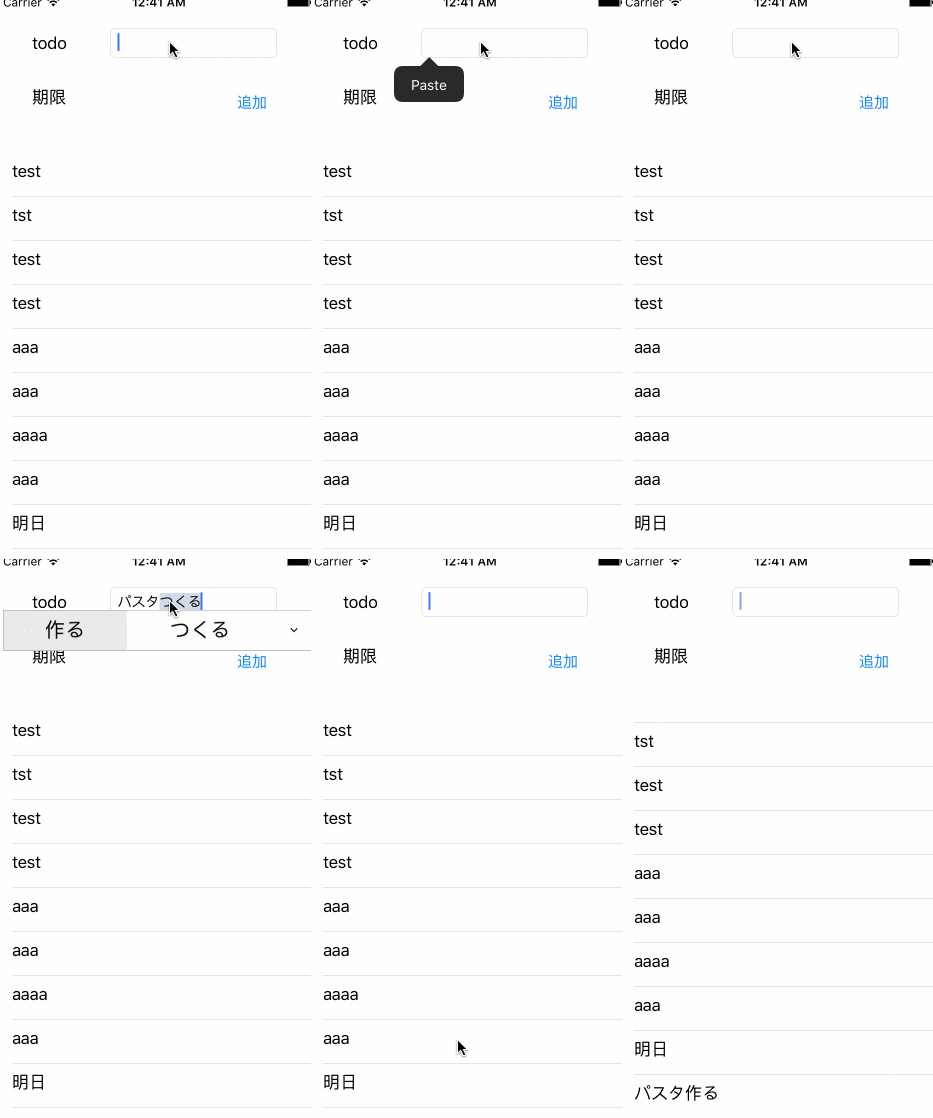
実行結果
確認ポイント
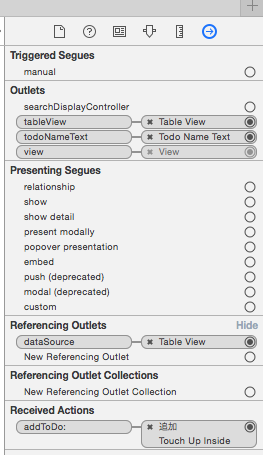
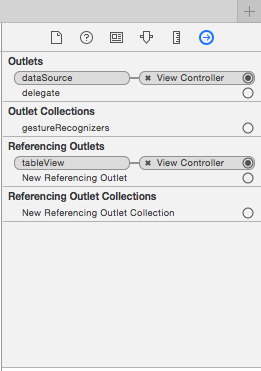
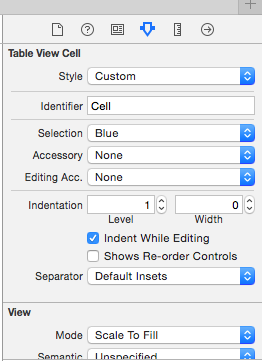
ここまでやってもtableviewに値が表示されない人は
tableviewのdataSourceなどの設定漏れが無いか確認してください。
ViewController
tableView
Cell


