今まで、画処理するのにImageJとかRとかMatlabとかを使ってたけど、Python( + OpenCV )でなんかやってみる試み。
Pythonのインストール
ライブラリの依存関係等面倒なので、ここは楽してhomebrewでanacondaをインストールしておくことにする。
% brew cask install anaconda
Windowsの場合は、chocolatey で choco install anaconda3とかやっておく。anacondaがインストールできたら、anacondaのパッケージシステムを使ってOpenCVをインストールする。
% conda install --channel https://conda.anaconda.org/menpo opencv3
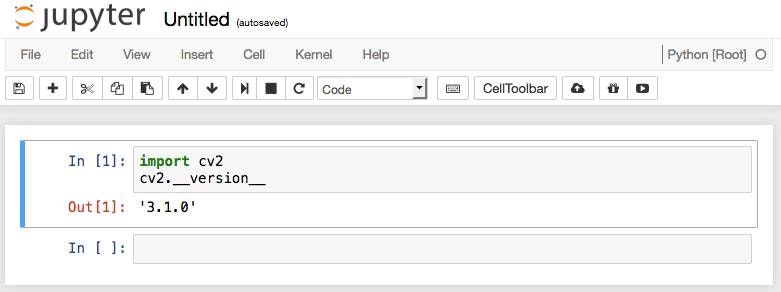
jupyter を起動して、OpenCVがインストールできていることを確認する。

jupyterが便利すぎる。jupyterのためだけにでもanacondaをインストールしたい。perlやRでも使いたい。
画像を読み込んで表示する
データベースといえばscott/tigerのemp、人の顔の画像といえばLennaである。
Lennaを求めて
まずは、SPI Image Database で、4.2.04.tiffという画像をダウンロードしておく。なお、Copyright的には「Scans of magazine pictures. Copyright belongs to original publisher or photographer.」のように書かれている。
事前に、画像処理系のツールをインストールしていたりすると、find /usr/local -name ‘Lenna.tiff’ -type f -print とかしてみたら、意外とどっかのディレクトリに保存されていることもある。
画像の表示
OpenCVを使って、画像を読み込んで表示する方法は、OpenCVのドキュメントを見れば分かる。
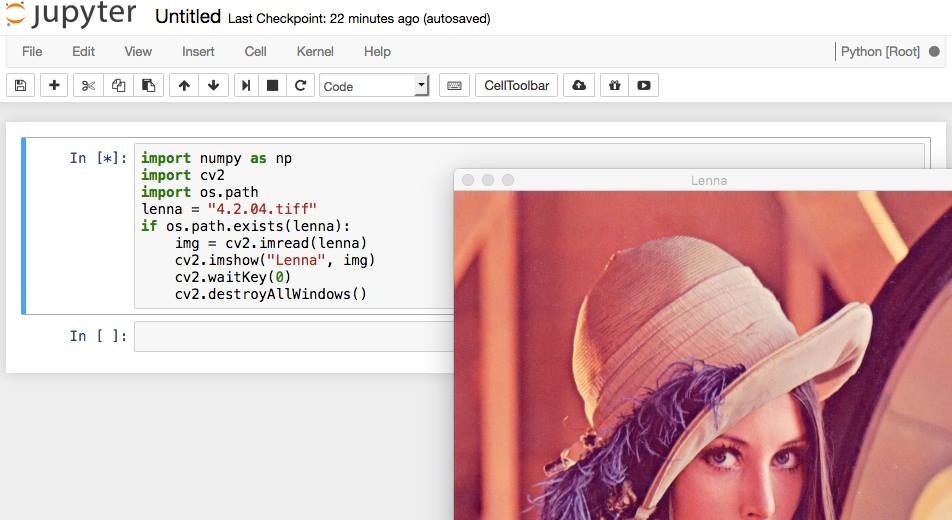
というワケで、さっそく、jupyter notebook上でやってみる。なお、cv2.waitKey(0)してからcv2.destroyAllWindows()しているが、これはキー入力を0ミリ秒待つという意味で、この場合の0秒というのは「時間指定なし」すなわちずっと「次のキー入力を待ちます」という意味らしい。つまり、何らかのキー入力があるまでは画像ウィンドウを開いておくという指示。
import numpy as np
import cv2
import os.path
lenna = "4.2.04.tiff"
if os.path.exists(lenna):
    img = cv2.imread(lenna)
    cv2.imshow("Lenna", img)
    cv2.waitKey(0)
    cv2.destroyAllWindows()
このLennaのことをもっと知りたいと思ったら、img.shapeとかimg.sizeとかを見ればいい。
画像の2値化
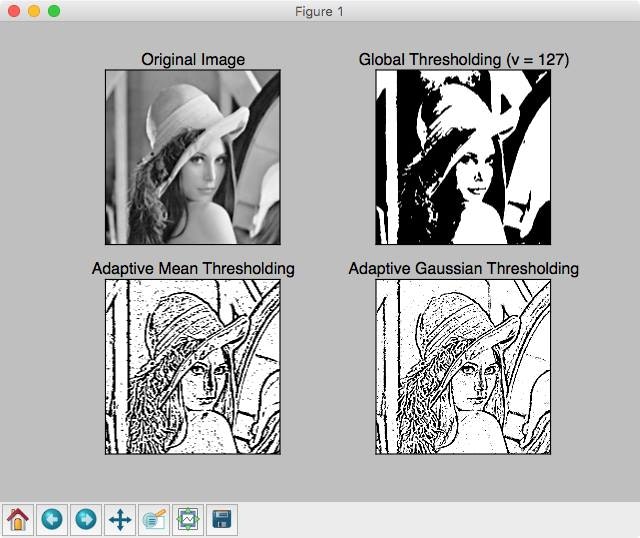
OpenCVのチュートリアルを見ると、2値化のためのコードが記載されているので、その通りやってみる。
os.path.exiss() することで、画像ファイルがあるかどうかを確認する行を入れてみた。
また、チュートリアルどおり、matplotlibを使って画像表示をするようになっている。
import cv2
import numpy as np
import os.path
from matplotlib import pyplot as plt
lenna = "4.2.04.tiff"

if os.path.exists(lenna):
    img = cv2.imread(lenna,0)
    img = cv2.medianBlur(img, 5)
    ret, th1 = cv2.threshold(img, 127, 255, cv2.THRESH_BINARY)
    th2 = cv2.adaptiveThreshold(img, 255, cv2.ADAPTIVE_THRESH_MEAN_C, cv2.THRESH_BINARY, 11, 2)
    th3 = cv2.adaptiveThreshold(img, 255, cv2.ADAPTIVE_THERSH_GAUSSIAN_C, cv2.THRESH_BINARY, 11, 2)

    titles = ['Original Image', 'Global Thresholding (v = 127)', 'Adaptive Mean Thresholding', 'Adaptive Gaussian Thresholding']
    images = [img, th1, th2, th3]

    for i in range(0, 4):
        plt.subplot(2, 2, i+1), plt.imshow(images[i], 'gray')
        plt.title(titles[i])
        plt.xticks([]), plt.yticks([])

    plt.show()
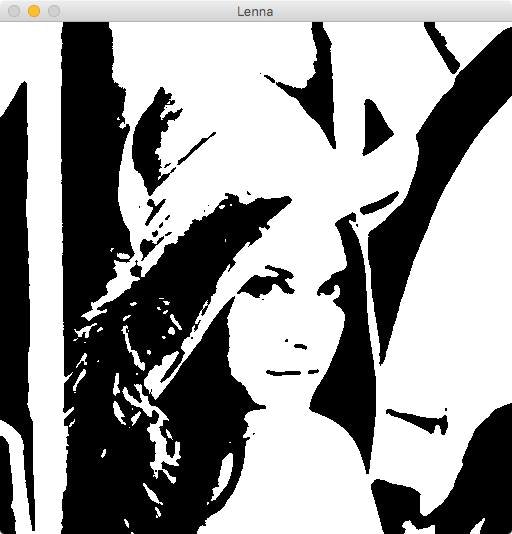
同様に、大津法での2値化もやってみる。コードは、ほとんど変わらない。
import cv2
import numpy as np
import os.path
from matplotlib import pyplot as plt
lenna = "4.2.04.tiff"
if os.path.exists(lenna):
    img = cv2.imread(lenna,0)
    img = cv2.medianBlur(img,5)
    ret,th = cv2.threshold(img,0,255,cv2.THRESH_BINARY+cv2.THRESH_OTSU)
    cv2.imshow("Lenna", th)
    cv2.waitKey(0)
    cv2.destroyAllWindows()
というワケで、ひとまず、基本的なところまではできるようになった。


