この記事で理解できること
- ストーリーボードを使用した画面遷移の方法(その1:presentメソッド)
- ストーリーボードを使用した画面遷移の方法(その2:performSegueメソッド)
- ナビゲーションコントローラ配下時の画面遷移アニメーションの違い
presentメソッドによる遷移
1. プロジェクトの作成
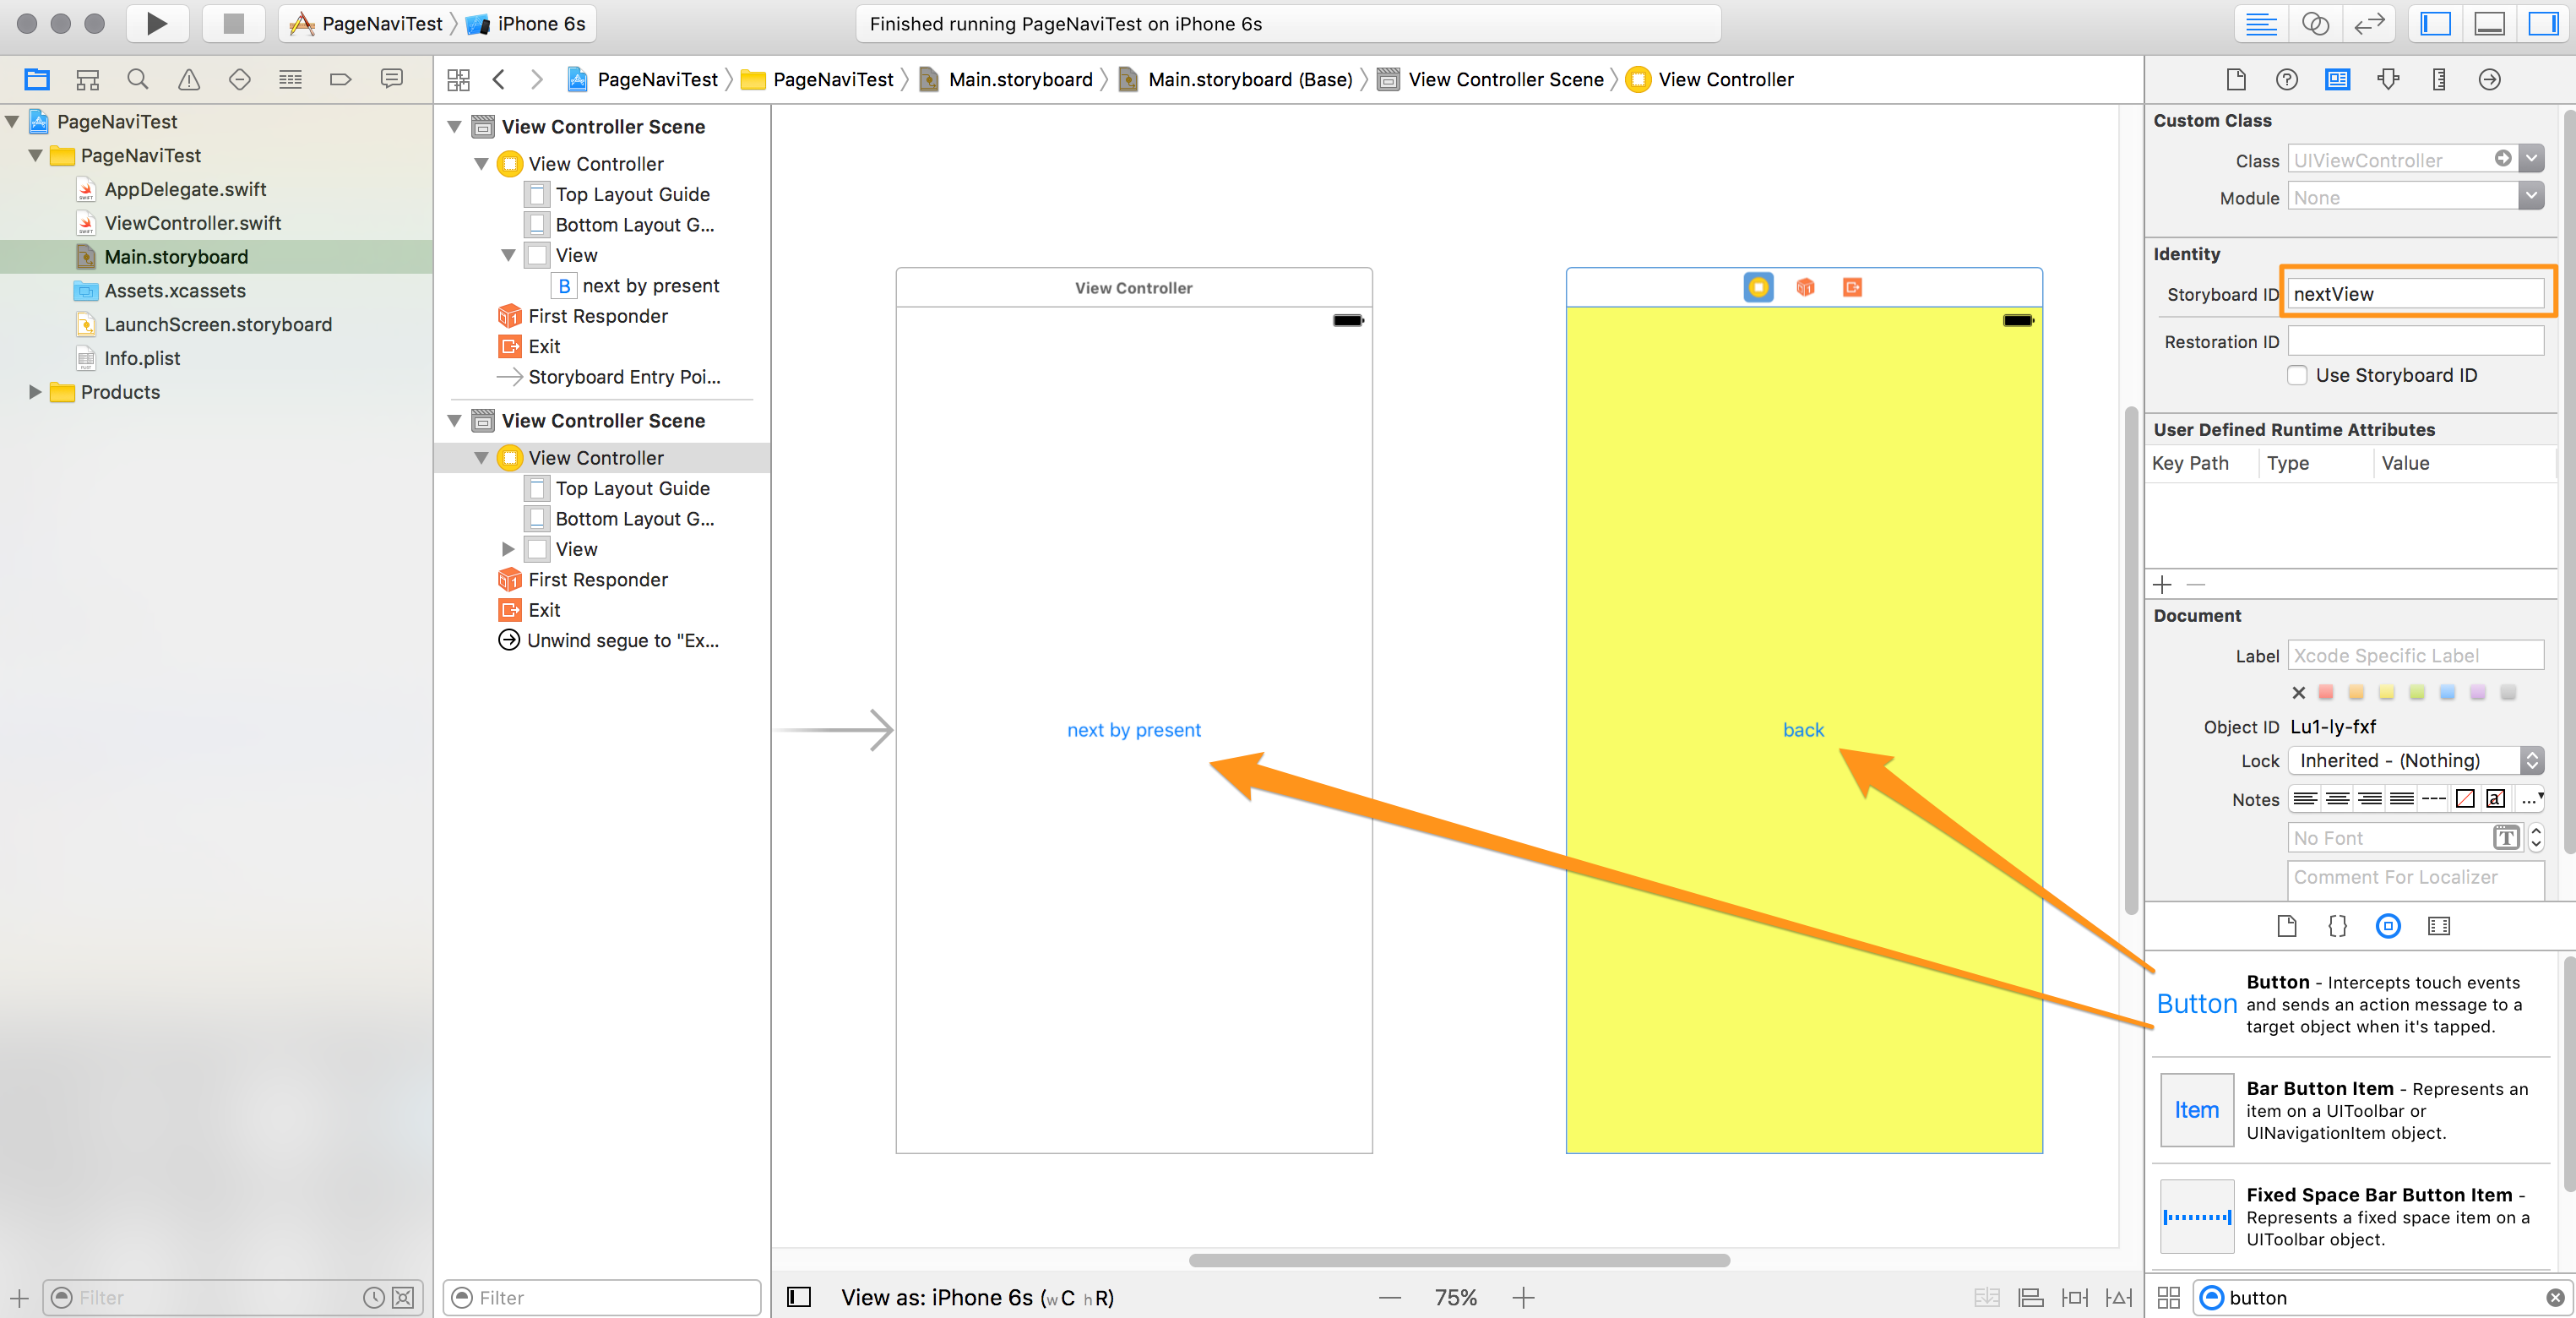
まずは、「Single View Application」をテンプレにプロジェクトを新規作成します。ストーリーボード上で、図のようにそれぞれのViewController上にボタンを配置します。instantiateViewControllerに備えて遷移先の画面(背景が黄色の画面)にStoryboard IDを割り当てておきます。この例ではnextViewとしました。
2. 画面遷移のファンクションを作成
画面遷移のアクションとしてgoNext()を以下のように実装します。戻るアクション用のgoBack()は空実装でかまいませんが、パラメタはUIStoryboardSegue型の引数を持たせる必要があります。presentが画面遷移をおこなうUIViewControllerのインスタンスメソッドです。
ViewController.swift
import UIKit

class ViewController: UIViewController {

    @IBAction func goBack(_ segue:UIStoryboardSegue) {}

    @IBAction func goNext(_ sender:UIButton) {
        let next = storyboard!.instantiateViewController(withIdentifier: "nextView")
        self.present(next,animated: true, completion: nil)
    }

    override func viewDidLoad() {
        super.viewDidLoad()
        // Do any additional setup after loading the view, typically from a nib.
    }

    override func didReceiveMemoryWarning() {
        super.didReceiveMemoryWarning()
        // Dispose of any resources that can be recreated.
    }


}
3. ストーリーボード上の部品とソースの紐付け
backボタンはcontrolを押しながら上部のExitアイコンへドロップし、goBackを選択します。これだけで戻るボタンの実装は完了です。goBack()は遷移元のViewControllerクラスに用意することに注意してください。

4. ビルドして確認
デフォルトは下からニョキッと出て来るアニメーションです。
performSegueメソッドによる遷移
5.セグエの作成
今度はセグエでの遷移を確認してみます。1画面目にボタンを追加し、ViewController上部のアイコンから遷移先のView上までcontrolを押しながらドラッグします。セグエの種類を選ぶポップアップが出現するのでShowを選びます。
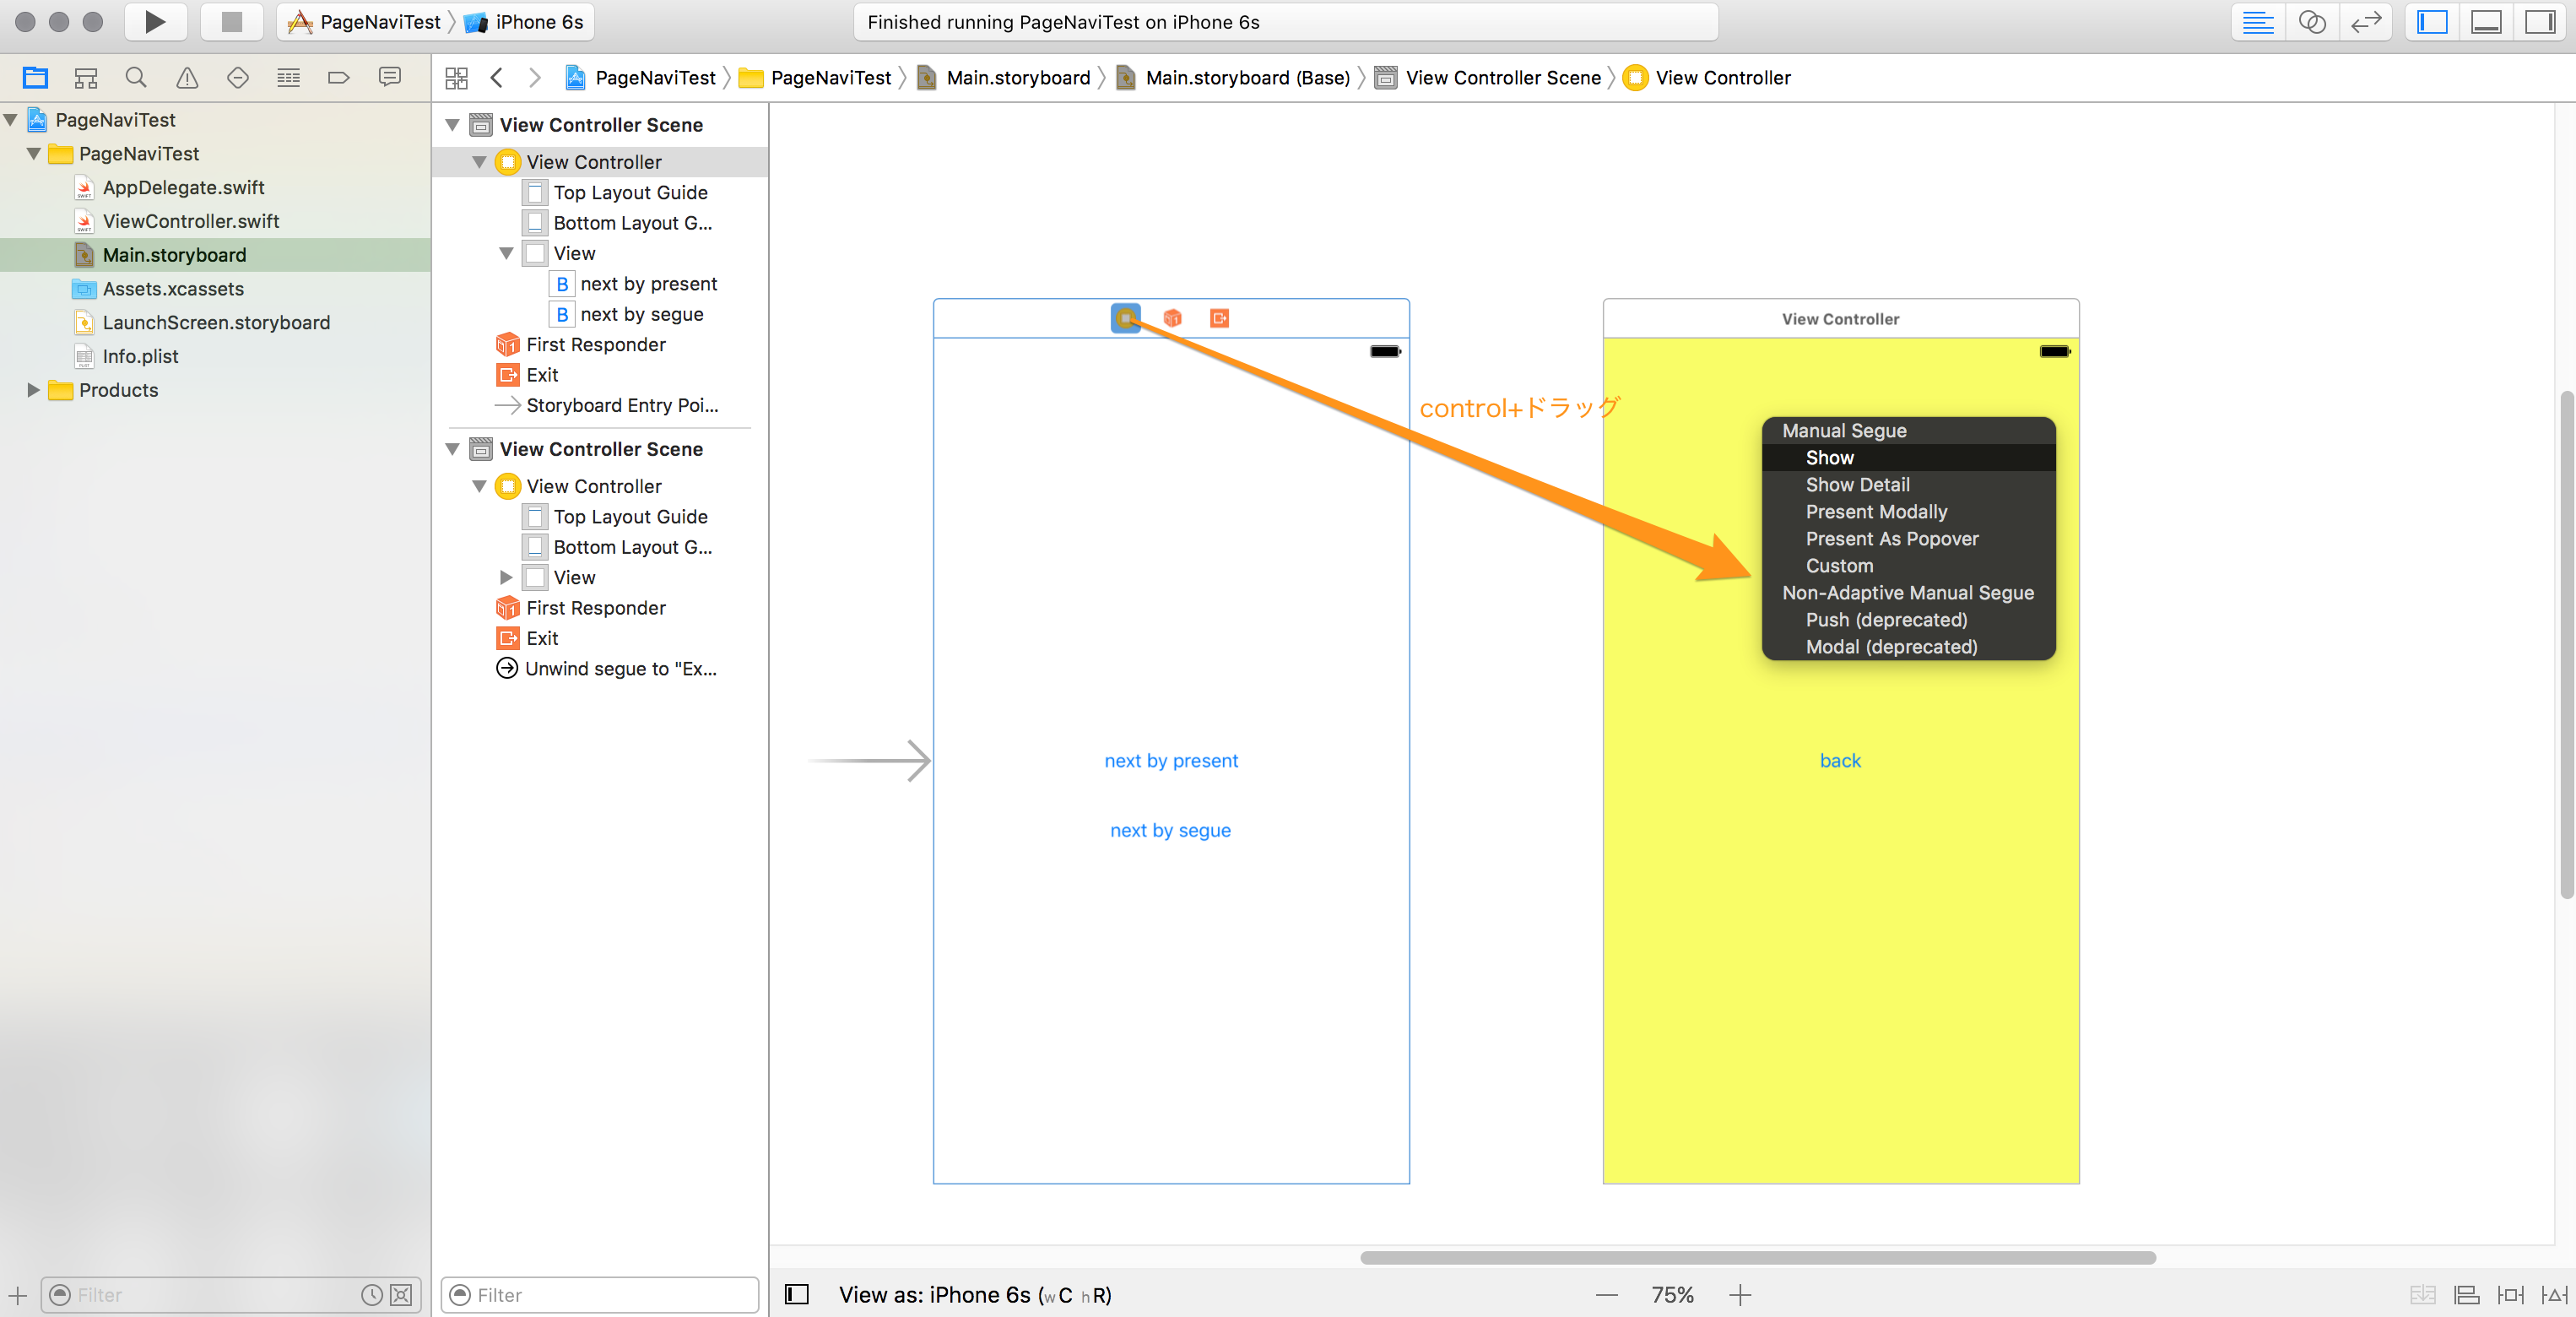
2つの画面の間にセグエのアイコンが現るのでクリックして選択状態にし、identifierを設定します。今回はnextSegueです。

6.セグエ遷移のアクションを追加
import UIKit

class ViewController: UIViewController {

    @IBAction func goBack(_ segue:UIStoryboardSegue) {}

    @IBAction func goNext(_ sender:UIButton) {
        let next = storyboard!.instantiateViewController(withIdentifier: "nextView")
        self.present(next,animated: true, completion: nil)
    }

    // セグエ遷移用に追加 ↓↓↓
    @IBAction func goNextBySegue(_ sender:UIButton) {
        performSegue(withIdentifier: "nextSegue", sender: nil)
    }

    override func viewDidLoad() {
        super.viewDidLoad()
        // Do any additional setup after loading the view, typically from a nib.
    }

    override func didReceiveMemoryWarning() {
        super.didReceiveMemoryWarning()
        // Dispose of any resources that can be recreated.
    }
}
7.ストーリーボード上の部品とソースの紐付け

ビルドして動作させてみると、presentメソッドによる遷移と同じ挙動であることが確認できます。
8.ナビゲーションコントローラを差し込んで見る
この状態からナビゲーションコントローラを差し込んでみます。ストーリーボード上で1画面目のViewControllerを選択し、メニューから、Editor → Embed In → Navigation Controllerと辿ります。
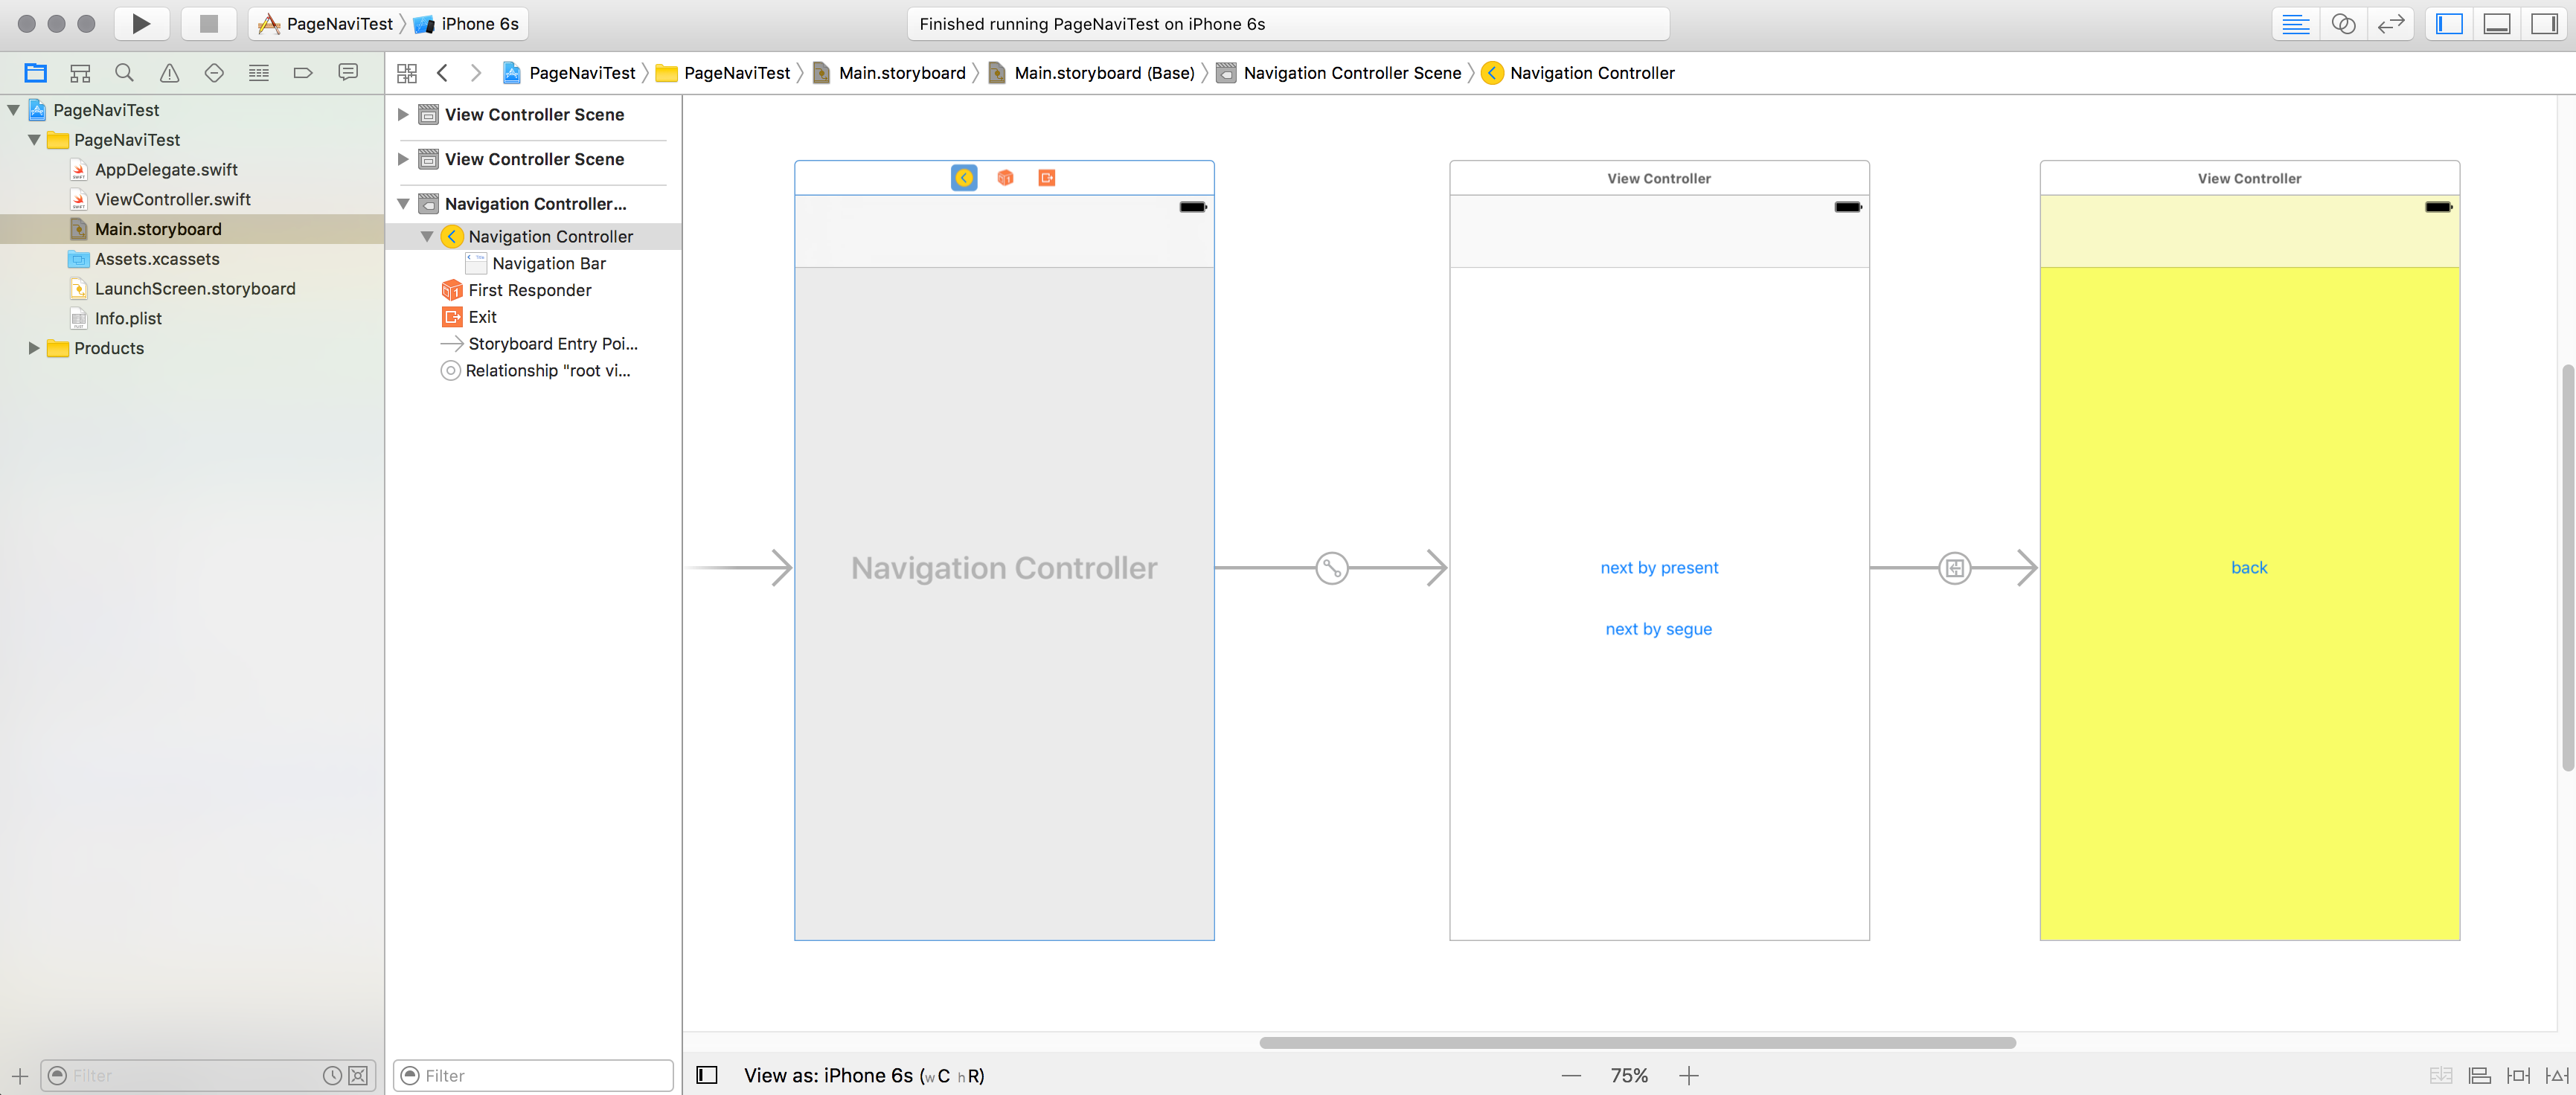
ソースは変更せずビルドして確認すると、セグエでの遷移時と戻る時のアニメーションがスライドになっているのが分かると思います。一方presentメソッドでの遷移はナビゲーションコントローラの影響を受けません。この違いに注意してください。
スライドのアニメーションはポリシーによりナビゲーションコントローラ配下(Viewスタック管理下)での遷移時にしか使用できません。