UIViewの表示位置に関する基本事項をおさえておけば、たとえばバナー広告を表示する際、広告業者のSDKにて提供されるバナー広告のほとんどはUIViewを継承しているので任意の場所に表示させることができるようになります。というかほぼバナー広告用の記事です。
前提
- selfはViewControllerのインスタンスとします
- self.view.bounds.widthは画面の幅です
- self.view.bounds.heightは画面の高さです
矩形の表示
矩形を表示させてみます。表示位置を確定させるには、frameプロパティに、CGRectメソッドにて矩形の左角の座標(x,y)、および幅と高さ(width,height)をセットします。ここでは横幅320px、高さ50pxの矩形を定義しています。
// 左寄せ・画面上部に表示
let rect1 = UIView()
rect1.frame = CGRect(x:0,y:0,width:320,height:50)
rect1.backgroundColor = UIColor.orange
self.view.addSubview(rect1)
横幅を画面いっぱいにする
矩形の幅を画面サイズいっぱいにするには、CGRectのwidthに画面の横幅(self.view.bounds.width)を指定します。
// 幅=画面の幅
let rect2 = UIView()
rect2.frame = CGRect(x:0,y:100,width:self.view.bounds.width,height:50)
rect2.backgroundColor = UIColor.green
self.view.addSubview(rect2)
右寄せにする
右寄せにするには、CGRectのxに、画面の横幅と矩形自身の横幅の差(self.view.bounds.width-320)をセットします。
// 右寄せ
let rect3 = UIView()
rect3.frame = CGRect(x:(self.view.bounds.width-320),y:200,width:320,height:50)
rect3.backgroundColor = UIColor.red
self.view.addSubview(rect3)
センタリングする
センタリングにするには、CGRectのxに、画面の横幅と矩形自身の横幅の差を2分割した値((self.view.bounds.width-320)/2)をセットします。
// 中央寄せ
let rect4 = UIView()
rect4.frame = CGRect(x:((self.view.bounds.width-320)/2),y:300,width:320,height:50)
rect4.backgroundColor = UIColor.yellow
self.view.addSubview(rect4)
下部に表示
下部に表示するには、CGRectのyに、画面の高さから矩形の高さの差(self.view.bounds.height-50)を指定します。
// 中央寄せ・下部に表示
let rect5 = UIView()
rect5.frame = CGRect(x:((self.view.bounds.width-320)/2),y:(self.view.bounds.height-50),width:320,height:50)
rect5.backgroundColor = UIColor.blue
self.view.addSubview(rect5)
コード全体
//
//  ViewController.swift
//  ViewPosition
//
//

import UIKit

class ViewController: UIViewController {

    override func viewDidLoad() {
        super.viewDidLoad()

        // 上部左角に表示・幅、高さ固定
        let rect1 = UIView()
        rect1.frame = CGRect(x:0,y:0,width:320,height:50)
        rect1.backgroundColor = UIColor.orange
        self.view.addSubview(rect1)

        // 幅=画面の幅
        let rect2 = UIView()
        rect2.frame = CGRect(x:0,y:100,width:self.view.bounds.width,height:50)
        rect2.backgroundColor = UIColor.green
        self.view.addSubview(rect2)

        // 右寄せ
        let rect3 = UIView()
        rect3.frame = CGRect(x:(self.view.bounds.width-320),y:200,width:320,height:50)
        rect3.backgroundColor = UIColor.red
        self.view.addSubview(rect3)

        // センタリング
        let rect4 = UIView()
        rect4.frame = CGRect(x:((self.view.bounds.width-320)/2),y:300,width:320,height:50)
        rect4.backgroundColor = UIColor.yellow
        self.view.addSubview(rect4)

        // センタリング & 下部に表示
        let rect5 = UIView()
        rect5.frame = CGRect(x:((self.view.bounds.width-320)/2),y:(self.view.bounds.height-50),width:320,height:50)
        rect5.backgroundColor = UIColor.blue
        self.view.addSubview(rect5)

    }

    override func didReceiveMemoryWarning() {
        super.didReceiveMemoryWarning()
        // Dispose of any resources that can be recreated.
    }

}
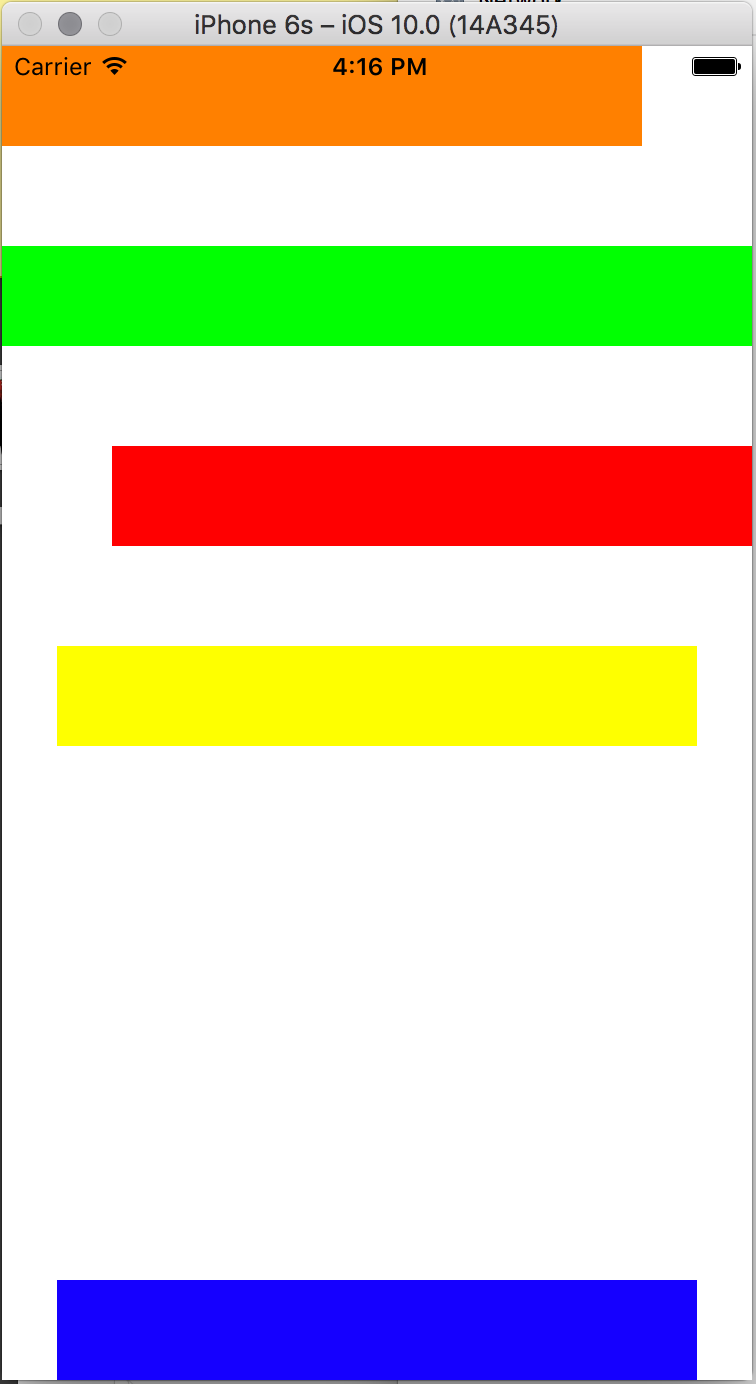
実行結果
補足
UIViewはframeをパラメタにしたコンストラクタ(init)が存在するので、こう書くことも可能です
let rect1 = UIView(frame:CGRect(x:0,y:0,width:320,height:50))