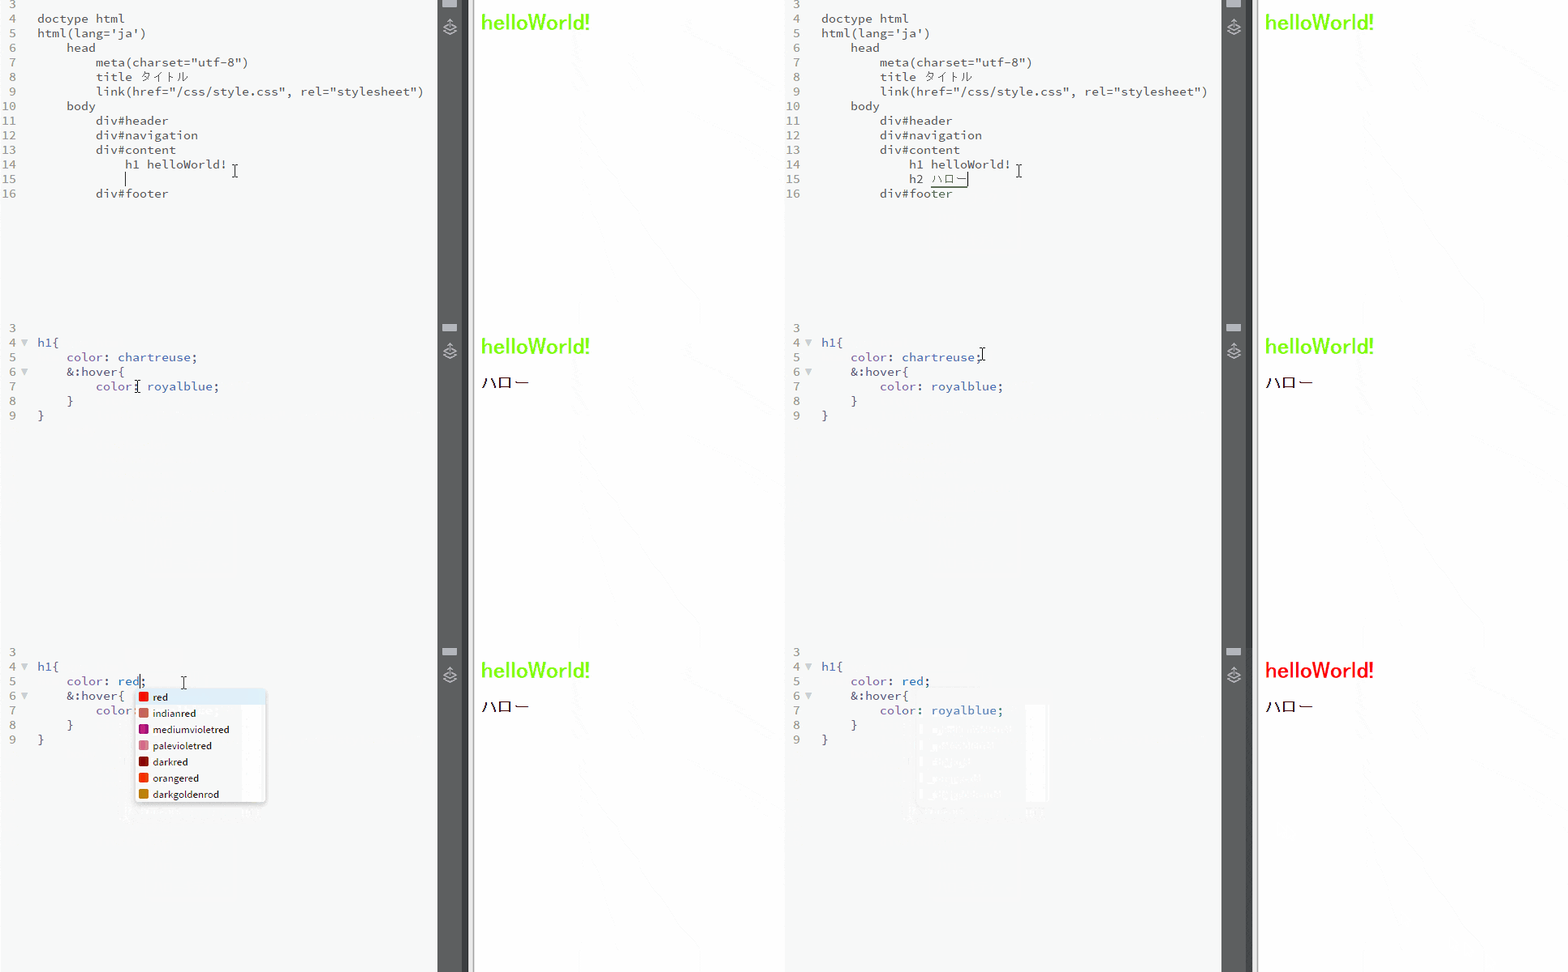
はじめに
何か記述等にミスやこうした方がいいとのことがあればコメントで教えてくださると幸いです。
目的
開発を円滑するために行ったら良いと思われることについての紹介
概要
タスクランナーのGulpを用いて開発の効率化を図る。
内容は、SassやPugで書いた内容を変換し、ファイルの内容が変更された場合は自動的にブラウザのリロードを行う流れを作成する。
環境
- Windows 8.1
- npm 2.15.1
- node 4.4.3
- gulp 3.9.1
環境構築
フォルダ構成
まず初めに、フォルダ構成を作成します。今回の場合私はポートフォリオサイト作ろうと思っていたので以下のようにしました。
今回はこのフォルダ構成で説明していきます。
root/
 ├ js/
 |  └ index.js
 ├ css/
 |  └ style.css
 ├ img/
 |  └ hoge.png
 ├ sass/
 |  └ style.scss
 ├ pug/
 |  └ index.pug
 ├ node_modules
 ├ package.json
 ├ gulpfile.js
 └ index.html
Node.jsのインストール
まずgulp等を利用するには、Node.jsが必要なので、インストールしてください。インストールはこちらから
コマンドプロンプトで以下のコマンドを実行してバージョンが出てきたらインストールされています。
node -v
npm -v
フォルダ構成の構築
まず任意の場所にプロジェクトのフォルダを作成し、jsやcssなどのフォルダを作成します。
mkdir frontend_template
cd frontend_template
mkdir css
mkdir js
mkdir sass
mkdir pug
mkdir img
gulpのインストール
gulpとはCSSやJavaScriptなどのコードの縮小化,画像の圧縮,ファイル変更時のブラウザのリロードなどのタスクを自動化するツールです。
今回gulpで自動化するタスクは以下の通りです。
| 利用するモジュール | 説明 |
|---|---|
| gulp-sass | sassファイルをcssファイルに変換 |
| gulp-pug | pugファイルをhtmlファイルに変換 |
| gulp-plumber | sassとpugの変換でエラーが出た場合の強制終了を防止 |
| gulp-notify | デスクトップ通知を行う |
| browser-sync | ブラウザの起動とファイル変更時にリロード |
まず初めにpackage.jsonを作成するために以下のコマンドを実行します。
npm init
いろいろ入力出来る欄が出てきますがすべてEnterで大丈夫です。
次にgulpのインストールです。
iはinstallの略称、-gはglobalにインストール、-Dはpackage.jsonのdevDependenciesにバージョン付きで書き込み、インストールします。
package.jsonに書く理由としては、npm iコマンドでpackage.jsonに書かれているこのプロジェクトに必要なパッケージ(指定されたバージョン)を自動的にインストールするためです。これにより、自分以外の人も同じバージョンで統一され、簡単に必要なパッケージをインストールが出来ます。
Macの場合は、npm i -g gulpをする際sudoを追加して、sudo npm i -g gulpにしなきゃ-g出来ない模様
npm i -g gulp
npm i -D gulp
gulp-sassのインストール
gulp-sassは説明した通り、sassファイルをcssファイルに変換してくれるモジュールです。
インストールは以下のコマンドを実行してください。
npm i -D gulp-sass
package.json見てもらうとdevDependenciesに追記されていると思います。
style.scssの作成
では、sassフォルダにstyle.scssを作成しておきましょう。※拡張子はscssです。
h1{
  color: red;
  &:hover{
    color: blue;
  }
}
こちらは後でcssファイルに変換します。
gulp-pugのインストール
gulp-pugは説明した通り、pugファイルをhtmlファイルに変換してくれるモジュールです。
インストールは以下のコマンドを実行してください。
npm i -D gulp-pug
index.pugの作成
Pug(旧Jade)は簡単にhtmlコーディング出来るツールです。htmlはと閉じタグがあるのに対し、Pugでは、閉じタグがなく、インデントでタグの階層を実現します。インデントだけで言うと、プログラミング言語でPythonみたいな感じです。
ではpugフォルダにindex.pugを作成します。
doctype html
html(lang='ja')
    head
        meta(charset="utf-8")
        title タイトル
        link(href="/css/style.css", rel="stylesheet")
    body
        div#header
        div#navigation
        div#content
            h1 helloWorld!
        div#footer
詳しくは、ゴリラでもわかるPug入門を参照してください。
gulp-plumber, gulp-notify, browser-syncのインストール
その他のplumber, notify, browser-syncをインストールします。
npm i -D gulp-plumber
npm i -D gulp-notify
npm i -D browser-sync
たぶん1行で書けるかも
npm i -D gulp-plumber gulp-notify browser-sync
gulpfile.jsの作成
次に、タスクをgulpfile.jsに記述します。
今回作成したgulpfile.jsはこちらになります。
var gulp = require("gulp");
var sass = require("gulp-sass");
var plumber = require("gulp-plumber");
var browserSync = require("browser-sync");
var notify = require("gulp-notify");
var pug = require("gulp-pug");

gulp.task('default', ['sass', 'browser-sync', 'pug', 'watch']);

//sassとpugの監視をして変換処理させる
gulp.task('watch', () => {
    gulp.watch(['./sass/**'], () => {
        gulp.start(['sass']);
    });
    gulp.watch(['./pug/**'], () => {
        gulp.start(['pug']);
    });
});

//ブラウザ表示
gulp.task('browser-sync', () => {
    browserSync({
        server: {
            baseDir: "./"   //サーバとなるrootディレクトリ
        }
    });
    //ファイルの監視
    //以下のファイルが変わったらリロードする
	gulp.watch("./js/**/*.js",     ['reload']);
    gulp.watch("./*.html",         ['reload']);
});

//sassをcssに変換
gulp.task("sass", () => {
	gulp.src("./sass/**/*scss")
        .pipe(plumber({
            errorHandler: notify.onError("Error: <%= error.message %>")
        }))
		.pipe(sass())
		.pipe(gulp.dest("./css"))
        //reloadせずにinjectする
        .pipe(browserSync.stream())
});

//pugをhtmlに変換
gulp.task("pug", () => {
    var option = {
        pretty: true
    }
    gulp.src("./pug/**/*.pug")
        .pipe(plumber({
            errorHandler: notify.onError("Error: <%= error.message %>")
        }))
        .pipe(pug(option))
        .pipe(gulp.dest("./"))
});

//ブラウザリロード処理
gulp.task('reload', () => {
    browserSync.reload();
});
モジュールのインクルード
それでは説明します。
まずここでは、必要なモジュールをrequireで呼び出しています。C言語で言うと#include、PHPで言うとrequire_onceなどにあたると思います。
var gulp = require("gulp");
var sass = require("gulp-sass");
var plumber = require("gulp-plumber");
var browserSync = require("browser-sync");
var notify = require("gulp-notify");
var pug = require("gulp-pug");
gulpコマンドで実行する処理の指定
これは、コマンドプロンプトからgulpと実行された場合に行うタスクの一覧です。
[]の中身は、gulp.task('ここ')に書かれている内容を記述しています。
sassやbrowser-syncなどのタスクはまだ記述しておらず、gulpfile.jsの下の方に書いています。
gulp.task('default', ['sass', 'browser-sync', 'pug', 'watch']);
フォルダ内の監視
次は、gulp.watchを用いてファイルの監視を行っている記述です。watchでsassフォルダとpugフォルダに入っているファイルを監視しています。
何か変更があればgulp.start([])でgulp.task('sass')またはgulp.task('pug')のタスクを実行させています。
gulp.task('watch', () => {})と書いており、() => {}は見たことない方もおられるかもしれませんが、function(){}の略称です。
//sassとpugの監視をして変換処理させる
gulp.task('watch', () => {
    gulp.watch(['./sass/**'], () => {
        gulp.start(['sass']);
    });
    gulp.watch(['./pug/**'], () => {
        gulp.start(['pug']);
    });
});
sassからcssに変換
次は、sassをcssファイルに変換するタスクについてです。
処理の内容は以下の通りです。
- 対象のscssファイルを
gulp.srcで指定 - plumberでcssに変換する際にエラーが起きた際に強制終了しないようにする
- sass()でsassをcssに変換
- gulp.destで変換したcssファイルを./cssフォルダに入れる
- ブラウザに変更をinjectする
//sassをcssに変換
gulp.task("sass", () => {
	gulp.src("./sass/**/*scss")
        .pipe(plumber({
            errorHandler: notify.onError("Error: <%= error.message %>")
        }))
	.pipe(sass())
	.pipe(gulp.dest("./css"))
        //reloadせずにinjectする
        .pipe(browserSync.stream())
});
pugからhtmlに変換
pugに関してもsassとほぼ同様です。
- 対象のpugファイルを
gulp.srcで指定 - plumberでhtmlに変換する際にエラーが起きた際に強制終了しないようにする
- pug()でpugをhtmlに変換
- gulp.destで変換したhtmlファイルを./に置く
//pugをhtmlに変換
gulp.task("pug", () => {
    var option = {
        pretty: true
    }
    gulp.src("./pug/**/*.pug")
        .pipe(plumber({
            errorHandler: notify.onError("Error: <%= error.message %>")
        }))
        .pipe(pug(option))
        .pipe(gulp.dest("./"))
});
ブラウザの起動とファイル変更時にリロード
次は、ブラウザの起動とファイルの更新時にリロードを行うタスクです。
browserSync({server:{baseDir: './'}});ではブラウザを起動するルートを指定し、そこにあるフォルダをブラウザで表示します。
また、jsファイルやpugが変換したhtmlファイル等の監視をして、変更があればreloadタスクに記述されているbrowserSync.reload();でブラウザのリロードを自動的に行います。
//ブラウザ表示
gulp.task('browser-sync', () => {
    browserSync({
        server: {
            baseDir: "./"   //サーバとなるrootディレクトリ
        }
    });
    //ファイルの監視
    //以下のファイルが変わったらリロードする
    gulp.watch("./js/**/*.js",     ['reload']);
    gulp.watch("./*.html",         ['reload']);
});
//ブラウザリロード処理
gulp.task('reload', () => {
    browserSync.reload();
});
実行方法
まず初めに、最初に書いたsassとpugをcssとhtmlに変換しましょう。
gulp sass
gulp pug
その後、以下のコマンドを実行するとブラウザが立ち上がります。
gulp
gulpで立ち上げている間、scssファイルとpugファイルを少し変更してみましょう。
変更したファイルを保存すると自動的にsass⇒css,pug⇒htmlと変換し、ブラウザがリロードされると思います。
今回作成したもの
今回作成したテンプレートはgithubにあげておきますので、よければご利用ください。
クローンを行った後、以下のコマンドで動くはずです。
npm i
その後、gulpで起動できると思います。
gulp
参考文献
- http://whiskers.nukos.kitchen/2014/12/06/gulp-notify.html
- https://tech.recruit-mp.co.jp/front-end/getting-started-gulp-watch-browsersync/
- http://chaika.hatenablog.com/entry/2015/09/06/145104
- http://qiita.com/BYODKM/items/58a6d070ae121e26a42d
- http://qiita.com/iakio/items/0bac00943814d4ba34d5
- https://www.browsersync.io/docs/gulp/#gulp-sass-css
