はじめに
本記事は,Student Advent Calendarの23日目です.
JavaScriptを用いてWebアプリケーション作成する際、テスト書いていますか?
テストを書くことで様々なメリットがあります。テストコードを書くのは時間がかかったり、面倒だと後回しにするかもしれません。しかし、重要なのでテストコード書きましょう。
テストについてはこちらの記事を見てください。
何か間違ったことを書いていたり、こうした方がいいよ!などご指摘がありましたら教えて下さると幸いです。
概要
JavaScriptで書かれたコードをテストフレームワークのJasmineを用いて基本的なテストコードの書き方を紹介する。
今回、足し算のプログラムに関して、足し算の処理を書いている sum関数のテストコードを記述する。
また、Travis-CI上でテストを自動実行するところまでカバーする。
環境
- Windows8.1
- Node.js 4.4.3
- npm 2.15.1
利用する技術
- Jasmine
- PhantomJS
- Karma
一応説明を・・・
| 技術 | 内容 |
|---|---|
| Jasmine | JavaScriptのコードをテストするためのフレームワーク |
| PhantomJS | CUI用のブラウザ、CI上で動かすときに利用されたりする |
| Karma | JavaScriptのテストコードを動かすためのもの(テストランナー) |
Projectの作成
今回のフォルダ構成としては以下のようになります。
JsTestCode/
   ├ .git/
   ├ .gitignore
   ├ .travis.yml
   ├ public/
   │   ├ index.html
   │   └ js/
   │      ├ index.js
   │      └ sum.js
   ├ spec/
   │   └ sum-test.js
   ├ package.json
   └ karma.conf.js
事前準備
index.html, index.js, sum.jsを以下のようにします。
内容は足し算するだけのプログラムです。
<!DOCTYPE html>
<html>
    <head>
        <meta charset="utf-8">
        <title>JSのテストコード</title>
    </head>
    <body>
        <h1>足し算</h1>
        <input type="number" id="first">
         +
        <input type="number" id="second">
         =
        <input type="button" id="answer" value="足し算の答え" onclick="alertAnswer()">

        <!-- JavaScriptファイルの読み込み -->
        <script src="./js/sum.js"></script>
        <script src="./js/index.js"></script>
    </body>
</html>
function alertAnswer(){
    //足し算の対象の数値の取得
    var first = parseInt(document.getElementById('first').value);
    var second = parseInt(document.getElementById('second').value);
    //計算結果を表示
    alert(sum(first,second));
}
function sum(val1, val2){
    return val1 + val2;
}
package.jsonの作成
npm を利用して、package.json を作成しましょう。
npm ( node package manager ) は、様々な package を管理するためのツールです。
また、package.json は様々な package と version などが記述されています。
npm と package.json を連携することで、容易に package を容易にインストールすることが出来ます。詳しくは、別途調べてください。
npm init
nameは入力しなければいけないので、プロジェクト名を JsTestCode にしておきましょう。その他は Enter で大丈夫です。
以下のような package.json が出来てると思います。
{
  "name": "JsTestCode",
  "version": "1.0.0",
  "description": "",
  "main": "index.js",
  "scripts": {
    "test": "echo \"Error: no test specified\" && exit 1"
  },
  "author": "",
  "license": "ISC"
}
Jasmine の導入
Jasmine のインストールを行います。
以下のコマンドを実行してください。
npm install -D jasmine-core
PhantomJS の導入
PhantomJSのインストールを行います。
以下のコマンドを実行してください。
npm install -D phantomjs-prebuilt
Karma の導入
Karma のインストールを行います。
以下のコマンドを実行してください。
npm install -D karma
npm install -g karma-cli
また、Karma から Jasmine や phantomjs を利用するために karma-jasmine karma-phantomjs-launcher もインストールします。
npm install -D karma-jasmine
npm install -D karma-phantomjs-launcher
karma.conf.js の作成
次に、karmaの設定ファイルを作成します。
以下のコマンドを実行してください。
karma init
実行すると、以下のことについて聞かれます。
- どのテストフレームワーク使いたいか?
- jasmine
- Require.js は使いたいか?
- no
- どのブラウザで使いたいか?
- PhantomJS
- 対象のソースとテストファイルはどこか?
- public/js/sum.js
- spec/sum-test.js
あとは全部 Enter で!
そうすると、以下のファイルが出来ているはずです。
// Karma configuration
// Generated on Fri Oct 28 2016 00:16:52 GMT+0900 (東京 (標準時))

module.exports = function(config) {
  config.set({

    // base path that will be used to resolve all patterns (eg. files, exclude)
    basePath: '',


    // frameworks to use
    // available frameworks: https://npmjs.org/browse/keyword/karma-adapter
    frameworks: ['jasmine'],


    // list of files / patterns to load in the browser
    files: [
      'public/js/sum.js',
      'spec/sum-test.js'
    ],


    // list of files to exclude
    exclude: [
    ],


    // preprocess matching files before serving them to the browser
    // available preprocessors: https://npmjs.org/browse/keyword/karma-preprocessor
    preprocessors: {
    },


    // test results reporter to use
    // possible values: 'dots', 'progress'
    // available reporters: https://npmjs.org/browse/keyword/karma-reporter
    reporters: ['progress'],


    // web server port
    port: 9876,


    // enable / disable colors in the output (reporters and logs)
    colors: true,


    // level of logging
    // possible values: config.LOG_DISABLE || config.LOG_ERROR || config.LOG_WARN || config.LOG_INFO || config.LOG_DEBUG
    logLevel: config.LOG_INFO,


    // enable / disable watching file and executing tests whenever any file changes
    autoWatch: true,


    // start these browsers
    // available browser launchers: https://npmjs.org/browse/keyword/karma-launcher
    browsers: ['PhantomJS'],


    // Continuous Integration mode
    // if true, Karma captures browsers, runs the tests and exits
    singleRun: false,

    // Concurrency level
    // how many browser should be started simultaneous
    concurrency: Infinity
  })
}
これでもいいのですが、以下を変更してください。
singleRun: false
から
singleRun: true
に変更しましょう。
これは、Travis-CI 上でテストを実行すると、ずっとテスト実行していて終わらないため、1回だけテストするように変更しました。
はい!次はやっとテストコード書きますよ!
テストコードの記述
環境を先に作ったので後はやるだけです!
今回利用しているのは Jasmine というテストフレームワークなので、フレームワーク通りに書いて行きましょう。では sum-test.js にテストコード書きます。
詳しくは以下をご覧ください。
describe("sum関数のテスト", function(){
    it("1+1=2", function(){
        expect(sum(1, 1)).toBe(2);
    });
    it("-1+1=0", function(){
        expect(sum(-1, 1)).toBe(0);
    });
    it("0+1=1", function(){
        expect(sum(0, 1)).toBe(0); //ミスするテスト
    });
});
ここでの sum関数は、public/js/sum.js に書いた sum関数を呼び出しています。
テストの実行
次に先ほど書いたテストを以下のコマンドで実行します。
karma start
そうするとこのようになります。
28 10 2016 00:42:38.770:WARN [karma]: No captured browser, open http://localhost:9876/
28 10 2016 00:42:38.784:INFO [karma]: Karma v1.3.0 server started at http://localhost:9876/
28 10 2016 00:42:38.785:INFO [launcher]: Launching browser PhantomJS with unlimited concurrency
28 10 2016 00:42:38.804:INFO [launcher]: Starting browser PhantomJS
28 10 2016 00:42:40.951:INFO [PhantomJS 2.1.1 (Windows 8 0.0.0)]: Connected on socket /#iq4wJIbXzPIx77GMAAAA with id 11536256
PhantomJS 2.1.1 (Windows 8 0.0.0) sum関数のテスト 0+1=1 FAILED
        Expected 1 to be 0.
        spec/sum-test.js:9:31
        loaded@http://localhost:9876/context.js:151:17
PhantomJS 2.1.1 (Windows 8 0.0.0): Executed 3 of 3 (1 FAILED) (0.008 secs / 0.004 secs)
このように、先ほどのテストを実行することが出来ます。
実行したテストは 2/3 が成功し、0+1=1 のテストが失敗するので、結果としては FAILED します。そのため、正常にテストが実行できていることが分かりました。
テストコードの修正
では、今の sum-test.js のテストコードの間違っている場所を直しましょう。
describe("sum関数のテスト", function(){
    it("1+1=2", function(){
        expect(sum(1, 1)).toBe(2);
    });
    it("-1+1=0", function(){
        expect(sum(-1, 1)).toBe(0);
    });
    it("0+1=1", function(){
        expect(sum(0, 1)).toBe(1); //修正
    });
});
では、もう一度テストの実行!
恐らく一回起動すればファイルの監視しているので、sum-test.jsを保存すれば、コマンドラインに結果が表示されます。
28 10 2016 01:13:19.069:WARN [karma]: No captured browser, open http://localhost:9876/
28 10 2016 01:13:19.080:INFO [karma]: Karma v1.3.0 server started at http://localhost:9876/
28 10 2016 01:13:19.081:INFO [launcher]: Launching browser PhantomJS with unlimited concurrency
28 10 2016 01:13:19.091:INFO [launcher]: Starting browser PhantomJS
28 10 2016 01:13:20.757:INFO [PhantomJS 2.1.1 (Windows 8 0.0.0)]: Connected on socket /#r2g4iuDJlq2aNLbIAAAA with id 34118358
PhantomJS 2.1.1 (Windows 8 0.0.0): Executed 3 of 3 SUCCESS (0.007 secs / 0.005 secs)
全てのテストが成功し、SUCCESS となっています。
package.json の script の test に karma start を登録
現在以下のようになっていると思います。
{
  "name": "JsTestCode",
  "version": "1.0.0",
  "description": "",
  "main": "index.js",
  "scripts": {
    "test": "echo \"Error: no test specified\" && exit 1"
  },
  "author": "",
  "license": "ISC"
}
これを以下に変更します。
{
  "name": "JsTestCode",
  "version": "1.0.0",
  "description": "",
  "main": "index.js",
  "scripts": {
    "test": "karma start"
  },
  "author": "",
  "license": "ISC"
}
script の中身を変更しました。
これでテストを以下のコマンドで実行できます。
npm test
Travis-CI 上で動かす際、build と test を行います。その際に npm test を実行するので、package.json の test の中身を karma start に変更しました。
これでテスト環境を作り、テストコードが動くことが確認出来たと思います。
ソースコードを GitHub に Push しよう
Gitのインストールはこちらからどうぞ ( Windows用 )
- https://git-for-windows.github.io/
まず初めに、GitHub で JsTestCode のレポジトリを作成しましょう。
その後以下のコマンドを実行してください。
git init
git remote add origin https://github.com/[ユーザーID]/JsTestCode.git
次に、.gitignore ファイルの作成をしましょう。
フォルダ node_modules はGitHub上には必要ないため、.gitignore で無視します。
/node_modules
さぁあとは add して commit して push や!
git add .
git commit -m "テスト環境作ったよ"
git push origin master
はい!このようになったと思います。

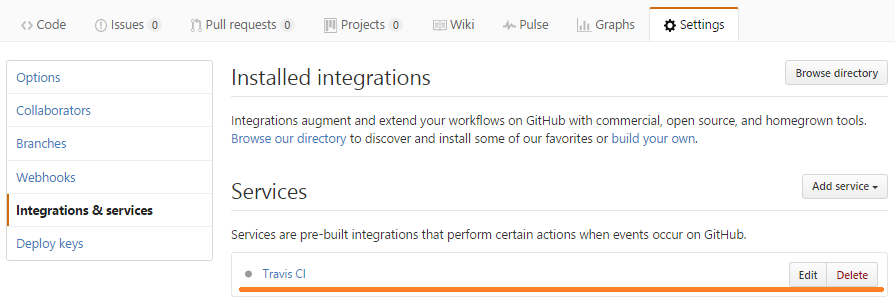
GitHub で Travis-CI を利用可能にする
レポジトリの settings > integrations & services から Add service を選び、Travis CI を選択しましょう。以下のようになればおkです。
次は、CI導入しまっせ^~^
CIの導入
次にCIとしてTravis-CIを利用していきたいと思います。
CIとは、継続的インテグレーションと言います。いい説明が見つかったので、引用します。
継続的インテグレーションとは、ソフトウェア開発において、ビルドやテストを頻繁に繰り返し行なうことにより問題を早期に発見し、開発の効率化・省力化や納期の短縮を図る手法。特に、専用のツールを用いてこのプロセスを自動化あるいは半自動化し、効率的に実施する方式[1]。
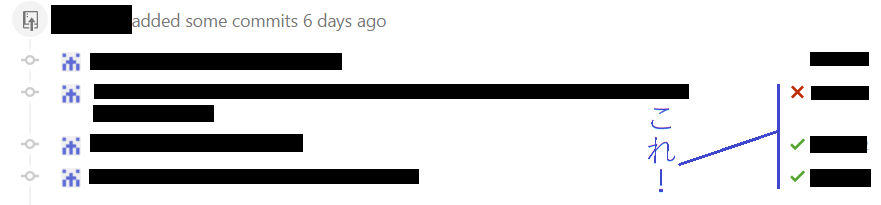
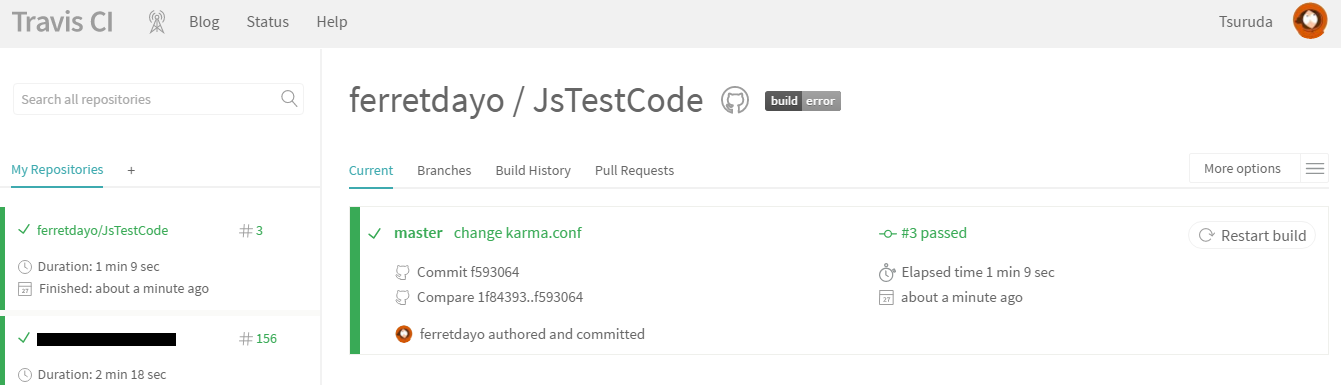
開発をする際に GitHub に Push すると思います。その際、自動的にテストを行い、そのテスト結果を GitHub上 で教えてくれます。

これですこれ!
ちなみに Build や test が失敗すると failed や errored となります。
他にもチーム開発で PullRequest をMerge するかという場面でテストの結果が分かるようになっています。
ですので、テストコードを書く環境作ったらCIの環境も整えましょう!
Travis-CI への登録
まず https://travis-ci.org/ にアクセスしましょう!
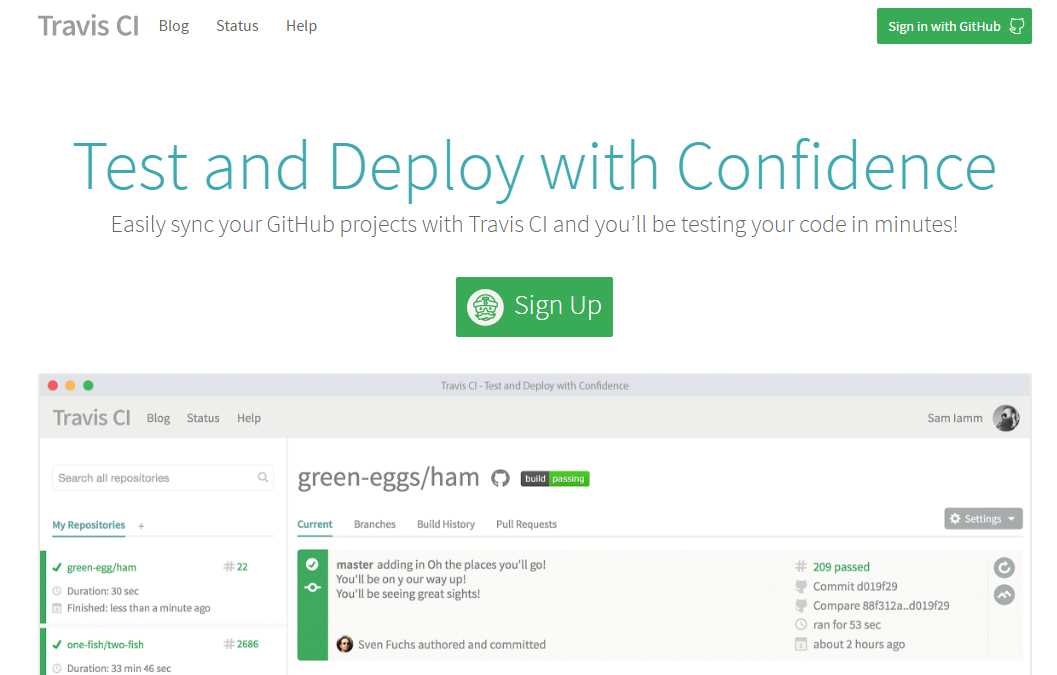
右上に GitHub のアカウントでサインイン出来るので、サインインしましょう。
Travis-CI にプロジェクトを登録
次に、右上にある自分のユーザをクリックすると以下のようなものが出てきます。
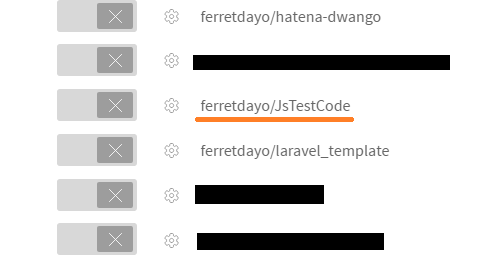
ここに先ほどGitHub上で作った JsTestCode があると思いますので、左にあるボタンをアクティブにしましょう!
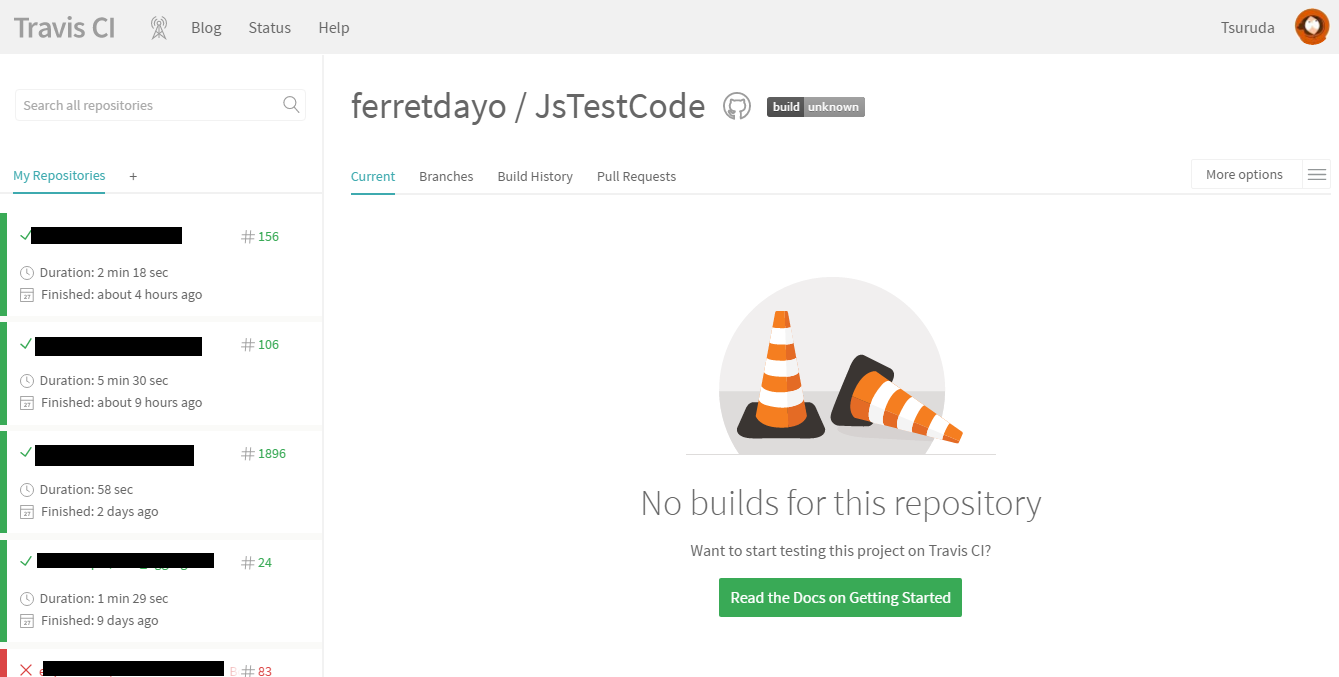
その後、ボタンの横の ユーザ名/JsTestCode をクリックしたら以下のようなページに来ます。
.travis.yml の記述
Travis-CI にプロジェクトを登録するだけでは何もしません。Travis-CI 上でプロジェクトを動かすために、設定ファイルを書きましょう。
language: node_js
じゃーこれを GitHub 上に置いていきましょう。
git add .
git commit -m ".travis.ymlの追加"
git push origin master
Travis-CI のブラウザでは passed となっていると思います。
これで、CIの環境は整いました!!
お疲れ様です!!
今回の作成したプロジェクト
ここに今回作成したプロジェクトを置いておきます。
煮るなり焼くなりご自由にどうぞ
次は,@takemioIO さんです!
参考文献
[1] 継続的インテグレーションとは|CI|Continuous Integration - 意味 / 定義 / 解説 / 説明 : IT用語辞典