概要
Git/GitHub 社内勉強会コンテンツ (最小限の手順まとめ)。
本記事は、Git-it で学習を進める際の、副資料。
はじめに
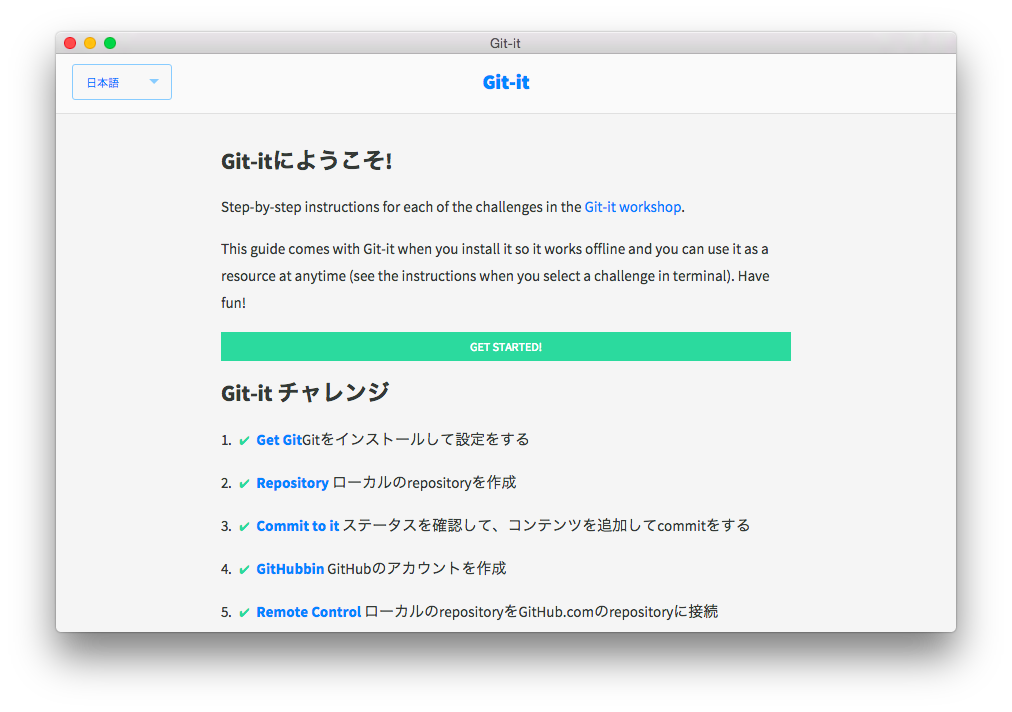
Git-it という、Git/GitHub学習のための素晴らしいアプリがある。
Git-it (Git/Github 勉強アプリ)
https://github.com/jlord/git-it-electron/releases/tag/3.1.0
それを使った、社内勉強会用コンテンツ。
しかしながら、Git-it では、プルリク - レビュー - マージ の開発の流れが理解しづらいので、その部分を、あとから追加で実施する。
SourceTree
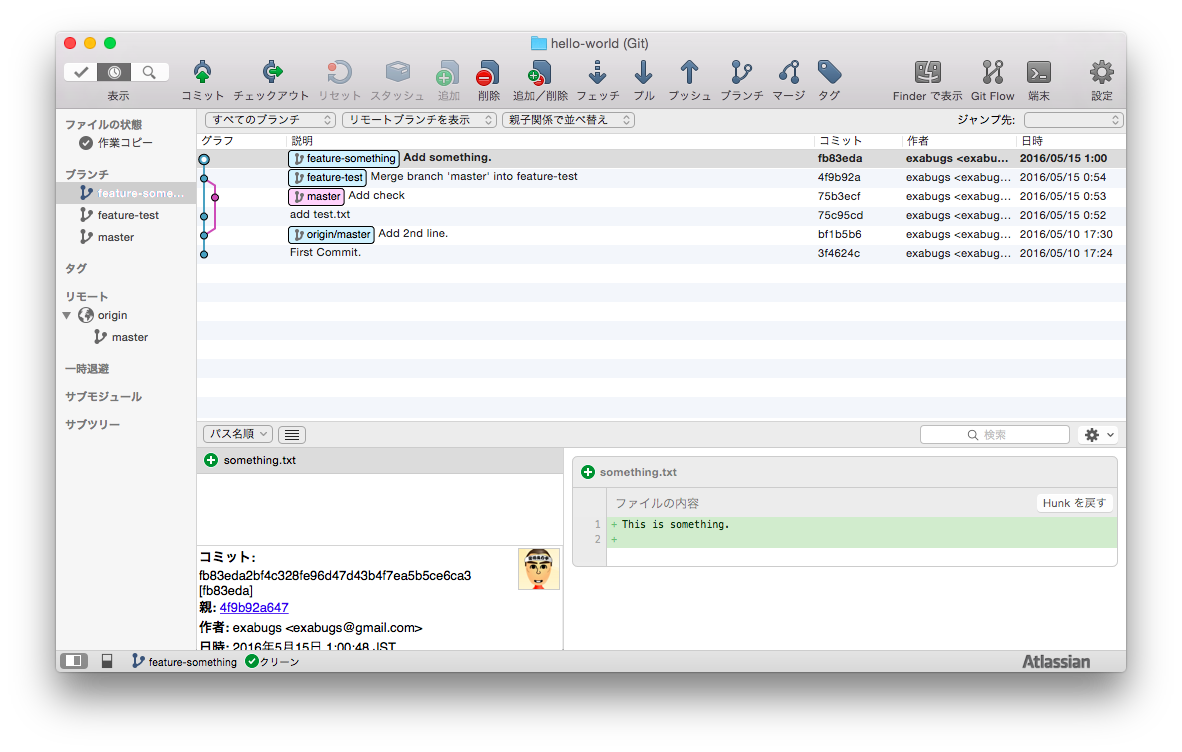
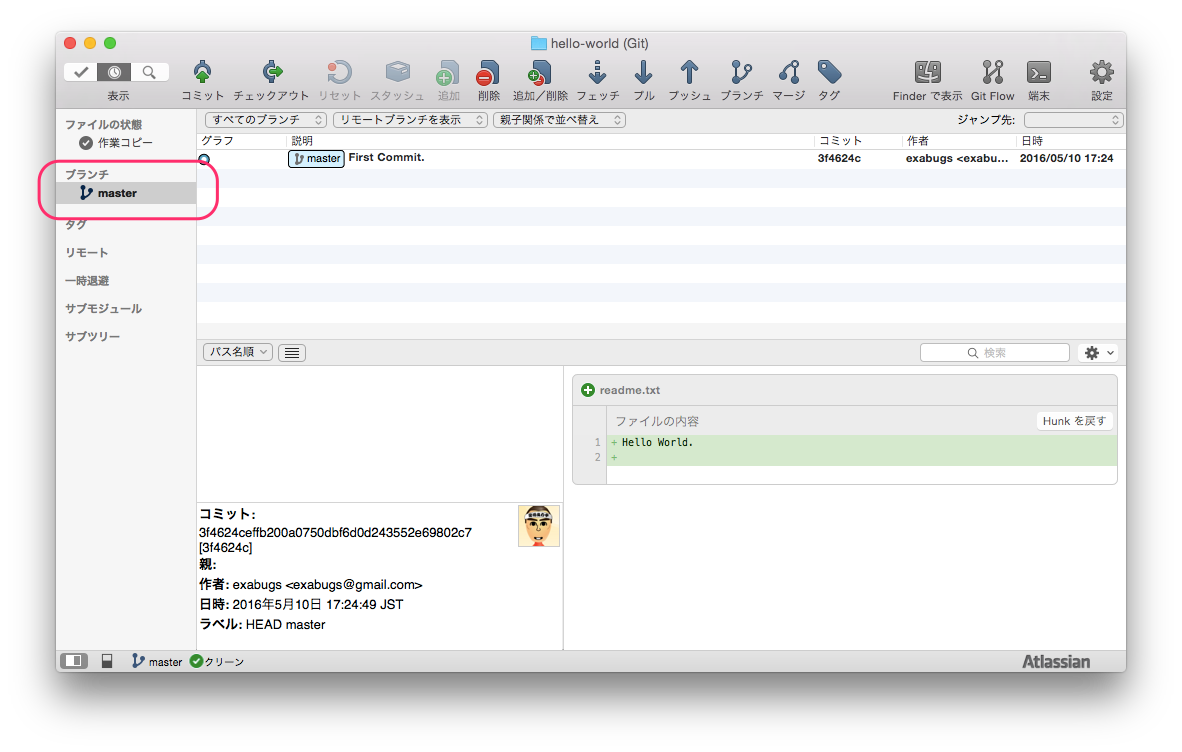
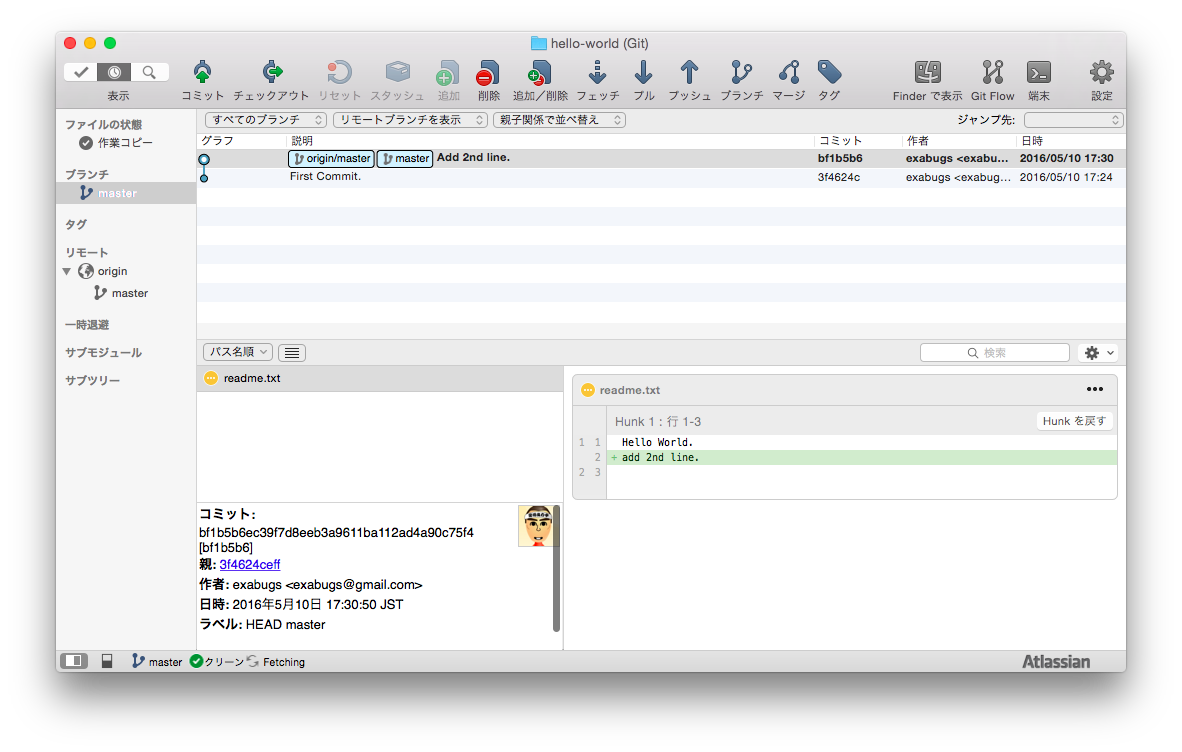
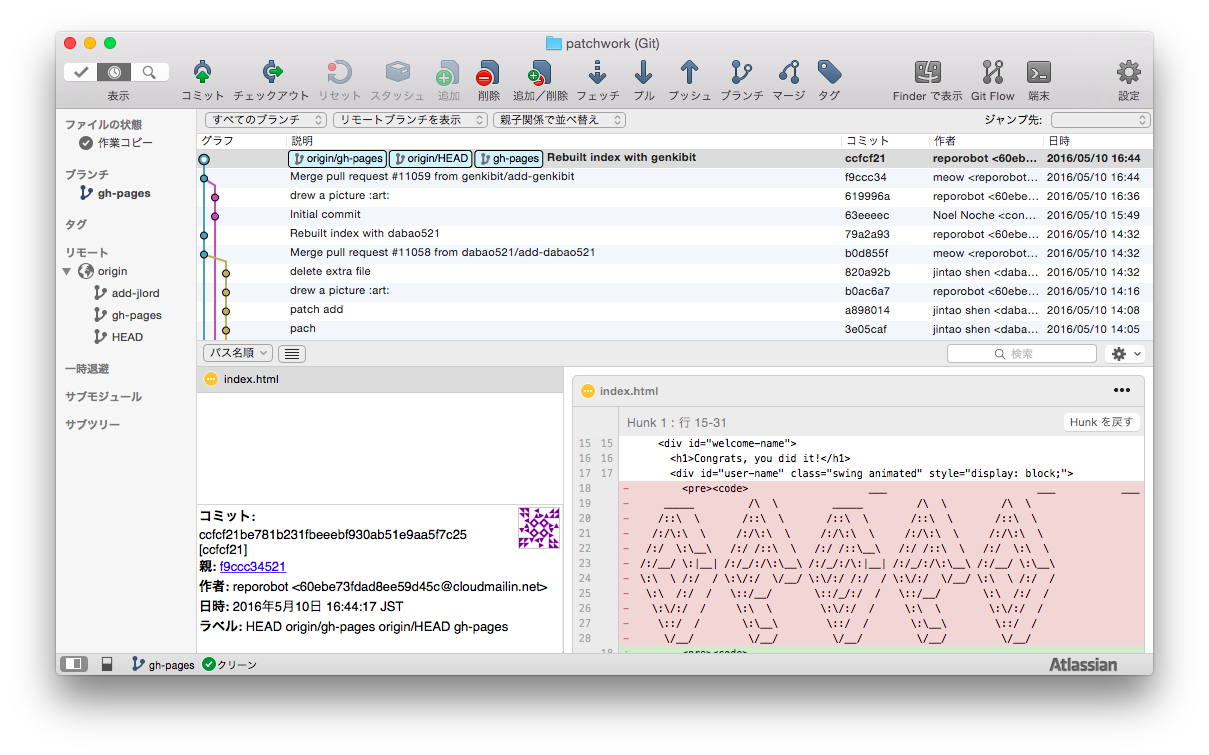
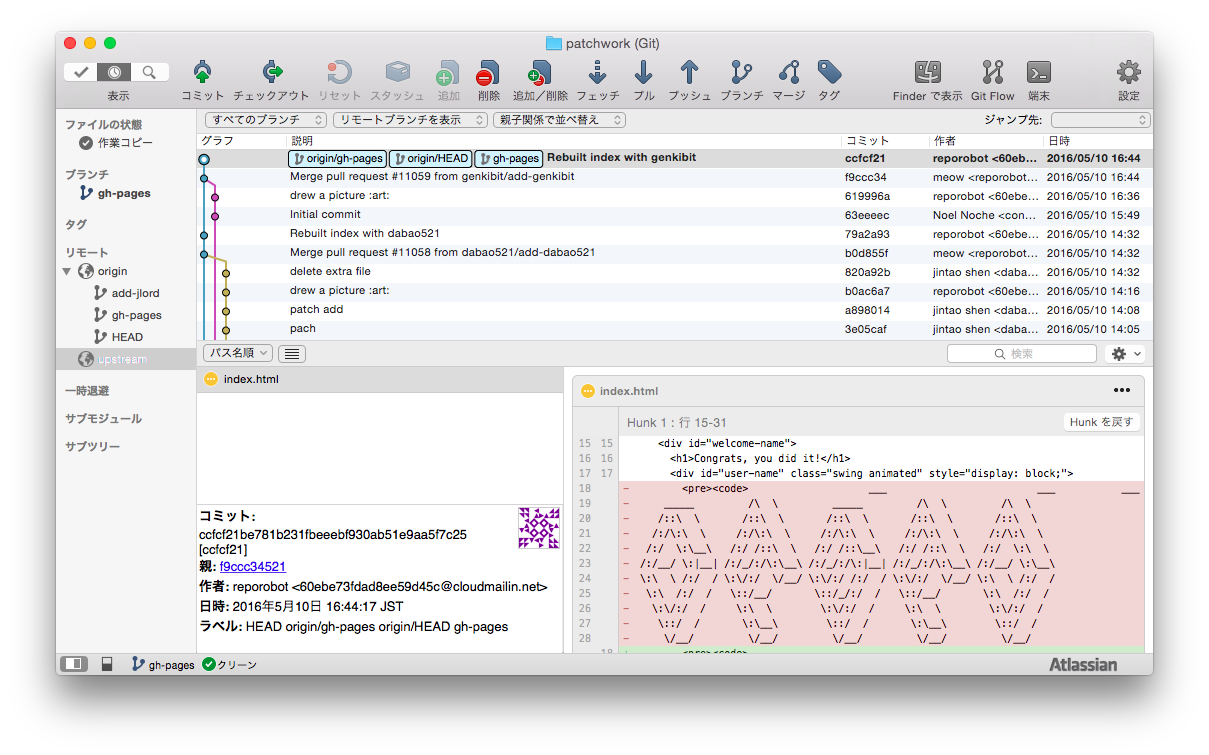
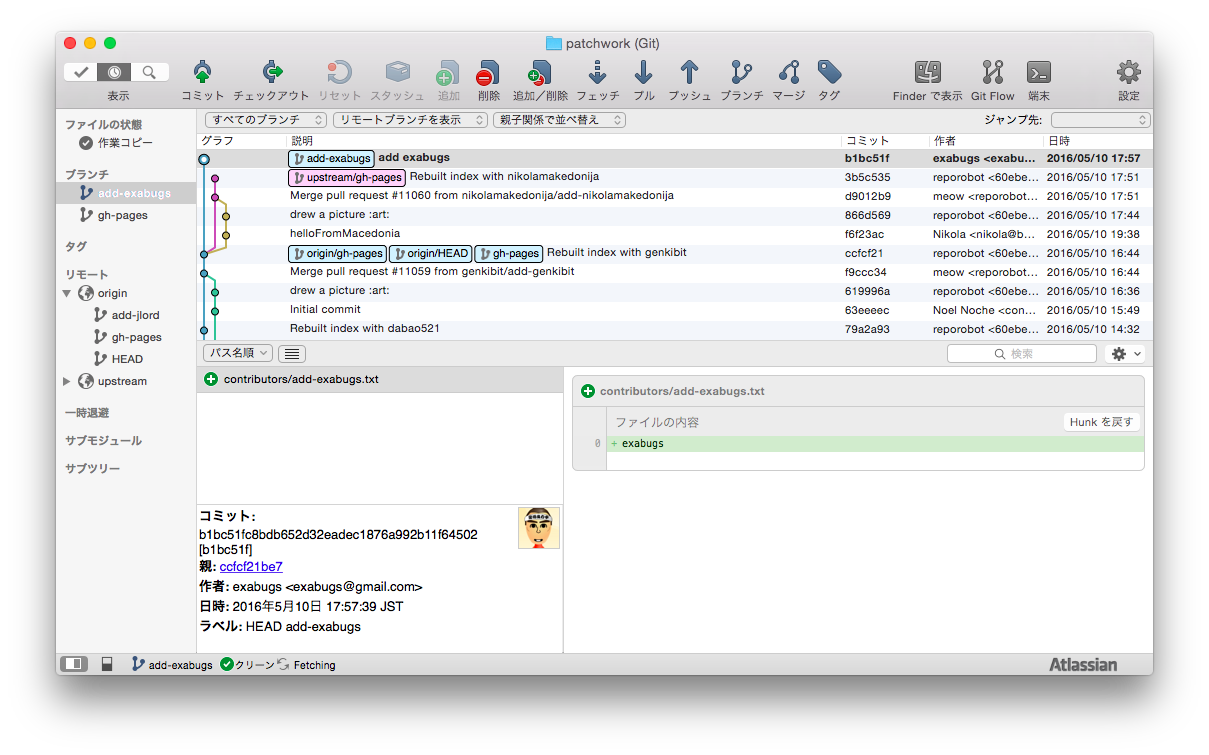
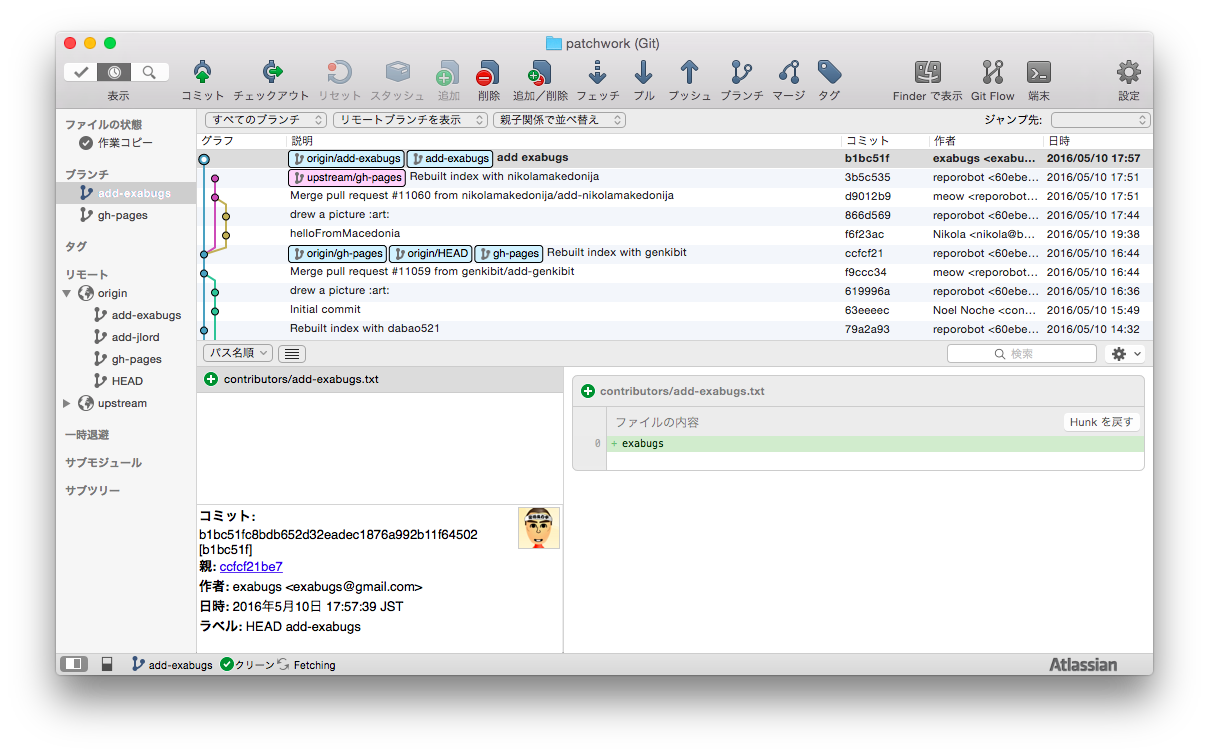
ブランチの状態を可視化する目的もあり、Git管理アプリ SourceTree を併用しながら学習を進める。
SourceTree
https://ja.atlassian.com/software/sourcetree
GitHub Desktop
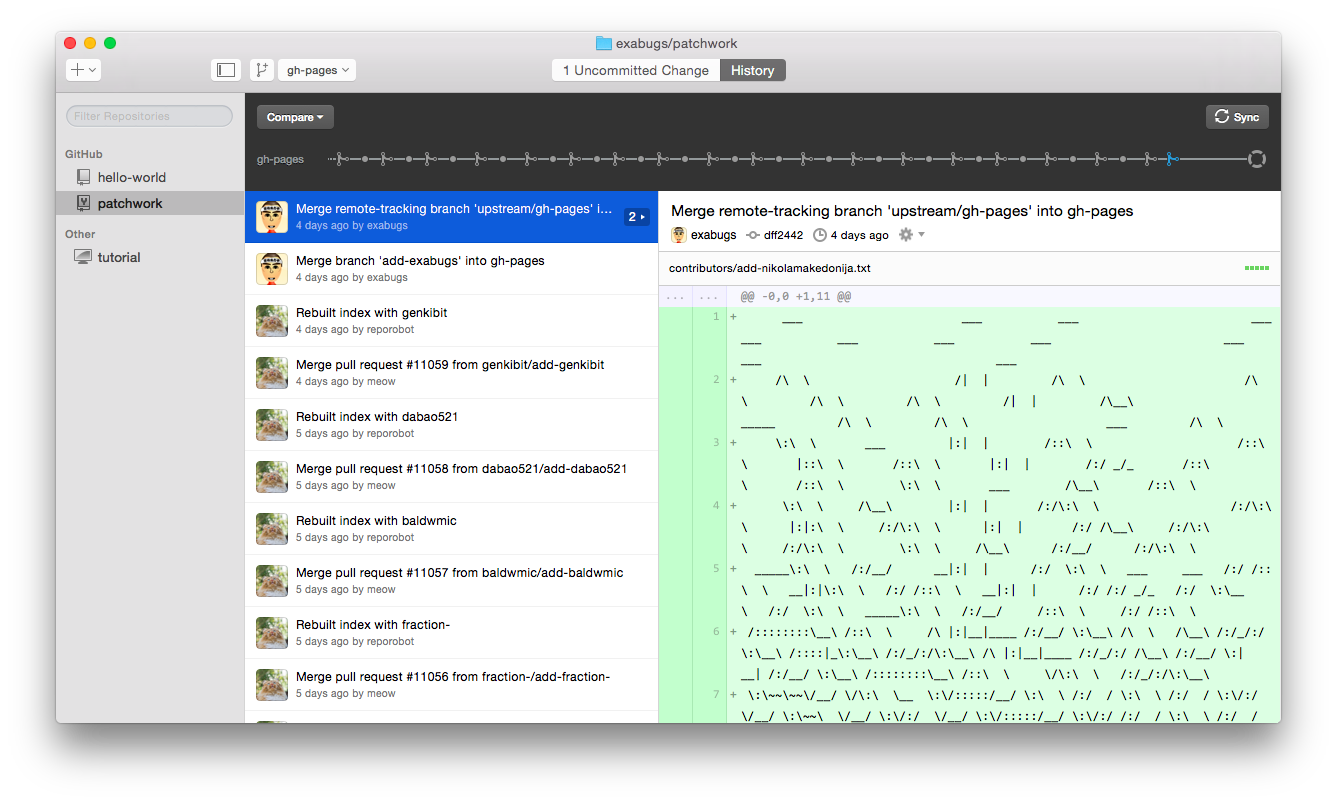
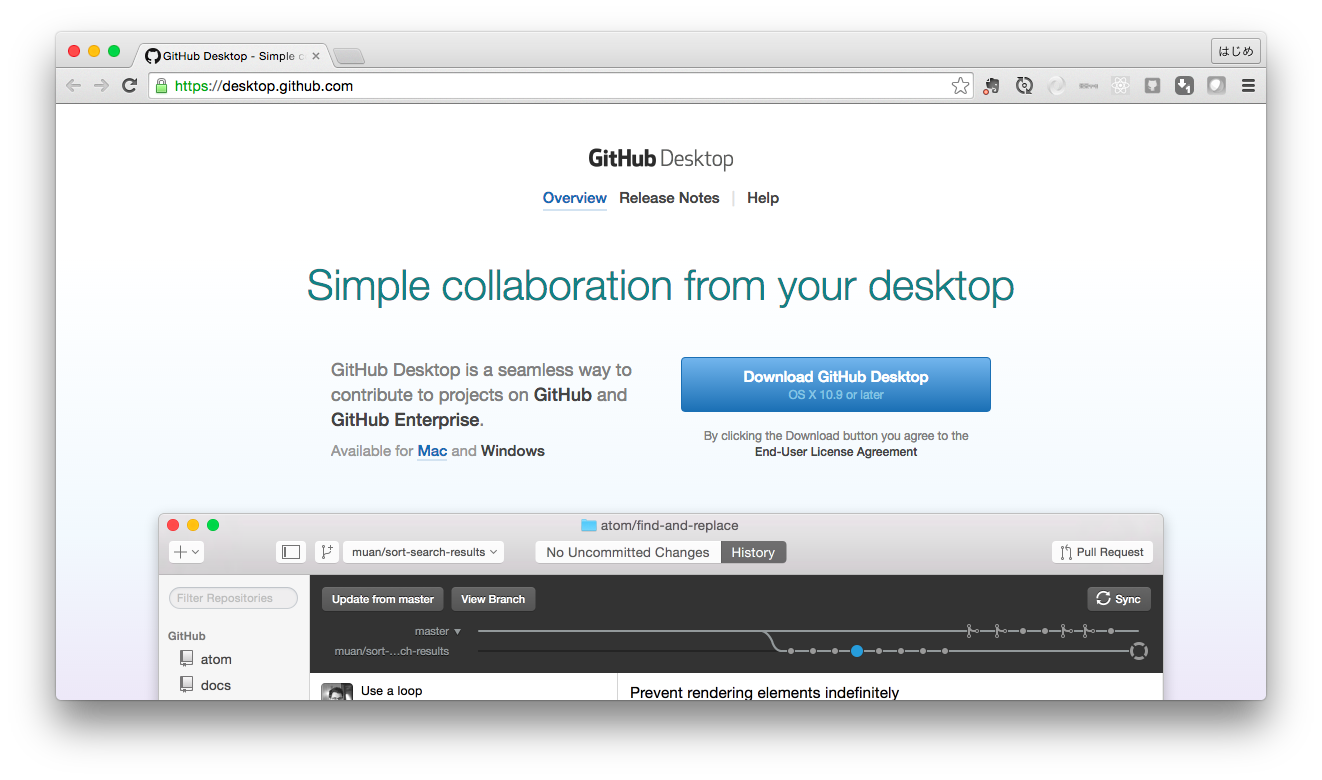
Git-it で強くオススメされている GitHub Desktop を使うのもよい。
「GitHub Desktop」 は GitHub / GitHub Enterprise と親和性があり、「プルリクエスト」を直接出すことができる。
GitHub Desktop
https://desktop.github.com/
ソース管理の「違い」
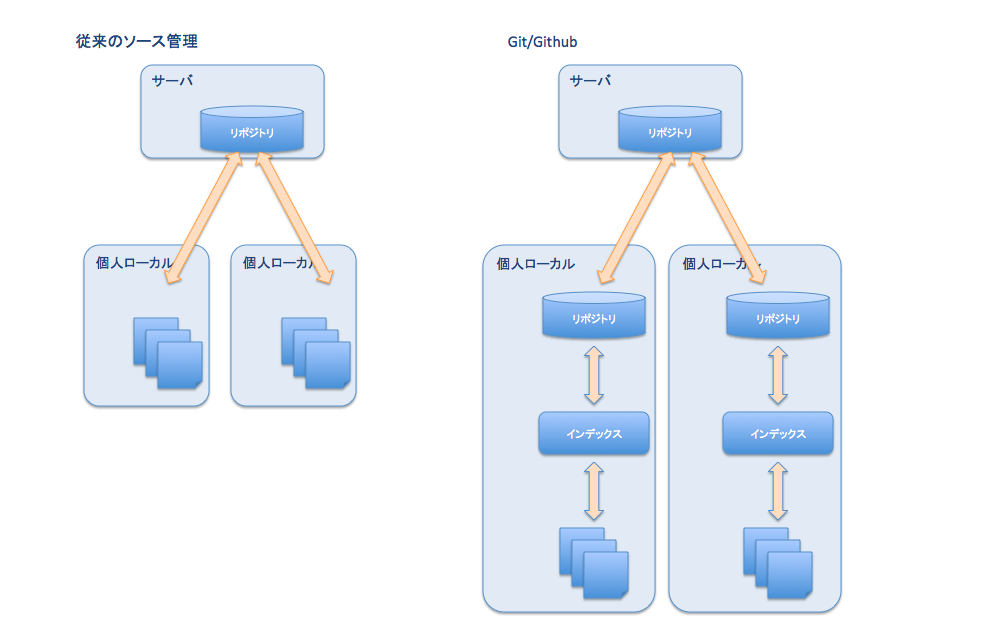
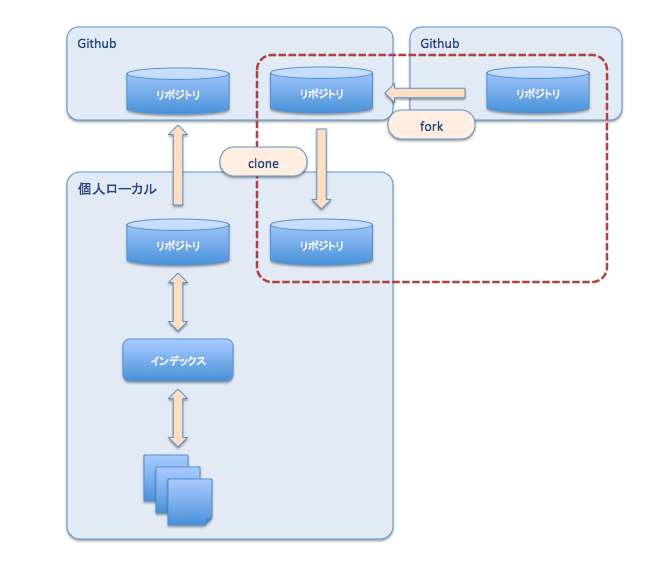
旧来のソース管理(Subversion等)とGit/GitHubの違い
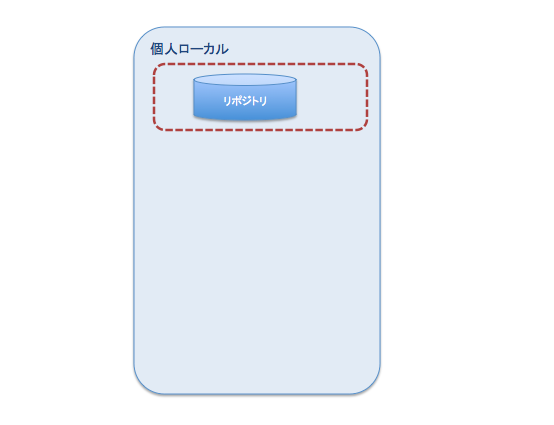
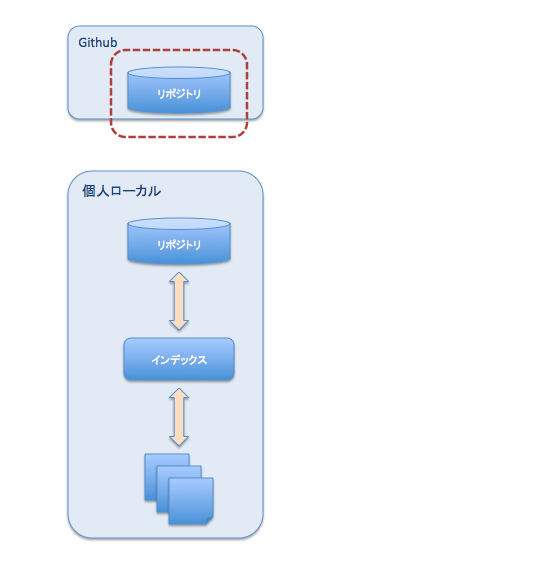
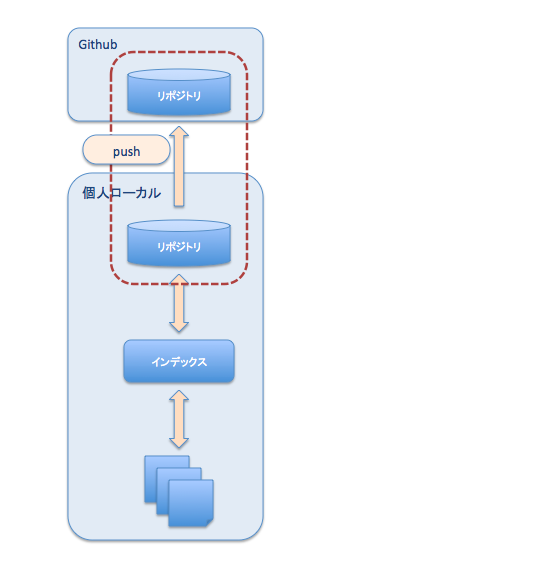
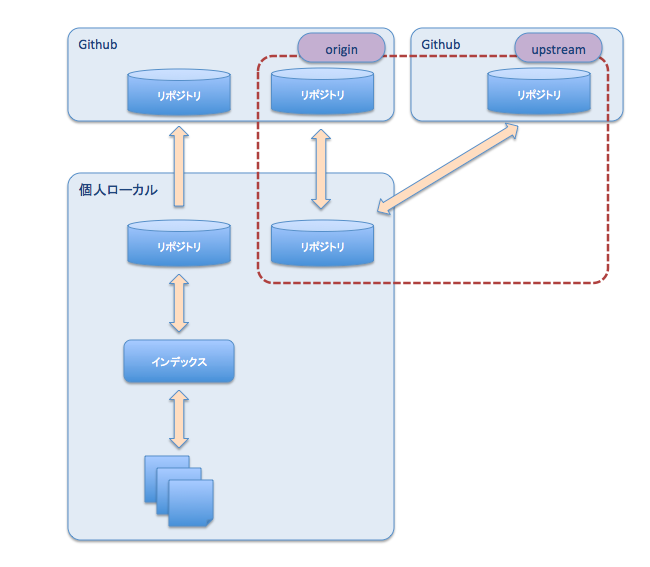
- Git/GitHubでは、リポジトリが複数存在する。(各人のローカルにリポジトリの完全なクローンが存在する)
[メリット]- 個人のローカルだけで完結する使い方もあり
- ネットワーク分断耐性 (ネットワークにつながってなくても作業が継続できる)
- 可用性 (サーバが破壊されても、リポジトリのクローンを、誰かが持っているはず)
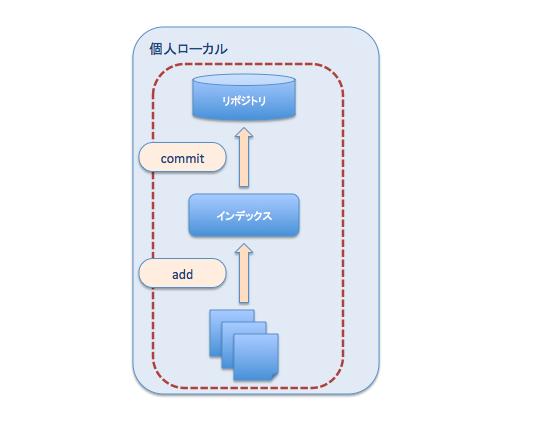
- Git/GitHubでは、作業ファイルとリポジトリの間に、インデックス(キャッシュ)というレイヤーが存在する
[メリット]- 一貫性 (コミットでの時間差による論理的な不整合が発生しない)
- ブランチ切り替えコスト
Subversion ではブランチ切り替えがびっくりするくらい遅いですが、Git では逆に、びっくりするくらい早いです。
ブランチで開発環境を切り替える戦略が、Subversion時代はやりたくても現実的にできませんでしたが、Git ではそれが基本戦略になります。
GitとGitHubの違い
- Git はオープンソースで、プログラムの名称。GitHub は Git をベースにした Webサービス
- Git 単体には無い、GitHubの素晴らしい特徴機能が「プル・リクエスト」
→ 修正箇所を取り込む(プル)ことを依頼(リクエスト)することができる。
→ プル・リクエスト を起点に、コード・レビュー、マージ が行われる。 - GitHubは他にも、wiki 機能や、 issue (チケット) 管理の機能がある。
- 個人利用は公開リポジトリの場合は無制限に無料。
- 非公開リポジトリを作成したい場合は、$7/月 (2016/05/12価格改定)
GitHubとGitHub Enterpriseの違い
- GitHub Enterprise は GitHub と同等機能をオンプレミスで動作させるプログラムモジュール。
- 費用 : ???? 調査
- 認証は LDAP 等が使える。
- コードを社外に持ち出せない場合に使われる、閉じた環境。
- GitHub の リポジトリからの Fork や、そのリポジトリに対してのプル・リクエストはできない。
Git-it
以下、Git-it の指示に従って、学習を進めていく。
(★exabugs は私のIDです!! 各自、自分のIDに置き換えてください)
1. Get Git
Gitをコンピュータにインストールして、名前とEメールアドレスを設定しましょう。
Step: Gitをインストールする
「GitHub Desktopをダウンロードしてインストールすることを強くおすすめします。」だそうです。
Step: Gitの設定をする
$ git --version
git version 2.5.4 (Apple Git-61)

$ git config --global user.name あなたの名前

$ git config --global user.email あなたのメールアドレス
確認
$ git config --global user.name
あなたの名前

$ git config --global user.email
あなたのメールアドレス
2. Repository
リポジトリを作ってみよう
Step: リポジトリを作ろう
$ mkdir hello-world

$ cd hello-world

$ git init
Initialized empty Git repository in /private/tmp/hello-world/.git/
SourceTree でリポジトリを開いてみる
3. Commit To It
ファイルを作って、何か変更を追加してみよう。その変更をGitにコミットしてみよう。
Step: 新しいファイルを作る
$ git status
On branch master

Initial commit

nothing to commit (create/copy files and use "git add" to track)
$ echo "Hello World." > readme.txt
Step: Statusを確認し、変更をAddしてCommitしてみよう
$ git status
On branch master

Initial commit

Untracked files:
  (use "git add <file>..." to include in what will be committed)

	readme.txt

nothing added to commit but untracked files present (use "git add" to track)
$ git add readme.txt

$ git status
On branch master

Initial commit

Changes to be committed:
  (use "git rm --cached <file>..." to unstage)

	new file:   readme.txt

$ git commit -m "First Commit"
[master (root-commit) b0a664e] First Commit
 1 file changed, 1 insertion(+)
 create mode 100644 readme.txt
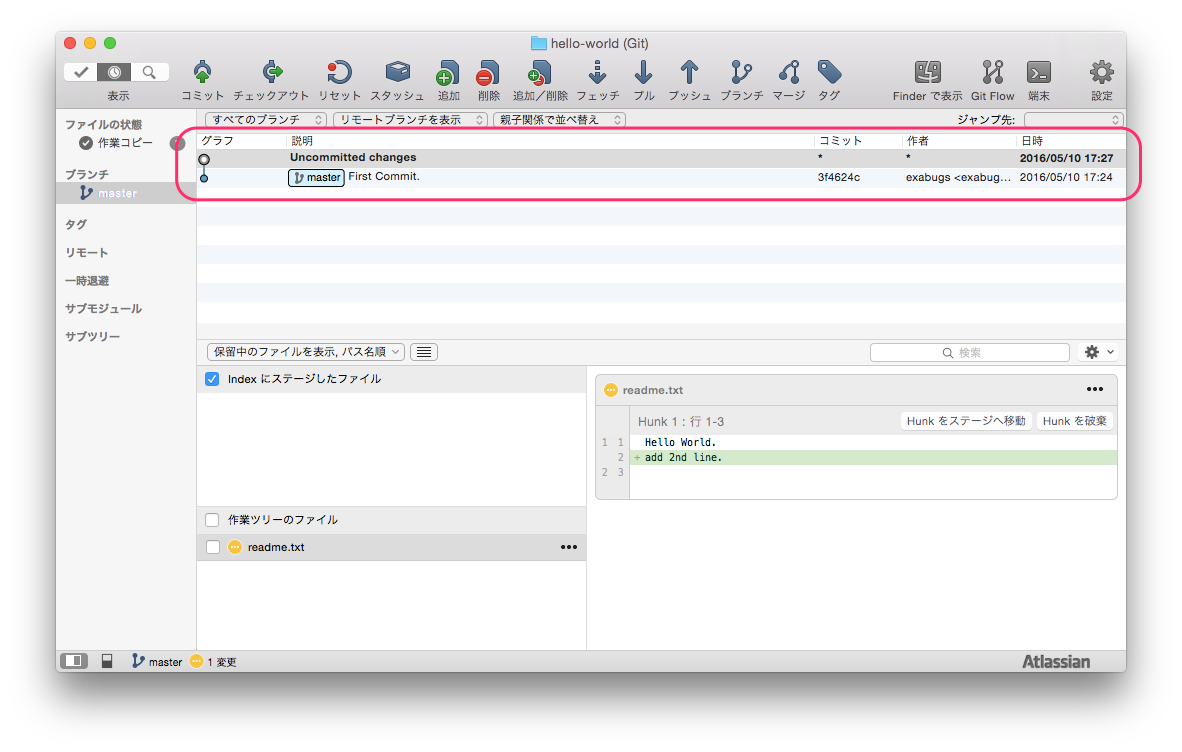
$ echo "add 2nd line." >> readme.txt

$ git status
On branch master
Changes not staged for commit:
  (use "git add <file>..." to update what will be committed)
  (use "git checkout -- <file>..." to discard changes in working directory)

	modified:   readme.txt

no changes added to commit (use "git add" and/or "git commit -a")

$ git diff
diff --git a/readme.txt b/readme.txt
index b9fa4ac..8870a18 100644
--- a/readme.txt
+++ b/readme.txt
@@ -1,2 +1,3 @@
 Hello World.
+add 2nd line.
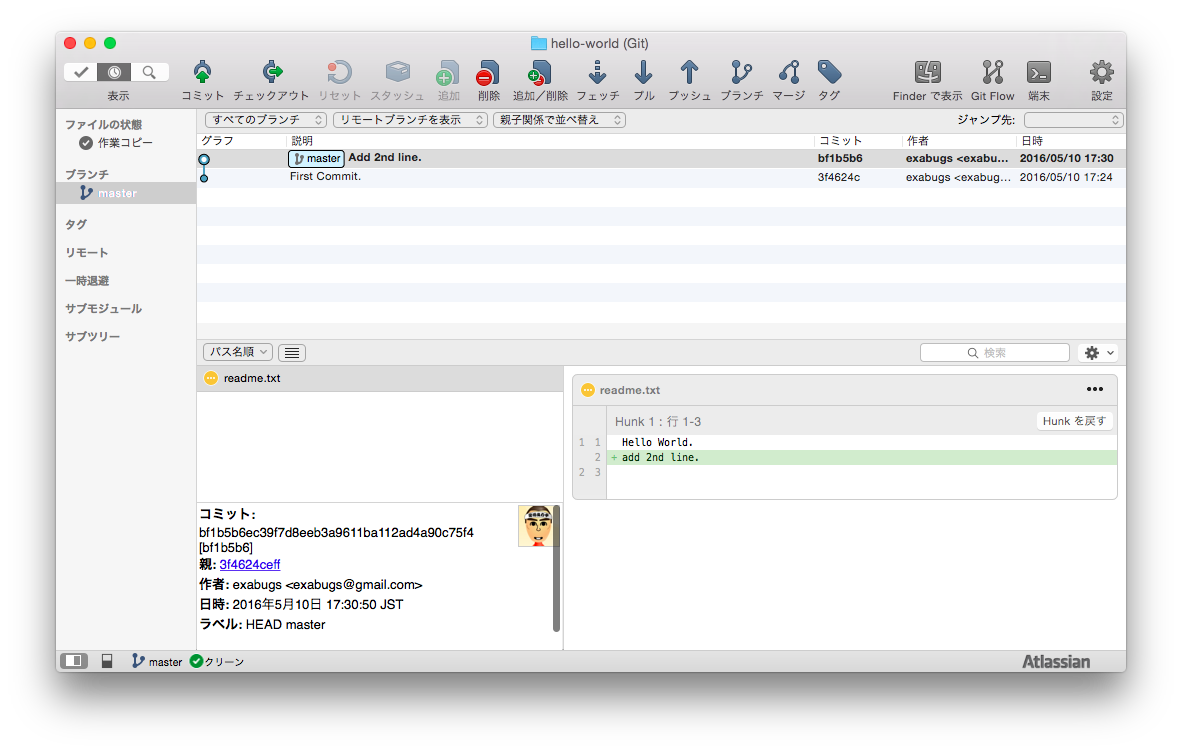
$ git add readme.txt

$ git commit
[master bf1b5b6] Add 2nd line.
 1 file changed, 1 insertion(+)
【コマンド解説】
- インデックスに追加(ステージング) 'add ファイル名'
- キャンセル (アンステージング) 'rm --cached ファイル名'
(--cached が「インデックスからのみ」を意味します)
【ポイント】
- 変更したファイルをaddコマンドでインデックス(キャッシュ)に集めていくイメージ。
あとでまとめてコミットするために。 - インデックスにaddされたファイルは、いくら大量になったとしても1回のコミットでアトミックに処理されるため、論理的な不整合が発生しない。
4. GitHubbin
GitHub のアカウントを作って、ユーザー名をGitに設定しよう
Step: GitHub のアカウントを作ろう
GitHub でアカウント作成
Step: Gitにユーザー名を追加する
Git-it では以下のように user.username を指定しているが、 user.name の間違いだと思う。
しかし、verify では user.username を見ているので、意味があるかどうかはわからないけども、user.username も設定しておかないと、Git-it が OK にならない。
【誤】
$ git config --global user.username <USerNamE>
【正】
$ git config --global user.name <USerNamE>
5. Remote Control
ローカルのリポジトリとリモートのリポジトリをつないで、変更をPushしてみよう
Step: リモートリポジトリを作ろう
Step: ローカルとリモートをつなごう
$ git remote add origin https://github.com/exabugs/hello-world.git
Step: 作業内容をリモートにPushしよう
$ git push origin master
Counting objects: 6, done.
Delta compression using up to 4 threads.
Compressing objects: 100% (2/2), done.
Writing objects: 100% (6/6), 459 bytes | 0 bytes/s, done.
Total 6 (delta 0), reused 0 (delta 0)
To https://github.com/exabugs/hello-world.git
 * [new branch]      master -> master
Mac の場合
- 「Mac用 キーチェーン for Github」
https://help.github.com/articles/caching-your-github-password-in-git/
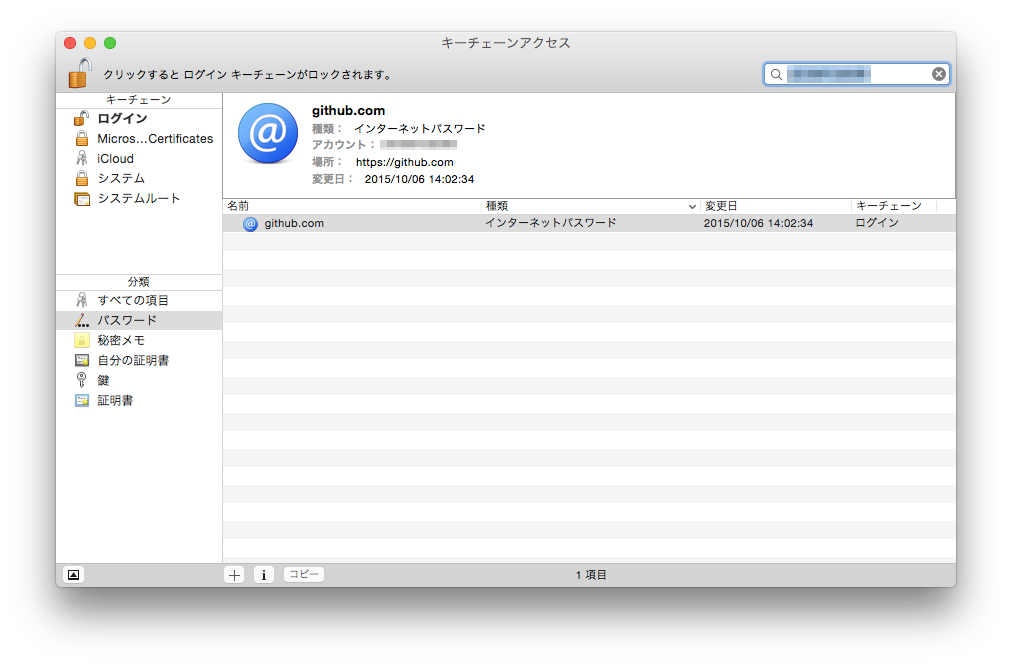
これをインストールしておくと、https 経由でのパスワード入力でキーチェーンを使ってくれるようになる。 - 「キーチェーン」
もし、以前に別アカウントでGithubにアクセスしたかもしれない場合は、キーチェーンアクセスに間違ったログインIDが記憶されている可能性がある。
キーチェーンアクセスから見つけ出して、削除する。
- 二段階認証の場合は、文末を参照
6. Forks And Clones
GitHub.comにあるプロジェクトをフォークして、ローカルにクローンしてみよう
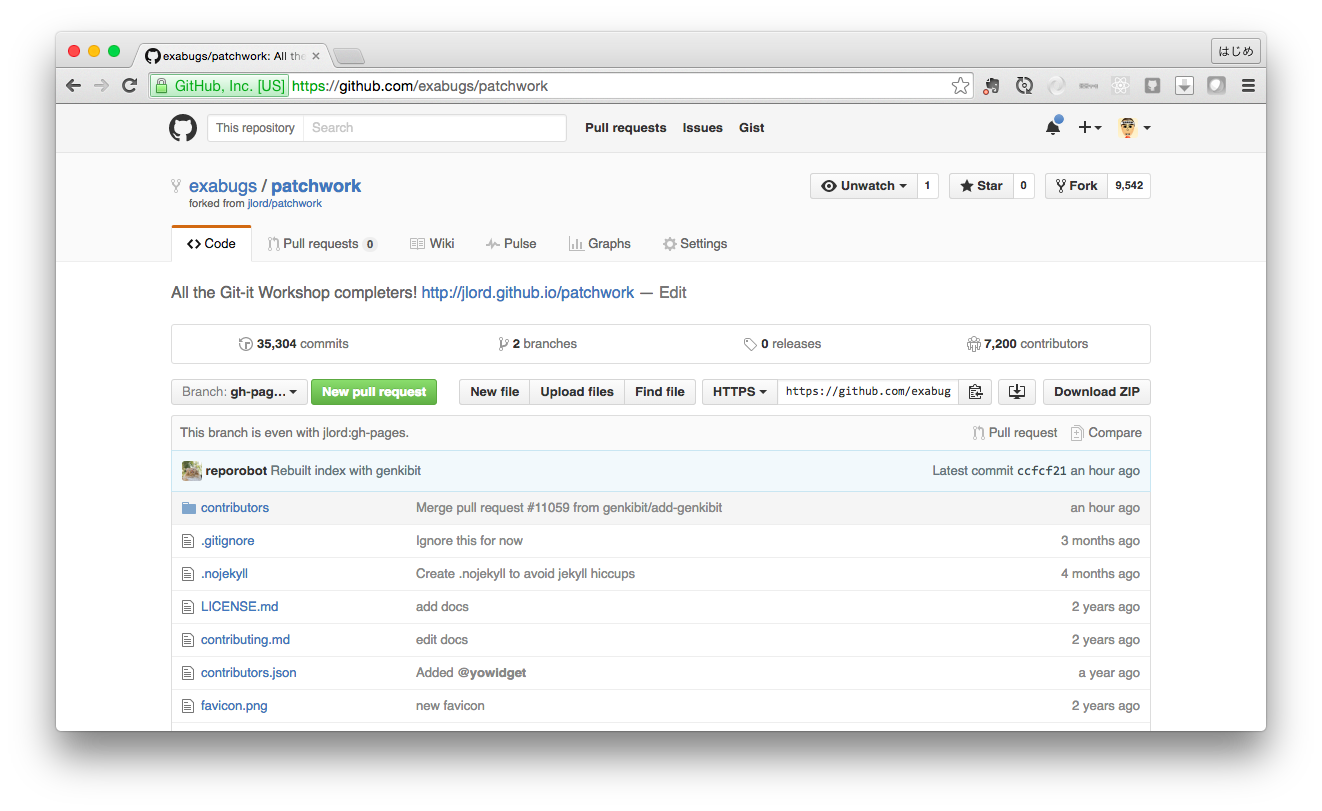
Step: Patchwork リポジトリをフォークしよう
Step: フォークをローカルにクローンしよう
$ git clone https://github.com/exabugs/patchwork.git
Cloning into 'patchwork'...
remote: Counting objects: 110024, done.
remote: Total 110024 (delta 0), reused 0 (delta 0), pack-reused 110024
Receiving objects: 100% (110024/110024), 77.63 MiB | 2.63 MiB/s, done.
Resolving deltas: 100% (64589/64589), done.
Checking connectivity... done.
Checking out files: 100% (8254/8254), done.
5分くらいかかる。リポジトリのサイズが大きい。。
Step: 元のリポジトリともつなごう
$ git remote add upstream https://github.com/jlord/patchwork.git
7. Branches Aren't Just For Birds
フォークしたリポジトリの上でブランチを作り、貢献の準備をしよう
Step: ブランチを作ろう
$ git status
On branch gh-pages
Your branch is up-to-date with 'origin/gh-pages'.
nothing to commit, working directory clean

$ git branch add-exabugs

$ git checkout add-exabugs
Switched to branch 'add-exabugs'

$ git branch
* add-exabugs
  gh-pages
Step: 新しいファイルを作ろう
$ echo "exabugs" > add-exabugs.txt
Step: チェックイン
$ git status
On branch add-exabugs
Untracked files:
  (use "git add <file>..." to include in what will be committed)

	add-exabugs.txt

nothing added to commit but untracked files present (use "git add" to track)

$ git add add-exabugs.txt

$ git commit -m "add exabugs"
[add-exabugs b1bc51f] add exabugs
 1 file changed, 1 insertion(+)
 create mode 100644 contributors/add-exabugs.txt
push でエラー。(リモートのブランチ(アップストリーム)が設定されていないから)
gitは、取り敢えず実行してみれば、どのように直せばよいか、git自身が教えてくれる。
$ git push
fatal: The current branch add-exabugs has no upstream branch.
To push the current branch and set the remote as upstream, use

    git push --set-upstream origin add-exabugs
$ git push --set-upstream origin add-exabugs
Counting objects: 4, done.
Delta compression using up to 4 threads.
Compressing objects: 100% (3/3), done.
Writing objects: 100% (4/4), 347 bytes | 0 bytes/s, done.
Total 4 (delta 2), reused 0 (delta 0)
To https://github.com/exabugs/patchwork.git
 * [new branch]      add-exabugs -> add-exabugs
Branch add-exabugs set up to track remote branch add-exabugs from origin.
【コマンド】
- リモートリポジトリの一覧
git remote -v
- リモートリポジトリの追加
$ git remote add <リポジトリ名> <リポジトリURL>
- リモートリポジトリの編集
$ git remote set-url <リポジトリ名> <リポジトリURL>
- リモートリポジトリの削除
$ git remote rm <リポジトリ名>
# 一人で実施する場合
Git-it は、一人で学習を進めるには良く出来ているが、チームで開発する場合は、プルリク - レビュー - マージ のフローに慣れる必要がある。
とりあえず、まずは、Git-it で、一人で最後まで学習を進める。
## 8. It's A Small World
プロジェクトにコラボレーターを追加しよう
### Step: Hello, Repo Robot!
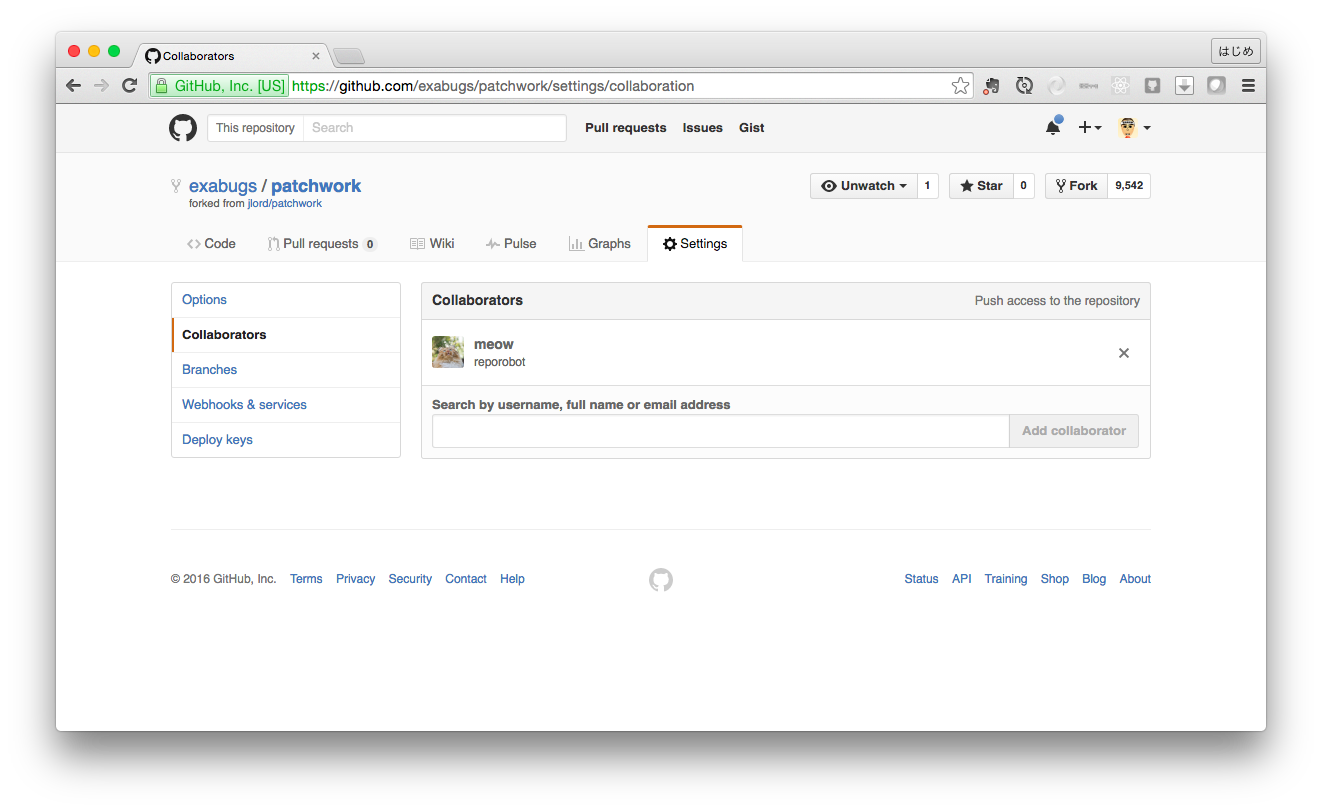
'reporobot'をコラボレーターとして追加
紛らわしいアカウントがいるので、間違わないように。
## 9. Pull Never Out Of Date
コラボレーターの変更をPullして、ファイルを最新に保とう
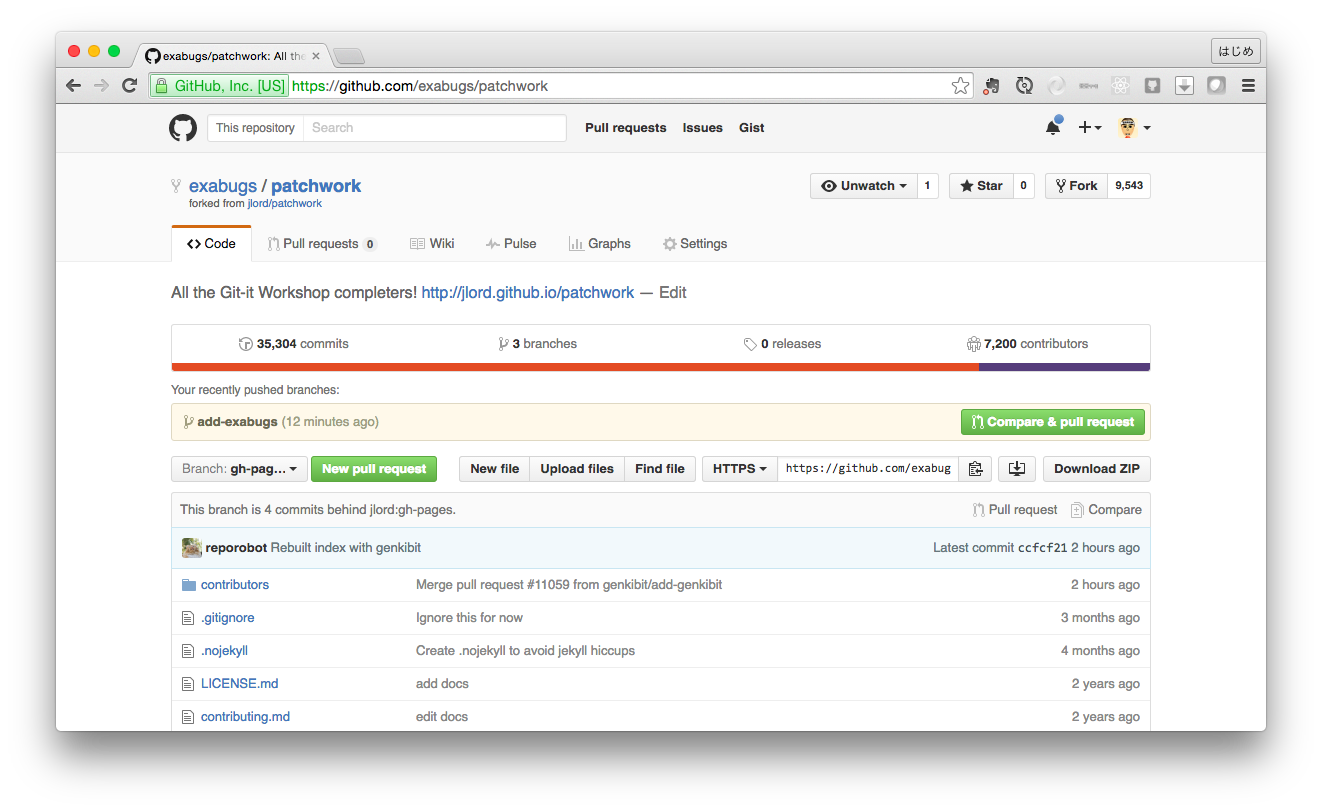
### Step: Reporobotはなにをやってるかな?
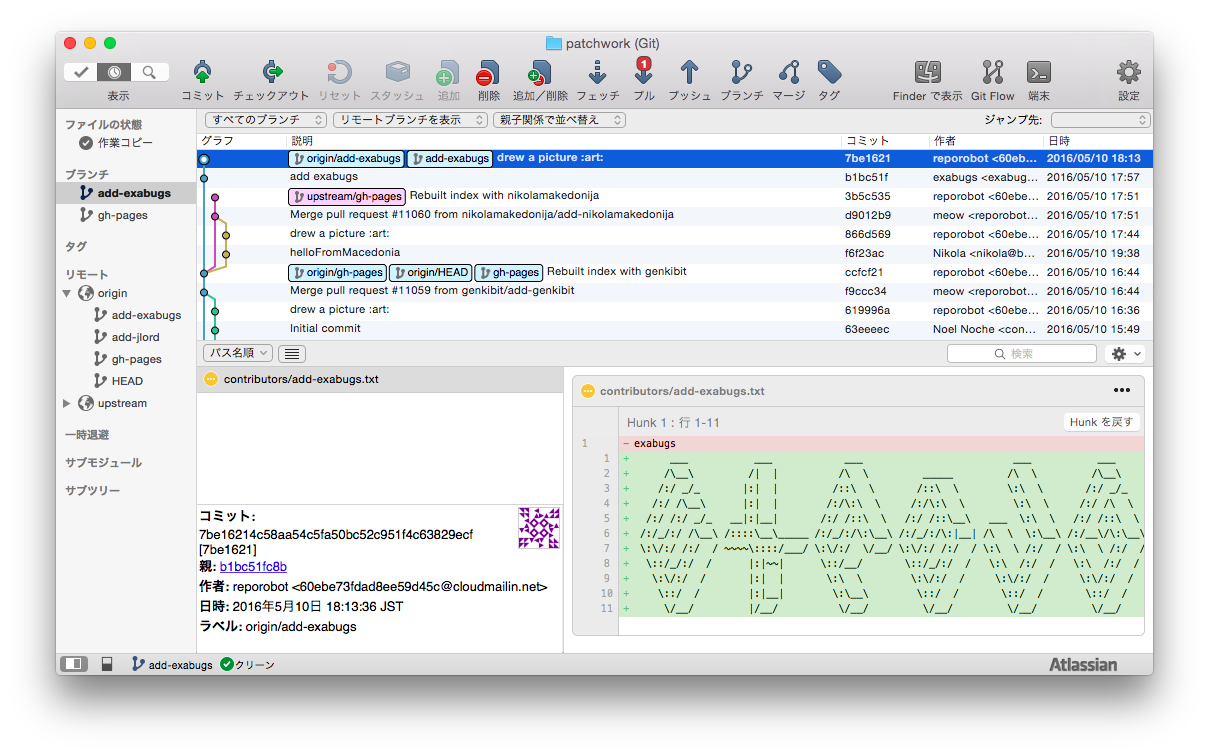
コラボレータ'reporobot'が、ファイルを修正している。
$ git pull
Updating b1bc51f..7be1621
Fast-forward
contributors/add-exabugs.txt | 12 +++++++++++-
1 file changed, 11 insertions(+), 1 deletion(-)
$ cat add-exabugs.txt
___ ___ ___ ___ ___ ___
/_\ /| | /\ \ _____ /\ \ /_\ /_\
/:/ / |:| | /::\ \ /::\ \ :\ \ /:/ / /:/ /
/:/ /_\ |:| | /:/:\ \ /:/:\ \ :\ \ /:/ /\ \ /:/ /\ \
/:/ /:/ / |:|| /:/ /::\ \ /:/ /::_\ ___ :\ \ /:/ /::\ \ /:/ /::\ \
/://:/ /_\ /::::______ /://:/:_\ /://:/:|__| /\ \ :_\ /://:_\ /://:/:_
:/:/ /:/ / ~~~~::::// :/:/ // :/:/ /:/ / :\ \ /:/ / :\ \ /:/ / :/:/ /:/ /
::/_/:/ / |:|~~| ::// :://:/ / :\ /:/ / :\ /:/ / ::/ /:/ /
:/:/ / |:| | :\ \ :/:/ / :/:/ / :/:/ / //:/ /
::/ / |:|| :__\ ::/ / ::/ / ::/ / /:/ /
// |// // // // // //
## 10. Requesting You Pull Please
元のPatchworkリポジトリに対してPull Requestを送ってみよう
### Step: pull requestを作ろう
Github上で、プルリクエストを発行する
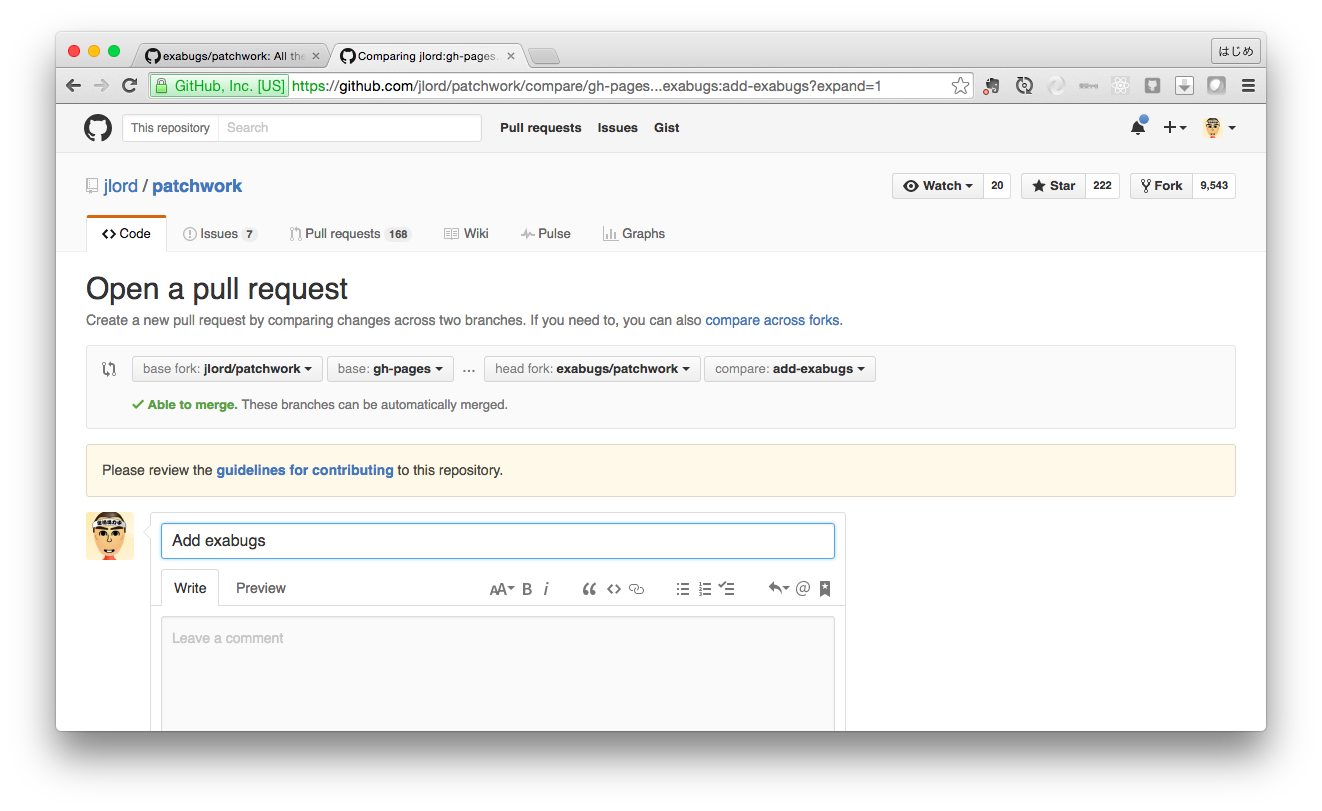
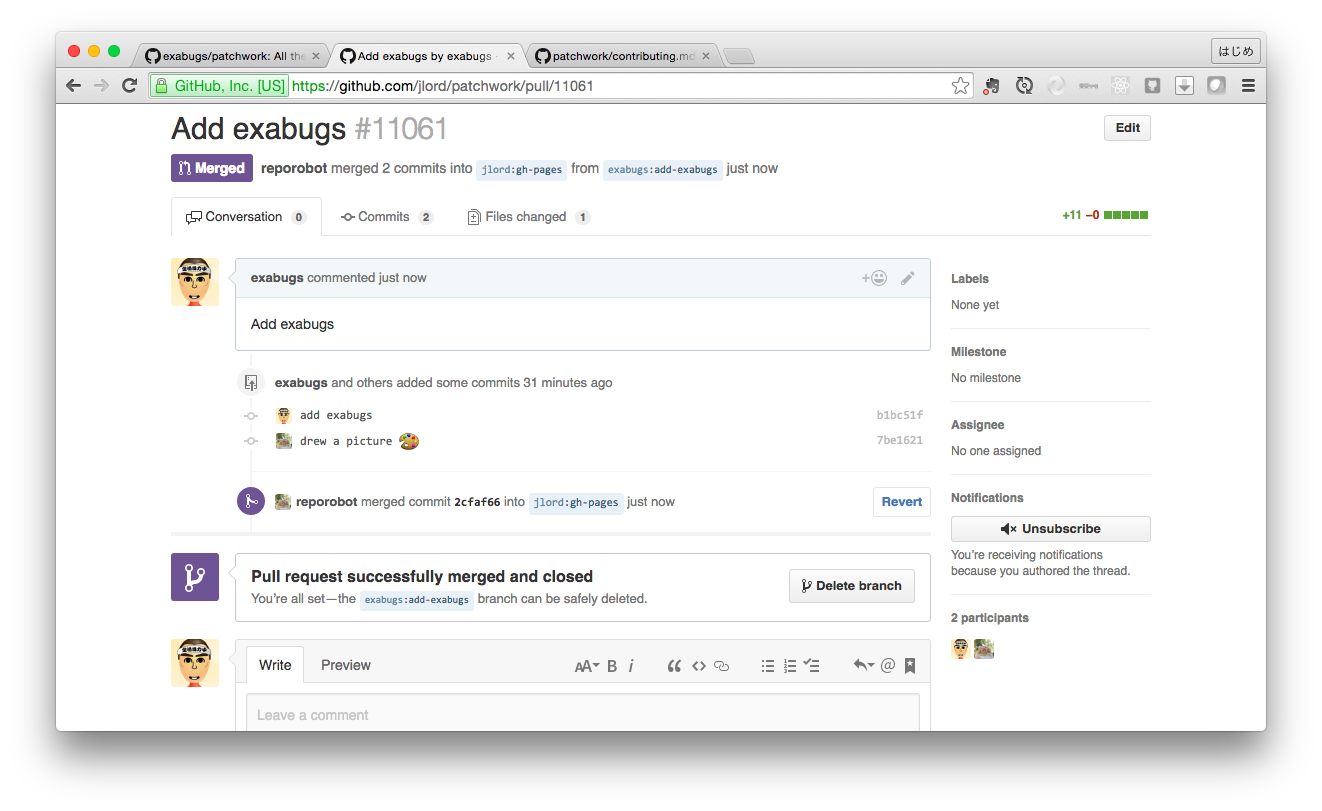
プルリクすると、あっという間に、マージされた。
## 11. Merge Tada
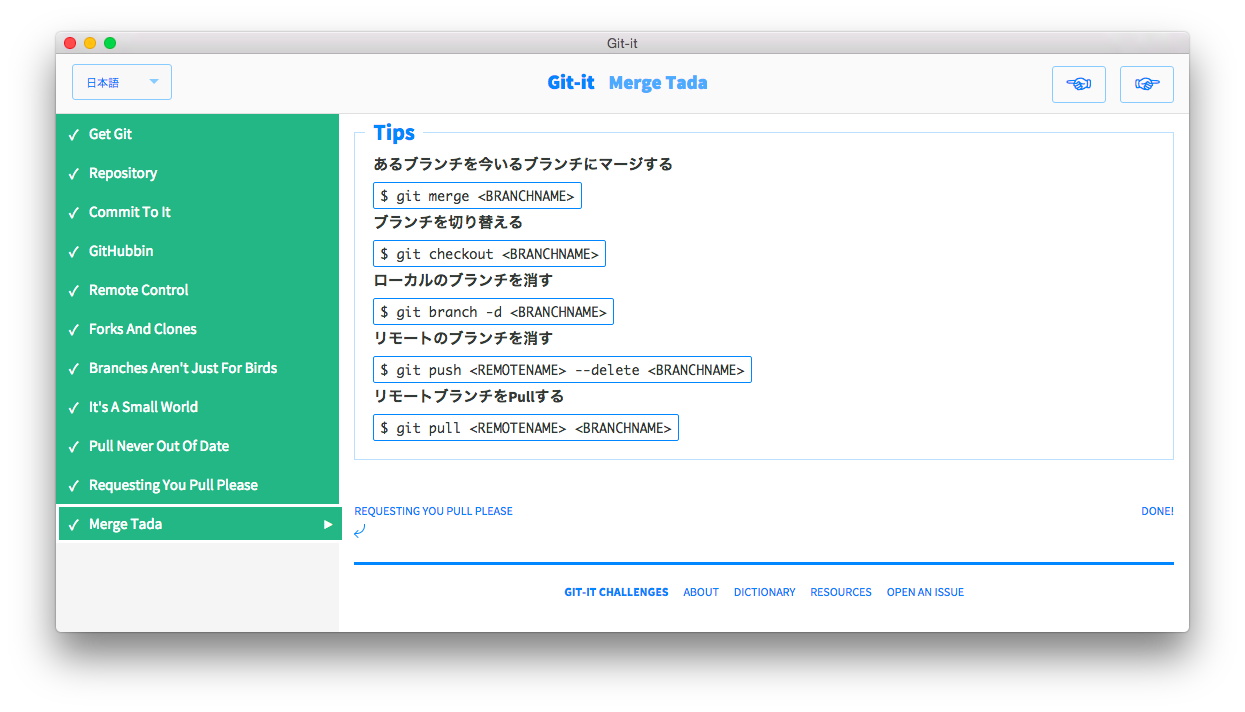
ブランチをローカルでマージして、古いブランチを消し、upstreamから変更をPullしましょう
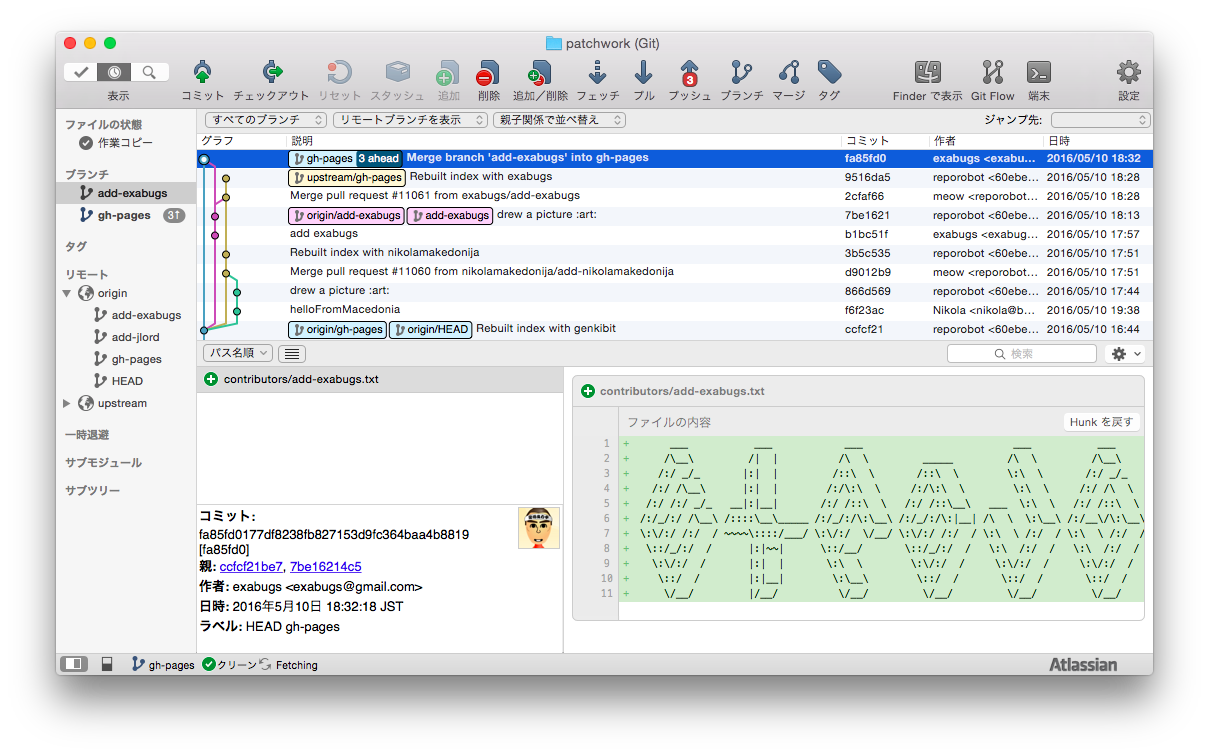
### Step: ローカルでマージする
#### origin と同期
$ git branch
- add-exabugs
gh-pages
$ git checkout gh-pages
Switched to branch 'gh-pages'
Your branch is up-to-date with 'origin/gh-pages'.
PC449-sakurai:contributors dreamarts$ git branch
add-exabugs
- gh-pages
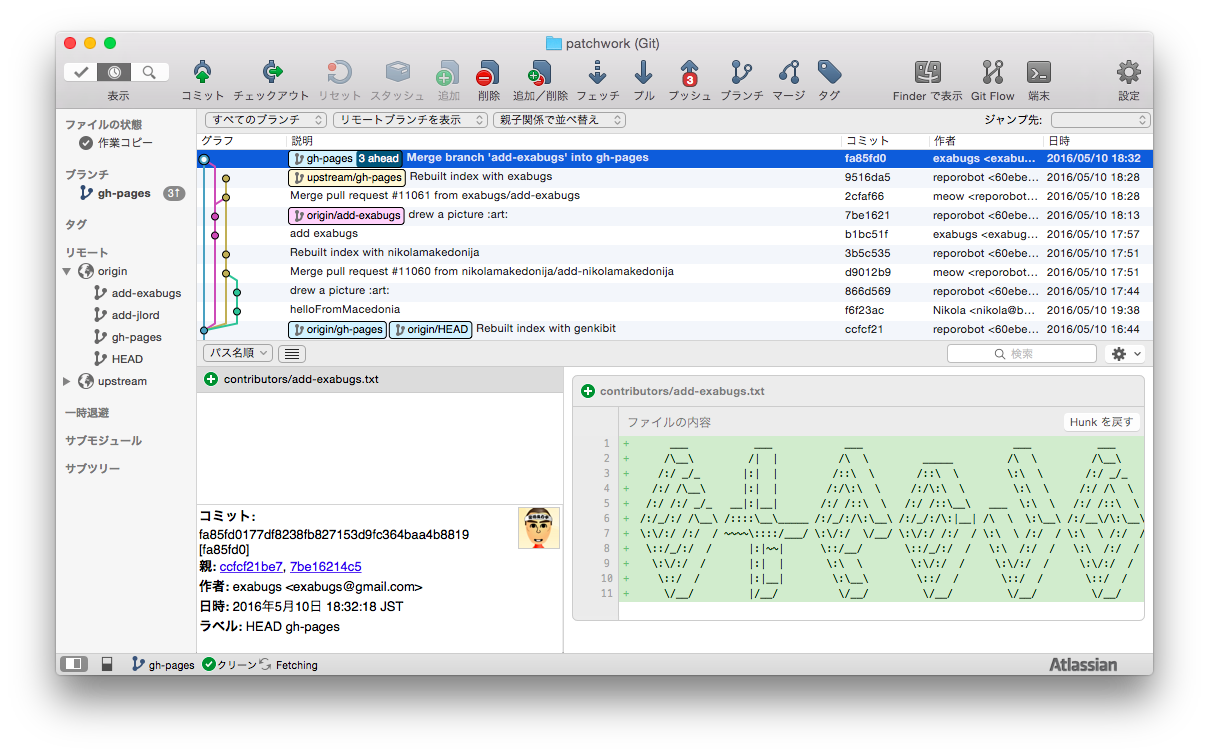
$ git merge add-exabugs
Merge made by the 'recursive' strategy.
contributors/add-exabugs.txt | 11 +++++++++++
1 file changed, 11 insertions(+)
create mode 100644 contributors/add-exabugs.txt
$ git branch -d add-exabugs
Deleted branch add-exabugs (was 7be1621).
リモートから削除
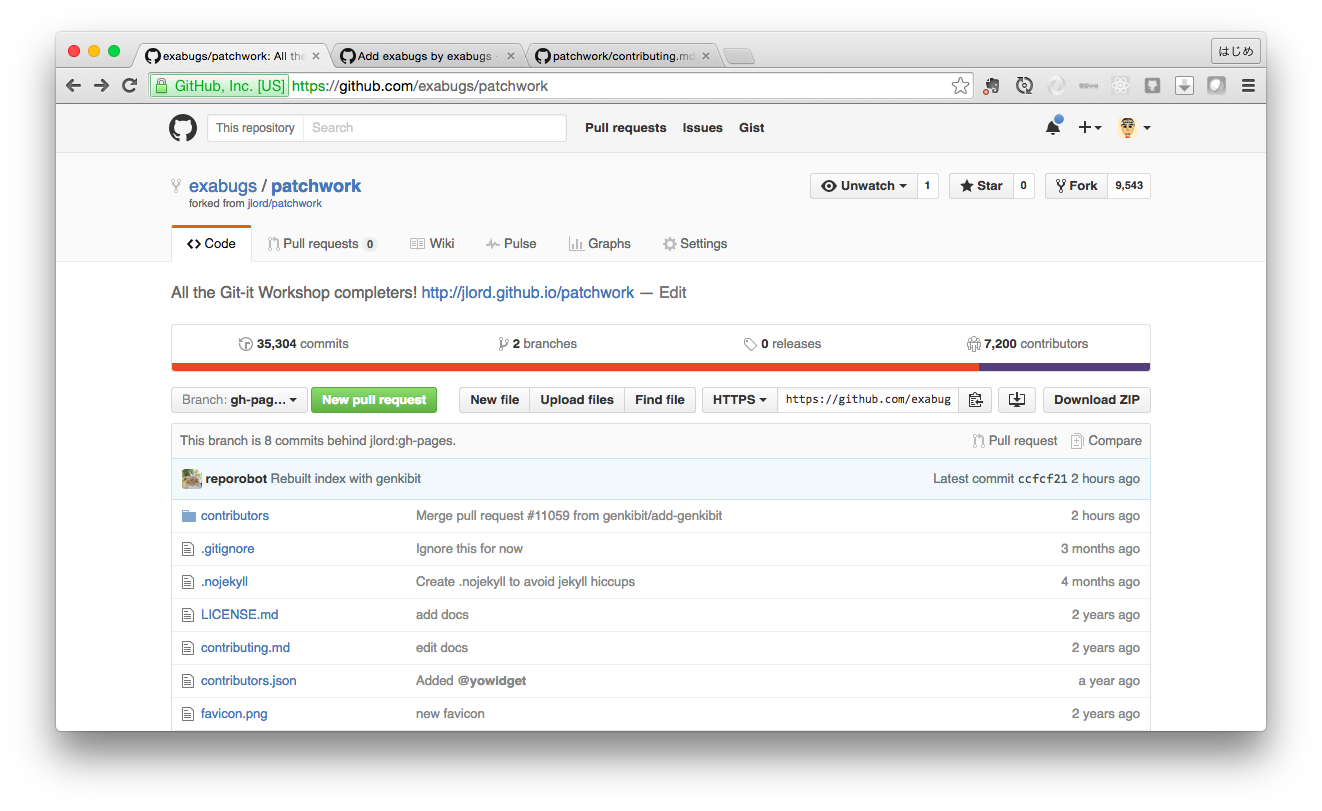
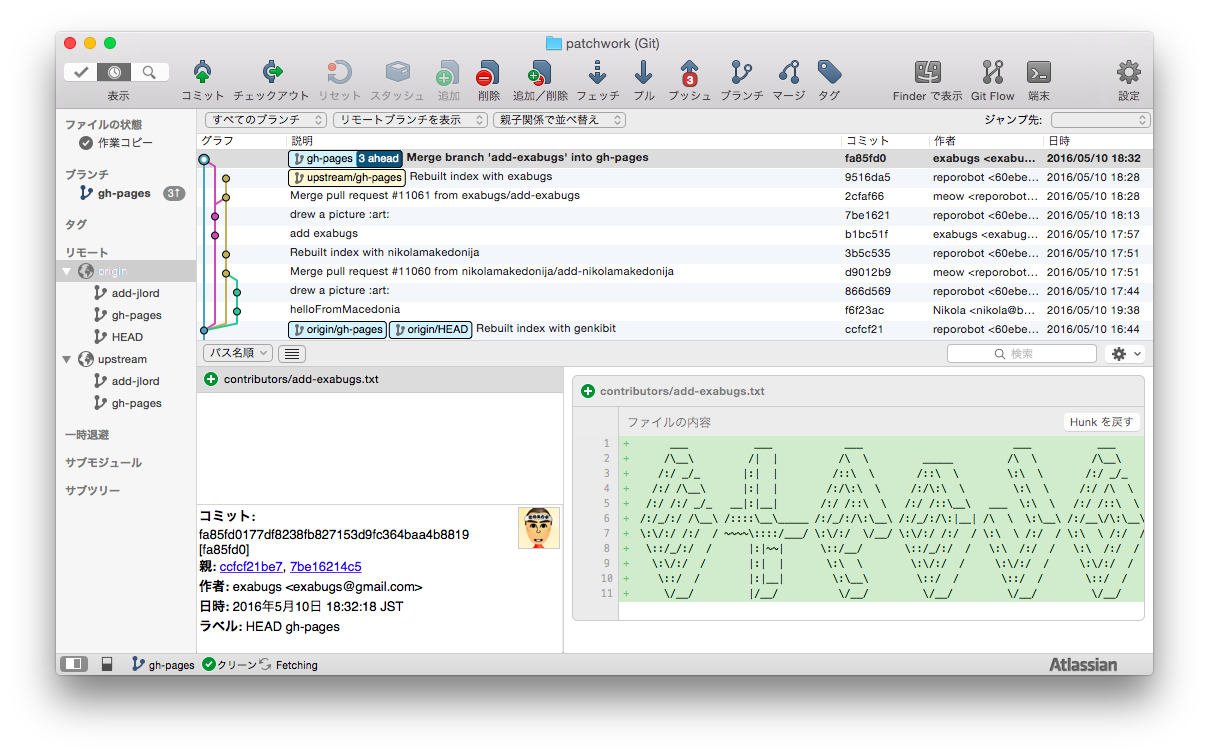
$ git push origin :add-exabugs
To https://github.com/exabugs/patchwork.git
- [deleted] add-exabugs
### Step: UpstreamからPullしてみよう
nikolamakedonija という外国人が、自分が作業している間に、編集しやがっていた。
そのため、pull が失敗。
$ git pull upstream gh-pages
From https://github.com/jlord/patchwork
- branch gh-pages -> FETCH_HEAD
fatal: Not possible to fast-forward, aborting.
そういう場合は、 fetch して merge する。
$ git fetch upstream
$ git branch -a
- gh-pages
remotes/origin/HEAD -> origin/gh-pages
remotes/origin/add-jlord
remotes/origin/gh-pages
remotes/upstream/add-jlord
remotes/upstream/gh-pages
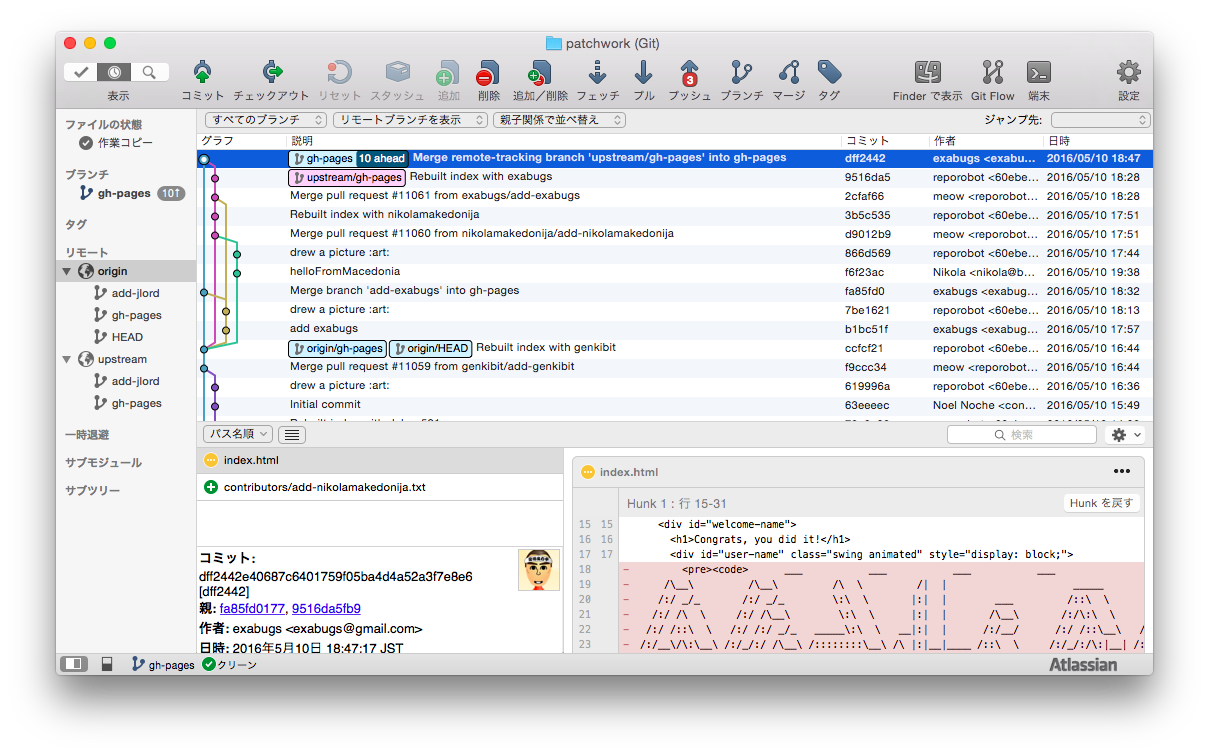
$ git merge upstream/gh-pages
Merge made by the 'recursive' strategy.
contributors/add-nikolamakedonija.txt | 11 +++++++++++
index.html | 26 +++++++++++++-------------
2 files changed, 24 insertions(+), 13 deletions(-)
create mode 100644 contributors/add-nikolamakedonija.txt
【コマンド解説】
pull = fetch + merge です。
つまり、以下
$ git pull upstream
は、以下と同じ。
$ git fetch upstream
$ git merge upstream/ブランチ名
リモートが upstream じゃなくて origin の場合、origin は省略可能だから、
以下のようになって、
$ git pull
これは、以下と同じ。
$ git fetch
$ git merge ブランチ名
【コマンド解説】
そもそも fetch XXX とは、ブランチの一覧を見た時の、
$ git branch -a
*master
remotes/origin/master
remotes/upstream/master
ローカルに取得している リモートリポジトリ (remotes/XXX ) を最新にすることです。
全クリア!
## 12. 最後に origin にPush
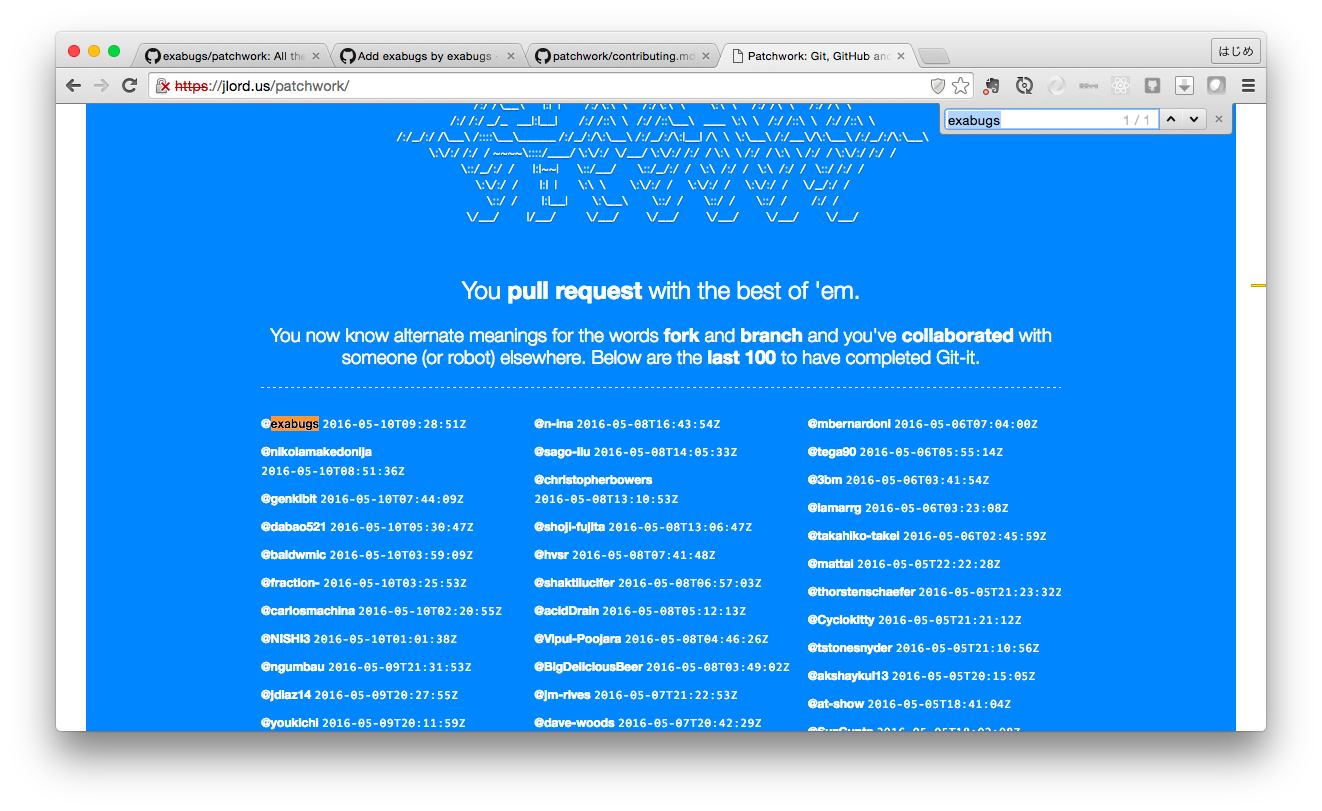
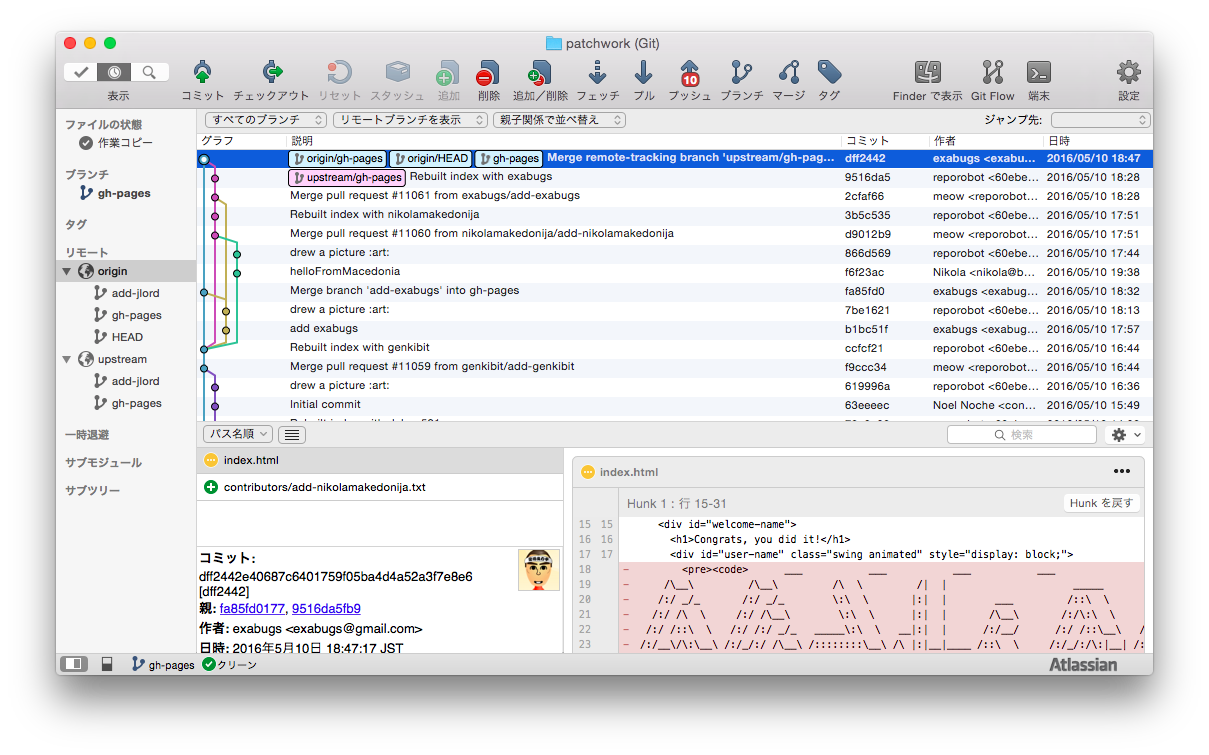
nikolamakedonija という外国人の変更を origin に反映する。
$ git push
Counting objects: 28, done.
Delta compression using up to 4 threads.
Compressing objects: 100% (26/26), done.
Writing objects: 100% (28/28), 4.13 KiB | 0 bytes/s, done.
Total 28 (delta 14), reused 0 (delta 0)
To https://github.com/exabugs/patchwork.git
ccfcf21..dff2442 gh-pages -> gh-pages
# 会社で実施する場合
## 13. It's A Small World
会社のリポジトリで、社員をコラボレータに
- 実験リポジトリ(Sandbox)を用意する。
- 参加者をコラボレータ (チームメンバー) に追加。
- 参加者は自分のローカルにクローン
## 14. Pull Never Out Of Date
- ローカルで自分のブランチを作成
develop ブランチからfeatureブランチを作成
- ファイルを修正
- プッシュ
リモートの自分のブランチにプッシュ
## 15. Requesting You Pull Please
- プルリク
develop ブランチにプルリク
- レビュー
共同で作業する場合は、レビューが大事。
- マージ
レビュー担当者は、問題ないなら、マージする
# お手本
## GitFlow
「A successful Git branching model」
http://nvie.com/posts/a-successful-git-branching-model/
# おわりに
- 役に立つアプリを提供してくれている jlord さんに感謝。
- 指示された通りにやればうまくいくが、意味を考えながらやらないと、頭に入らない。
# インストール FAQ
- 二段階認証
二段階認証を設定している場合は、以下を参考に .netrc に ID と 「Personal access token」 を書いておく
「[Git][GitHub]GitHubにPushする際に認証失敗する」
http://wada811.blogspot.com/2014/05/failed-to-push-to-github-over-https.html
# 変更履歴
2016/05/17 「pull = fetch + merge」 の説明を追記
2016/05/17 「そもそも fetch とは」 の説明を追記
