対象読者
- Reactの書き方がある程度はわかってる人
- Reduxの概念とか言われてもわからない、コードでくれって人
- 私(備忘録)
Reduxとは
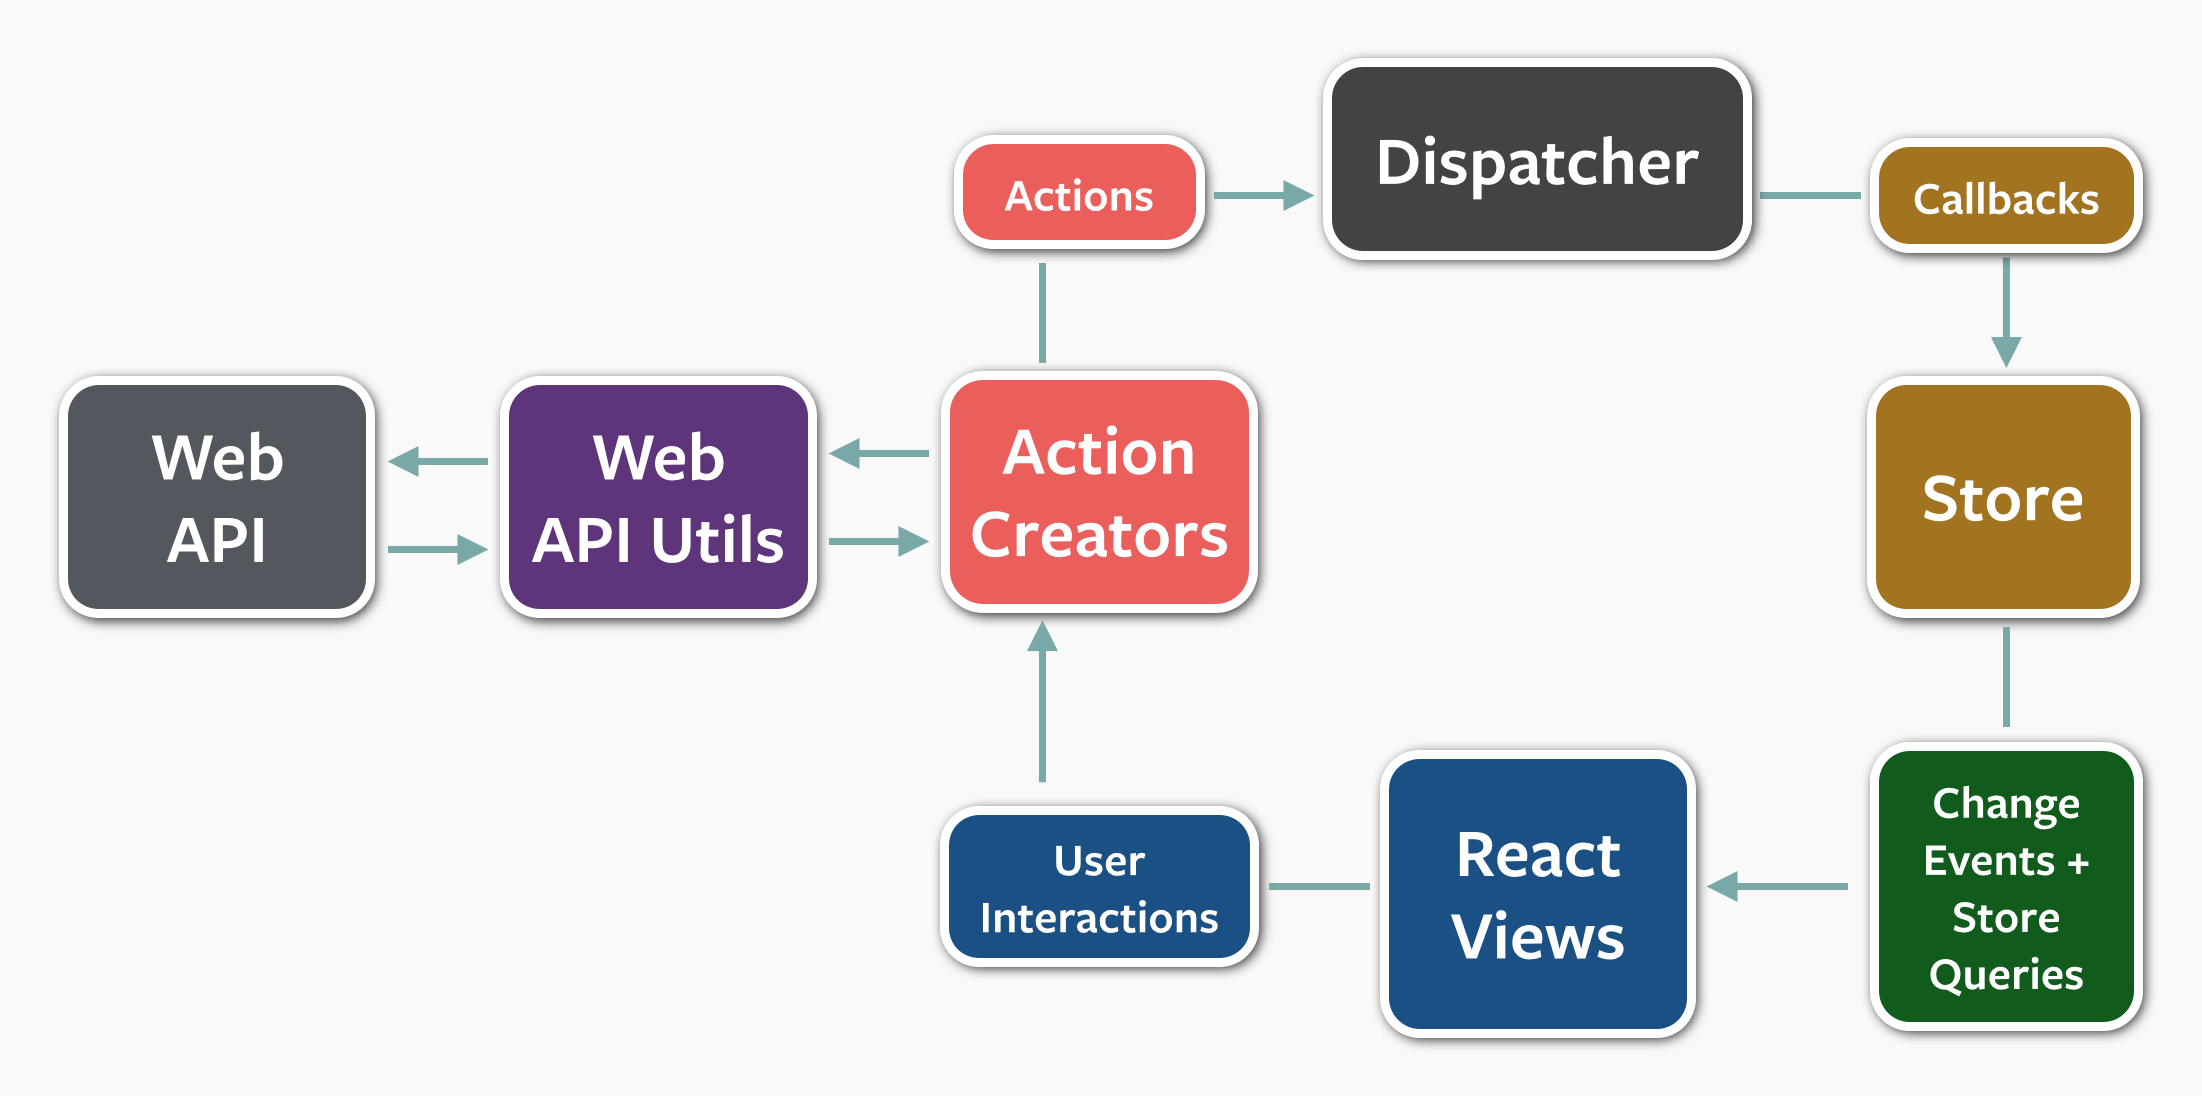
fluxの考え方にもとづいて作られたフレームワーク
React専用ではないが、Reactと連携させることでより高いパフォーマンスを得られる
【参考】fluxとは
facebookが提唱したアーキテクチャ(ソフトウェア設計の思想・考え方)
データの流れを一方通行にしたもの
Reduxの特徴
Reduxの3原則
1.Single source of truth
1つのアプリケーションが持つstateは1つのみ
stateをオブジェクトツリー構造で管理する
2.State is read-only
stateを直接変更することはできない
変更したいときはActionをdispatchで渡したときのみ
これにより、stateの変更に関わる部分が限定化され、バグの特定が容易になる
3.Changes are made with pure functions
reducerは純粋関数である
同じ引数を渡されたら同じデータを返す
ランダム値や現在の日付をReducer内で取得しない
サンプル
プログラム概要
入力した内容の税込(8%)の金額を表示させるだけのプログラム

reduxのイベント発生後の流れ
View
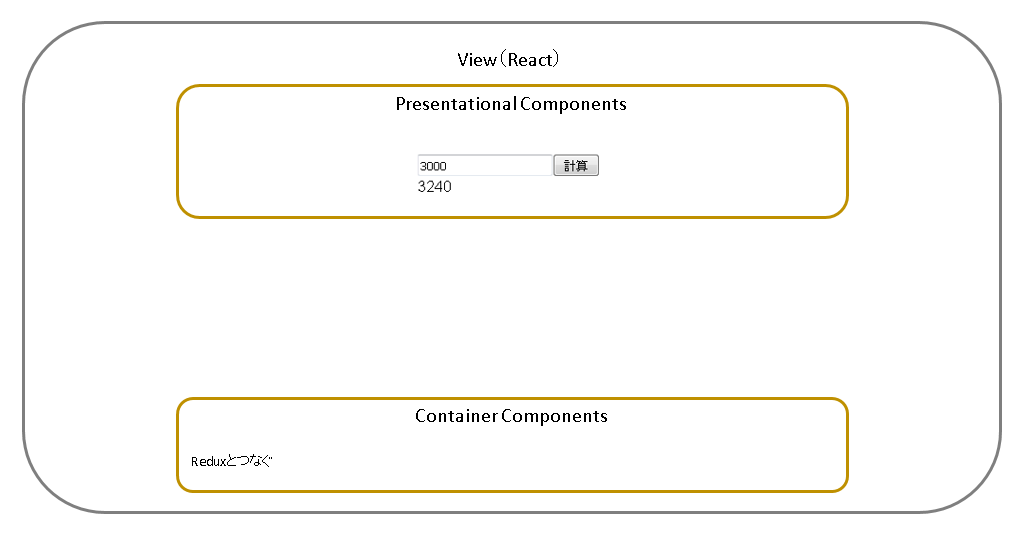
表示させる部分で、イベントの発火位置でもある
Presentational Components
いままでのReactコンポーネントのこと
class AppComponents extends React.Component {

  send(e){
    this.props.onClick(this.refs.inputText.value);
  }


  render() {
    return (
      <div>
        <input type="text" defaultValue="" ref="inputText" /> { /* 入力フォーム */ }
        <button onClick={this.send.bind(this)}>計算</button>  { /* ボタン */ }
        <br />
        {this.props.price}  { /* 表示させる税込の金額 */ }
      </div>
    );
  }
}
Container Components
Reduxと連携するコンポーネント
正直ここが一番ややこしい
function mapStateToProps(state) {
return {
price: state.price
};
}
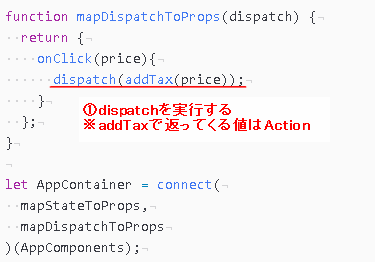
function mapDispatchToProps(dispatch) {
return {
onClick(price){
dispatch(addTax(price));
}
};
}
let AppContainer = connect(
mapStateToProps,
mapDispatchToProps
)(AppComponents);
mapStateToProps
Presentational Componentsに渡すStateとしてpriceを指定している
mapDispatchToProps
Presentational Componentsに渡す関数としてonClickを指定している
addTax(price)はActionCreator(後述)の関数でAction(オブジェクト)が返ってくる
dispatch(Action)を実行することでReducer(後述)が実行される
また、bindActionCreatorsを使用することで、ActionCreatorの関数をdispatchせずに実行できる
import * as Actions from './../actions/app';

const mapDispatchToProps = (dispatch) => (bindActionCreators(Actions, dispatch));
connect
React-ReduxのconnectメソッドでReactとReduxをつなげている
1つ目の引数に**[Stateを返す関数]と[Stateを変更する関数を書いた関数]を、
2つ目の引数に[Presentational Componentsのトップのコンポーネント]**を指定する
上記のように書くことでPresentational Componentsのトップのコンポーネントでthis.props.priceや'this.props.onClick'のように使用できるようになる
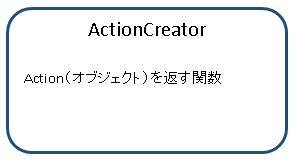
ActionCreator
どのアクションなのかをReducerに判別させるため、typeという要素をつける
typeはconstで定数化するのがツウらしい
const ADDTAX = 'ADDTAX';
function addTax(price) {
  return {
    type: ADDTAX,
    price
  };
}
Reducer
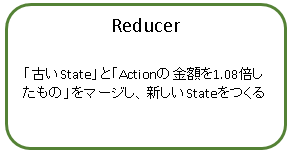
Actionで指定したtype要素をswitch文で判別し、関数を実行する
引数にStateとActionを指定する
function appReducer(state, action) {
  switch (action.type) {
    case 'ADDTAX':
      return (
        Object.assign({}, state, {price: action.price * 1.08})
      );
    default:
      return state
  }
}
初期処理とレンダリング
//state初期化
const initialState = {
  price: ''
};

//store作成
const store = createStore(appReducer, initialState);

//レンダリング
ReactDOM.render(
  <Provider store={store}>
    <AppContainer />
  </Provider>,
  document.getElementById('root')
);
createStore
ReducerとState初期値を渡してStoreを作成する
そのStoreをView(Container Components)に渡すことでReactでstoreを使える
Reducerを複数に分けたい場合はcombineReducersを使う
const store = createStore(
  combineReducer(FirstReducer, SecondReducer)
)
Provider
storeプロパティに先程作ったstoreを入れる
Providerコンポーネントの子コンポーネントとしてView(Container Components)を指定する
コード全体
実行にはreduxとreact-reduxのインストールが必要
npm install --save redux
npm install --save react-redux
import React from 'react'
import ReactDOM from 'react-dom'
import { createStore } from 'redux'
import { Provider, connect } from 'react-redux'

//Presentational Components
class AppComponents extends React.Component {

  send(e){
    this.props.onClick(this.refs.inputText.value);
  }


  render() {
    return (
      <div>
        <input type="text" defaultValue="" ref="inputText" /> { /* 入力フォーム */ }
        <button onClick={this.send.bind(this)}>計算</button>  { /* ボタン */ }
        <br />
        {this.props.price}  { /* 表示させる税込の金額 */ }
      </div>
    );
  }
}

function mapStateToProps(state) {
  return {
    price: state.price
  };
}

function mapDispatchToProps(dispatch) {
  return {
    onClick(price){
      dispatch(addTax(price));
    }
  };
}

let AppContainer = connect(
  mapStateToProps,
  mapDispatchToProps
)(AppComponents);


// ActionCreator
const ADDTAX = 'ADDTAX';
function addTax(price) {
  return {
    type: ADDTAX,
    price
  };
}


// Reducer
function appReducer(state, action) {
  switch (action.type) {
    case 'ADDTAX':
      return (
        Object.assign({}, state, {price: action.price * 1.08})
      );
    default:
      return state
  }
}


//state初期化
const initialState = {
  price: ''
};

//store作成
const store = createStore(appReducer, initialState);

//レンダリング
ReactDOM.render(
  <Provider store={store}>
    <AppContainer />
  </Provider>,
  document.getElementById('root')
);
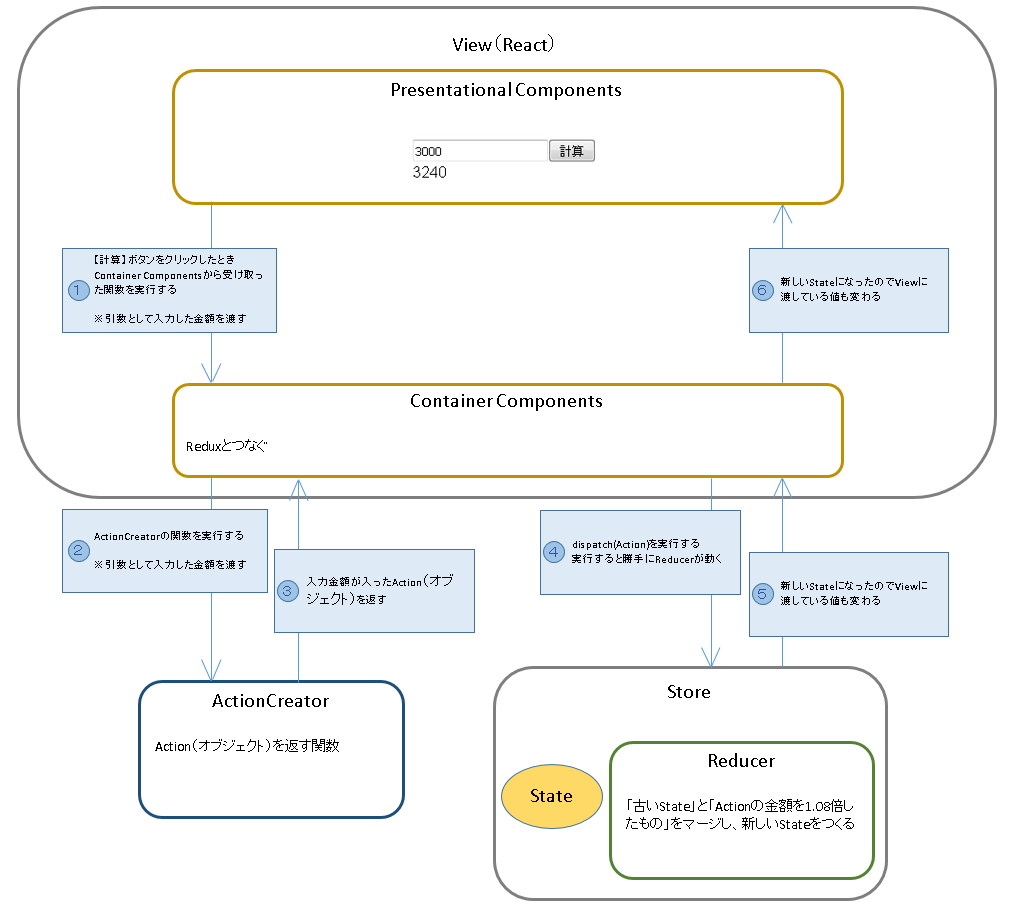
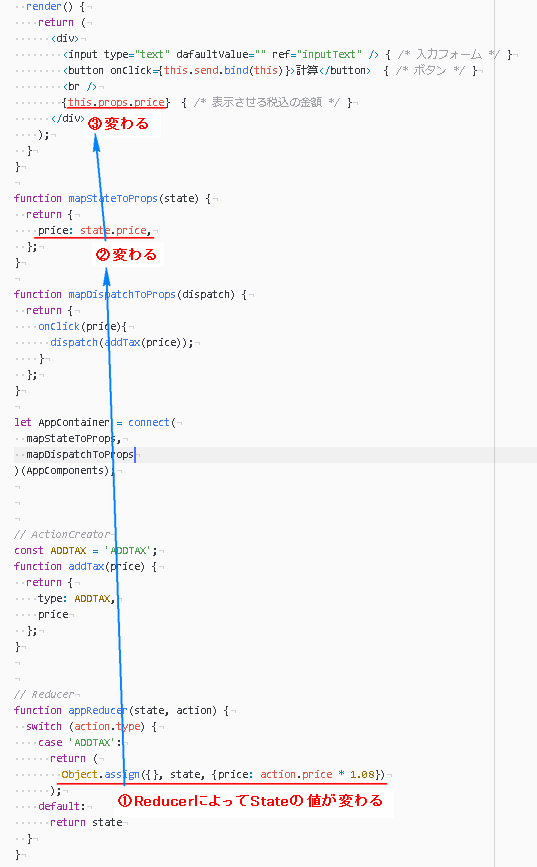
コードで見るイベント発生後の流れ
上にも貼ったこの画像で処理の流れをコードで見ていきます。
①【計算】ボタンをクリックしたときContainer Componentsから受け取った関数を実行する
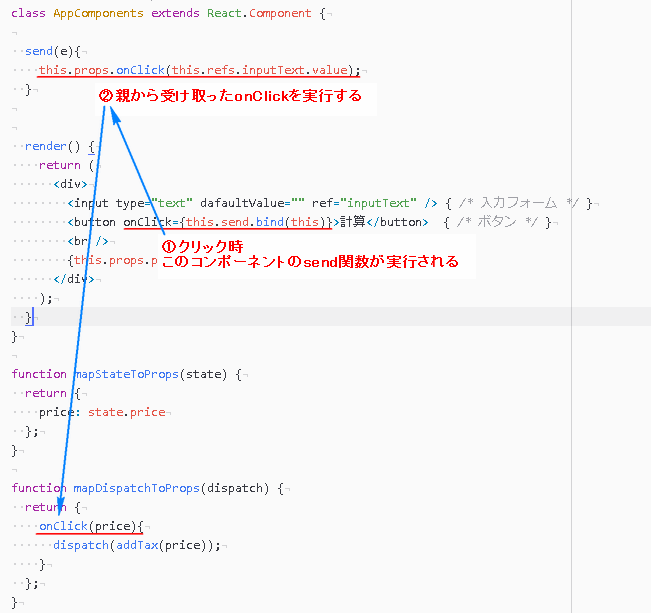
②ActionCreatorの関数を実行する
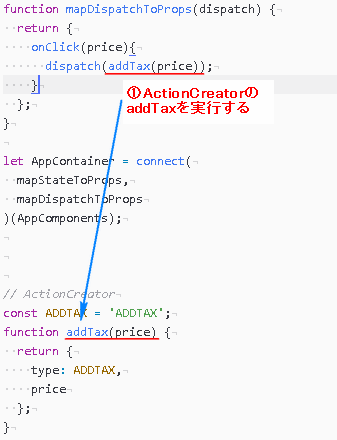
③入力金額が入ったAction(オブジェクト)を返す
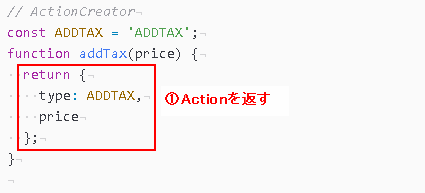
④dispatch(Action)を実行する 実行すると勝手にReducerが動く
⑤⑥新しいStateになったのでViewに渡している値も変わる
参考にしたサイト
http://mae.chab.in/archives/2885
http://qiita.com/kiita312/items/49a1f03445b19cf407b7
http://qiita.com/gcfuji/items/547ab425f96bf7134b9d