アプリを作る上で基本となってくるListViewですが、基本の割にはやることが多いので、主な流れをまとめます。
今回は人のプロフィール情報を表示するサンプルを作ります。
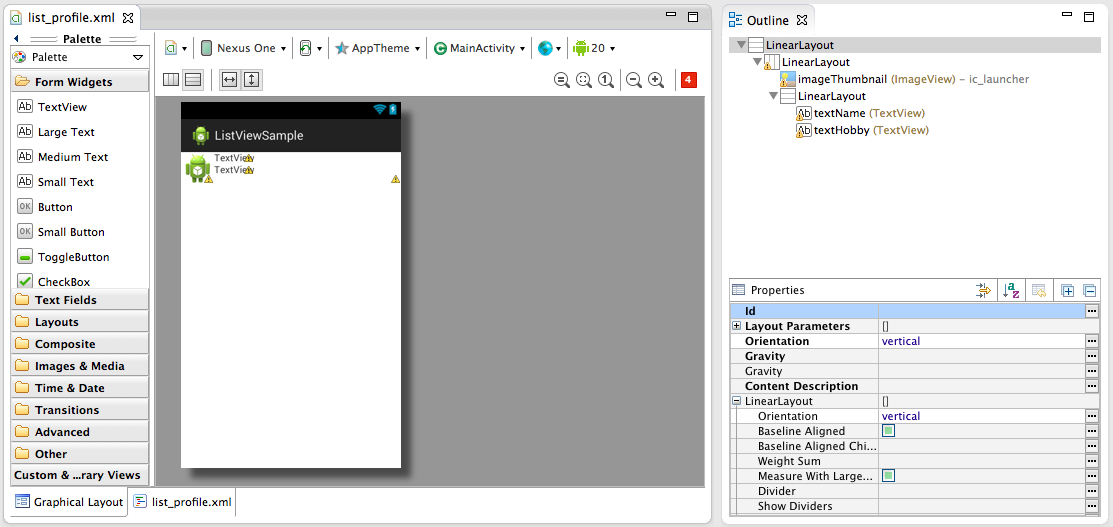
1.Layoutを作る
<?xml version="1.0" encoding="utf-8"?>
<LinearLayout xmlns:android="http://schemas.android.com/apk/res/android"
    android:layout_width="match_parent"
    android:layout_height="match_parent"
    android:orientation="vertical" >

    <LinearLayout
        android:layout_width="match_parent"
        android:layout_height="wrap_content" >

        <ImageView
            android:id="@+id/imageThumbnail"
            android:layout_width="wrap_content"
            android:layout_height="wrap_content"
            android:src="@drawable/ic_launcher" />

        <LinearLayout
            android:layout_width="wrap_content"
            android:layout_height="match_parent"
            android:orientation="vertical" >

            <TextView
                android:id="@+id/textName"
                android:layout_width="wrap_content"
                android:layout_height="wrap_content"
                android:text="TextView" />

            <TextView
                android:id="@+id/textHobby"
                android:layout_width="wrap_content"
                android:layout_height="wrap_content"
                android:text="TextView" />

        </LinearLayout>

    </LinearLayout>

</LinearLayout>
まずはLayoutを作っていきます。
Modelから作る人もいると思いますが、僕は見た目から入ります。
2.Modelを作る
public class Profile {
	private static final String TAG = Profile.class.getSimpleName();
	private String name;
	private String hobby;
	private int thumbnailId;
	/**
	 * @param name
	 * @param hobby
	 * @param thumbnailId
	 */
	public Profile(String name, String hobby, int thumbnailId) {
		super();
		this.name = name;
		this.hobby = hobby;
		this.thumbnailId = thumbnailId;
	}
	public String getName() {
		return name;
	}
	public void setName(String name) {
		this.name = name;
	}
	public String getHobby() {
		return hobby;
	}
	public void setHobby(String hobby) {
		this.hobby = hobby;
	}
	public Bitmap getThumbnailId() {
		return thumbnailId;
	}
	public void setThumbnailId(int thumbnailId) {
		this.thumbnailId = thumbnailId;
	}
}
普通のモデルです。
今回は名前と趣味とプロフィール画像のサムネイルを表示します。
3.Adapterを作る
Adapterは、ModelをLayoutに落としこんでListViewに接続するためのものです。ListViewだとここが一番つまずくポイントだと思うので、コメント多めに書いていきます。
public class ProfileAdapter extends ArrayAdapter<Profile> {
	private static final String TAG = ProfileAdapter.class.getSimpleName();

	// Viewにタグ付けするオブジェクトとして、ViewHolderというものを作る
	private static class ViewHolder {
		public TextView nameTextView;
		public TextView hobbyTextView;
		public ImageView thumbnailBitmap;

		/**
		 * @param nameTextView
		 * @param hobbyTextView
		 * @param thumbnailBitmap
		 */
		public ViewHolder(View v) {
			super();
			this.nameTextView = (TextView) v.findViewById(R.id.textName);
			this.hobbyTextView = (TextView) v.findViewById(R.id.textHobby);
			this.thumbnailBitmap = (ImageView) v
					.findViewById(R.id.imageThumbnail);
		}
	}

	//
	private LayoutInflater layoutInflater;

	/**
	 * @param context
	 * @param resource
	 * @param objects
	 */
	public ProfileAdapter(Context context, int resource, List<Profile> objects) {
		super(context, resource, objects);
		// TODO Auto-generated constructor stub
		this.layoutInflater = (LayoutInflater) context
				.getSystemService(Context.LAYOUT_INFLATER_SERVICE);
	}

	@Override
	public View getView(int position, View convertView, ViewGroup parent) {
		ViewHolder holder;
		// Viewがリサイクル出来ない場合
		if (convertView == null) {
			// Viewにレイアウトの情報を登録する
			convertView = layoutInflater.inflate(R.layout.list_profile, null);
			// Viewがリサイクル出来る場合はnewする必要がないので、holderはここでnewする
			holder = new ViewHolder(convertView);
			// リサイクルするときのためにタグ付けしておく
			convertView.setTag(holder);
		} else { // Viewがリサイクル出来る場合
			// タグ付けしておいた情報を取得する
			holder = (ViewHolder) convertView.getTag();
		}

		//
		Profile item = getItem(position);
		holder.nameTextView.setText(item.getName());
		holder.hobbyTextView.setText(item.getHobby());
		holder.thumbnailBitmap.setImageResource(item.getThumbnailId());

		return convertView; // Viewを返す
	}
}
Viewのリサイクルに関してはここがわかりやすかったです。
ListViewチュートリアル その4 カスタム
4.ListViewとAdapterを宣言して、ListViewにAdapterをセットする
public class MainActivity extends ActionBarActivity {
	private static final String TAG = MainActivity.class.getSimpleName();
	private ListView lv;

	@Override
	protected void onCreate(Bundle savedInstanceState) {
		super.onCreate(savedInstanceState);
		setContentView(R.layout.activity_main);
		lv = (ListView) findViewById(R.id.listView1);
		// Profile型のリストを作る
		List<Profile> profiles = new ArrayList<Profile>();
		// サンプルデータを作る
		profiles.add(new Profile("bob","cooking",R.drawable.ic_launcher));
		profiles.add(new Profile("takeshi","baseball",R.drawable.ic_launcher));
		profiles.add(new Profile("hirotaka","darts",R.drawable.ic_launcher));
		// Adapterを宣言して、サンプルデータを入れる
		ProfileAdapter adapter = new ProfileAdapter(this, 0, profiles);
		// ListViewにAdapterをセットする
		lv.setAdapter(adapter);

	}

	@Override
	public boolean onCreateOptionsMenu(Menu menu) {
		// Inflate the menu; this adds items to the action bar if it is present.
		getMenuInflater().inflate(R.menu.main, menu);
		return true;
	}

	@Override
	public boolean onOptionsItemSelected(MenuItem item) {
		// Handle action bar item clicks here. The action bar will
		// automatically handle clicks on the Home/Up button, so long
		// as you specify a parent activity in AndroidManifest.xml.
		int id = item.getItemId();
		if (id == R.id.action_settings) {
			return true;
		}
		return super.onOptionsItemSelected(item);
	}
}
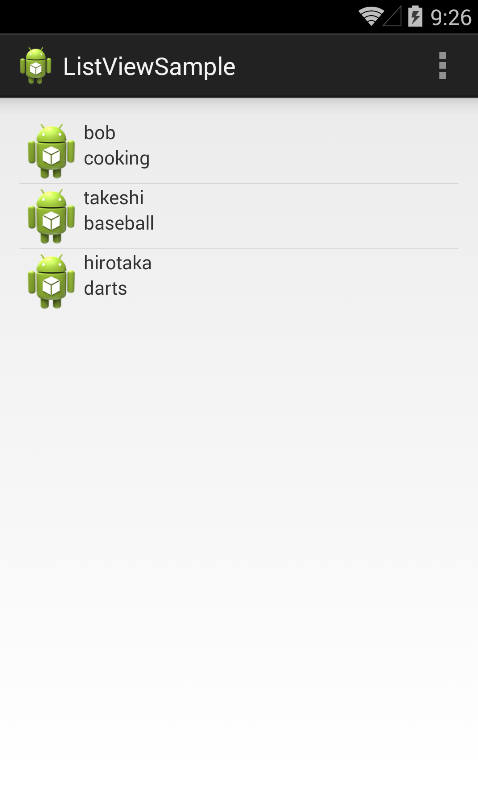
こんな感じになればOKです!
リストを表示するサンプルはこれで完成です!
5.Listenerを書く
ListView内のアイテムがクリックされた時のListener(OnItemClickListener)を書いていきます。
スクロールなどでフォーカスされた時のListenerはOnItemSelectedListenerです。
lv.setOnItemClickListener(new OnItemClickListener() {

	@Override
	public void onItemClick(AdapterView<?> parent, View view, int position,
			long id) {
		// TODO Auto-generated method stub
		Profile p = (Profile) parent.getAdapter().getItem(position);
		Log.d(TAG, "Name: " + p.getName());
		Log.d(TAG, "Hobby: " + p.getHobby());
	}

});
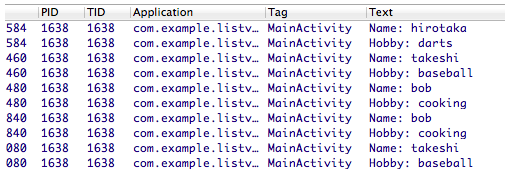
parent.getAdapter()でListViewにセットされたAdapterが取得出来るので、それを元にクリックされたアイテムのプロフィールを取得します。
実行するとこんな感じでLogCatに表示されます。
以上チュートリアルでした。


