Webサイトのレイアウトを作成するにはmargin: 0 auto;したりとややこしかったのですが、flexboxであればbootstrapなどのCSSフレームワークしか使った事がない自分が簡単に画面下にフッターを固定出来ました。
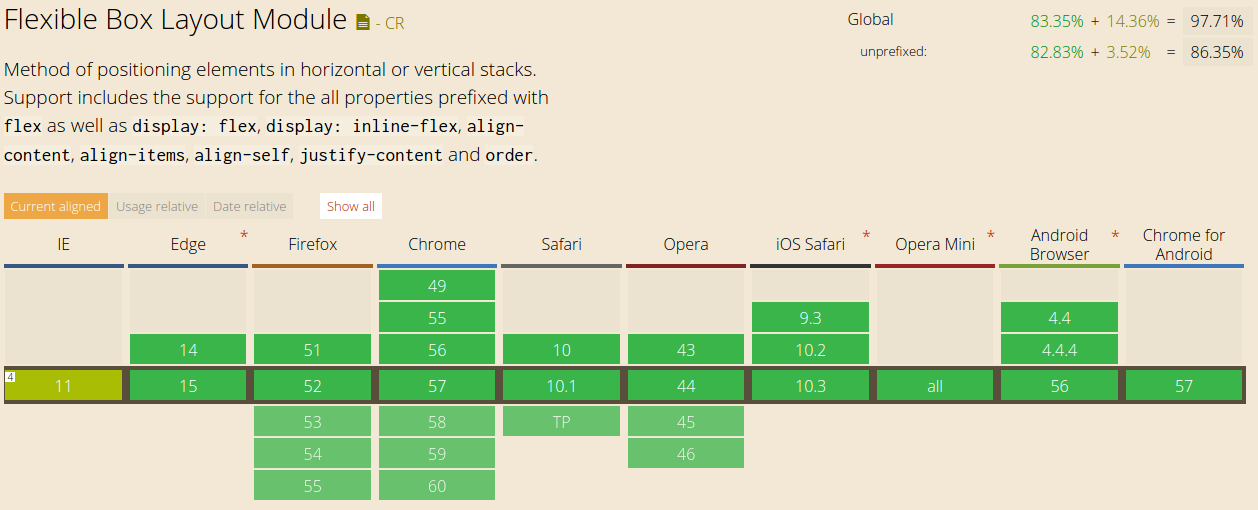
caniuse.comによると現在のflexboxの対応状況は最新バージョンのすべてのブラウザが対応しています 
画面下にフッターを固定
Htmlはこのようになります、シンプルです
<body>
	<div id="container">
		テキスト
	</div>
	<footer>
			<a href="">Contact Form</a>
			<a href="">その他</a>
	</footer>
</body>
次はcssです。flexboxを使用する事をブラウザに伝えるためにbody部分にdisplay: flex;と記述します。縦軸方向にflex-direction: colum;センター寄せalign-items: center;します。そしてビュポートの高さの最小サイズを100%min-height: 100vh; にしてcontainerを膨らませてflex-grow: 1;フッターを画面下に押しやります
body{
	display: flex;
	align-items: center;
	min-height: 100vh;
	flex-direction: column;
}
# container{
	flex-grow: 1;
}
フッターの中身のリンクを均等に配置したいのでflexboxを宣言display: flex;してからjustify-content: space-around;で均等に配置します。width:100%;で横幅いっぱいに広げて完成です。
footer{
	display: flex;
	justify-content: space-around;
	width: 100%;
}
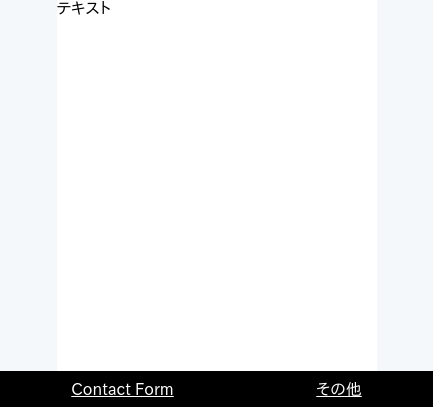
これでレイアウトは完成です。後は見栄えを良くして最終的に以下のソースコードになりました。
<!DOCTYPE html>
<html lang="ja">
<head>
<meta charset="utf-8" />
<meta http-equiv="X-UA-Compatible" content="IE=edge">
<meta name="viewport" content="width=device-width, initial-scale=1.0">
<style type="text/css">
<!--
body{
	margin: 0;
	background-color: #f5f8fa;
	display: flex;
	align-items: center;
	min-height: 100vh;
	flex-direction: column;
}
# container{
	background-color: #fff;
	min-width:320px;
	flex-grow: 1;
}
footer{
	background-color: #000;
	display: flex;
	justify-content: space-around;
	width: 100%;

}
footer a{
	color: #fff;
	padding: 10px;
	text-align: center;
}
-->
</style>

</head>
<body>
	<div id="container">
		テキスト
	</div>
	<footer>
			<a href="">Contact Form</a>
			<a href="">その他</a>
	</footer>
</body>
</html>
最後に
flexboxを使ってサイトを作成したのでもしよろしれば見てください
似ているタレントを画像検索するサイトです
http://talent.oldjpg.com/
