皆さんこんにちは。
この記事ではphina.jsとGLBoostの連携について説明しようと思います。
そもそものきっかけ
そもそもGLBoostってなんやねん。という方も多かろうと思います。
まずはこのGLBoostの紹介記事をご覧ください。
記事に書いてあるように、GLBoostはWebGLライブラリです。元々はPhina.jsの3D機能部分として開発される予定だったのですが、いつの間にか独立したプロジェクトとなって今に至る感じです。
とはいえ、phina.jsとの関係が途絶えた訳ではなく、今後もPhina.jsとの連携して使えるようにする方向性は取っていくつもりです。
Phina.jsは便利なんだけど、2Dゲームだけでなく3Dゲームも作ってみたい。という方は是非GLBoostの併用をご検討ください。
GLBoostとの連携の実際
では、実際にどのように連携していくのか、について書いていきます。
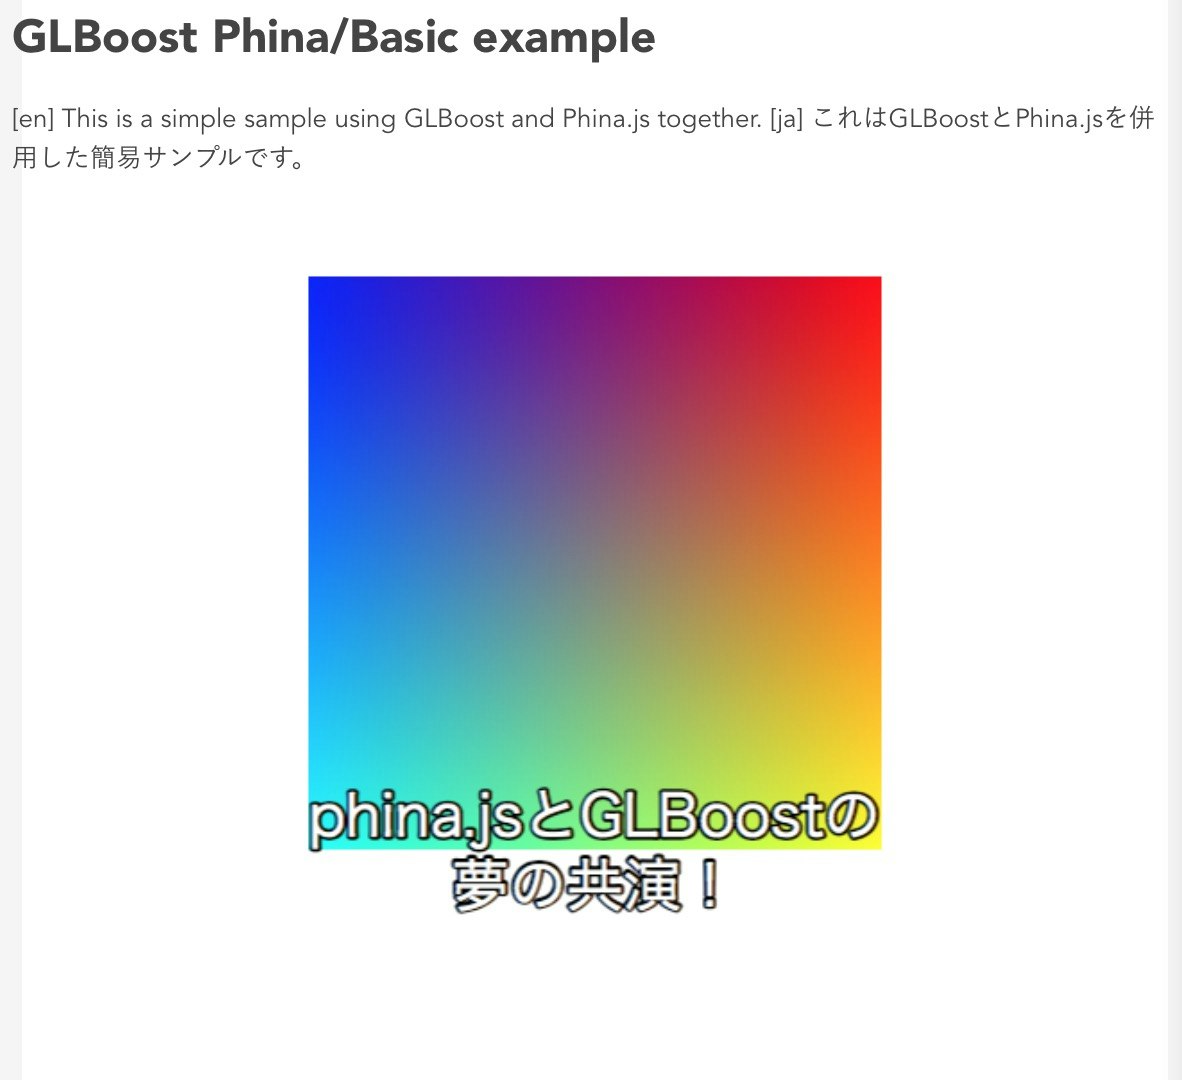
GLBoost側に標準で、PhinaにGLBoostの描画レイヤーを加えるGLBoostLayerというクラスが定義されています。
これを使うことで、phina.jsの描画物の1つとして、GLBoostによる描画を取り入れることができます。
GLBoostの3D描画はPhina側の2D canvasにコピーされ、Phina側の描画と合わせることが可能です。

コードとしてはこんな感じ。
var SCREEN_WIDTH = 640;
var SCREEN_HEIGHT = 640;

phina.globalize();

phina.define('MainScene', {
  superClass: 'DisplayScene',

  init: function(options) {
    this.superInit();

	// GLBoostLayerの作成
    var layer = phina.display.GLBoostLayer({
      width: SCREEN_WIDTH,
      height: SCREEN_HEIGHT
    }).addChildTo(this);

	// GLBoostContextの生成
    var glBoostContext = layer.glBoostContext;

	// 頂点データ作成
    var positions = [
      new GLBoost.Vector3(-0.5, -0.5, 0.0),
      new GLBoost.Vector3(0.5, -0.5, 0.0),
      new GLBoost.Vector3(-0.5,  0.5, 0.0),

      new GLBoost.Vector3(-0.5, 0.5, 0.0),
      new GLBoost.Vector3(0.5, -0.5, 0.0),
      new GLBoost.Vector3(0.5,  0.5, 0.0)
    ];

    var colors = [
      new GLBoost.Vector4(0.0, 1.0, 1.0, 1.0),
      new GLBoost.Vector4(1.0, 1.0, 0.0, 1.0),
      new GLBoost.Vector4(0.0, 0.0, 1.0, 1.0),

      new GLBoost.Vector4(0.0, 0.0, 1.0, 1.0),
      new GLBoost.Vector4(1.0, 1.0, 0.0, 1.0),
      new GLBoost.Vector4(1.0, 0.0, 0.0, 1.0)
    ];

	// ジオメトリクラスの作成
    var geometry = glBoostContext.createGeometry();
    geometry.setVerticesData({
      position: positions,
      color: colors
    });

    // メッシュクラスの作成
    var mesh = glBoostContext.createMesh(geometry, null);
    layer.scene.addChild( mesh );

	// 描画の前の準備
    layer.expression.prepareToRender();

    // Phinaとしての描画
    var label = Label('phina.jsとGLBoostの\n夢の共演!').addChildTo(this);
    label.fill = 'white';
    label.stroke = 'black';
    label.fontSize = 32;
    label.strokeWidth = 4;
    label.x = this.gridX.center();
    label.y = this.gridY.center();
  }
});

phina.main(function() {
  var app = GameApp({
    startLabel: 'main',
    width: SCREEN_WIDTH,
    height: SCREEN_HEIGHT
  });

  app.run();
});
PhinaTextureでPhina側の描画をGLBoost側に取り込む
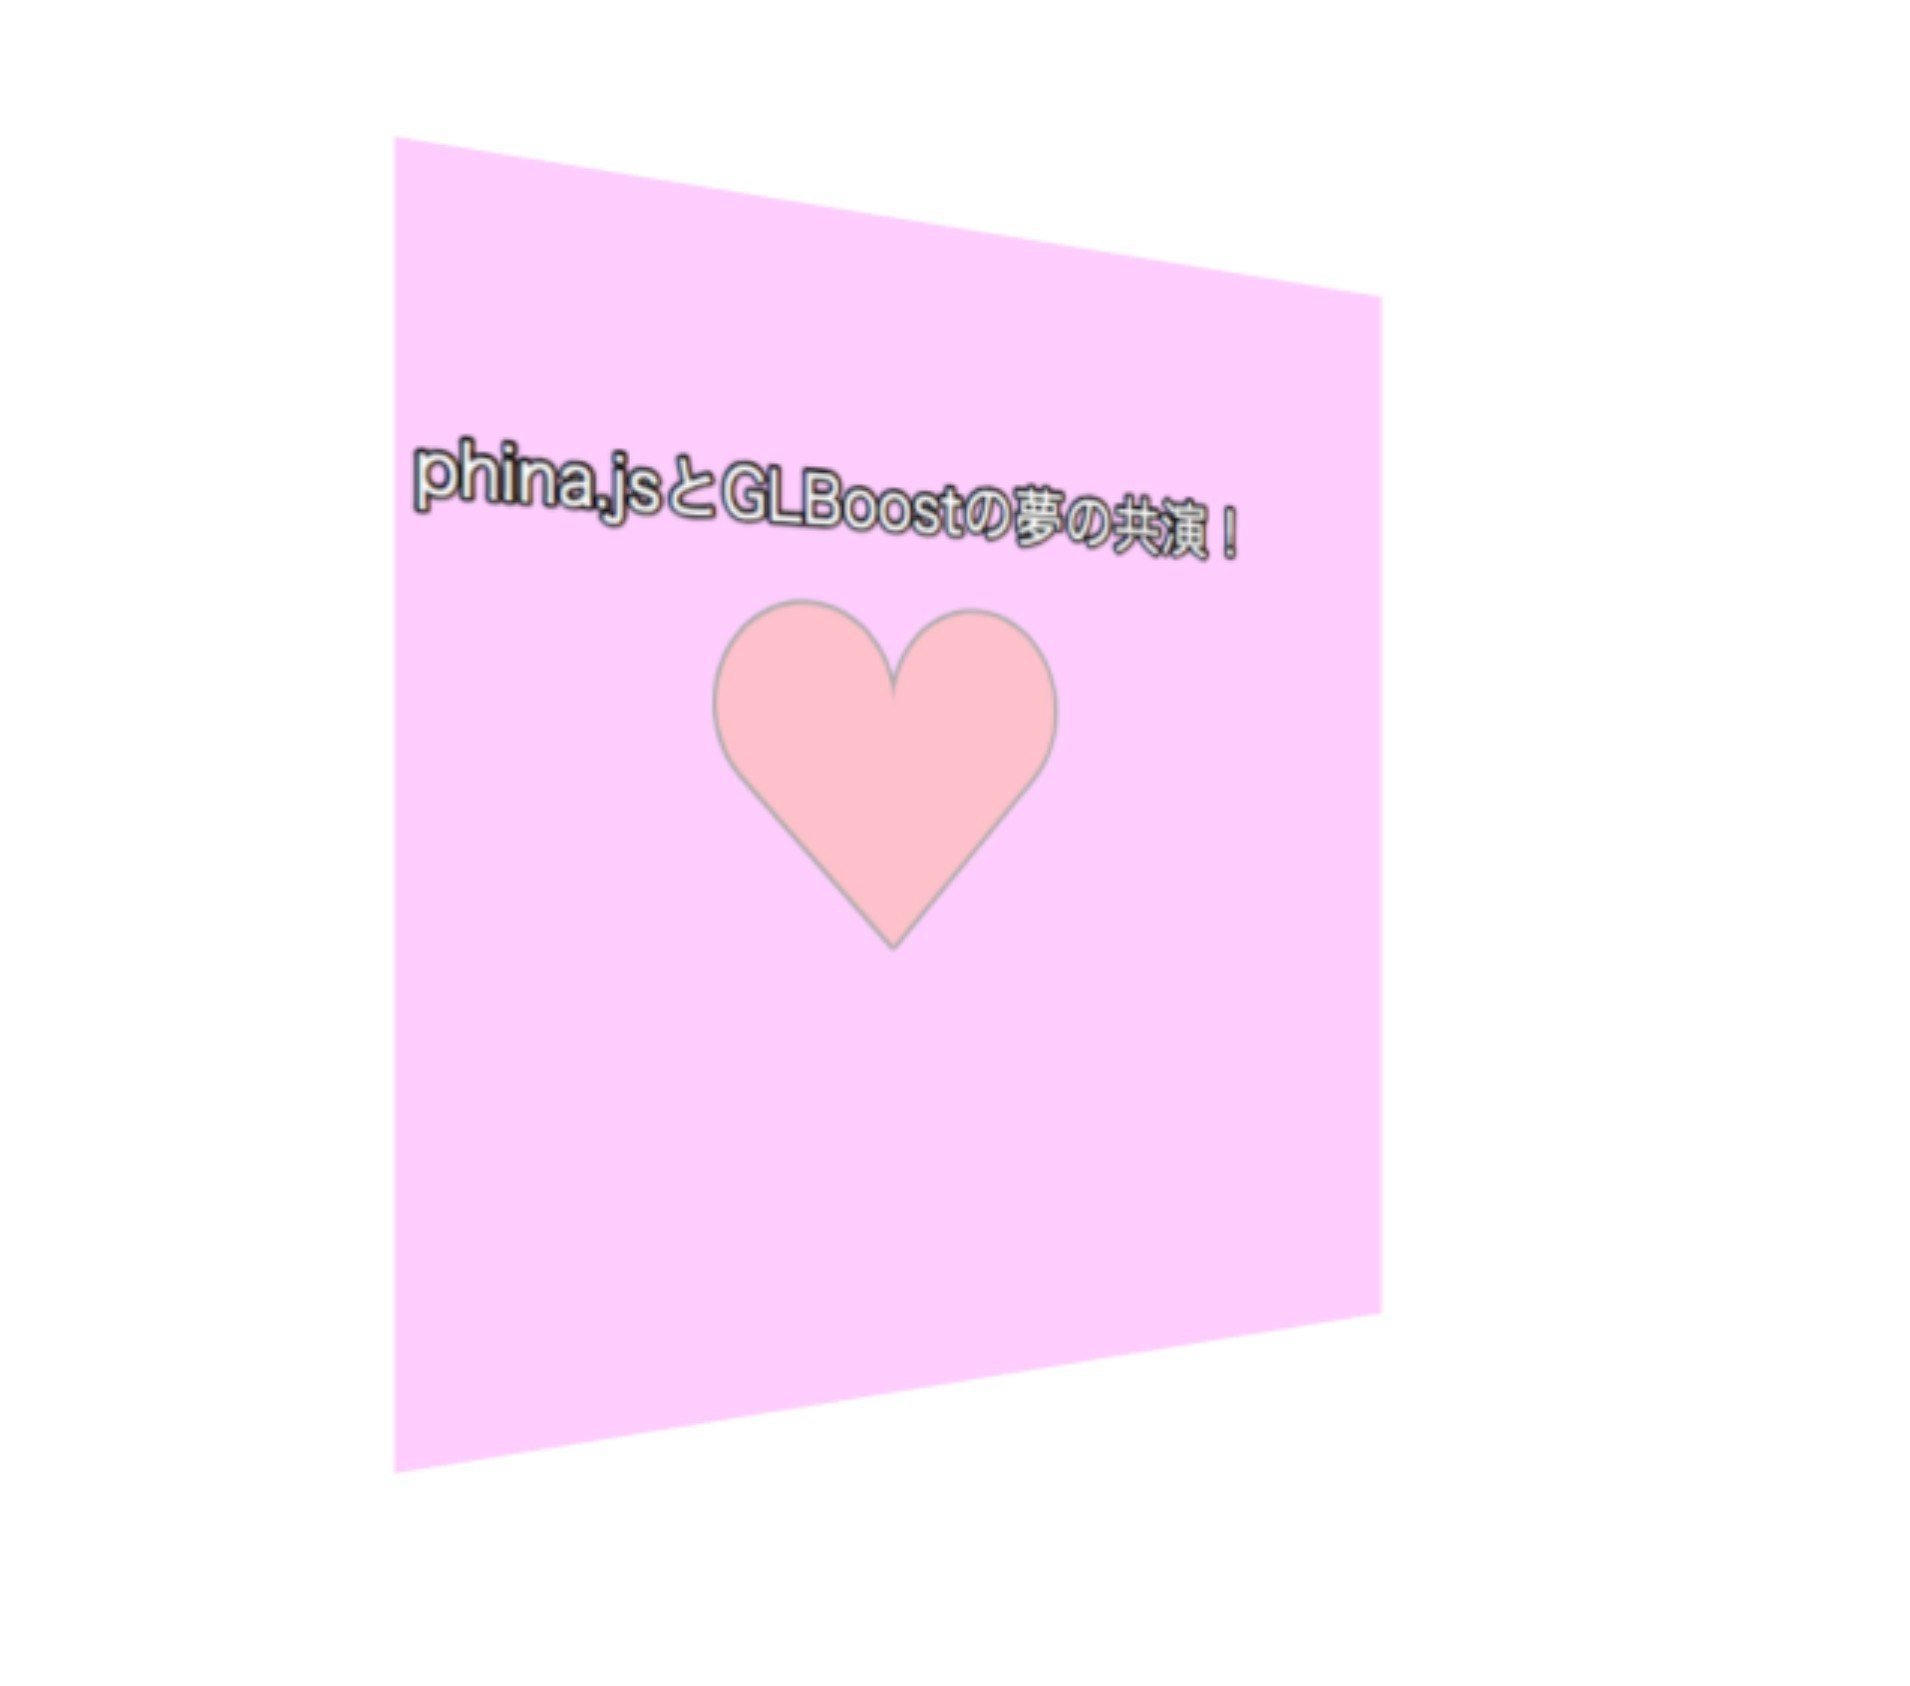
さて、先ほどはGLBoost側の描画をphina.js側に取り込むお話でしたが、逆にphina側の描画をGLBoost側にテクスチャとして取り込むこともできます。
それを実現するのが、GLBoost側で定義されているPhinaTexureクラスです。
コードとしてはこんな感じ。
var SCREEN_WIDTH = 640;
var SCREEN_HEIGHT = 640;

phina.globalize();

phina.define('MainScene', {
  superClass: 'DisplayScene',

  init: function(options) {
    this.superInit();

	// GLBoostLayerの作成
    var layer = phina.display.GLBoostLayer({
      width: SCREEN_WIDTH,
      height: SCREEN_HEIGHT
    }).addChildTo(this);

    // GLBoostContextの作成
    var glBoostContext = layer.glBoostContext;

    // 頂点データ作成
    var positions = [
      new GLBoost.Vector3(-0.5, -0.5, 0.0),
      new GLBoost.Vector3(0.5, -0.5, 0.0),
      new GLBoost.Vector3(-0.5,  0.5, 0.0),

      new GLBoost.Vector3(-0.5, 0.5, 0.0),
      new GLBoost.Vector3(0.5, -0.5, 0.0),
      new GLBoost.Vector3(0.5,  0.5, 0.0)

    ];
    var colors = [
      new GLBoost.Vector4(0.0, 1.0, 1.0, 1.0),
      new GLBoost.Vector4(1.0, 1.0, 0.0, 1.0),
      new GLBoost.Vector4(0.0, 0.0, 1.0, 1.0),

      new GLBoost.Vector4(0.0, 0.0, 1.0, 1.0),
      new GLBoost.Vector4(1.0, 1.0, 0.0, 1.0),
      new GLBoost.Vector4(1.0, 0.0, 0.0, 1.0)

    ];
    var texcoords = [
      new GLBoost.Vector2(0.0, 0.0),
      new GLBoost.Vector2(1.0, 0.0),
      new GLBoost.Vector2(0.0, 1.0),

      new GLBoost.Vector2(0.0, 1.0),
      new GLBoost.Vector2(1.0, 0.0),
      new GLBoost.Vector2(1.0, 1.0)
    ];

    // ジオメトリ生成
    var geometry = glBoostContext.createGeometry();
    geometry.setVerticesData({
      position: positions,
      //color: colors,
      texcoord: texcoords
    });

    // PhinaTexture(Phinaの描画を利用するGLBoostテクスチャクラス)の生成
    var texture = glBoostContext.createPhinaTexture(512, 512, new GLBoost.Vector4(1, 0, 1, 0.2));
    this.texture = texture;

    // Phinaのラベルを生成
    var label = Label('');
    label.fill = 'white';
    label.stroke = 'black';
    label.fontSize = 28;
    label.strokeWidth = 4;
    label.align = 'left';
    label.x = label.calcCanvasWidth()/2;
    label.y = label.calcCanvasHeight()/2;
    label.y += 100;
    this.label = label;

    // Phinaのハートを生成
    var heart = HeartShape({radius: 86});
    heart.x = heart.calcCanvasWidth()/2;
    heart.y = heart.calcCanvasHeight()/2;
    heart.x += 130;
    heart.y += 150;

	// PhinaTextureにラベルとハートを登録し、テクスチャに対してレンダリングを行う。
    texture.addPhinaObject(label).addPhinaObject(heart).renderPhinaObjects();

    // マテリアルの生成
    var material = glBoostContext.createClassicMaterial();

    // マテリアルにPhinaTextureを設定
    material.setTexture(texture);

    // ジオメトリとマテリアルを指定してメッシュ生成
    var mesh = glBoostContext.createMesh(geometry, material);
    layer.scene.addChild( mesh );

    // カメラ設定
    var camera = glBoostContext.createPerspectiveCamera(
      {
        eye: new GLBoost.Vector3(0.0, 0, 2.0),
        center: new GLBoost.Vector3(0.0, 0.0, 0.0),
        up: new GLBoost.Vector3(0.0, 1.0, 0.0)
      },
      {
        fovy: 45.0,
        aspect: 1.0,
        zNear: 0.1,
        zFar: 300.0
      }
    );
    layer.scene.addChild( camera );

    // 描画の前の準備
    layer.expression.prepareToRender();

    var delta = 0;

    layer.time = 0;
    layer.textCount = 0;
    layer.displayText = 'phina.jsとGLBoostの夢の共演!';

    // アニメーション処理
    layer.update = function(app) {

	  // PhinaTextureを張った四角ポリゴンを回転させる
      mesh.rotate = new GLBoost.Vector3(0, delta, 0);

      this.time += app.deltaTime;

      // PhinaTextureに移す文字をアニメーションさせる。
      if (this.time > 100) {
        this.textCount++;
        label.text = this.displayText.substr(0, this.textCount);
        texture.renderPhinaObjects();
        this.time = 0;
        if (this.textCount > this.displayText.length + 10) {
          this.textCount = 0;
        }
      }

      delta += 0.1;

    };


  }
});

phina.main(function() {
  var app = GameApp({
    startLabel: 'main',
    width: SCREEN_WIDTH,
    height: SCREEN_HEIGHT
  });

  app.fps = 120;
  app.enableStats();
  app.run();
});
Phina側で描画したオブジェクト群が、GLBoost側でテクスチャとしてポリゴンに貼られていることがわかりますね。で、このGLBoostの描画がまたPhina.js側のcanvasにコピーされているわけです。
いろいろ活用法が考えられそうですね^-^
今後の展開
さてさて、現状はこういった疎結合な感じの連携しかできていませんが、今後はもう少し高度な連携・結合のアプローチを模索しようとしています。
Phina.jsはすでに一部では商業案件にも使われているような、実績あるOSSプロダクトです。
また、GLBoostも貪欲に機能増強を日々図っています。
Web上での2D・3Dゲーム開発における強力な選択肢の一つとして、Phina&GLBoostのソリューションが今後皆様の候補に上がれるよう、ますます邁進していこうと思います!
