初めてNode-REDを使ってみよう、というかたのためのガイドです。
Node-REDを使ってシンプルなウェブサイトを作ってみます。
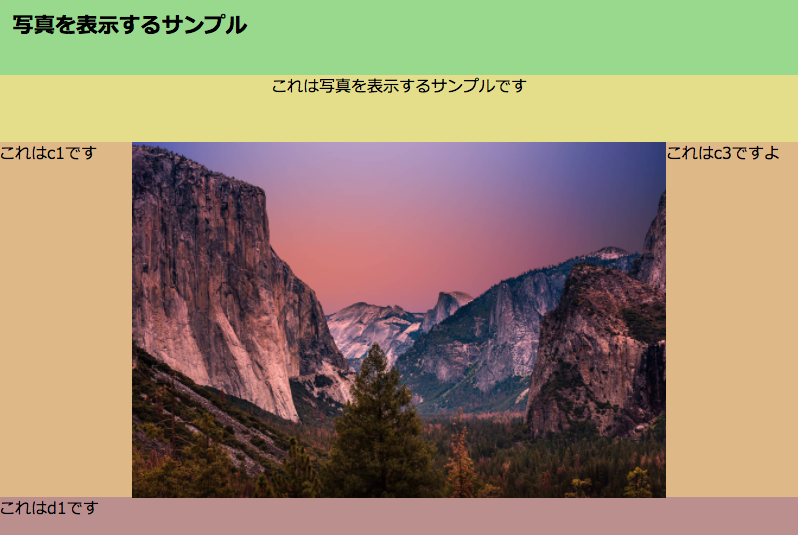
- このステップではウェブサイトに写真を貼ってみます。
6.1. 写真を用意する
- 無料の写真サイトなどで素材を探します
- ここではUnsplashから適当な写真を探してダウンロードします
- UnsplashではCreative Commons Zeroで素材を提供しているので商用・非商用での使用が可能です。Unsplash License
6.2. 写真をサイズ変更/圧縮/エンコードする
- そのままでは大きすぎたり高精度すぎたりする写真をウェブサイト掲出用に軽量化します
- Macではjpgファイルを「プレビュー」で開き、「ツール」メニューから「サイズ調整」を行います
- サイズを調整したjpgファイルを圧縮してファイルサイズを小さくします。TinyJPGなどが便利です。他にも「JPG 圧縮」などで見つかります。
- jpgファイルをbase64エンコードします。画像をbase64エンコードするツールなどが便利です。
6.3. Node−REDフローに貼る
-
Node-RED - フローをコピーする方法を参照し、下記のフローをコピペします。

写真掲出用フロー
[{"id":"4b8318b1.5544b8","type":"http in","z":"2302eb53.652cc4","name":"","url":"/test24","method":"get","swaggerDoc":"","x":90,"y":100,"wires":[["2d4b4493.1fe804"]]},{"id":"d9360f6e.c3bd2","type":"http response","z":"2302eb53.652cc4","name":"","x":710,"y":100,"wires":[]},{"id":"a5558d53.b42448","type":"comment","z":"2302eb53.652cc4","name":"写真を掲出します","info":"","x":110,"y":60,"wires":[]},{"id":"72030a24.31f77c","type":"template","z":"2302eb53.652cc4","name":"image","field":"payload.image","fieldType":"msg","format":"handlebars","syntax":"mustache","template":"","x":390,"y":100,"wires":[["581c5a16.d8a26c"]]},{"id":"581c5a16.d8a26c","type":"template","z":"2302eb53.652cc4","name":"test24.html","field":"payload","fieldType":"msg","format":"handlebars","syntax":"mustache","template":"<html>\n <head>\n <style type=\"text/css\">\n {{{payload.css}}}\n </style>\n </head>\n <body style=\"background-color: #EAE5E3; \">\n <div id='basic'>\n <div id='a1'><h1>写真を表示するサンプル</h1></div>\n <div id='b1'>これは写真を表示するサンプルです</div>\n <div id='c1'>これはc1です</div>\n <div id='c2'>\n <img src=\"{{{payload.image}}}\" style=\"width:100%;height:auto;\" />\n </div>\n <div id='c3'>これはc3ですよ</div>\n <div id='d1'>これはd1です</div>\n </div>\n </body>\n</html>\n","x":550,"y":100,"wires":[["d9360f6e.c3bd2"]]},{"id":"2d4b4493.1fe804","type":"template","z":"2302eb53.652cc4","name":"css","field":"payload.css","fieldType":"msg","format":"handlebars","syntax":"mustache","template":"#basic {\n font-family: meiryo;\n width: 1200px;\n position: absolute;\n top: 0;\n left: 0;\n right: 0;\n bottom: 0;\n margin: auto;\n}\n#a1 {\n background-color: #98d98e;\n height: 100px;\n padding: 20px;\n}\n#b1 {\n background-color: #e4de8a;\n height: 100px;\n text-align: center;\n font-size: 18pt;\n}\n#c1 {\n float: left;\n background-color: burlywood;\n height: 533px;\n width: 200px;\n text-align: left;\n font-size: 18pt;\n}\n#c2 {\n float: left;\n background-color: wheat;\n height: 533px;\n width: 800px;\n}\n#c3 {\n float: right;\n background-color: burlywood;\n height: 533px;\n width: 200px;\n font-size: 18pt;\n}\n#d1 {\n clear: both;\n background-color: rosybrown;\n height: 100px;\n text-align: left;\n font-size: 18pt;\n}\n","x":250,"y":100,"wires":[["72030a24.31f77c"]]}]
6.4 写真データを添付します
- フロー内の「image」テンプレートノード(オレンジ色)をクリックし、上記6.2で用意した写真のbase64エンコードされたデータをコピペし、 「閉じる」→「デプロイ」します。
- `アプリ名/test24.html`にアクセスし確認します。ブラウザのサイズを変えるとそれに応じて写真のサイズが変化して表示されることを確認します。