はじめに
今更ですが、
UIViewControllerTransitioningDelegateを利用した
カスタムトランジションのサンプルを備忘録として残しておきます。
動作イメージは、Pinterest風のトランジションです。
素敵なライブラリもありますが、勉強がてらに実装してみます。
実装手順
- 画面遷移元、画面遷移先、CollectionViewCell用のプロトコルを定義する
- 画面表示時のアニメーションクラスを定義する
- 画面非表示時のアニメーションクラスを定義する
- UIViewControllerTransitioningDelegateを継承したサブクラスを作る
- Pinterest風アニメーションを利用してみる
1. 画面遷移元、画面遷移先、CollectionViewCell用のプロトコルを定義する
トランジションに必要なプロパティをプロトコルで定義します。
今回は、下記の3つのプロトコルを定義します。
・画面遷移元には、UICollectionViewと土台のUIViewを設置します
・画面遷移先には、UIImageViewと土台のViewを設置します
・CollectionViewCellには、UIImageViewを設置します
ImageTransitionProtocol.swift
import UIKit

protocol ImageSourceTransitionType {
    var collectionView: UICollectionView! {get}
    var baseView: UIView! {get}
}

protocol ImageDistinationTransitionType {
    var imageView: UIImageView! {get}
    var baseView: UIView! {get}
}

protocol ImageCollectionViewCellType {
    var imageView: UIImageView! {get}
}
2. 画面表示時のアニメーションクラスを定義する
画面表示時のアニメーションクラスをImagePresentedAnimatorとします。
ImagePresentedAnimator.swift
import UIKit

class ImagePresentedAnimator: NSObject, UIViewControllerAnimatedTransitioning {

    func transitionDuration(transitionContext: UIViewControllerContextTransitioning?) -> NSTimeInterval {
        return 0.3
    }

    func animateTransition(transitionContext: UIViewControllerContextTransitioning) {

        guard let sourceVC = transitionContext.viewControllerForKey(UITransitionContextFromViewControllerKey)
            as? ImageSourceTransitionType else {
            return
        }

        guard let distinationVC = transitionContext.viewControllerForKey(UITransitionContextToViewControllerKey)
            as? ImageDistinationTransitionType else {
            return
        }

        guard let containerView = transitionContext.containerView() else {
            return
        }

        let animationDuration = transitionDuration(transitionContext)

        guard let selectedIndexPath = sourceVC.collectionView.indexPathsForSelectedItems()?.first else {
            return
        }

        let selectedCell = sourceVC.collectionView.cellForItemAtIndexPath(selectedIndexPath)
            as! ImageCollectionViewCellType
        let selectedImage = selectedCell.imageView.image

        let selectedCellsFrame = containerView.convertRect(selectedCell.imageView.frame,
            fromView: selectedCell.imageView.superview)

        let selectedImageWrapperView = UIView.init(frame: selectedCellsFrame)
        selectedImageWrapperView.backgroundColor = UIColor.clearColor()
        selectedImageWrapperView.clipsToBounds = true

        let imageView = UIImageView.init(image: selectedImage)
        imageView.frame = CGRectMake(0.0, 0.0, CGRectGetWidth(selectedCellsFrame), CGRectGetHeight(selectedCellsFrame))
        imageView.contentMode = distinationVC.imageView.contentMode
        imageView.autoresizingMask = [.FlexibleHeight,.FlexibleWidth,.FlexibleTopMargin,.FlexibleBottomMargin]
        selectedImageWrapperView.addSubview(imageView)

        containerView.addSubview(selectedImageWrapperView)

        let whiteBackgroundView = UIView.init(frame: sourceVC.baseView.frame)
        whiteBackgroundView.backgroundColor = UIColor.whiteColor()
        containerView.insertSubview(whiteBackgroundView, belowSubview: selectedImageWrapperView)

        distinationVC.baseView.alpha = 0.0
        containerView.addSubview(distinationVC.baseView)

        let rect = CGRectMake(0.0, 0.0,
                              CGRectGetWidth(distinationVC.baseView.frame),
                              CGRectGetHeight(distinationVC.baseView.frame))
        let imageViewFinalFrame = containerView.convertRect(rect, fromView: distinationVC.baseView)

        UIView.animateWithDuration(animationDuration,
                                   delay: 0.0,
                                   options: .CurveEaseOut,
                                   animations: {
                                    selectedImageWrapperView.frame = imageViewFinalFrame
            }) { (finished) in

                distinationVC.imageView.image = selectedImage;
                distinationVC.baseView.alpha = 1.0;
                transitionContext.completeTransition(!transitionContext.transitionWasCancelled())
        }
    }
}
3. 画面非表示時のアニメーションクラスを定義する
画面非表示時のアニメーションクラスをImageDismissedAnimatorとします。
ImageDismissedAnimator.swift
import UIKit

class ImageDismissedAnimator: NSObject, UIViewControllerAnimatedTransitioning {

    func transitionDuration(transitionContext: UIViewControllerContextTransitioning?) -> NSTimeInterval {
        return 0.3
    }

    func animateTransition(transitionContext: UIViewControllerContextTransitioning) {

        guard let sourceVC = transitionContext.viewControllerForKey(UITransitionContextFromViewControllerKey)
            as? ImageDistinationTransitionType else {
                return
        }

        guard let distinationVC = transitionContext.viewControllerForKey(UITransitionContextToViewControllerKey)
            as? ImageSourceTransitionType else {
                return
        }

        guard let containerView = transitionContext.containerView() else {
            return
        }

        let animationDuration = transitionDuration(transitionContext)

        let snapshot = sourceVC.imageView.snapshotViewAfterScreenUpdates(false)
        snapshot.frame = containerView.convertRect(sourceVC.imageView.frame,
                                                   toView: sourceVC.imageView.superview)
        snapshot.autoresizingMask = [.FlexibleHeight,.FlexibleWidth,.FlexibleTopMargin,.FlexibleBottomMargin]
        sourceVC.imageView.alpha = 0.0

        guard let selectedIndexPath = distinationVC.collectionView.indexPathsForSelectedItems()?.first else {
            return
        }

        let selectedCell = distinationVC.collectionView.cellForItemAtIndexPath(selectedIndexPath) as! ImageCollectionViewCellType
        selectedCell.imageView.alpha = 0.0
        selectedCell.imageView.transform =  CGAffineTransformMakeScale(1.1, 1.1)

        distinationVC.baseView.frame = transitionContext.finalFrameForViewController(distinationVC as! UIViewController)
        containerView.insertSubview(distinationVC.baseView, belowSubview: sourceVC.baseView)

        let imageWrapperView = UIView.init(frame: containerView.convertRect(sourceVC.imageView.frame,
            toView: sourceVC.imageView.superview))
        imageWrapperView.clipsToBounds = true
        imageWrapperView.addSubview(snapshot)
        containerView.addSubview(imageWrapperView)

        let whiteBackgroundView = UIView.init(frame: sourceVC.baseView.frame)
        whiteBackgroundView.backgroundColor = UIColor.whiteColor()
        containerView.insertSubview(whiteBackgroundView, belowSubview: imageWrapperView)

        UIView.animateKeyframesWithDuration(animationDuration,
                                            delay: 0.0,
                                            options: UIViewKeyframeAnimationOptions.CalculationModeLinear,
                                            animations: {

                                                UIView .addKeyframeWithRelativeStartTime(0.0,
                                                    relativeDuration: 1.0,
                                                    animations: {

                                                        sourceVC.baseView.alpha = 0.0
                                                        imageWrapperView.frame = containerView.convertRect(selectedCell.imageView.frame,
                                                            fromView: selectedCell.imageView.superview)
                                                        whiteBackgroundView.alpha = 0.0
                                                        selectedCell.imageView.alpha = 1.0
                                                })

                                                UIView .addKeyframeWithRelativeStartTime(0.95,
                                                    relativeDuration: 0.05,
                                                    animations: {
                                                        selectedCell.imageView.transform = CGAffineTransformIdentity
                                                        snapshot.alpha = 0.0
                                                })

            }) { (finished) in

                whiteBackgroundView.removeFromSuperview()
                snapshot.removeFromSuperview()
                imageWrapperView.removeFromSuperview()
                sourceVC.imageView.hidden = false
                transitionContext.completeTransition(!transitionContext.transitionWasCancelled())
        }
    }
}
4. UIViewControllerTransitioningDelegateを継承したサブクラスを作る
ImageTransitionDelegate.swift
import UIKit

class ImageTransitionDelegate: NSObject {}

extension ImageTransitionDelegate: UIViewControllerTransitioningDelegate{

    func animationControllerForPresentedController(presented: UIViewController, presentingController presenting: UIViewController, sourceController source: UIViewController) -> UIViewControllerAnimatedTransitioning? {
        return ImagePresentedAnimator()
    }

    func animationControllerForDismissedController(dismissed: UIViewController) -> UIViewControllerAnimatedTransitioning? {
        return ImageDismissedAnimator()
    }
}
5. Pinterest風アニメーションを利用してみる
画面イメージ
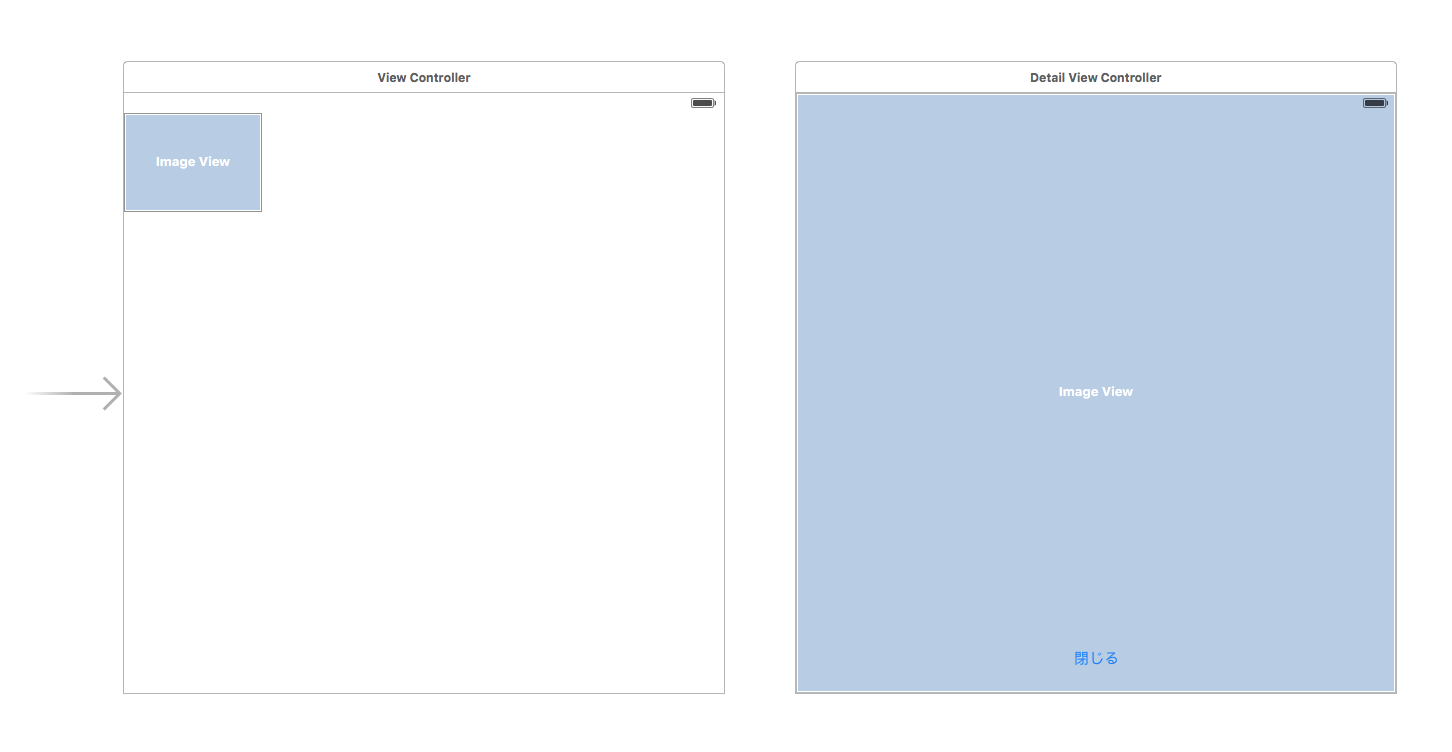
画面遷移元画面
ViewController.swift
import UIKit

class ViewController: UIViewController {

    @IBOutlet weak var collectionView: UICollectionView!
    @IBOutlet var baseView: UIView!

    var imageTransitioningDelegate: ImageTransitionDelegate?
}

extension ViewController: UICollectionViewDataSource {

    func collectionView(collectionView: UICollectionView, cellForItemAtIndexPath indexPath: NSIndexPath) -> UICollectionViewCell {

        let cell = collectionView.dequeueReusableCellWithReuseIdentifier("ImageCollectionViewCell",
        forIndexPath: indexPath) as! ImageCollectionViewCell

        //適当に画像を表示しています
        let imageName = indexPath.row % 2 == 0 ? "image1" : "image2"
        cell.imageView.image = UIImage.init(named: imageName)
        return cell
    }

    func collectionView(collectionView: UICollectionView, numberOfItemsInSection section: Int) -> Int {
        //適当に表示する画像数返しています
        return 15
    }
}

extension ViewController: UICollectionViewDelegate {

    func collectionView(collectionView: UICollectionView, didSelectItemAtIndexPath indexPath: NSIndexPath) {

        if imageTransitioningDelegate == nil {
            imageTransitioningDelegate = ImageTransitionDelegate()
        }

        let vc = UIStoryboard(name: "Main",bundle: nil).instantiateViewControllerWithIdentifier("DetailViewController")
            as! DetailViewController

        //Pinterest風のトランジションをセットしています
        vc.transitioningDelegate = imageTransitioningDelegate

        let imageName = indexPath.row % 2 == 0 ? "image1" : "image2"
        vc.imageToPresent = UIImage.init(named: imageName)
        presentViewController(vc, animated: true, completion: nil)
    }
}


extension ViewController: ImageSourceTransitionType {}
画面遷移先画面
DetailViewController.swift
import UIKit

class DetailViewController: UIViewController {

    var imageToPresent: UIImage!
    @IBOutlet weak var imageView: UIImageView!
    @IBOutlet var baseView: UIView!

    @IBAction func didTappedDissmiss(sender: UIButton) {
        self.dismissViewControllerAnimated(true, completion: nil)
    }
}

extension DetailViewController: ImageDistinationTransitionType {}
CollectionViewCell
ImageCollectionViewCell.swift
import UIKit

class ImageCollectionViewCell: UICollectionViewCell {
    @IBOutlet weak var imageView: UIImageView!
}

extension ImageCollectionViewCell: ImageCollectionViewCellType {}
まとめ
基本的には、UIViewControllerAnimatedTransitioningを継承したクラスでアニメーションを定義し、
UIViewControllerTransitioningDelegateを継承したクラスで、各アニメーションと関連付けます。
あとは、画面遷移時に、transitioningDelegateのプロパティに上記のクラスをセットするだけです。
参考