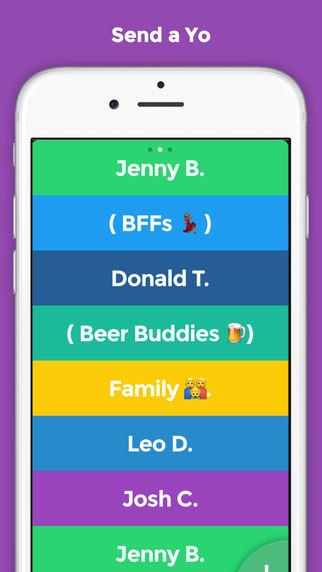
「Yo.」というアプリをご存知ですか?
「Yo」というメッセージを送り合うだけのアプリですが、UIが**「So Cool!」**
かなり前にelocogyさんから教わりました。
Coolなアニメーション!
elocogyさんから、どうやって実装しているか相談があり、
いろいろ試行錯誤してみました。
力技ですが、実装してみました。
※まだ不完全です。
完成イメージ
タップされたセルが一番上に移動するアニメーションです。
実装のポイント
- タップされたセルのスナップショットをとる。
- スナップショットを一番上のセルまで移動させ、一定時間経過するとスナップショットを消す。
- タップしたセルを一番上に入れ替え、再描画する。
サンプル
貧素なソースコードですが、ご愛嬌!
まずは、動かすことに重点をおきました。(言い訳)
import UIKit

class ViewController: UIViewController, UITableViewDataSource, UITableViewDelegate {

    @IBOutlet weak var tableView: UITableView!
    var snapshot: UIView?
    var itemLists = ["株式会社", "スマート", "デバイス", "テクノロジー","♥","♤","♣","◆"]

    override func viewDidLoad() {
        super.viewDidLoad()
        configureTableView()
    }

    func configureTableView() {
        tableView.dataSource = self
        tableView.delegate = self
        tableView.rowHeight = 44.0
    }

    //MARK:- UITableViewDataSource
    func tableView(tableView: UITableView, numberOfRowsInSection section: Int) -> Int {
        return itemLists.count
    }

    func tableView(tableView: UITableView, cellForRowAtIndexPath indexPath: NSIndexPath) -> UITableViewCell {
        let cell: UITableViewCell = UITableViewCell(style: UITableViewCellStyle.Subtitle, reuseIdentifier: "Cell")
        cell.textLabel?.text = itemLists[indexPath.row]
        return cell
    }

    //MARK:- UITableViewDelegate
    func tableView(tableView: UITableView, didSelectRowAtIndexPath indexPath:NSIndexPath) {
        let text = itemLists[indexPath.row]

     //タップされたセルのスナップショットをとる
        let cell = tableView.cellForRowAtIndexPath(indexPath)
        snapshot = self.selectedCellSnapshot(cell!)
        let center = cell?.center
        snapshot?.center = center!
        snapshot?.alpha = 1
        tableView.addSubview(snapshot!)

        UIView.animateWithDuration(0.75, animations: {[weak self] () -> Void in

            if let weakSelf = self {

             //スナップショットを一番上のセルまで移動する
                weakSelf.snapshot?.center = center!
                var index = indexPath.row * Int(weakSelf.tableView.rowHeight)
                index *= -1
                weakSelf.snapshot?.transform = CGAffineTransformMakeTranslation(0, CGFloat(index))
                weakSelf.snapshot?.alpha = 0.98
                cell?.alpha = 0
            }

        }) {[weak self] (finished) -> Void in

            if let weakSelf = self {

                //一番上まで行ったら、スナップショットを消して、タップしたセルを一番上に入れる
                cell?.hidden = true
                weakSelf.itemLists.removeAtIndex(indexPath.row)
                var deleteIndexPaths: [NSIndexPath] = []
                deleteIndexPaths.append(indexPath)
                weakSelf.tableView.deleteRowsAtIndexPaths(deleteIndexPaths, withRowAnimation: UITableViewRowAnimation.Bottom)
                weakSelf.itemLists.insert(text, atIndex: 0)
                var insertIndexPaths: [NSIndexPath] = []
                insertIndexPaths.append(NSIndexPath(forRow: 0, inSection: 0))
                weakSelf.tableView.insertRowsAtIndexPaths(insertIndexPaths, withRowAnimation: UITableViewRowAnimation.Top)
                weakSelf.snapshot?.hidden = true
            }
        }
    }

    /**
     選択されたセルをキャプチャーする
    */
    func selectedCellSnapshot(inputView: UIView) -> UIView {
        UIGraphicsBeginImageContextWithOptions(inputView.bounds.size, false, 0)
       inputView.layer.renderInContext(UIGraphicsGetCurrentContext()!)
        let image = UIGraphicsGetImageFromCurrentImageContext()
        UIGraphicsEndImageContext()
        let snapshot = UIImageView(image: image)
        snapshot.layer.masksToBounds = false
        snapshot.layer.cornerRadius = 0
        snapshot.layer.shadowOffset = CGSizeMake(-5, 0)
        snapshot.layer.shadowRadius = 5.0
        snapshot.layer.shadowOpacity = 0.4
        return snapshot
    }
}
最後に
もっと良い方法があったら、ご教授ください。
現状は、一番上のセルが画面に見えている状態でないと、
それっぽく動作しません。
また、デザイナーさんの無茶振りに答えられるように、
UIデザイン(AutoLayoutを含む)及び、アニメーションも
柔軟に実装できるようになりたいです。
[参考] 無茶振りデザイナーのアニメーション群
dribbble