はじめに
9月14日(水)にiOS10が正式リリースされるということですので、
下記の記事を参考にプッシュ通知の機能を少し触ってみます。
iOS 10 で画像つきの Notification を配信する
なお、本サンプルは下記の環境で実施しています。
・Xcode 8 GM seed
・iOS 10.0.1 GM seed
実装手順
- アプリ側の実装
- Application Extension側の実装
- サーバー側の実装(PHP)
- 動かしてみます
1. アプリ側の実装
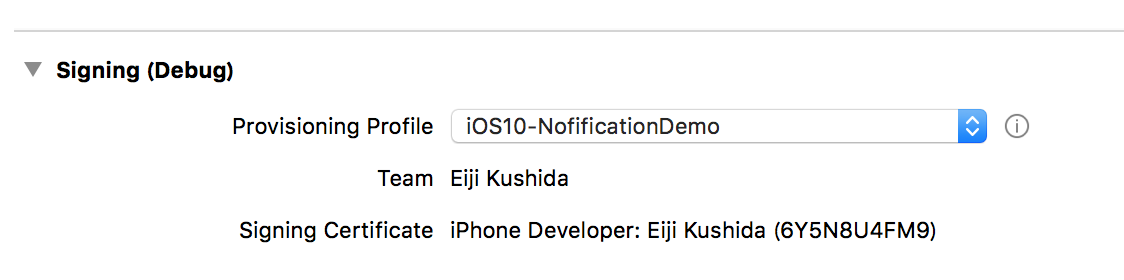
(1) Generalにて、プッシュ通知用のプロビジョニングプロファイルを設定する
Signingを設定する場所がXCode7.xと違うので注意!
| XCodeのバージョン | 説明 |
|---|---|
| XCode8.0 GM | Generalにて設定できる |
| XCode7.x | Build Settingsにて設定できる |
今回のサンプルは、Debug用だけ行います。
(プロジェクト名のタイポはご愛嬌)
プロビジョニングプロファイルの作成方法は、割愛します。
(2) Capabilitiesにて、Push NotificationsをONにする

Push NotificationsをONにすると、<プロジェクト名>.entitlementsという名前のファイルが自動生成されるようです。
<?xml version="1.0" encoding="UTF-8"?>
<!DOCTYPE plist PUBLIC "-//Apple//DTD PLIST 1.0//EN" "http://www.apple.com/DTDs/PropertyList-1.0.dtd">
<plist version="1.0">
<dict>
	<key>aps-environment</key>
	<string>development</string>
</dict>
</plist>
(3) APNSサーバーへの登録及び、デバイストークンのデバイストークンの取得
まだまだiOS8、9は、必要だと思われますので、
DevelopmentTargetを8.0にした場合の例です。
import UIKit
import UserNotifications

@UIApplicationMain
class AppDelegate: UIResponder, UIApplicationDelegate {

    var window: UIWindow?

    func application(_ application: UIApplication, didFinishLaunchingWithOptions launchOptions: [UIApplicationLaunchOptionsKey: Any]?) -> Bool {
        print(#function)

        if #available(iOS 10.0, *) {

            let center = UNUserNotificationCenter.current()
            center.delegate = self
            center.requestAuthorization(options: [.badge, .sound, .alert], completionHandler: { (granted, error) in
                if error != nil {
                    print(error?.localizedDescription)
                    return
                }

                if granted {
                    //利用許可
                    application.registerForRemoteNotifications()
                }
            })
        } else {
            print("iOS9以下の処理")
        }

        return true
    }

    func application(_ application: UIApplication,
                     didRegisterForRemoteNotificationsWithDeviceToken deviceToken: Data) {
        print(#function)

        var token = String(format: "%@", deviceToken as CVarArg) as String
        let characterSet: CharacterSet = CharacterSet.init(charactersIn: "<>")
        token = token.trimmingCharacters(in: characterSet)
        token = token.replacingOccurrences(of: " ", with: "")

        //本来は、APIでサーバーへ通知する
        print("deviceToken: \(token)")
    }

    func application(_ application: UIApplication,
                     didFailToRegisterForRemoteNotificationsWithError error: Error) {
        print(#function)
        print(error)
    }
}
(4) プッシュ通知が表示された時、プッシュ通知をタップした時の処理
今回は、処理を割愛します。
extension AppDelegate: UNUserNotificationCenterDelegate {

    // フォアグランドでもアラートを表示する
    @available(iOS 10.0, *)
    func userNotificationCenter(_ center: UNUserNotificationCenter,
                                willPresent notification: UNNotification,
                                withCompletionHandler completionHandler: @escaping (UNNotificationPresentationOptions) -> Void) {

        print(#function)
        completionHandler([.badge, .sound, .alert])
    }

    // Pushをタップした時
    @available(iOS 10.0, *)
    func userNotificationCenter(_ center: UNUserNotificationCenter,
                                didReceive response: UNNotificationResponse,
                                withCompletionHandler completionHandler: @escaping () -> Void) {
        print(#function)
        completionHandler()
    }
}
2. Application Extension側の実装
iOS10からApplication Extensionを利用すると、
画像も表示できるようですので、こちらも合わせて実装してみます。
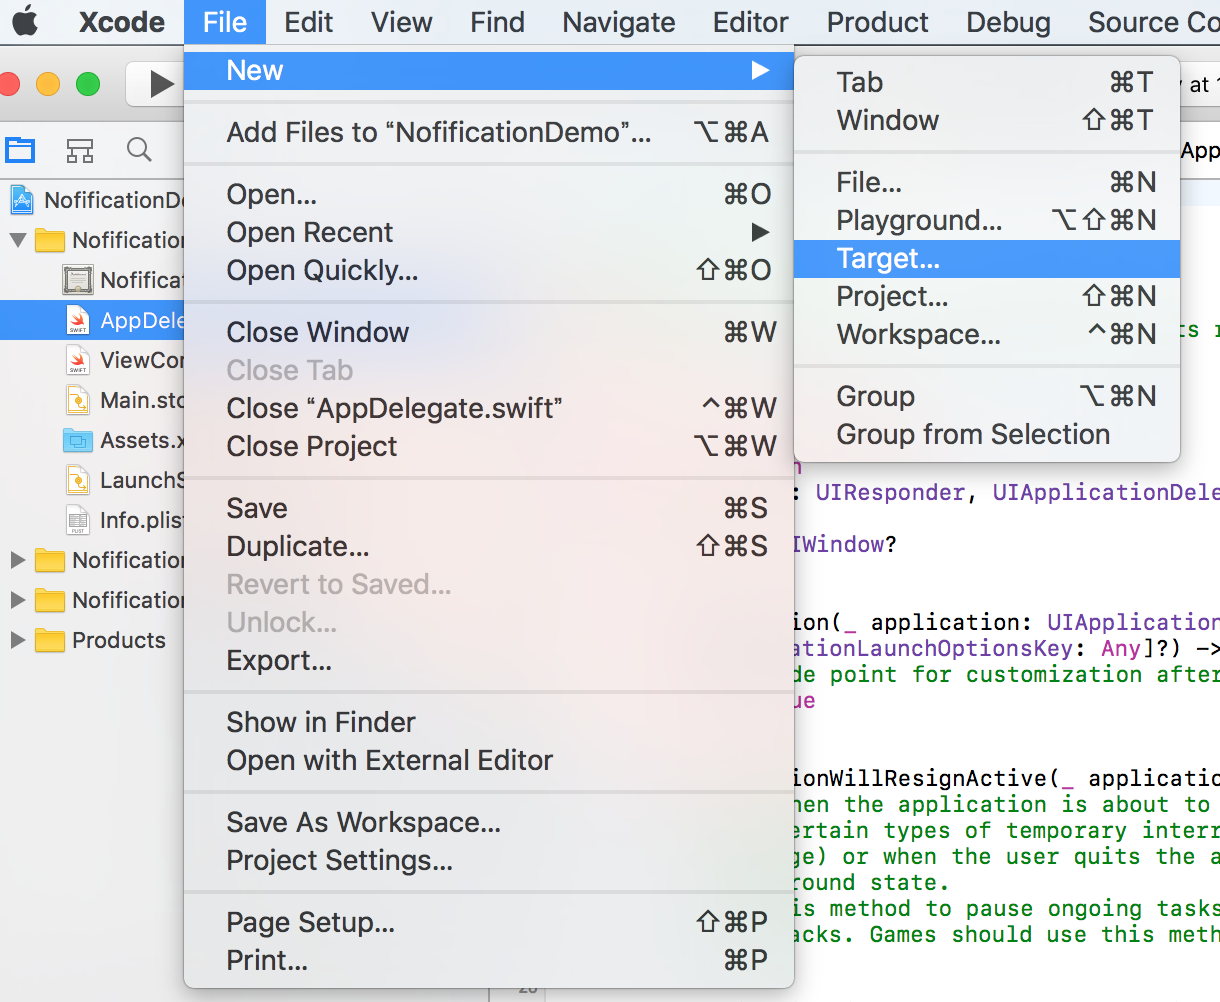
(1) Xcode の File > New > Targetを選択する
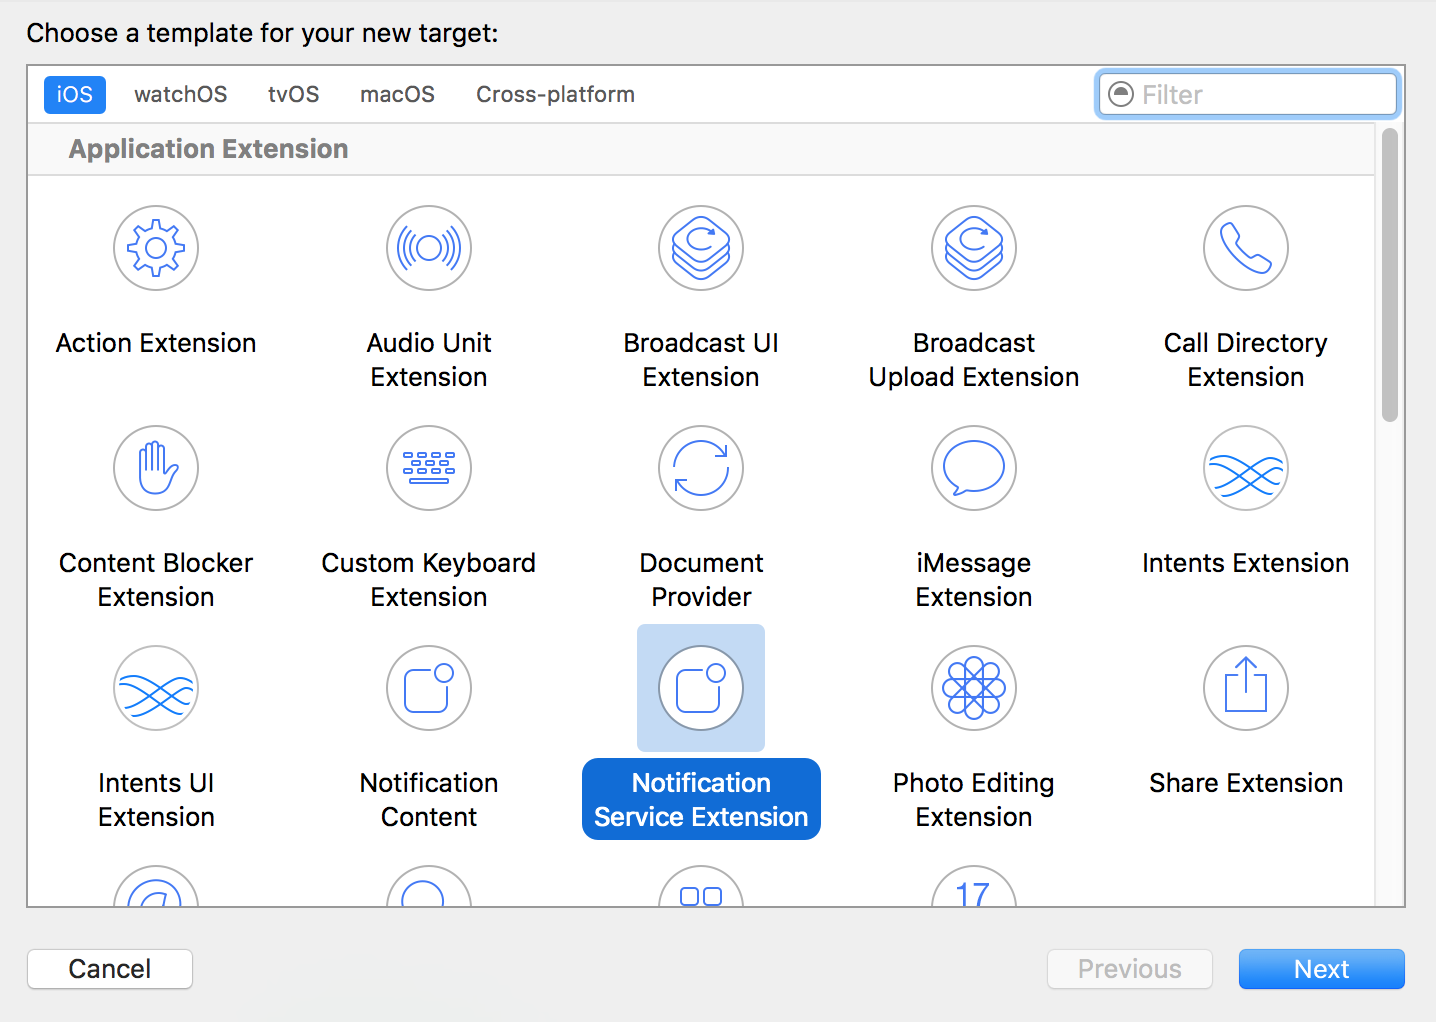
(2)左のバーで iOS > Application Extension を選択し、Notification Service Extensionを選んで Next
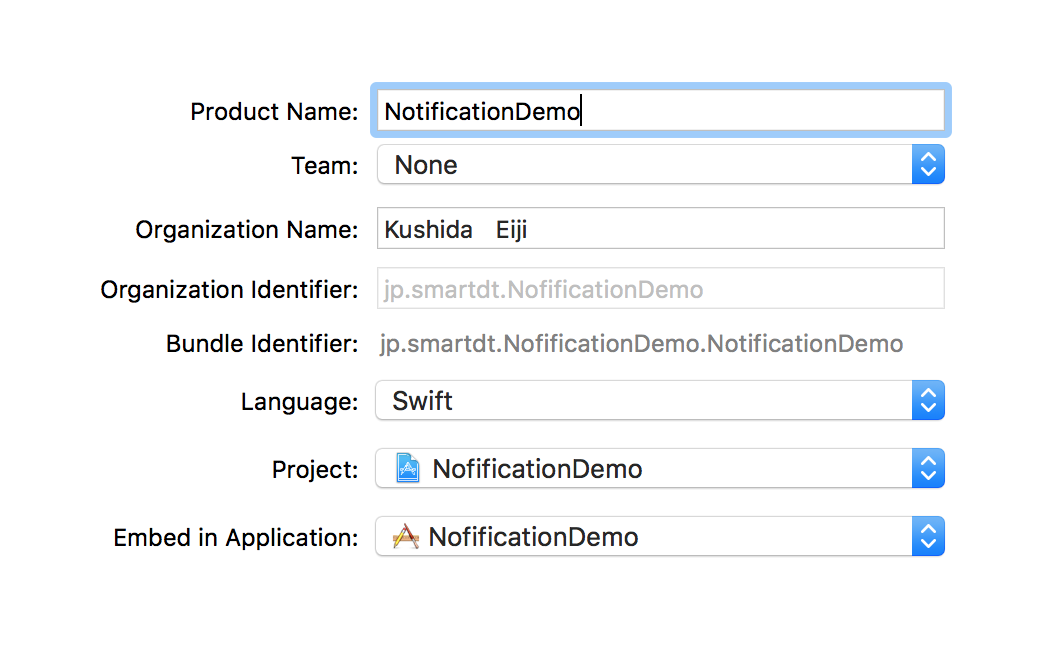
(3)Target名などを指定して Finish
Product名は、アプリ名と違う名前にしてください。
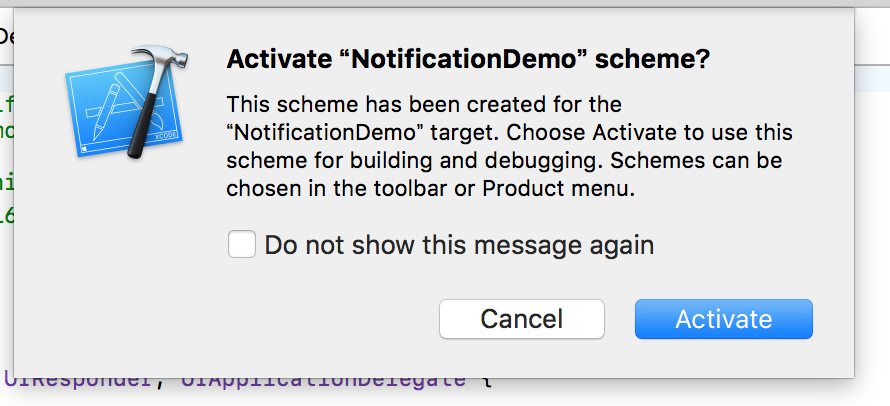
(4)Activateを選択
(5) NotificationServiceクラスが自動生成される
import UserNotifications

class NotificationService: UNNotificationServiceExtension {

    var contentHandler: ((UNNotificationContent) -> Void)?
    var bestAttemptContent: UNMutableNotificationContent?

    override func didReceive(_ request: UNNotificationRequest, withContentHandler contentHandler: @escaping (UNNotificationContent) -> Void) {
        self.contentHandler = contentHandler
        bestAttemptContent = (request.content.mutableCopy() as? UNMutableNotificationContent)

        if let bestAttemptContent = bestAttemptContent {
            // Modify the notification content here...
            bestAttemptContent.title = "\(bestAttemptContent.title) [modified]"

            contentHandler(bestAttemptContent)
        }
    }

    override func serviceExtensionTimeWillExpire() {
        // Called just before the extension will be terminated by the system.
        // Use this as an opportunity to deliver your "best attempt" at modified content, otherwise the original push payload will be used.
        if let contentHandler = contentHandler, let bestAttemptContent =  bestAttemptContent {
            contentHandler(bestAttemptContent)
        }
    }

}
(6) 画像のURLをパースできるように改造する
APNsから受信するキー名は、image-urlとします。
こちらのキー名は、サーバーとアプリが一致していれば何でも構いません。
また、アプリ側でタイトル等の変更ができるようです。
import UserNotifications

@available(iOSApplicationExtension 10.0, *)
class NotificationService: UNNotificationServiceExtension {

    let imageKey = "image-url"

    var contentHandler: ((UNNotificationContent) -> Void)?
    var bestAttemptContent: UNMutableNotificationContent?

    override func didReceive(_ request: UNNotificationRequest, withContentHandler contentHandler: @escaping (UNNotificationContent) -> Void) {

        self.contentHandler = contentHandler
        bestAttemptContent = (request.content.mutableCopy() as? UNMutableNotificationContent)

        if let imageUrl = request.content.userInfo[imageKey] as? String {

            let session = URLSession(configuration: URLSessionConfiguration.default)
            let task = session.dataTask(with: URL(string: imageUrl)!, completionHandler: {[weak self](data, response, error) in
                do {
                    if let writePath = NSURL(fileURLWithPath:NSTemporaryDirectory())
                        .appendingPathComponent("tmp.jpg") {
                        try data?.write(to: writePath)

                        let identifier = "sdt"

                        if let bestAttemptContent = self?.bestAttemptContent {
                            let attachment = try UNNotificationAttachment(identifier: identifier, url: writePath, options: nil)
                            bestAttemptContent.attachments = [attachment]
                            contentHandler(bestAttemptContent)
                        }
                    } else {
                        // URLが不正な場合
                        if let bestAttemptContent = self?.bestAttemptContent {
                            contentHandler(bestAttemptContent)
                        }
                    }
                } catch let error as NSError {
                    print(error.localizedDescription)

                    if let bestAttemptContent = self?.bestAttemptContent {
                        contentHandler(bestAttemptContent)
                    }
                }
            })
            task.resume()
        } else {
            if let bestAttemptContent = self.bestAttemptContent {
                contentHandler(bestAttemptContent)
            }
        }
    }
}
3.サーバー側の実装(PHP)
Notification Service Extensionを利用するには、
mutable-contentを1にしておく必要があるようです。
{
    "aps": {
        "alert": {
            "title": "iOSプッシュ通知テスト",
            "subtitle": "SubTitle",
            "body": "Body"
        },
        "sound": "sound1.aiff",
        "badge": 1,
        "mutable-content": 1
    },
    "image_url": "https://s3-ap-northeast-1.amazonaws.com/qiita-image-store/0/71694/5e08632a6a84409c6ed692141608d10b47f22766/medium.png?1468746973"
}
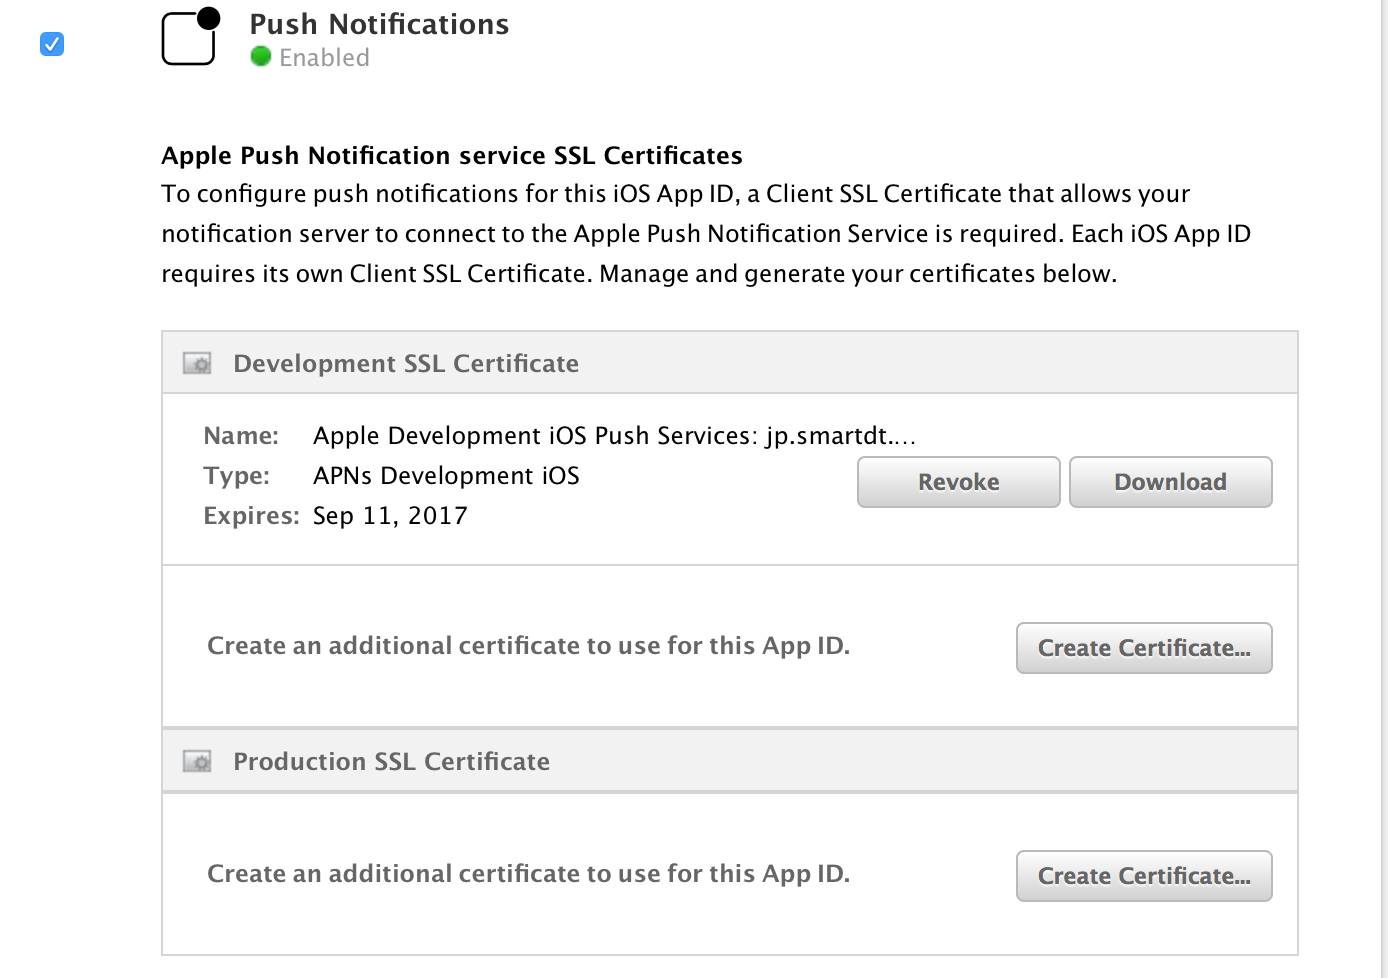
(1) サーバー側の証明書を取得する
1) iOS Dev Center のIdentifiers > App IDs > PushNotifications からcerファイルダウンロードする
2) cerファイルをダブルクリックし、キーチェーンにインストールする
3) キーチェーンから対象のファイルをp12形式で出力する
4) p12ファイルをpem形式に変換する
openssl pkcs12 -in aps_developments.p12 -out aps_developments.pem -nodes -clcerts
(2) テストデータ送信用のコードを書きます
本サンプルは、PHPです。
<?php
$deviceToken = ''; //適宜変更してください。

$body = array();
$body['aps']['alert']['title'] = 'iOSプッシュ通知テスト';
$body['aps']['alert']['subtitle'] = 'SubTitle';
$body['aps']['alert']['body'] = 'Body';
$body['aps']['sound'] = 'sound1.aiff';
$body['aps']['badge'] = 1;
$body['aps']['mutable-content'] = 1;
$body['image-url'] = 'https://s3-ap-northeast-1.amazonaws.com/qiita-image-store/0/71694/5e08632a6a84409c6ed692141608d10b47f22766/medium.png?1468746973';

// SSL証明書
$cert = 'aps_development.pem';
//$cert = 'aps_production.pem';

$url = 'ssl://gateway.sandbox.push.apple.com:2195'; // 開発用
//$url = 'ssl://gateway.push.apple.com:2195'; // 本番用

$context = stream_context_create();
stream_context_set_option( $context, 'ssl', 'local_cert', $cert );
$fp = stream_socket_client( $url, $err, $errstr, 60, STREAM_CLIENT_CONNECT, $context );

if( !$fp ) {

    echo 'Failed to connect.' . PHP_EOL;
    exit( 1 );

}

$payload = json_encode( $body );
$message = chr( 0 ) . pack( 'n', 32 ) . pack( 'H*', $deviceToken ) . pack( 'n', strlen($payload ) ) . $payload;

print 'send message:' . $payload . PHP_EOL;

fwrite( $fp, $message );
fclose( $fp );
echo 'end';
(3) 下記のようにファイルを配置します
・aps_development.pem
・index.php
4. 動かしてみます
(1) アプリを起動する
プッシュ通知の許可ダイアログが表示されます。
許可を押下し、ダイアログを閉じます。

(2) サーバーからプッシュ通知を送ってみる
今回のサンプルは、MAMPに設置し、下記のようなURLを叩いてみました。
(3) プッシュ通知を受信する
無事画像付きのプッシュ通知が受信できました。
画像のサイズ調べてなかった。。。。。

まとめ
iOSのNotificationはOSのバージョンが上がる度に仕様が変わるので
しっかりとキャッチアップしたいです。
また、iOS10のNotificationは、パワーアップし、
まだまだ色々できるようですので、
少しずつ触ってみたいと思います。
参考