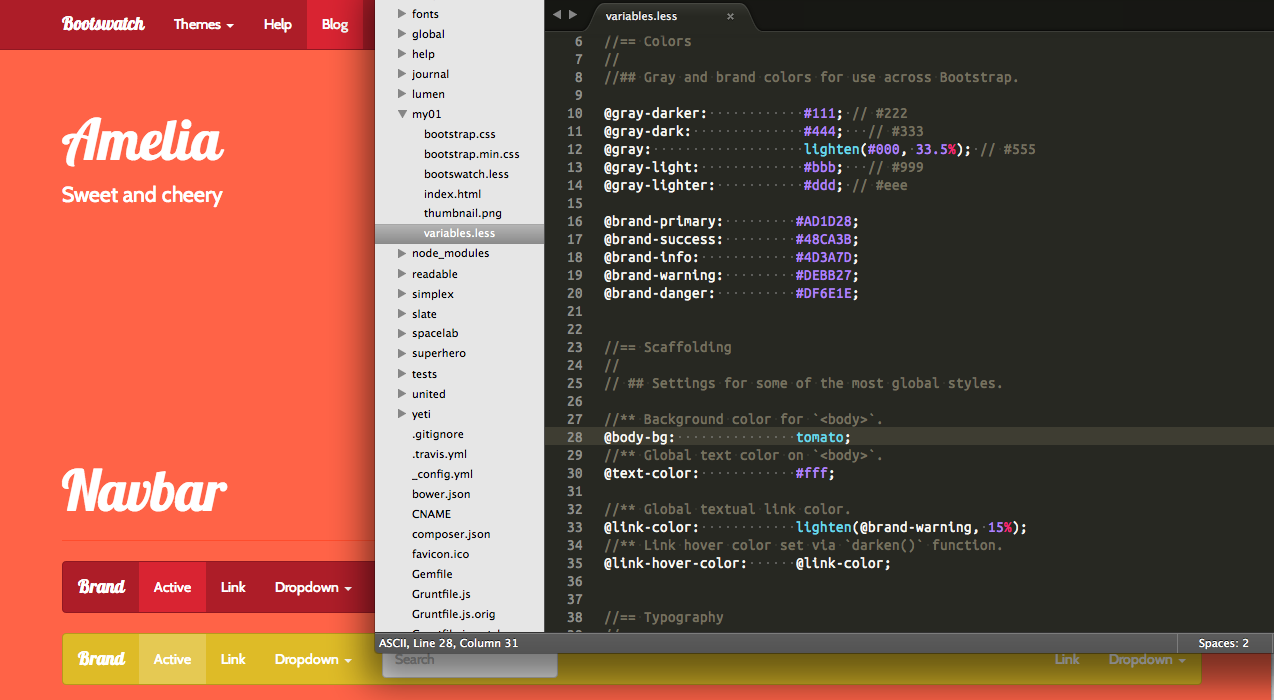
最初に
この投稿は拙文 http://qiita.com/smaeda/items/bdd2ed2a8fba37307147 の改良版です。
(↑この投稿だけで完結していますのでわざわざ読む必要はありません。)
前作はBootstrap本家の開発&デプロイ環境(https://github.com/twbs/bootstrap )をまるごとgit cloneしローカルで直接実行していました。しかしこのやり方はBootstrap本家のjeykyllデプロイ手順を引きずっているためサイト全体の再ビルドが必要となり、「いじって即プレビュー」のつもりが時間がかかり ストレスマックス になるためやめます。いやその他にも面倒なことがあって・・・
と能書きはこれくらいにして・・・
あらためて目標
Bootstrap3(http://getbootstrap.com/ )の自前カスタム環境を 最速で ローカルに作る。作業の効率化のために 自動で less->cssリビルド、すぐにプレビューしながらやりたい。そのためにBootswatchのGithubを使うぞ!
前提
- Mac OSX Mavericks & Chrome
- Bootswatch (http://bootswatch.com/ ) powered by Twitter Bootstrap v3.1.1
- ruby, node, git等(他にも?)はインストール済み(brew, anyenvが便利だよ!)
手順
1. Bootswatch の開発環境をダウンロード
適当にディレクトリを作ってそこにgit cloneする。
$ mkdir my_bootswatch
$ cd my_bootswatch
$ git clone https://github.com/thomaspark/bootswatch.git
2. gruntタスクの追加と変更
Gruntfile.jsとpackage.jsonにパッチを当てる。
--- Gruntfile.org.js	2014-02-24 18:56:00.000000000 +0900
+++ Gruntfile.js	2014-02-25 00:17:26.000000000 +0900
@@ -1,8 +1,11 @@
 module.exports = function (grunt) {
+
   grunt.loadNpmTasks('grunt-contrib-less');
   grunt.loadNpmTasks('grunt-contrib-concat');
   grunt.loadNpmTasks('grunt-contrib-clean');
-  grunt.loadNpmTasks('grunt-contrib-watch');
+  grunt.loadNpmTasks('grunt-contrib-watch'); // added
+  grunt.loadNpmTasks('grunt-contrib-connect'); // added
+  grunt.loadNpmTasks('grunt-notify'); // added

   // Project configuration.
   grunt.initConfig({
@@ -20,6 +23,9 @@
       journal:{}, lumen:{}, readable:{}, simplex:{}, slate:{}, spacelab:{},
       superhero:{}, united:{}, yeti:{}, custom:{}
     },
+    my_swatch: {//added
+      my01:{}
+    },
     clean: {
       build: {
         src: ['*/build.less', '!global/build.less']
@@ -42,6 +48,22 @@
         },
         files: {}
       }
+    },
+    watch: { // added
+      files: ['*/bootswatch.less', '*/variables.less'],
+      tasks: ['my_swatch'],
+      options: {
+        livereload: true,
+      }
+    },
+    connect: { // added
+      server: {
+        options:{
+          port: 9001,
+          hostname: "127.0.0.1",
+          open: true
+        }
+      }
     }
   });

@@ -88,4 +110,14 @@
   grunt.registerTask('default', 'build a theme', function() {
     grunt.task.run('swatch');
   });
+
+
+  //begin-added
+  grunt.registerMultiTask('my_swatch', 'build a theme', function() {
+    var t = this.target;
+    grunt.task.run('build:'+t);
+  });
+  grunt.registerTask('happy_customize', ['connect', 'watch']);
+  //end-added
+
 };
--- package.org.json    2014-02-25 04:35:24.000000000 +0900
+++ package.json        2014-02-24 19:11:13.000000000 +0900
@@ -18,6 +18,8 @@
     "grunt-contrib-clean": "~0.5.0",
     "grunt-contrib-concat": "~0.3.0",
     "grunt-contrib-less": "~0.9.0",
-    "grunt-contrib-watch": "~0.5.1"
+    "grunt-contrib-watch": "~0.5.3",
+    "grunt-contrib-connect": "~0.7.0",
+    "grunt-notify": "~0.2.17"
   }
(↑今回はMacの通知センターにエラー出力をリダイレクトしてくれるgrunt-notifyを追加しました)
それぞれコピペでファイルに保存し、
$ cd bootswatch
$ patch -su < Gruntfile.js.patch
$ patch -su < package.json.patch
3. JSライブラリのセットアップ
package.jsonから必要なライブラリをインストールする。
$ npm install
4. LiveReloadプラグインのインストール
ChromeにLiveReloadプラグインを入れる。
https://chrome.google.com/webstore/detail/livereload/jnihajbhpnppcggbcgedagnkighmdlei
↓ 以下はカスタム作業をする時に行う
5. bootswatchのtheme(swatchとも呼ぶ)でベースにするものを選ぶ
好きなのを選んでディレクトリごとmy01という別名でコピーします。以下の例はameliaを選んだ場合。
$ cp -pri amelia my01
6. 作業環境を走らせる
grunt でhappy_customizeタスクを走らせます。
$ grunt happy_customize
7. Happy Customizing!
あとは
http://127.0.0.1:9001/my01 を表示しながら
がしがしmy01/css/*.lessをいじりましょう。
*.lessが更新されると自動で http://127.0.0.1:9001/ 以下に反映され、さらにChromeのタブがリロードされます。LiveReloadプラグインをonにしとくのを忘れずに。
Thanks:
Bootswatch - Free themes for Bootstrap
http://bootswatch.com/
各ブラウザ用LiveReloadプラグイン
http://feedback.livereload.com/knowledgebase/articles/86242-how-do-i-install-and-use-the-browser-extensions-
大ざっぱに以上です。
告知
というか宣伝ですが、このエントリーも関係してますが、
2chまとめ巡査長β
http://j.inthemaking.net/
というのを作ってみました。PCでも見れますがスマホ用です。
よろしければ暇つぶしに使って感想いただければ嬉しいです。
