Riot.js Advent Calendar 2016の23日目です!
Riot.js(以下riot)は非常にシンプルかつ軽量で敷居も低く、とても書きやすいコンポーネント指向のUIライブラリです。(ここまでテンプレート)
今更ですが、ちゃんとES6で書こうと思いまして、riot+webpack+ES6の開発環境を作りました。
準備
ディレクトリ構成
今回のサンプルのディレクトリ構成は以下です。
./
├ .gitignore
├ node_modules
├ package.json
├ webpack.config.js
├ index.html
├ app
│  └ app.js
│
├ tag
│  └ app.tag
│
└ build
   └ bundle.js
以下はBabelを使う場合とbubleを使う場合で微妙に違いがあるため、別々に記述します。
▼Babelを使う場合
モジュールリスト
インストールするモジュールは以下です。
- babel-core
- babel-preset-es2015-riot
- riot
- riot-route(これは任意)
- webpack
- riot-tag-loader(tag-loader, riotjs-loaderでも可)
- babel-loader
インストール用コマンド
$ npm install -D babel-core babel-preset-es2015-riot riot riot-route webpack riotjs-loader babel-loader
webpackの設定
まずはwebpack v1の設定例。
const webpack = require('webpack')

module.exports = [
   {
      // 対象のjsファイル
      entry: './app/app.js',
      output: {
         path: __dirname + '/build/',
         filename: 'bundle.js'
      },
      module: {
         preLoaders: [
            {
               test: /\.tag$/,
               exclude: /node_modules/,
               loader: 'riot-tag-loader'
            }
         ],
         loaders: [
            {
               test: /\.js|\.tag$/,
               exclude: /node_modules/,
               loader : 'babel-loader',
               query  : {
                  presets: ['es2015-riot']
               }
            }
         ]
      },
      resolve: {
         extensions: ['', '.js', '.tag']
      },
      plugins: [
         new webpack.optimize.OccurenceOrderPlugin(),
         new webpack.ProvidePlugin({ riot: 'riot' })
      ]
   }
]
次にv2 (2.3.3)の設定例。
const webpack = require('webpack')

module.exports = [
  {
      entry: './app/app.js',
      output: {
         path: __dirname + '/build/',
         filename: 'bundle.js'
      },
      module: {
         rules: [
            {
               test: /\.tag$/,
               enforce: 'pre',
               exclude: /node_modules/,
               use: [
                  {
                     loader: 'riot-tag-loader',
                     options: {
                        template: 'pug',   // テンプレートを指定(任意)
                        debug: true
                     }
                  }
               ]
            },
            {
               test: /\.js|\.tag$/,
               enforce: 'post',
               exclude: /node_modules/,
               use: [
                  {
                     loader: 'babel-loader',
                     options: {
                        presets: `es2015-riot`
                     }
                  }
               ]
            }
         ]
      },
      resolve: {
         extensions: ['.js', '.tag']
      },
      plugins: [
         new webpack.ProvidePlugin({ riot: 'riot' })
      ]
   }
]
▼bubleを使う場合
モジュールリスト
インストールするモジュールは以下です。
- buble
- riot
- riot-route(これは任意)
- webpack
- riot-tag-loader(riotjs-loader, tag-loaderでも可)
- buble-loader
$ npm install -D buble riot riot-route webpack riotjs-loader buble-loader
webpackの設定
上記のwebpack.config.jsを以下のように変更します。
まずはv1の設定例。
const webpack = require('webpack')

module.exports = [
   {
      // 対象のjsファイル
      entry: './app/app.js',
      output: {
         path: __dirname + '/build/',
         filename: 'bundle.js'
      },
      module: {
         preLoaders: [
            {
               test: /\.tag$/,
               exclude: /node_modules/,
               loader: 'riot-tag-loader'
            }
         ],
         loaders: [
            {
               test: /\.js|\.tag$/,
               exclude: /node_modules/,
-              loader : 'babel-loader',
-              query  : {
-                 presets: ['es2015-riot']
-              }
+              loader : 'buble-loader'
            }
         ]
      },
      resolve: {
         extensions: ['', '.js', '.tag']
      },
      plugins: [
         new webpack.optimize.OccurenceOrderPlugin(),
         new webpack.ProvidePlugin({ riot: 'riot' })
      ]
   }
]
次にv2 (2.3.3)の設定例。
const webpack = require('webpack')

module.exports = [
  {
      entry: './app/app.js',
      output: {
         path: __dirname + '/build/',
         filename: 'bundle.js'
      },
      module: {
         rules: [
            {
               test: /\.tag$/,
               enforce: 'pre',
               exclude: /node_modules/,
               use: [
                  {
                     loader: 'riot-tag-loader',
                     options: {
                        template: 'pug',   // テンプレートを指定(任意)
                        debug: true
                     }
                  }
               ]
            },
            {
               test: /\.js|\.tag$/,
               enforce: 'post',
               exclude: /node_modules/,
-              use: [
-                 {
-                    loader: 'babel-loader',
-                    options: {
-                       presets: `es2015-riot`
-                    }
-                 }
-              ]
+              use: ['buble-loader']
            }
         ]
      },
      resolve: {
         extensions: ['.js', '.tag']
      },
      plugins: [
         new webpack.ProvidePlugin({ riot: 'riot' })
      ]
   }
]
ぶっちゃけますと、Babelではbabel-preset-es2015-riotモジュールをインストールし、presetを指定しないと正しくトランスパイルされないのに、bubleでは上記の設定で動いているのが何故なのかちょっと不思議でならんです。(※私はbubleの方が気に入ってます!)
以降はBabel、buble共通です。
サンプルコード
<!doctype html>
<html>
  <head>
    <meta charset="utf-8">
    <title>sample</title>
  </head>
  <body>
    <app></app>
    <script src="build/bundle.js"></script>
  </body>
</html>
require('../app.tag');

riot.mount('app', { title: 'hogehoge' });
<app>
   <h2>{ opts.title }</h2>
   <button onclick="{ show_count }">click</button>

   <script>
      self = this
      let count = 0

      show_count() {
         count += 1
         alert(`count: ${count}`)
      }
   </script>
</app>
コマンドの設定および、コンパイル実行
コマンドラインからコンパイルを実行できるように、package.jsonにコマンドを追加。
"scripts": {
   "build": "webpack --watch --progress"
}
以下のコマンドからコンパイル実行!
$ npm run build
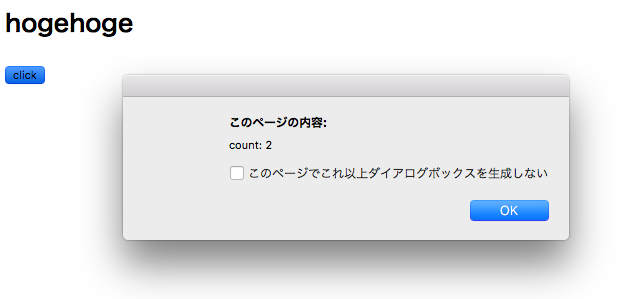
ブラウザでindex.htmlを開き、clickボタンをクリックして以下のようにアラートが表示され、クリックの度にカウントがインクリメントされれば成功です!
注意点
riotjs-loaderですが__バージョン3.0.0だとコンパイルエラー__になりますので、4.0.0にアップグレードして下さい。
皆さんそれぞれにベストな環境があると思いますので、ご参考までに〜。