はじめに
deviseを触ってみました。
時間が空くと忘れてしまいそうなのでまとめておきます。
2016/11/13
Rails5版はこちら
[Rails] deviseの使い方(rails5版)
2020/04/04
Rails6版はこちら
[Rails] deviseの使い方(rails6版)
deviseとは
ユーザー登録して、送られてきたメールのリンクをクリックして本登録して、ログインして、パスワード忘れたら再設定して、何回もログインミスったらアカウントロックして…などといった認証系アプリに必要な機能を簡単に追加できる便利なgemです。
deviseの導入
1. gemのインストール
1. プロジェクトの作成
新しいプロジェクトを作ります。
$ rails new devise
$ cd devise
2. Gemfileの編集とインストール
以下ファイルにdeviseとomniauth-twitterを追加します。
source 'https://rubygems.org'

(省略)...

# Devise
gem 'devise'
gem 'omniauth-twitter'
gemをインストール。
$ bundle install
2. deviseの設定
devise関連ファイルを追加。
すると以下のような英文が表示されます。1から5まで順番に見ていきます。
$ rails g devise:install
      create  config/initializers/devise.rb
      create  config/locales/devise.en.yml
===============================================================================

Some setup you must do manually if you haven't yet:

  1. Ensure you have defined default url options in your environments files. Here
     is an example of default_url_options appropriate for a development environment
     in config/environments/development.rb:

       config.action_mailer.default_url_options = { host: 'localhost', port: 3000 }

     In production, :host should be set to the actual host of your application.

  2. Ensure you have defined root_url to *something* in your config/routes.rb.
     For example:

       root to: "home#index"

  3. Ensure you have flash messages in app/views/layouts/application.html.erb.
     For example:

       <p class="notice"><%= notice %></p>
       <p class="alert"><%= alert %></p>

  4. If you are deploying on Heroku with Rails 3.2 only, you may want to set:

       config.assets.initialize_on_precompile = false

     On config/application.rb forcing your application to not access the DB
     or load models when precompiling your assets.

  5. You can copy Devise views (for customization) to your app by running:

       rails g devise:views

===============================================================================
1. デフォルトURLの指定
英文の例に書いてあったconfig.action_mailer.default_url_options = { host: 'localhost', port: 3000 }を以下のファイルに追加しました。
config.action_mailer.default_url_options = { host: 'localhost:3000' }でもOKです。
Rails.application.configure do
  # Settings specified here will take precedence over those in config/application.rb.

  (省略)...

  # mailer setting
  config.action_mailer.default_url_options = { host: 'localhost', port: 3000 }
end
2. root_urlの指定
1番で指定した*http://localhost:3000/*にアクセスした際に表示されるページを指定します。
現状ページは1つも作っていないため、先に追加します。
Pagesコントローラーと、indexページとshowページを追加してみます。
$ rails g controller Pages index show
routes.rbに以下を指定します。
Rails.application.routes.draw do
  root 'pages#index'
  get 'pages/show'
  (省略)...
end
3. flashメッセージの設定
ログインした時などに上の方に「ログインしました」みたいなメッセージが出るようにします。
以下のファイルの<body>タグのすぐ下に指定されたタグを挿入します。
<!DOCTYPE html>
<html>
 <head>
  <title>DeviseQiita</title>
  <%= stylesheet_link_tag    'application', media: 'all', 'data-turbolinks-track' => true %>
  <%= javascript_include_tag 'application', 'data-turbolinks-track' => true %>
 </head>
 <body>
  <p class="notice"><%= notice %></p>
  <p class="alert"><%= alert %></p>

  <%= yield %>

 </body>
</html>
4. Rails3.2用の設定
Rails3.2でHerokuにデプロイするための設定で、今回はRails4.2.0なので不要です。
5. DeviseのViewを生成
Deviseの導入で追加されるViewは、以下のコマンドを実行しなければデザインを変更できないので、デザインをカスタマイズするためにも実行します。
$ rails g devise:views
すると以下の様なファイルが生成されます。
app/views/devise/shared/_links.html.erb (リンク用パーシャル)
app/views/devise/confirmations/new.html.erb (認証メールの再送信画面)
app/views/devise/passwords/edit.html.erb (パスワード変更画面)
app/views/devise/passwords/new.html.erb (パスワードを忘れた際、メールを送る画面)
app/views/devise/registrations/edit.html.erb (ユーザー情報変更画面)
app/views/devise/registrations/new.html.erb (ユーザー登録画面)
app/views/devise/sessions/new.html.erb (ログイン画面)
app/views/devise/unlocks/new.html.erb (ロック解除メール再送信画面)
app/views/devise/mailer/confirmation_instructions.html.erb (メール用アカウント認証文)
app/views/devise/mailer/reset_password_instructions.html.erb (メール用パスワードリセット文)
app/views/devise/mailer/unlock_instructions.html.erb (メール用ロック解除文)
3. Userモデルの設定
1. Userモデルの作成
以下を実行。
$ rails g devise User
マイグレーションファイルができます。
デフォルトではこんな感じになってます。
class DeviseCreateUsers < ActiveRecord::Migration
  def change
    create_table(:users) do |t|
      ## Database authenticatable
      t.string :email,              null: false, default: ""
      t.string :encrypted_password, null: false, default: ""

      ## Recoverable
      t.string   :reset_password_token
      t.datetime :reset_password_sent_at

      ## Rememberable
      t.datetime :remember_created_at

      ## Trackable
      t.integer  :sign_in_count, default: 0, null: false
      t.datetime :current_sign_in_at
      t.datetime :last_sign_in_at
      t.string   :current_sign_in_ip
      t.string   :last_sign_in_ip

      ## Confirmable
      # t.string   :confirmation_token
      # t.datetime :confirmed_at
      # t.datetime :confirmation_sent_at
      # t.string   :unconfirmed_email # Only if using reconfirmable

      ## Lockable
      # t.integer  :failed_attempts, default: 0, null: false # Only if lock strategy is :failed_attempts
      # t.string   :unlock_token # Only if unlock strategy is :email or :both
      # t.datetime :locked_at


      t.timestamps
    end

    add_index :users, :email,                unique: true
    add_index :users, :reset_password_token, unique: true
    # add_index :users, :confirmation_token,   unique: true
    # add_index :users, :unlock_token,         unique: true
  end
end
Userモデルはこんな感じになっています。
デフォルトではdatabase_authenticatable、registerable、recoverable、rememberable、trackable、validatableが使えるようになっています。
class User < ActiveRecord::Base
  # Include default devise modules. Others available are:
  # :confirmable, :lockable, :timeoutable and :omniauthable
  devise :database_authenticatable, :registerable,
         :recoverable, :rememberable, :trackable, :validatable
end
2. deviseモジュール概要
各モジュールについて以下に紹介します。
| 機能 | 概要 |
|---|---|
| database_authenticatable | サインイン時にユーザーの正当性を検証するためにパスワードを暗号化してDBに登録します。認証方法としてはPOSTリクエストかHTTP Basic認証が使えます。 |
| registerable | 登録処理を通してユーザーをサインアップします。また、ユーザーに自身のアカウントを編集したり削除することを許可します。 |
| recoverable | パスワードをリセットし、それを通知します。 |
| rememberable | 保存されたcookieから、ユーザーを記憶するためのトークンを生成・削除します。 |
| trackable | サインイン回数や、サインイン時間、IPアドレスを記録します。 |
| validatable | Emailやパスワードのバリデーションを提供します。独自に定義したバリデーションを追加することもできます。 |
| confirmable | メールに記載されているURLをクリックして本登録を完了する、といったよくある登録方式を提供します。また、サインイン中にアカウントが認証済みかどうかを検証します。 |
| lockable | 一定回数サインインを失敗するとアカウントをロックします。ロック解除にはメールによる解除か、一定時間経つと解除するといった方法があります。 |
| timeoutable | 一定時間活動していないアカウントのセッションを破棄します。 |
| omniauthable | intridea/omniauthをサポートします。TwitterやFacebookなどの認証を追加したい場合はこれを使用します。 |
3. Userモデルの編集
今回はデフォルトではないものも触ってみたいと思うので全部入れてみます。
Twitter認証を使うのでTwitterを指定しています。
class User < ActiveRecord::Base
  # Include default devise modules. Others available are:
  # :confirmable, :lockable, :timeoutable and :omniauthable
  devise :database_authenticatable, :registerable,
         :recoverable, :rememberable, :trackable, :validatable,
	     :confirmable, :lockable, :timeoutable, :omniauthable, omniauth_providers: [:twitter]
end
4. マイグレーションファイルの編集
上に合わせて使用モジュールに対応する部分のコメントアウトを外します。今回は全部使うので全部外します。
class DeviseCreateUsers < ActiveRecord::Migration
  def change
    create_table(:users) do |t|
      ## Database authenticatable
      t.string :email,              null: false, default: ""
      t.string :encrypted_password, null: false, default: ""

      ## Recoverable
      t.string   :reset_password_token
      t.datetime :reset_password_sent_at

      ## Rememberable
      t.datetime :remember_created_at

      ## Trackable
      t.integer  :sign_in_count, default: 0, null: false
      t.datetime :current_sign_in_at
      t.datetime :last_sign_in_at
      t.string   :current_sign_in_ip
      t.string   :last_sign_in_ip

      ## Confirmable
      t.string   :confirmation_token
      t.datetime :confirmed_at
      t.datetime :confirmation_sent_at
      t.string   :unconfirmed_email # Only if using reconfirmable

      ## Lockable
      t.integer  :failed_attempts, default: 0, null: false # Only if lock strategy is :failed_attempts
      t.string   :unlock_token # Only if unlock strategy is :email or :both
      t.datetime :locked_at


      t.timestamps
    end

    add_index :users, :email,                unique: true
    add_index :users, :reset_password_token, unique: true
    add_index :users, :confirmation_token,   unique: true
    add_index :users, :unlock_token,         unique: true
  end
end
5. omniauth-twitter用カラムの追加
ついでにomniauth-twitterで使うproviderとuid、それとTwitter認証の場合はアカウント名を保存しておきたいのでusernameもUserテーブルに追加します。
$ rails g migration add_columns_to_users provider uid username
以下のようなマイグレーションファイルができます。usernameのデフォルト値だけ設定しました。
class AddColumnsToUsers < ActiveRecord::Migration
  def change
    add_column :users, :provider, :string
    add_column :users, :uid, :string
    add_column :users, :username, :string, default: "anonymous"
  end
end
ここまで出来たら以下を実行します。
$ rake db:migrate
4. viewの編集
以下のファイルを編集して、ページ上部にメニューが出るようにします。
user_signed_in?はdeviseのHelperメソッドです。
ログインしているかしてないかで上部のメニューの表示が変わるようになります。
<!DOCTYPE html>
<html>
<head>
  <title>DeviseQiita</title>
  <%= stylesheet_link_tag    'application', media: 'all', 'data-turbolinks-track' => true %>
  <%= javascript_include_tag 'application', 'data-turbolinks-track' => true %>
  <%= csrf_meta_tags %>
</head>
<body>
	<header>
		<nav>
			<% if user_signed_in? %>
				<strong><%= link_to current_user.username, pages_show_path %></strong>
				<%= link_to 'プロフィール変更', edit_user_registration_path %>
				<%= link_to 'ログアウト', destroy_user_session_path, method: :delete %>
			<% else %>
				<%= link_to 'サインアップ', new_user_registration_path %>
				<%= link_to 'ログイン', new_user_session_path %>
			<% end %>
		</nav>
	</header>

	<p class="notice"><%= notice %></p>
	<p class="alert"><%= alert %></p>

<%= yield %>

</body>
</html>
以下の2ページも修正。
indexの方がトップページ、showの方がログインしているユーザー用のページになる予定です。
<h1>ようこそ</h1>
<p>トップページです。</p>
<h1>こんにちは、<%= current_user.username %>さん</h1>
<p>ユーザー用ページです。</p>
サーバーを立ち上げて、「サインアップ」を押下すると、app/models/user.rbでomniauthableを設定しているのに何の設定もしていないので現状ではエラーになります。
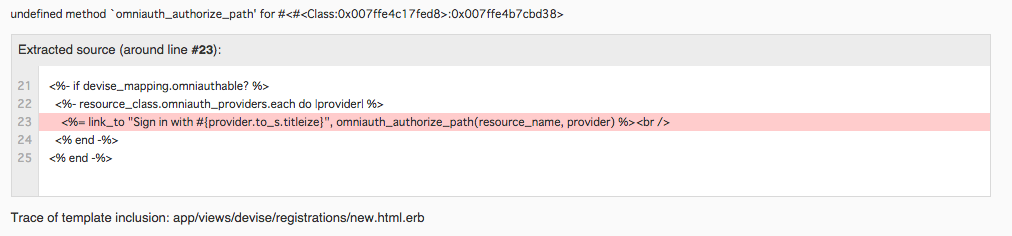
omniauthableを設定していない場合はサインアップページが表示されます。
Twitterで認証する
1. 設定
1. Twitter Developerの登録
Twitter Developerにアクセスし、Create New Appをクリックし(ツイッターにログインしてないとボタンが出ません)、情報を適当の入力にします。
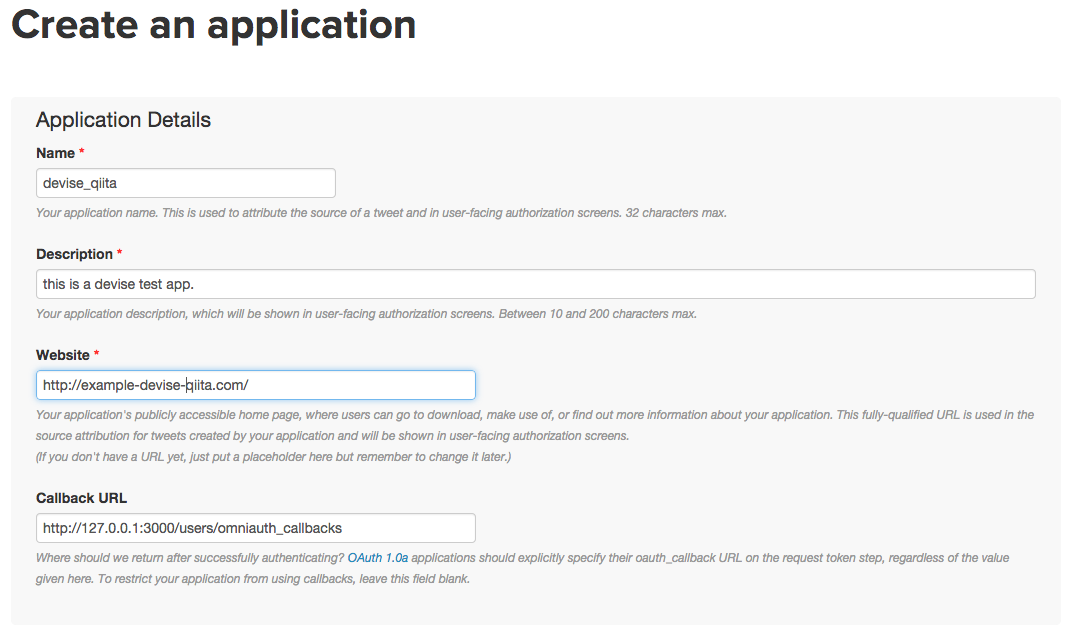
作成したプロジェクトを開き、Settingsタブの下の方のAllow this application to be used to Sign in with Twitterにチェックを入れ、Update Settingsを押下します。
2. 設定ファイルの編集
Keys and Access Tokensタブを開き、**Consumer Key (API Key)とConsumer Secret (API Secret)**を以下の該当箇所にコピーして貼り付けます。
Devise.setup do |config|
  # The secret key used by Devise. Devise uses this key to generate
  (省略)...
  config.omniauth :twitter, "API Key", "API Secret"
end
2. 動作確認
サーバーを立ち上げてサインアップページの下の方にあるSign in with Twitterというリンクをクリックします。
すると以下の様な画面が開くのでログインをクリックします。
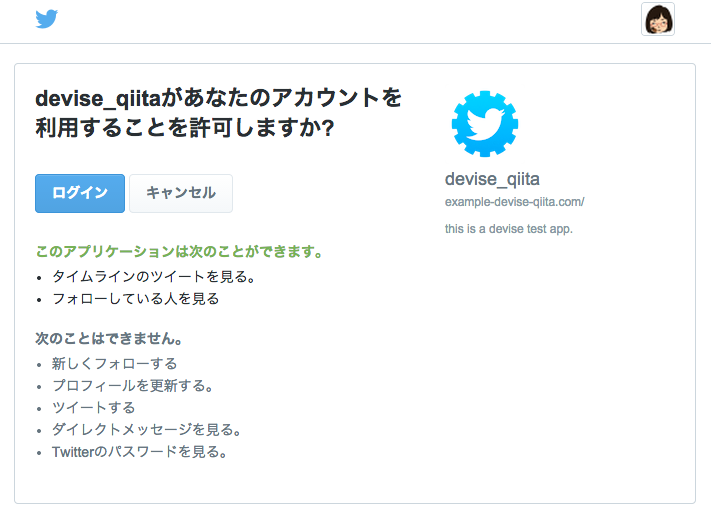
こんな画面が出るはずです。

3. コールバック用コントローラーの作成
Twitter認証後適切に画面が遷移するように以下を実行してコントローラーを作ります。
$ rails g controller omniauth_callbacks
作成したコントローラーの中身を以下のように修正します。
継承するのがDevise::OmniauthCallbacksControllerになっていることに注意です。
omniauth.authという環境変数に認証に関する情報が入っています。
その情報を使ってユーザーが登録されているかを検証し、登録してる場合はログイン、登録されてない場合は登録用ページに遷移します。
class OmniauthCallbacksController < Devise::OmniauthCallbacksController
	def twitter
		@user = User.from_omniauth(request.env["omniauth.auth"].except("extra"))

		if @user.persisted?
			flash.notice = "ログインしました!"
			sign_in_and_redirect @user
		else
			session["devise.user_attributes"] = @user.attributes
			redirect_to new_user_registration_url
		end
	end
end
ちなみにomniauth.authの中にはこんなものが入ってます。(一部の値は適当に変えてあります。)
{"provider"=>"twitter", "uid"=>"0123456789", "info"=>{"nickname"=>"manycicadas", "name"=>"芭蕉", "location"=>"関東", "image"=>"http://pbs.twimg.com/profile_images/483964583371997185/2ZqzhzKV_normal.png", "description"=>"デザイン系出身。プログラミングは初心者レベルを脱しませんがプロジェクトでJavaEEを使っているので勉強中です。でもRubyやRailsの勉強の方に熱が入っています。", "urls"=>{"Website"=>nil, "Twitter"=>"https://twitter.com/manycicadas"}}, "credentials"=>{"token"=>"0123456789-hQywfs78sQ9NnwpSkwiejf2Ij74sut7hKjEsF9", "secret"=>"sijIYUsiJslOhiwkYukshKKJG6skWbhbXCYji3sabla3O1"}}
Userモデルにself.from_omniauthとself.new_with_sessionを作ります。
self.from_omniauthではuidとproviderで検索してあったらそれを、無かったらレコードを作ります。
self.new_with_sessionについては、もしこのメソッドを追加しておかなければ、Twitter認証後サインアップページで登録を行っても、認証情報として取ってきたuidやproviderなどが登録されません。それらが登録されないのでTwitterで認証しても登録されてないユーザーとして毎回サインアップページに飛ばされます。
class User < ActiveRecord::Base
  # Include default devise modules. Others available are:
  # :confirmable, :lockable, :timeoutable and :omniauthable
  devise :database_authenticatable, :registerable,
         :recoverable, :rememberable, :trackable, :validatable,
		 :confirmable, :lockable, :timeoutable, :omniauthable, omniauth_providers: [:twitter]

	def self.from_omniauth(auth)
		where(provider: auth["provider"], uid: auth["uid"]).first_or_create do |user|
			user.provider = auth["provider"]
			user.uid = auth["uid"]
			user.username = auth["info"]["nickname"]
		end
	end

	def self.new_with_session(params, session)
		if session["devise.user_attributes"]
			new(session["devise.user_attributes"], without_protection: true) do |user|
				user.attributes = params
				user.valid?
			end
		else
			super
		end
    end
end
以下ファイルを編集して、コールバック用のコントローラーとしてさっき作ったコントローラーが呼ばれるようにします。これを書かないとdevise側のコントローラーが呼ばれます。
Rails.application.routes.draw do
  devise_for :users, controllers: { :omniauth_callbacks => "omniauth_callbacks" }
  root 'pages#index'
  get 'pages/show'
  (省略)...
end
これでTwitter認証ができるようになりました。
初回、Twitter認証を行うと、サインアップページに飛ばされ、そこでメールアドレスやパスワードを入力して登録するとユーザー情報が登録されます。
今回はcomfirmable機能を入れているので、登録したら確認メッセージを送ったとのメッセージが出て、そのままログインすることはできません。
この機能を入れてなかった場合、登録すると即ログインします。
アカウント登録確認メールを送る
1. comfirmable概要
多くの登録系サイトで採用されている、登録すると仮登録状態になり、届いたメールのリンクをクリックするとログイン可能になるという仕組みを追加できるのがcomfirmableです。
今回はGmailのアカウントを使って実際にメールが届くように設定します。
2. ログを見る
サインアップ画面からEmailやパスワードを入力して登録すると、ログに以下のような内容が出力されます。
現状何も設定してないので、送信元アドレスなどがデフォルトであることが分かります。
Devise::Mailer#confirmation_instructions: processed outbound mail in 715.1ms

Sent mail to aiueo@test.com (31.8ms)
Date: Thu, 19 Feb 2015 23:04:11 +0900
From: please-change-me-at-config-initializers-devise@example.com
Reply-To: please-change-me-at-config-initializers-devise@example.com
To: aiueo@test.com
Message-ID: <54e5ed5b8f624_5c4f3fdbda3b0c7c2258e@xxx-no-MacBook-Air.local.mail>
Subject: Confirmation instructions
Mime-Version: 1.0
Content-Type: text/html;
 charset=UTF-8
Content-Transfer-Encoding: 7bit

<p>Welcome aiueo@test.com!</p>

<p>You can confirm your account email through the link below:</p>

<p><a href="http://localhost:3000/users/confirmation?confirmation_token=kF2Fz-NGD-xh4jd5M4QF">Confirm my account</a></p>
3. メールが実際に届くようにする
1. 設定ファイルの編集
今回はgmailを使うのでメールアドレスにはgmailを設定します。
Devise.setup do |config|
  (省略)...
  # mail setting
  config.mailer_sender = "メールアドレス"
end
gmailの場合はGメールアドレスとGメールパスワードの部分を自分のアカウントのものに変更します。
Rails.application.configure do
  # default url
  config.action_mailer.default_url_options = {  host: 'localhost', port: 3000 }
  # mail setting
  config.action_mailer.raise_delivery_errors = true
  config.action_mailer.delivery_method = :smtp
  config.action_mailer.smtp_settings = {
	:address => "smtp.gmail.com",
	:port => 587,
	:user_name => "Gメールアドレス",
	:password => "Gメールパスワード",
	:authentication => :plain,
	:enable_starttls_auto => true
  }
end
2. Gmailの設定
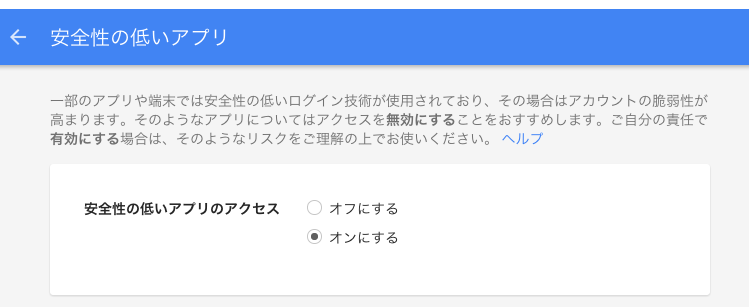
デフォルトでは安全性の低いアプリケーションからGmailへのアクセスが制限されています。
よってその制限を解除する必要があります。
安全性の低いアプリがアカウントにアクセスするのを許可するの安全性の低いアプリを許可というリンクをクリックして、以下のように設定します。
3. 届いたメールを確認
これでアプリ側からサインアップすると、以下の様なメールが届くようになります。Confirm my accountをクリックするログイン画面からログインが可能になります。
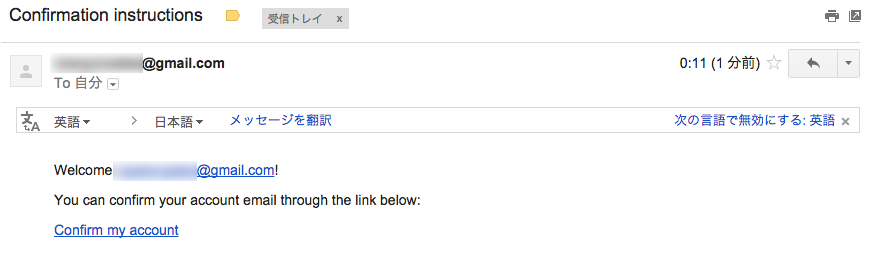
メールで送られる文章は以下のファイルを編集することで可能です。
app/views/devise/confirmation_instructions.html.erb
アカウントをロックする
1. lockable概要
アカウントの認証を一定回数間違うと、アカウントをロックするようにする機能です。
2. 設定
1. 設定ファイルの編集
以下ファイルを修正して、アカウントの認証を5回失敗します。
Devise.setup do |config|
    (省略)...
	# lock sessings
	config.unlock_strategy = :email
	config.maximum_attempts = 4
end
するとアカウントがロックされてこのようなメールが届きます。
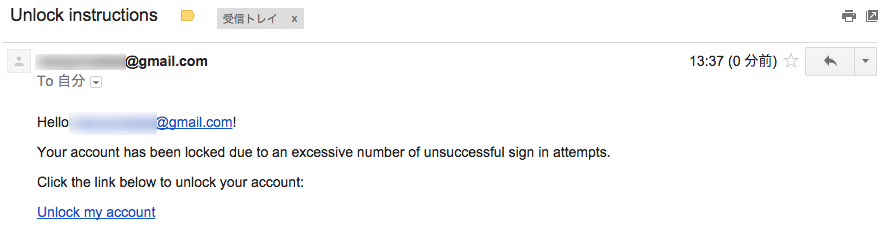
メールの中身はapp/views/devise/mailer/unlock_instructions.rbファイルを修正すれば変わります。
2. 設定値について
- lock_strategy(ロック方法)
| 属性 | 説明 |
|---|---|
| :failed_attempts | 失敗回数によってロック。 |
| :none | ロックしない。 |
- unlock_strategy(ロック解除方法)
| 属性 | 説明 |
|---|---|
| :time | 指定時間でロックを解除する。 |
| メールでロックを解除する。 | |
| :both | :timeと:emailの両方。 |
| :none | 解除させない。 |
:noneを指定した場合、ユーザーのレコードのlocked_atカラムをnilにアップデートしたらロックが解除できます。
- unlock_in(ロック解除時間)
2時間で解除するならconfig.unlock_in = 2.hoursといった具合に指定。
- unlock_keys
アカウントをロックまたは解除するときに使用するキーを定義するみたいです。
config.unlock_keys = [:username]と言った具合に指定するみたいなのですが、何が変わるのかいまいちピンときてません。
- maximum_attempts(失敗可能回数)
アカウントの認証を失敗して良い回数を指定します。
config.maximum_attempts = 4と指定した場合、4回目までは失敗しても大丈夫ですが、5回目を失敗した時点でアカウントがロックされます。
セッションをタイムアウトする
1. timeoutable概要
一定時間活動がない場合にセッションをタイムアウトさせるのがtimeoutableです。
2. 設定
以下ファイルを修正するとタイムアウトまでの時間を指定できます。
以下の場合だと3分後にセッションがタイムアウトします。
デフォルトは30分だそうです。
Devise.setup do |config|
    (省略)...
	# timeout setting
	config.timeout_in = 3.minutes
end
その他の設定
1. ログイン後のページを変更する
ログインすると、デフォルトではroot_urlに飛ばされます。
これをapp/views/pages/show.html.erbになるように修正します。
after_sign_in_path_forメソッドを追加します。ここにログイン後に遷移したいページを指定します。
あとsign_in_requiredも追加します。showページはログインしているユーザーだけにアクセスさせ、ログインしてない場合はログインページに遷移させます。
class ApplicationController < ActionController::Base
  (省略)...
	def after_sign_in_path_for(resource)
		pages_show_path
	end

	private
		def sign_in_required
			redirect_to new_user_session_url unless user_signed_in?
		end
end
Pagesコントローラーにbefore_actionを追加します。
class PagesController < ApplicationController
  before_action :sign_in_required, only: [:show]
  (省略)...
end
これでログイン後showページに遷移するようになります。
最後に
devise便利です。他にも色々触ったのですが、全部まとめきれてないので、忘れないうちにちょっとずつ追加していこうと思います。