AngularJS Advent Calendar 2015 6日目の投稿です。
先日 AngularJS v1.5.0-beta.2 がリリースされましたね。
そこで、v1.5.x で新しく追加された機能3つを、今日から3日連続で紹介してみます。
module.component
AngularJS v1.5 から module.component という機能が実装されました。
これまでは <my-element></my-element> など独自要素を作成する際は、module.directive を利用していました。しかしv1.5 からは module.component を利用することで、より少ないコードで実装することができるようになります。
とりあえず使ってみる
参考サイトを見ながら試しに使ってみます。以下のような構文になります。
angular.module('sampleApp', [])
.controller(...) // 初期値とか設定
}]);

angular.module('sampleApp')
.component('counter', {
  bindings: {
    count: '='
  },
  controller: function () {
    function increment() {
      this.count++;
    }
    function decrement() {
      this.count--;
    }
    this.increment = increment;
    this.decrement = decrement;
  },
  template: [
    '<div class="todo">',
      '<input type="text" ng-model="counter.count">',
      '<button type="button" ng-click="counter.decrement();">-</button>',
      '<button type="button" ng-click="counter.increment();">+</button>',
    '</div>'
  ].join('')
});
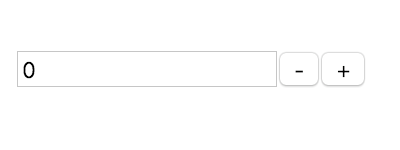 ※出来上がりの図
コードを見てみる
実際にAngularJS v1.5.0-beta.2 での実装をみてみます。
[loader.js ] (https://github.com/angular/angular.js/blob/54e816552f20e198e14f849cdb2379fed8570c1a/src/loader.js#L362-L396)に記述されているとのこと。
component: function(name, options) {
            function factory($injector) {
              function makeInjectable(fn) {
                if (angular.isFunction(fn)) {
                  return function(tElement, tAttrs) {
                    return $injector.invoke(fn, this, {$element: tElement, $attrs: tAttrs});
                  };
                } else {
                  return fn;
                }
              }

              var template = (!options.template && !options.templateUrl ? '' : options.template);
              return {
                controller: options.controller || function() {},
                controllerAs: identifierForController(options.controller) || options.controllerAs || name,
                template: makeInjectable(template),
                templateUrl: makeInjectable(options.templateUrl),
                transclude: options.transclude === undefined ? true : options.transclude,
                scope: options.isolate === false ? true : {},
                bindToController: options.bindings || {},
                restrict: options.restrict || 'E'
              };
            }

            if (options.$canActivate) {
              factory.$canActivate = options.$canActivate;
            }
            if (options.$routeConfig) {
              factory.$routeConfig = options.$routeConfig;
            }
            factory.$inject = ['$injector'];

            return moduleInstance.directive(name, factory);
          },
module.component に渡せる options のプロパティを見ると、module.directive と比べて少ないですね。 controllerAs や transclude 、 scope などの定義が簡素化されてます。
公式ブログ で "module.component は独自要素を作成するための特別な directive である"という通り、処理の最後にmoduleInstance.directive( = module.directive) に設定値を渡しているのがわかります。
module.directive との違い
構文がちょっとだけシンプルに。
// ディレクティブは function を渡す
module.directive('counter', function counter() {
  return { someProperties: xxx };
});
// コンポーネントは object を渡す
module.component('counter', {
  someProperties: xxx;
});
link プロパティが設定できない
module.directive で利用していた link プロパティは渡すことができなさそう。
個人的には link はややこしいと感じていたため、スッキリするので大歓迎。
大抵のUIコンポーネントはこれで作れば問題ないです。逆に、 module.directive でないと実現できないようなものについては、今まで通り module.directive を使うことになりそう(相当複雑なやつじゃないと出番はないかも)です。
bindings プロパティ
module.directive で定義していた scope と bindToController は、この bindings にまとめて定義する形になりました。こちらもちょっとスッキリ。
transclude も、ちょっとシンプルに。
module.directive では、transclude と replace の関係でエラーが出たりしてましたが、これがちょこっとシンプルになります。module.directive では replace が設定できないため false として設定されます。
あとこの transclude が複数箇所に指定できるようになったんですが、それは後日紹介します。
scope プロパティはデフォルトで isolate scope に。
isolate プロパティは true / false で指定することで、module.directive の scope: {} || true 相当になります。module.directive の scope: false 相当の設定はできません。
module.directive がなくせるかというと...
必ずしもそうではなさそう。上記の諸々の制約があるため、複雑なコンポーネントを作る場合はやっぱり directive をつかって作りこむ必要があるのではないかなと。ボク自身そんな複雑なコンポーネントを作ろうと思わないので、かなり限定された状況のみで directive を使うのかなーっていう印象です。
v2.x への準備
参考サイトの最後らへんに、v2.x に migration しやすいよってあります。
最初に紹介したカウンターのサンプルを v2.x で書くと以下のようになるとのこと。
-
controllerをClassに変更 -
selectorを追記 -
templateを v2.x の構文に変更
var Counter = ng
.Component({
  selector: 'counter',
  template: [
    '<div class="todo">',
      '<input type="text" [(ng-model)]="count">',
      '<button type="button" (click)="decrement();">-</button>',
      '<button type="button" (click)="increment();">+</button>',
    '</div>'
  ].join('')
})
.Class({
  constructor: function () {
    this.count = 0;
  },
  increment: function () {
    this.count++;
  },
  decrement: function () {
    this.count--;
  }
});
確かに既存の module.direcive の link でごにょごにょしてるのを、上のような構文に移すのは確かに手間だなーとは思う。なので、できる限り近しい状態にできるようにしておくと少しだけ楽ができるのかもしれない。
まとめ
module.component のおかげで、より単純にUIコンポーネントを作成できるようになりました。
v2.x に向けての準備もできるので率先して使っていくとよさそう。
まちがってたら教えてください。