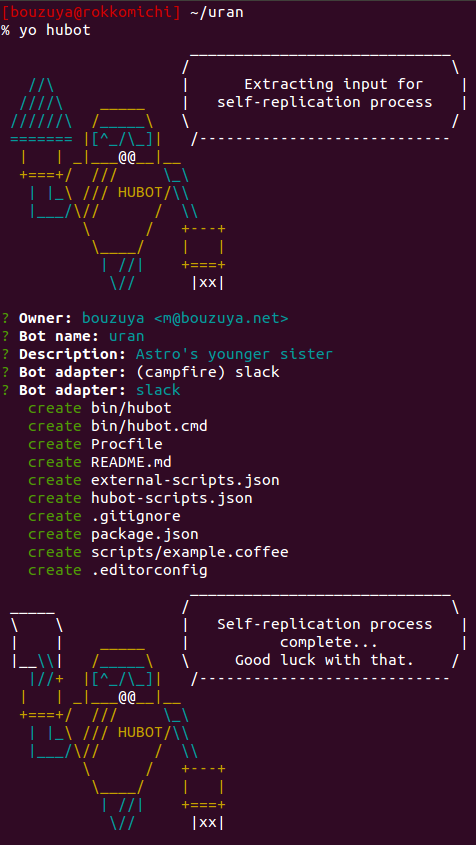
これは Hubot Advent Calendar 2014 の 2 日目の記事です。
前回は Hubot / ChatOps の概要 について紹介しました。今回は Hubot をインストールしてみましょう。
また @bouzuya の Hubot 連載の第 2 回です。目次は、第 1 回の記事にあるので、そちらをどうぞ。
Hubot のインストール
Hubot のインストール方法は 2.9.x とそれ以前とで大きく変わっています。今回は 2.9.3 を対象としているので、新しいインストール方法を紹介していきます。
ちなみにこんな Qiita 記事を読むより、公式のドキュメント ( というか README ) を読むのが確実です。
yo および generator-hubot のインストール
Hubot 2.9.x は Yeoman ジェネレーターでインストールするようになっています。
Hubot にも Yeoman にも Node.js が必要です。事前に Node.js がインストールされているものとします。Node.js をインストールすれば npm も使える状態になっていると思います。npm で Yeoman (yo) と Hubot のための Yeoman ジェネレーター (generator-hubot) をインストールします。
今回は yo が 1.3.3 、generator-hubot が 0.1.4 です。
# 権限が足りない場合は sudo を付けます。
$ npm install -g yo generator-hubot

$ npm list -g generator-hubot yo
/usr/local/lib
├── generator-hubot@0.1.4
└── yo@1.3.3
これで yo, generator-hubot のインストールは完了です。
あなたの BOT の生成
次は Yeoman ジェネレーターを使って あなたの BOT (Hubot) を生成します。
BOT 名のディレクトリをつくり、そこで yo hubot を実行します。あとは質問に答えていけば OK です。
ちなみに今回の例では、 BOT 名にはウラン (uran) を使っています。
$ mkdir uran
$ cd uran

$ yo hubot
shell アダプターで動かす
ひとまず shell アダプターで動かしてみましょう。 shell アダプターが何かは、またそのうち説明します。
$ ./bin/hubot -a shell -n uran
いろいろな警告と一緒にプロンプト (uran>) が出たと思います。uran help と話しかけて、コマンド一覧を見てみましょう。
uran> uran help
uran> uran adapter - Reply with the adapter
uran animate me <query> - The same thing as `image me`, except adds a few parameters to try to return an animated GIF instead.
uran echo <text> - Reply back with <text>
uran help - Displays all of the help commands that uran knows about.
uran help <query> - Displays all help commands that match <query>.
uran image me <query> - The Original. Queries Google Images for <query> and returns a random top result.
uran map me <query> - Returns a map view of the area returned by `query`.
uran mustache me <query> - Searches Google Images for the specified query and mustaches it.
uran mustache me <url> - Adds a mustache to the specified URL.
uran ping - Reply with pong
uran pug bomb N - get N pugs
uran pug me - Receive a pug
uran the rules - Make sure uran still knows the rules.
uran time - Reply with current time
uran translate me <phrase> - Searches for a translation for the <phrase> and then prints that bad boy out.
uran translate me from <source> into <target> <phrase> - Translates <phrase> from <source> into <target>. Both <source> and <target> are optional
uran youtube me <query> - Searches YouTube for the query and returns the video embed link.
ship it - Display a motivation squirrel
uran>
初期でも色々はいっていますね。
ひとまず、Hubot は無事に動いたようです。
Hubot にもっと話しかける
続けて、いろいろ Hubot に話しかけてみましょう。
hubot ping
ping で応答確認できます。PONG を返してくれます。名前を間違えていると無視されます。
uran> uran ping
uran> PONG
hubot echo
echo で任意のメッセージを返させることができます。
uran> uran: echo ワイがウランや!
uran> ワイがウランや!
hubot time
time で現在時刻を返してくれます。
uran> @uran time
uran> Server time is: Tue Dec 02 2014 21:28:05 GMT+0900 (JST)
Hubot に話しかけるパターン
Hubot に話しかけるのはいくつかのパターンが許容されています。
具体例を挙げると、先頭が名前からはじまる場合や、名前の前に @ がついている場合、後ろに : がついている場合などです。
正規表現で言うと、だいたい "^\\s*[@]?#{name}[:,]?\\s*" こんな感じです。
Hubot を Heroku にデプロイする
と言いたいところなのですが、もう分量が増えてきたので、今日はこのへんでおしまい。
Procfile もきちんと配置されているので、git init, git add -A, git commit, heroku create して git push heroku master とかやれば、動きそうなものなのですが (Heroku アカウント・ heroku コマンドインストール前提) 、 Heroku にデプロイするとなると shell アダプター以外の、実際のチャットに対応するためのアダプターやその設定が必要です。簡単なものとそうでないものとがあります。
ひとまず、人気の高そうな Slack あたりで、明日、説明したいと思います。
最後に
これは対象読者外へのメッセージなのですが、hubot の実行コマンドってアレどう思いますか? ./node_modules/.bin/hubot に配置されるアレです。
あの実行コマンドの #!/usr/bin/env coffee ってぼくはないと思うんですけど、どうなんですかね?あれのせいで実行するために coffee-script を PATH に含めることが前提になりますし、そのために今回も ./bin/hubot とかやってますよね (内部で PATH 設定してます) 。イケてないなあ、って思うんですけど……。
では、今日はこのへんで。
