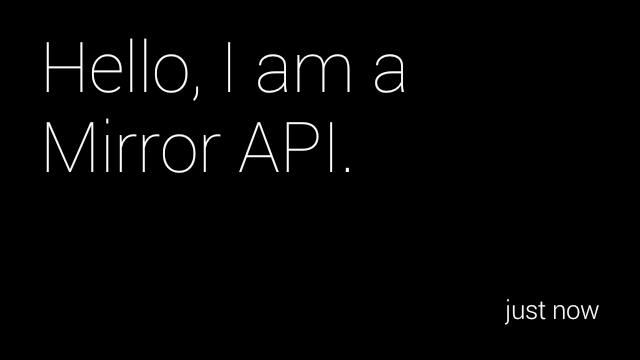
Node.js+expressを使って、Google Mirror API経由でgoogle glassのタイムラインにカードをインサートするサンプルをつくりました。
Githubのblackaplysia/mirrorにソースがあります。
Google Mirror APIはGoogle OAUTH認証によって対象を同定します。そこで、サンプルでは、最初にpassportモジュールを使ってOAUTH認証を行います。
OAUTH認証の準備
まず、Google OAUTH認証を利用するための準備としてCliend IDの作成を行います。
- Google Developers Consoleで[CREATE PROJECT]より新規のprojectを作成(名前は任意)
- [APIs & auth]→[APIs]でGoogle Mirror APIのstatusをONにする
- [APIs & auth]→[Credentials]で[CREATE NEW CLIENT ID]より新規のClient IDを作成する
Client IDは、以下のパラメータで設定します。
| パラメータ | 設定する内容 |
|---|---|
| Application type | Web application |
| Authorized JavaScript origins | 認証をリクエストするサーバURL |
| Authorized redirect URI | Googleが認証後に遷移するリダイレクト先URI |
これらのうち、Authorized redirect URIについては、サンプルをそのまま使う場合にはパスが/auth/google/callbackとなるように注意してください。理由は、単にサンプルではこのURIで受けているからです。
コードへのClient IDの埋め込み
Cliend IDは、passport (passport-google-oauth)のstrategyに設定します。
passport.use(new GoogleStrategy({
    clientID: conf.google.clientID,
    clientSecret: conf.google.clientSecret,
    callbackURL: conf.google.callbackURL
  },
  function(accessToken, refreshToken, profile, done) {
    token = accessToken;
    process.nextTick(function() {
      return done(null, profile);
    });
  }
));
サンプルでは、node-configの機能を使って、config/default.jsonからconf.google.*という値を読み込んで設定しています。
{
    "google":{
        "clientID":"YOUR_GOOGLE_OAUTH_CLIEND_ID",
        "clientSecret":"YOUR_GOOGLE_OAUTH_CLIENT_SECRET",
        "callbackURL":"YOUR_GOOGLE_OAUTH_CALLBACK_URL"
    }
}
実際にこれらに設定する値は、Google Developer's Consoleに設定したClient IDの情報です。具体的には、Client ID、Client secret、Redirect URIsに表示されている内容をそれぞれ転記します。
OAUTH認証ページへの遷移
それでは、Google OAUTHにリクエストを投げて、ユーザ認証とGoogle Mirror APIの認可を受けたアクセストークンを取得します。
Google Mirror APIでは2個のスコープが公開されています。利用するAPIによって必要となるスコープは違いますので、個別にリファレンスマニュアルで確認する必要があります。
これをpassport.authenticate()に渡します。このコードを実行するとGoogleによる認可確認ページに遷移します。
app.get('/auth/google',
  passport.authenticate('google', {
    scope: [
      'https://www.googleapis.com/auth/userinfo.profile',
      'https://www.googleapis.com/auth/glass.timeline' ],
    successReturnToOrRedirect: '/',
    failureRedirect: '/login'}));
コールバック
Googleによる認可が完了すると、googleからcallbackURLに遷移します。ここではとくに何もする必要がありませんので、そのままトップページに遷移しています。
カードのインサート
サンプルでは、google認証が完了するとトップページに/messageへのリンクが表れます。これをクリックすると、ユーザに対応するglassのタイムラインにカードをインサートします。
Google glassのタイムラインにカードをインサートするには、以下のようにjson形式のデータをAPIに投げます。
  var data = '{ "text": "Hello, I am a Mirror API.", "notification": {"level": "DEFAULT"}}';
  var options = {
    host: 'www.googleapis.com',
    path: '/mirror/v1/timeline',
    method: 'POST',
    headers: {
      'Content-Type': 'application/json',
      'Content-Length': data.length,
      'Authorization': 'Bearer ' + "Google OAuth認証で取得したアクセストークン"
    }
  }
  var post_req = https.request(options, function(res) {
    res.setEncoding('utf8');
    res.on('data', function(chunk) {
      console.log('Response: ' + chunk);
    });
  });
  post_req.write(data);
  post_req.end();
このAPI呼び出しが成功すると、200や304のようなコードで以下のようなレスポンスが返ってきます。
{
 "kind": "mirror#timelineItem",
 "id": "XXXXXXXX",
 "selfLink": "https://www.googleapis.com/mirror/v1/timeline/XXXXXXXX",
 "created": "2014-03-28T00:21:43.615Z",
 "updated": "2014-03-28T00:21:43.615Z",
 "etag": "1395966103615",
 "text": "Hello, I am a Mirror API.",
 "notification": {
  "level": "DEFAULT"
 }
}
参考
- Build with the GDK and Mirror API. Mirror API仕様。
- passport-google-oauth. Passportによるgoogle oauth認証を実現。
- node.jsのいろいろなモジュール13 – node-configで設定ファイルを切り替えたりする. node-configの使い方。
