ずっと使っていたStartSSLが使えなくなってしまうので、Let's Encryptを使いSSLを再設定したので手順をメモしておきます。
環境:
- さくらのレンサバ
- macOS Sierra
手順:
証明書の発行
基本的にはcertbotに書かれている手順で行います。
-
brewでcertbotをインストールします
brew install certbot -
以下のコマンドでcertbotをマニュアルモードで証明書を発行します
(/etc/letsencrypt以下に保存するためsudo権限が必要です)sudo certbot certonly --manual -d hogehoge.com
Saving debug log to /var/log/letsencrypt/letsencrypt.log
Obtaining a new certificate
Performing the following challenges:
http-01 challenge for hogehoge.com

------------------------------------------
NOTE: The IP of this machine will be publicly logged as having requested this
certificate. If you're running certbot in manual mode on a machine that is not
your server, please ensure you're okay with that.

Are you OK with your IP being logged?
------------------------------------------
(Y)es/(N)o: y
- IPを記録されるけど良いか?と確認されます。何も悪い事を企んでいないので、迷わずYを押します
------------------------------------------
Make sure your web server displays the following content at
http://hogehoge.com/.well-known/acme-challenge/SUrappQZZZZZZZqfmcQzY339-MWX4w before continuing:

SUrappQZZZZZZZqfmcQzY339-MWX4w.XXXXYOhf4ayj-_Uu_S-VVVV

If you don't have HTTP server configured, you can run the following
command on the target server (as root):

....
------------------------------------------
Press Enter to Continue
-
FTP等でサーバーにアクセスし
/.well-known/acme-challenge/というディレクトリーを作成します。 -
上記のサンプルの場合は
SUrappQZZZZZZZqfmcQzY339-MWX4w.XXXXYOhf4ayj-_Uu_S-VVVVと書いたファイルをSUrappQZZZZZZZqfmcQzY339-MWX4wという名称で保存します。ユーザー認証等がある場合は一時的に外しておきます。 -
上記の場合だとURL「 http://hogehoge.com/.well-known/acme-challenge/SUrappQZZZZZZZqfmcQzY339-MWX4w 」にアクセスし、レスポンスが返ってくるのを確認します。
-
リターンを押すと次に進みます。
※該当のURLにアクセスできない場合は証明書が発行されません。パス名やファイルの内容を確認してください。テキストの文字列とファイル名は異なりますので注意が必要です(そのままコピペして少し悩みました)
しばらく待つと証明書が発行されます。
Waiting for verification...
Cleaning up challenges
Generating key (2048 bits): /etc/letsencrypt/keys/0000_key-certbot.pem
Creating CSR: /etc/letsencrypt/csr/0000_csr-certbot.pem

IMPORTANT NOTES:
- Congratulations! Your certificate and chain have been saved at
  /etc/letsencrypt/live/hogehoge.com/fullchain.pem. Your
  cert will expire on 2017-05-10. To obtain a new or tweaked version
  of this certificate in the future, simply run certbot again. To
  non-interactively renew *all* of your certificates, run "certbot
  renew"
- If you like Certbot, please consider supporting our work by:

  Donating to ISRG / Let's Encrypt:   https://letsencrypt.org/donate
  Donating to EFF:                    https://eff.org/donate-le
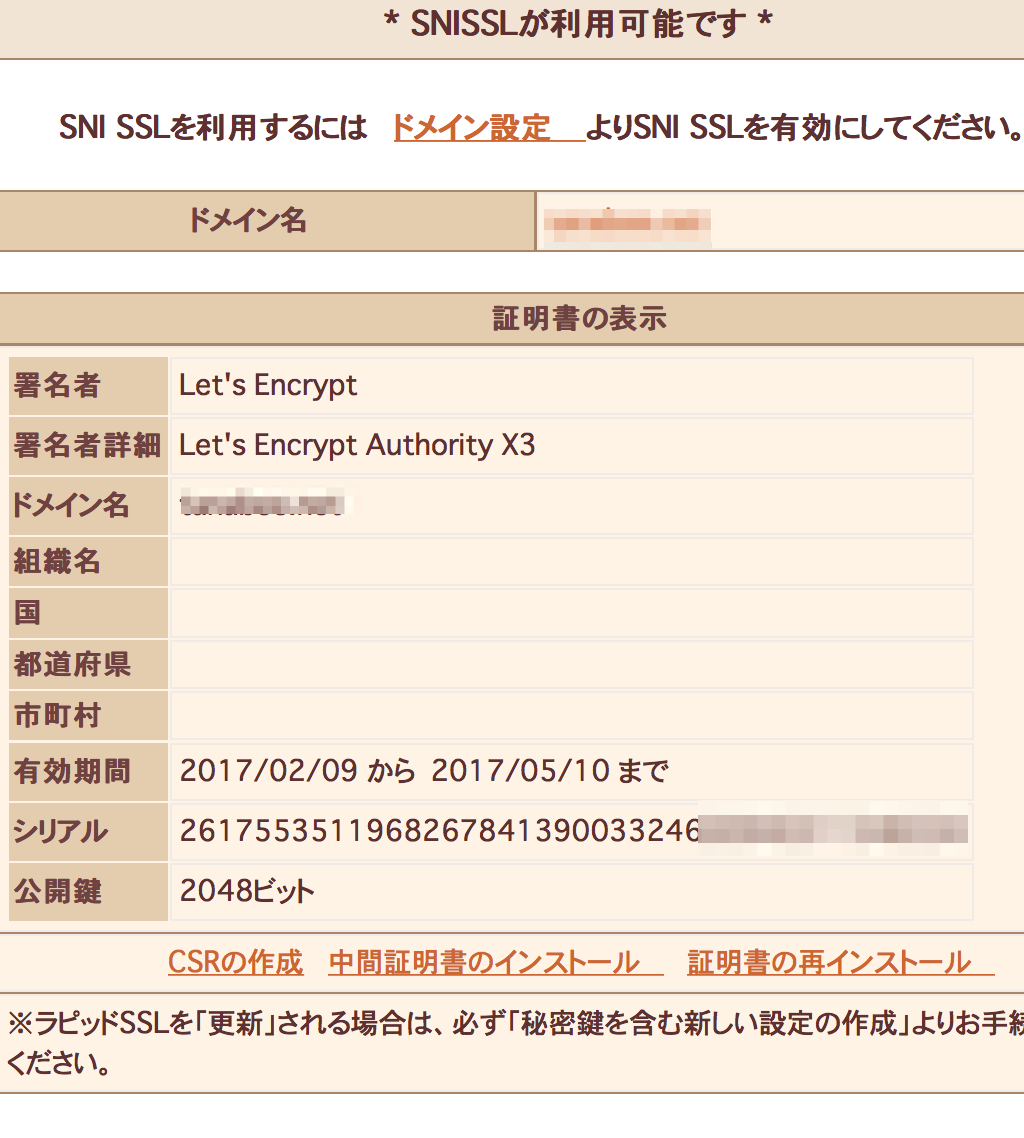
/etc/letsencrypt/live/[ドメイン名]/にファイルが作られます。
証明書の設定
さくらのサーバーコントロールパネルを開きます。
- 左メニューから「ドメイン設定」をクリックし、ドメイン一覧より対象のドメインのSSLの証明書の項目から「登録」をクリックします。
-
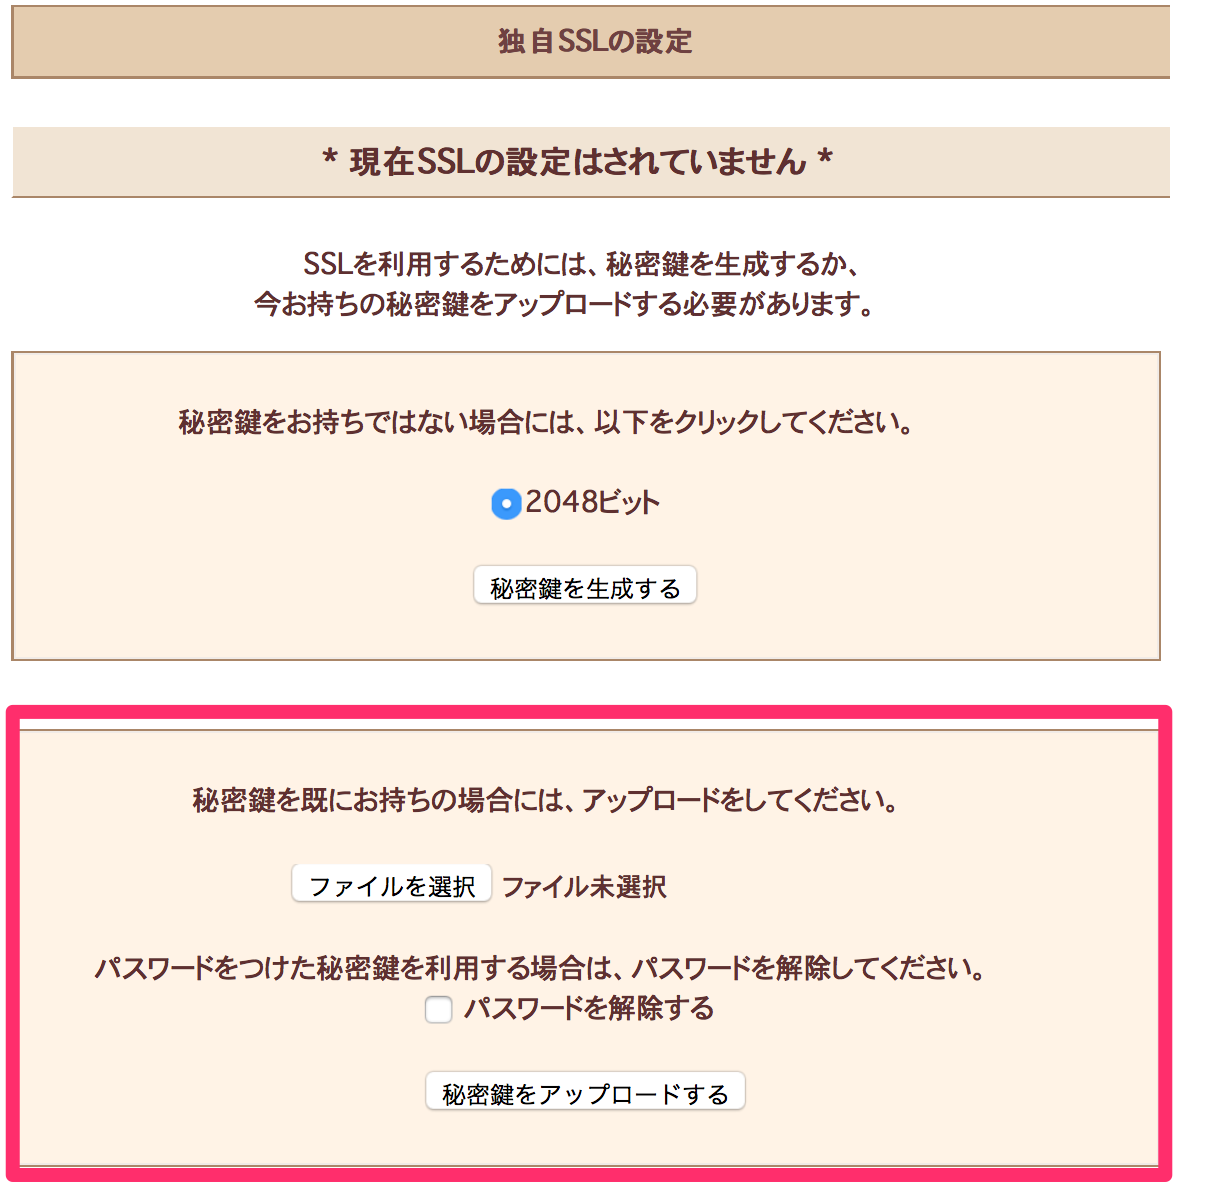
デスクトップにファイルをコピーし、「独自SSLの設定」からprivkey.pemをファイル選択し、「秘密鍵をアップロード」します。下記のコマンドでデスクトップにファイルをコピーします。
sudo cp /etc/letsencrypt/live/[ドメイン名]/privkey.pem ~/Desktop/ -
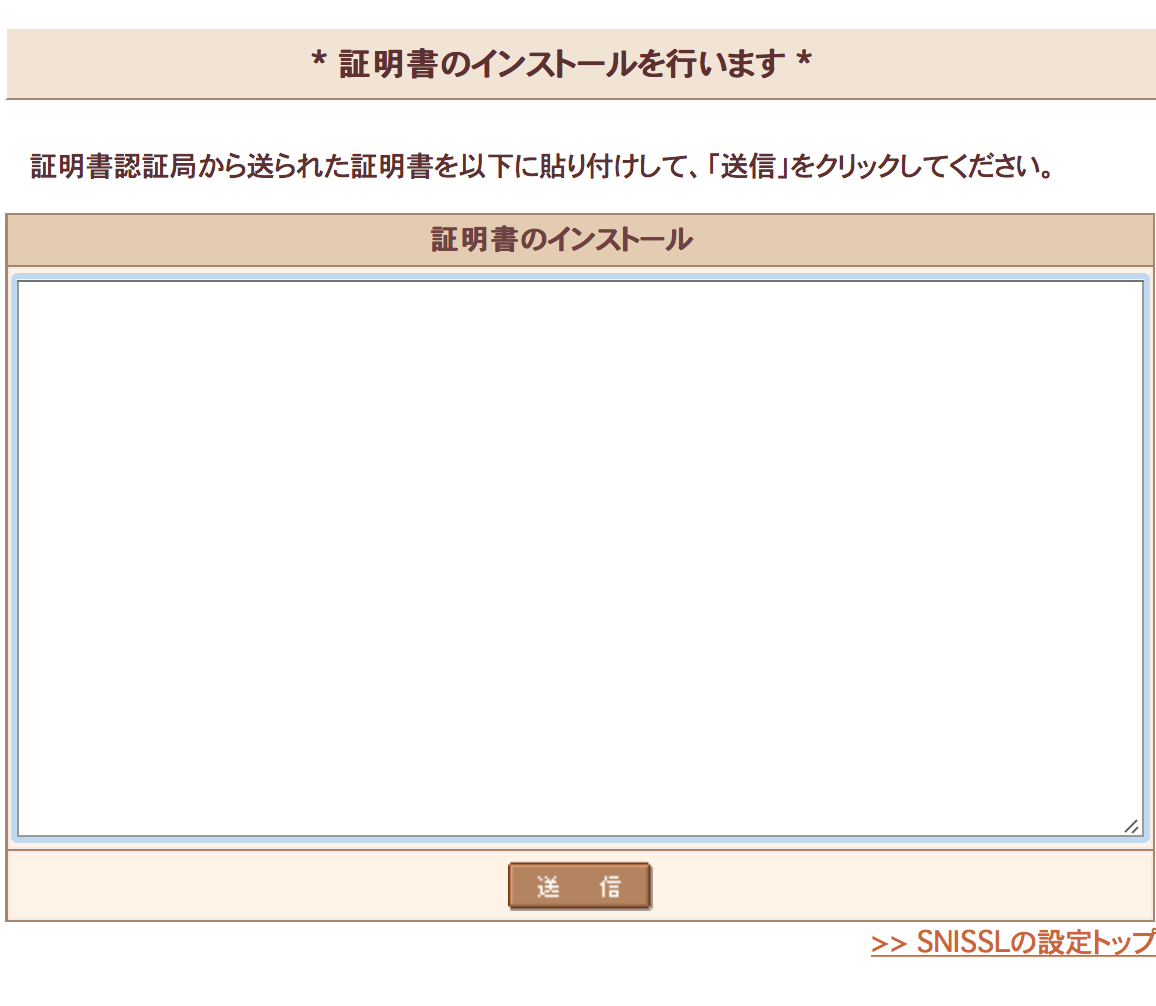
「証明書のインストール」ではfullchain.pemの内容をコピペして貼り付けます。下記のコマンドでクリップボードにコピーできますので、⌘+Vでペーストします。
sudo cat /etc/letsencrypt/live/[ドメイン名]/fullchain.pem | pbcopy
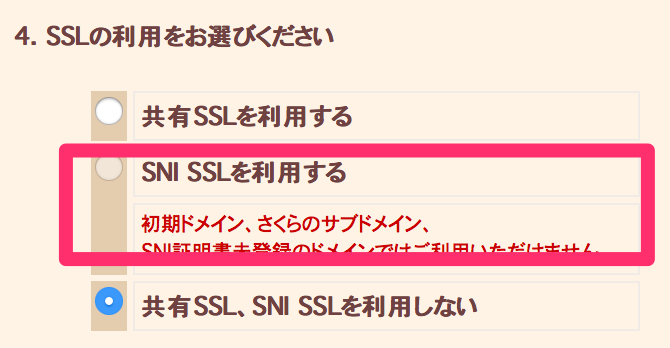
- ドメイン一覧より「変更」を押し、「4.SSLの利用をお選びください」で「SNI SSLを利用する」を選択します。
以上で完了です。
メモ
3ヶ月に1回更新の必要はありますが、思ったより簡単に設定することができました。


