詳しい説明は後で頑張ってまとめていきたいと思います。
とりあえず、流れだけざっと覚え書き。
各種バージョン
JDK:1.8
Eclipse:Mars
Maven:4.3
1. Mavenプロジェクトの作成
Eclipseを開いた状態から始めます。
新規 > Maven > Mavenプロジェクト > 次へ
新規Mavenプロジェクト画面が表示されるので「シンプルなプロジェクト作成(アーキタイプ選択スキップ)」にチェックを入れ次へ
グループID:ルートパッケージ名
アーティファクトID:プロジェクト名
を入力し完了
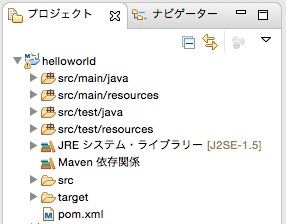
helloworldプロジェクトが作成されたことを確認する
2. Springの依存関係を追加する
helloworld/pom.xml のソースを開く
<project xmlns="http://maven.apache.org/POM/4.0.0"
		 xmlns:xsi="http://www.w3.org/2001/XMLSchema-instance"
		 xsi:schemaLocation="http://maven.apache.org/POM/4.0.0
		 					 http://maven.apache.org/xsd/maven-4.0.0.xsd">
  <modelVersion>4.0.0</modelVersion>
  <groupId>sample</groupId>
  <artifactId>helloworld</artifactId>
  <version>0.0.1-SNAPSHOT</version>

<!-- ▽ add ▽ -->
  <dependencies>
    <dependency>
      <groupId>org.springframework</groupId>
      <artifactId>spring-webmvc</artifactId>
      <version>4.2.3.RELEASE</version>
     </dependency>
  </dependencies>
<!-- △ add △ -->
</project>
pom.xmlはプロジェクト情報ファイルです。
dependencies属性の部分を追加します。
今回はSpringの「Spring-webmvc」のライブラリを使いました。
3. プロジェクト・ファセットの設定
動的webプロジェクトなので「Dynamic web Module」を追加します。
プロジェクト > 右クリック > プロパティ > Progect Facets(プロジェクト・ファセット) > ファセット・フォーム変換...
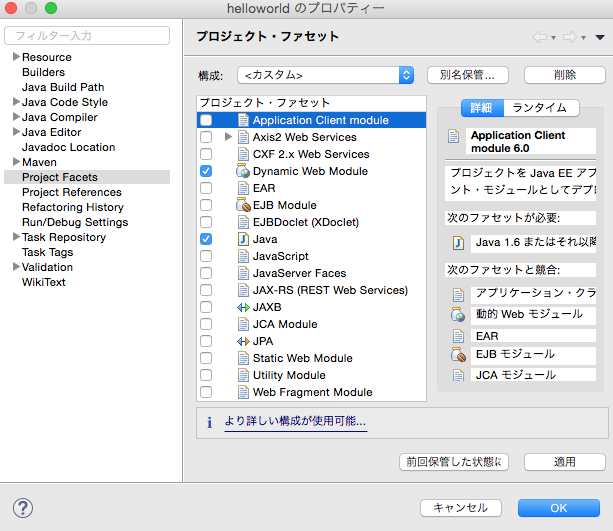
Dynamic web Module(動的 Web モジュール) をチェックする。
「より詳しい構成が使用可能...」を選択し、コンテンツディレクトリーを「src/main/webapp」と入力ます。
「web.xmlデプロイメント記述子の生成」のチェックボックスにチェックを入れ、OKを押します。
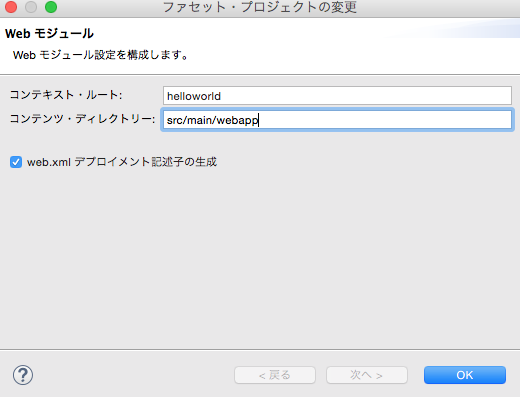
元のウィンドウに戻り適用 > OKで画面が自動で閉じます。
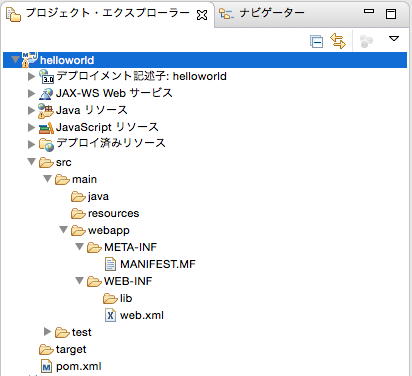
4. DispatcherServletの設定
helloworld/src/main/webapp/WEB-INF/web.xmlを開きます。
Servletのマッピングの設定を追記します。
<?xml version="1.0" encoding="UTF-8"?>
<web-app
  xmlns="http://java.sun.com/xml/ns/javaee"
  xmlns:xsi="http://www.w3.org/2001/XMLSchema-instance"
  xsi:schemaLocation="http://java.sun.com/xml/ns/javaee http://java.sun.com/xml/ns/javaee/web-app_2_5.xsd"
  version="2.5">

	<display-name>mvcSample</display-name>

    <welcome-file-list>
    <welcome-file>index.html</welcome-file>
    <welcome-file>index.htm</welcome-file>
    <welcome-file>index.jsp</welcome-file>
    <welcome-file>default.html</welcome-file>
    <welcome-file>default.htm</welcome-file>
    <welcome-file>default.jsp</welcome-file>
    </welcome-file-list>

<!-- ▽ add ▽ -->
	<servlet>
    	<servlet-name>spring-dispatcher</servlet-name>
    	<servlet-class>org.springframework.web.servlet.DispatcherServlet</servlet-class>
    	<load-on-startup>1</load-on-startup>
	</servlet>
	<servlet-mapping>
    	<servlet-name>spring-dispatcher</servlet-name>
    	<url-pattern>/</url-pattern>
	</servlet-mapping>
<!-- △ add △ -->
</web-app>
5. Springの設定ファイル作成
web.xmlファイルと同階層に「spring-dispatcher-servlet.xml」を作成します。
(/helloworld/src/main/webapp/WEB-INF/spring-dispatcher-servlet.xml)
以下の内容を記述します。
<?xml version="1.0" encoding="UTF-8"?>
<beans xmlns="http://www.springframework.org/schema/beans"
  xmlns:xsi="http://www.w3.org/2001/XMLSchema-instance"
  xmlns:context="http://www.springframework.org/schema/context"
  xmlns:p="http://www.springframework.org/schema/p"
  xmlns:mvc="http://www.springframework.org/schema/mvc"
  xsi:schemaLocation="
  	http://www.springframework.org/schema/beans
  	http://www.springframework.org/schema/beans/spring-beans-4.0.xsd
  	http://www.springframework.org/schema/context
  	http://www.springframework.org/schema/context/spring-context-4.0.xsd
  	http://www.springframework.org/schema/mvc
  	http://www.springframework.org/schema/mvc/spring-mvc-4.0.xsd">

	<context:component-scan base-package="com.controller" />

	<bean id="viewResolver" class="org.springframework.web.servlet.view.InternalResourceViewResolver" >
		<property name="prefix">
			<value>/WEB-INF/views/</value>
		</property>
		<property name="suffix">
			<value>.jsp</value>
		</property>
	</bean>

	<mvc:resources mapping="/resources/**" location="/resources/" />
	<mvc:annotation-driven />
</beans>
6. Controllerの設定
コントローラのファイルを作成します。
「/helloworld/src/main/java/com/controller」となるように「com」「controller」のフォルダを作成します。
次にcontrollerフォルダ直下に「SampleController.java」ファイルを作成します。
(/helloworld/src/main/java/com/controller/SampleController.java)
package com.controller;
import static org.springframework.web.bind.annotation.RequestMethod.GET;

import org.springframework.stereotype.Controller;
import org.springframework.web.bind.annotation.RequestMapping;

@Controller
public class SampleController {

	@RequestMapping(value = "/", method = GET)
	public String show() {
		// jspのファイル名
		return "test";
	}
}
7. jspファイルの作成
WEB-INF下にjspファイルを作成します。
今回はviewsフォルダを作成しその下に「test.jsp」を作成しました。
(/helloworld/src/main/webapp/WEB-INF/views/test.jsp)
<%@ page contentType="text/html; charset=UTF-8" pageEncoding="UTF-8"%>
<html>
<head>
<title>Hello Spring Framework</title>
</head>
<body>Hello Spring Framework</body>
</html>
8. その他設定
クラスパスの設定
jspファイルにエラー以下のエラーがでたら。
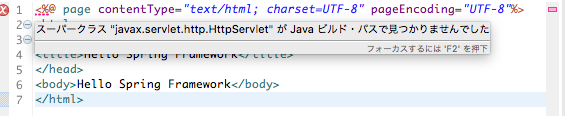
この行で見つかった複数の注釈:
	- スーパークラス "javax.servlet.http.HttpServlet" が Java ビルド・パスで見つかりませんでした
	- スーパークラス "javax.servlet.http.HttpServlet" が Java ビルド・パスで見つかりませんでした
プロジェクト > 右クリック > プロパティ > Javaのビルド・パス > フライブラリ > 外部JARの追加
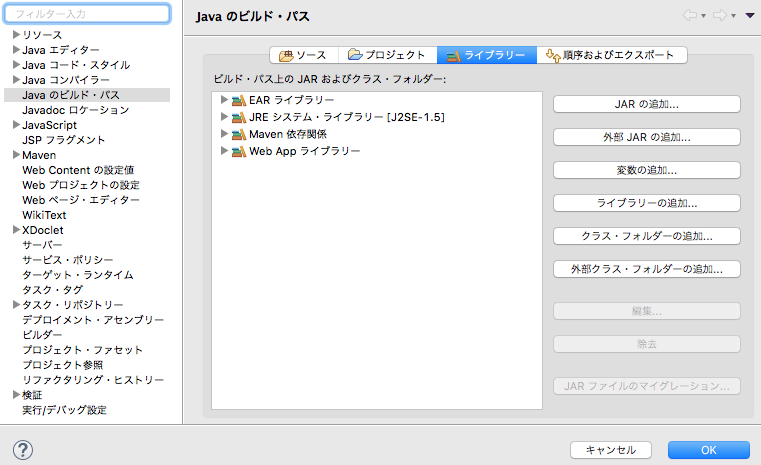
Tomcatを配置したディレクトリを開き、lib/servlet-api.jarを選択し「開く」を押す。
ライブラリに選択したjarファイルが追加されたことを確認し
適用 > OK でエラーが消えたことを確認する。
デプロイメント・アセンブリの設定
このまま実行して以下のエラーがでたら。
java.lang.ClassNotFoundException:org.springframework.web.servlet.DispatcherServlet
```
プロジェクト > 右クリック > プロパティ > デプロイメント・アセンブリー > 追加
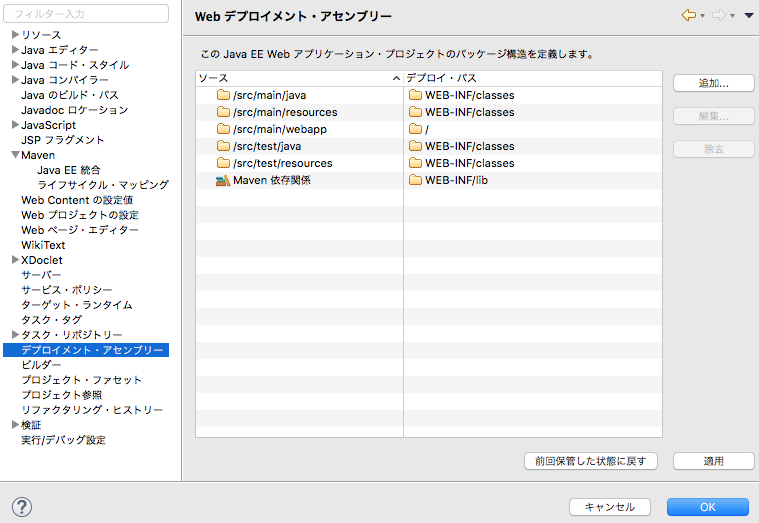
Javaビルド・パス・エントリー > Mavenの依存関係 > 完了 > 適用 > OK
# 9. 実行
プロジェクト > 右クリック > 実行 > サーバーで実行
http://localhost:8080/helloworld/
をブラウザで確認する。
# 参考資料
http://www.mkyong.com/spring3/spring-3-mvc-hello-world-example/