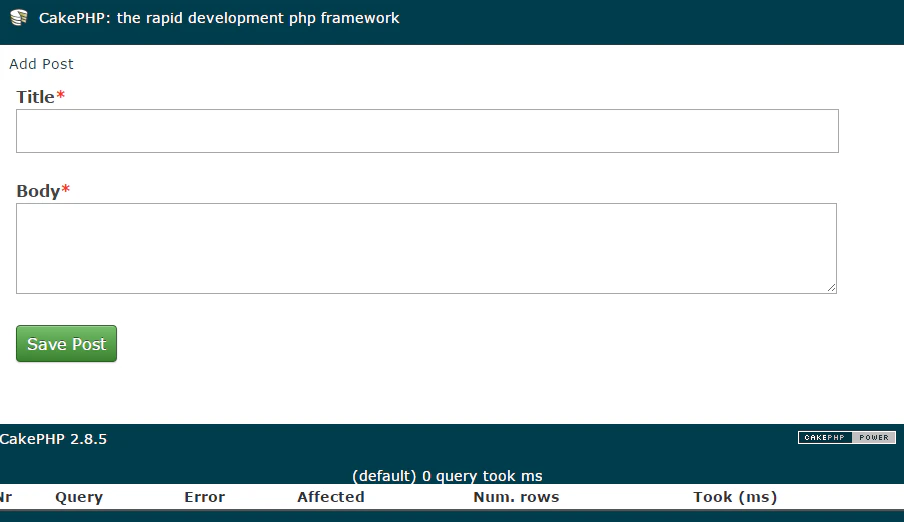
完成イメージ
1. コントローラにアクションを追加する
/app/Controller/PostsController.php
<?php
class PostsController extends AppController {

    public $helpers = array('Html', 'Form');

    public function index() {
        $this->set('posts', $this->Post->find('all'));
    }

    public function view($id = null) {
        if (!$id) {
            throw new NotFoundException(__('Invalid post'));
        }

        $post = $this->Post->findById($id);
        if (!$post) {
            throw new NotFoundException(__('Invalid post'));
        }
        $this->set('post', $post);
    }

    // 追加 Start ------------------------------------------------
    public function add() {
        if ($this->request->is('post')) {
            $this->Post->create();
            if ($this->Post->save($this->request->data)) {
                $this->Flash->success(__('Your post has been saved.'));
                return $this->redirect(array('action' => 'index'));
            }
            $this->Flash->error(__('Unable to add your post.'));
        }
    }
    // 追加 END --------------------------------------------------
}
2. モデルにバリデーションを追加する
/app/Model/Post.php
<?php
class Post extends AppModel {
    public $validate = array(
        'title' => array(
            'rule' => 'notBlank'
        ),
        'body' => array(
            'rule' => 'notBlank'
        )
    );
}
3. ビューを作成する
/app/View/Posts/add.ctp
<!-- File: /app/View/Posts/add.ctp -->

<h1>Add Post</h1>
<?php
echo $this->Form->create('Post');
echo $this->Form->input('title');
echo $this->Form->input('body', array('rows' => '3'));
echo $this->Form->end('Save Post');
?>
4. 一覧表示画面に、「登録」リンクを追加する
/app/View/Posts/index.ctp
<!-- File: /app/View/Posts/index.ctp -->

<h1>Blog posts</h1>

<!-- 登録用リンク追加 Start -->
<?php echo $this->Html->link(
    'Add Post',
    array('controller' => 'posts', 'action' => 'add')
); ?>
<!-- 登録用リンク追加 END -->

<table>
    <tr>
        <th>Id</th>
        <th>Title</th>
        <th>Created</th>
    </tr>

    <!-- ここから、$posts配列をループして、投稿記事の情報を表示 -->

    <?php foreach ($posts as $post): ?>
    <tr>
        <td><?php echo $post['Post']['id']; ?></td>
        <td>
            <?php echo $this->Html->link($post['Post']['title'], array('controller' => 'posts', 'action' => 'view', $post['Post']['id'])); ?>
        </td>
        <td><?php echo $post['Post']['created']; ?></td>
    </tr>
    <?php endforeach; ?>
    <?php unset($post); ?>
</table>
5. 確認