ローカルのデータベースをAWSにインポートしたい!
ローカルで作ったアプリをAWSのEC2インスタンス内へデプロイ。その際、ローカルで使っていたデータベースとデプロイ時のデータベースの内容を同じにしたい。つまり、○○_developmentの内容を○○_productionに反映させたい。
あ、ちなみにアプリはRuby on Rails使用で、デプロイはgem Capistranoで自動デプロイしてます。
EC2インスタンスにMySQLをインストールする
MySQLのインストールと起動
以下のコマンドでEC2インスタンスへMySQLをインストール。Amazon Linuxを利用している場合、yumというコマンドでMySQLをインストールできる。
[ec2-user@ip-xxx-xx-xx-xxx ~]$ sudo yum install mysql56-server mysql56-devel mysql56
これでMySQLのバージョン5.6がインストールされます。
MySQLを起動するためにserviceコマンドを叩く。これは、Amazon LinuxやCentOSに含まれているもので、インストールしたソフトウェアの起動を一括して行えるツール。
[ec2-user@ip-xxx-xx-xx-xxx ~]$ sudo service mysqld start
mysql ではなく mysqld であることに注意。「d」はLinuxの用語で「サーバ」を意味する「デーモン(daemon)」の頭文字。
起動確認のために以下のコマンド。
[ec2-user@ip-xxx-xx-xx-xxx ~]$ sudo service mysqld status
mysqld (pid  15692) is running...
runningと表示されれば、MySQLの起動は成功している。
パスワードの設定
yum でインストールしたMySQLには、デフォルトで root というユーザーでアクセス出来るようになっているが、パスワードが設定されていない。
以下のコマンドでパスワードを設定
[ec2-user@ip-xxx-xx-xx-xxx ~]$ sudo /usr/libexec/mysql56/mysqladmin -u root password '<設定したいパスワード>'
MySQLへの接続確認
先ほど入力したパスワードが使えるか、以下のコマンドで確認。
[ec2-user@ip-xxx-xx-xx-xxx ~]$ mysql -u root -p
Enter password: とパスワードを入力するように表示されるので、先ほど登録したパスワードを入力。以下のように表示されれば、MySQLの設定は終了。
Welcome to the MySQL monitor.  Commands end with ; or \g.
Your MySQL connection id is 4
Server version: 5.6.33 MySQL Community Server (GPL)

Copyright (c) 2000, 2016, Oracle and/or its affiliates. All rights reserved.

Oracle is a registered trademark of Oracle Corporation and/or its
affiliates. Other names may be trademarks of their respective
owners.

Type 'help;' or '\h' for help. Type '\c' to clear the current input statement.

mysql>
ローカルのデータベースをAWS EC2インスタンス内にインポートする
ローカルのデータベースをCSV形式でエクスポートする
まずはローカルのデータベースをCSV形式でエクスポートする。テーブル名.csvの形式でデスクトップへ出力される。
参考
MySQLのデータインポート・エクスポート
MySQLのデータベースをまるっとお引越し。 (エクスポート/インポート)
csvファイルをdbフォルダに入れる
先ほどデスクトップに出力されたcsvファイルを、(アプリ名)/dbの中に入れる。orders, users,productsのテーブルデータをエクスポートしたのなら、こんな具合になる。
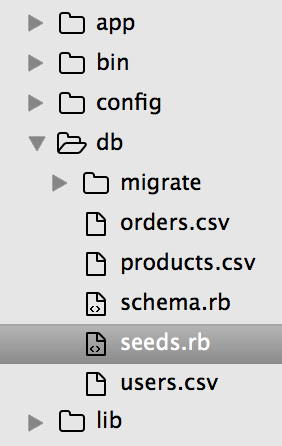
seeds.rbを編集する
dbフォルダ下にあるseeds.rbファイル(ちょうど上の画像で選択されてるやつ)を以下のように書き変える。
require "csv"
# 1番上に1度だけ記述

# 以下は各テーブルごとに名前を変えて記述。例えばこれはordersテーブル。
orders_csv = CSV.readlines("db/orders.csv")
orders_csv.shift
orders_csv.each do |row|
  Order.create(user_id: row[1], created_at: row[2], updated_at: row[3], product_count: row[4], product_id: row[5])
  # idを除くカラム名を記述する
end

# productsテーブル
products_csv = CSV.readlines("db/products.csv")
products_csv.shift
# 以下略
deploy.rbを編集する
次に、deploy.rbを編集する。
# 前略
set :log_level, :debug

after 'deploy:publishing', 'deploy:restart'
namespace :deploy do
# 以下を追加
  desc 'db_seed'
  task :db_seed do
    on roles(:db) do |host|
      with rails_env: fetch(:rails_env) do
        within current_path do
          execute :bundle, :exec, :rake, 'db:seed'
        end
      end
    end
  end
# ここまでが追加分
  task :restart do
    invoke 'unicorn:restart'
  end
end
リモートリポジトリへプッシュ
いつものように、git add, commit, push。
Cap deploy
capistranoを使った自動デプロイ。
まずはいつもの。
$ bundle exec cap production deploy
これで一旦デプロイしたあと、改めてデータベース読み込み。
$ bundle exec cap production deploy:db_seed
これで○○_developmentと○○_productionの内容を同じものにできました!わーい!!
ちゃんとデータ入ってるのか確認
EC2インスタンスのMySQLへログイン
[ec2-user@ip-xxx-xx-xx-xxx ~]$ mysql -u root -p
パスワードを求められるので入力。
データベース一覧を確認するにはこのコマンド。
mysql> show databases
データベースを選択
mysql> use amazon_production;
各テーブルの中身を見る
# ordersテーブルなら
mysql> select * from orders