Arduinoの入門でLEDの13番光らせる(Lチカ)してもしょうがないので、その次のステップとしてサーボを動かす例を公開してみる。これができてうまくハード組み合わせればロボットアーム位なら作れるはず。
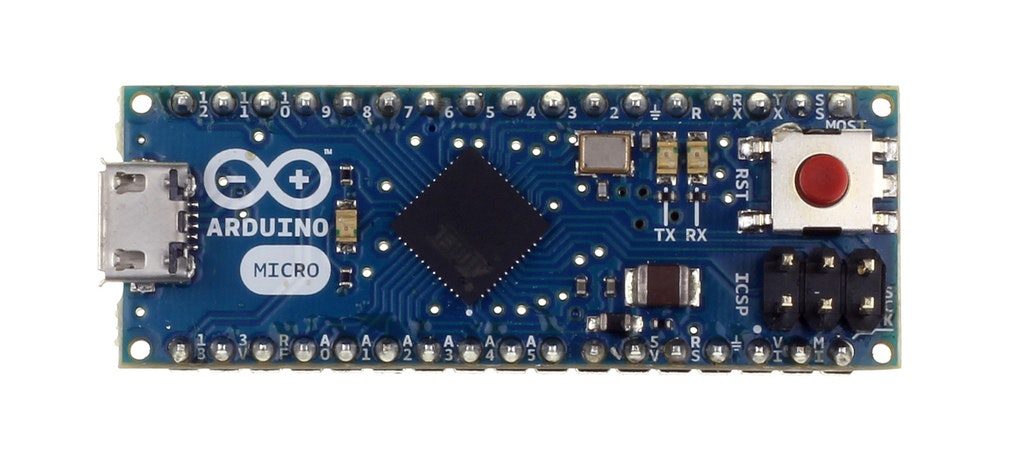
Arduino Micro
Arduinoはマイコンボードで、簡単なハードウェアを制御するのに使う。
Arduinoで最も一般的なのはArduino Unoだが、Arduino Microは小さいっていうのと、Micro USB端子で通信できるのが特徴。
Arduino書き込みソフトの準備
PC用の書き込みソフトもArduinoという名前で配布されている。
からArduinoをダウンロード
使うときにはマイコンボードの種類と、シリアルポート(PCとArduino間)を選ぶ必要がある。
具体的には、
- ツール -> マイコンボード -> Arduino Micro
- ツール -> シリアルポート -> /dev/tty.usbserial...
と選択する。
ピン配置
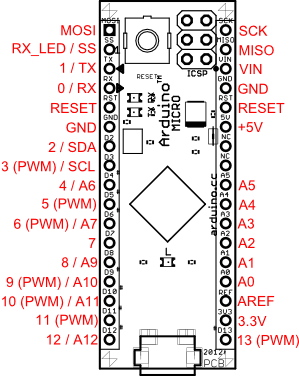
この中で今回使うのは、+5V, GNDと9版ピンだけ。
ArduinoでのHello world的な、「Lチカ」と言われるのに使われる13番ピンは、Arduino Microには存在しないが、ちゃんとそれに相当するLは基板の中央下寄りに存在している。
サーボモータ
サーボモータは普通のモータと違って、回転し続けるというものではなく、指定した角度まで回転させることができるモータ。
ロボットアームを作るとかに使える。
今回使ったのはこれ (EMAX-ES08A)

スピード: 0.12秒/60度 (4.8V時)/0.10秒/60度 (6.0V時)
トルク: 1.5kgf-cm(4.8V時)/1.8kgf-cm(6.0V時)
動作電圧: 4.8V~6.0V
入力パルス幅: 1500usec〜1900usec
コネクター: JRタイプ(オレンジ:信号、赤:電源、茶:GND)
GNDを茶色、5V電源を抵抗とか挟まずに赤につないだ後、9ピンを黄色につなぐ。9ピンじゃなくてもいいはずだけれど、Servoの例では9がデフォルトだった。
実際に動かしたプログラムはこれ。
ファイル -> スケッチブックの例 -> Servo -> Sweep
を選択後、attach(9, 1500, 1900)というように入力パルス幅を入力しただけ。
// Sweep
// by BARRAGAN <http://barraganstudio.com>
// This example code is in the public domain.


#include <Servo.h>

Servo myservo;  // create servo object to control a servo
                // a maximum of eight servo objects can be created

int pos = 0;    // variable to store the servo position

void setup()
{
  myservo.attach(9, 1500, 1900);  // attaches the servo on pin 9 to the servo object
}


void loop()
{
  for(pos = 0; pos < 180; pos += 1)  // goes from 0 degrees to 180 degrees
  {                                  // in steps of 1 degree
    myservo.write(pos);              // tell servo to go to position in variable 'pos'
    delay(15);                       // waits 15ms for the servo to reach the position
  }
  for(pos = 180; pos>=1; pos-=1)     // goes from 180 degrees to 0 degrees
  {
    myservo.write(pos);              // tell servo to go to position in variable 'pos'
    delay(15);                       // waits 15ms for the servo to reach the position
  }
}
そこら辺にあったレゴを適当にくっつけてみたら扇風機みたいになった。
