この記事ではClojureとAWS LambdaとAPI GatewayでJSONを返却するAPIの作成を行います
Lambda Functionの登録
Clojure Projectを作成してLambdaで動作させるコードを書いていきます.
Clojure projectの作成
lein new hello
依存関係にcom.amazonaws/aws-lambda-java-coreを追加
(defproject hello "0.1.0-SNAPSHOT"
  :description "FIXME: write description"
  :url "http://example.com/FIXME"
  :license {:name "Eclipse Public License"
            :url "http://www.eclipse.org/legal/epl-v10.html"}
  :dependencies [[org.clojure/clojure "1.7.0"]
                 [org.clojure/data.json "0.2.6"]
                 [com.amazonaws/aws-lambda-java-core "1.0.0"]]
  :aot :all)
ソースコードの編集
今回は{:name "foo"}というobjectを受け取ると {"message": "Hello foo"}というjsonを返却するコードを記述します。
(ns hello.core
  (:gen-class
   :implements [com.amazonaws.services.lambda.runtime.RequestStreamHandler])
  (:require [clojure.data.json :as json]
            [clojure.string :as s]
            [clojure.java.io :as io]))

(defn hello [params]
  {:message (str "Hello " (:name params))})

(defn -handleRequest [this is os context]
  (let [w (io/writer os)]
    (-> (json/read (io/reader is) :key-fn keyword)
        (hello)
        (json/write w))
    (.flush w)))
jarの生成
lein uberjar
Lambda Functionの作成
aws lambda create-function \
--function-name hello \
--handler hello.core \
--runtime java8 \
--memory 512 \
--timeout 10 \
--role arn:aws:iam::YOUR_AWS_ACCOUNT_ID:role/YOUR_ROLE \
--zip-file filed://./target/hello-0.1.0-SNAPSHOT-standalone.jar
これでClojureコードがAWS Lambdaで動かせるようになっているはずです。
API GatewayからLambda Functionを呼び出す
APIを作成
API Gatewayコンソールから新しくAPIを作成します。
Resourceの追加
"Create Method"ボタンをクリックすると"Resources"にプルダウンが表示されて、HTTPメソッドが選択可能になります。
ここではGETメソッドを選択して追加。
"Integration type"に"Lambda Function"を設定するとAWS Lambdaの関数を呼び出すことができます。
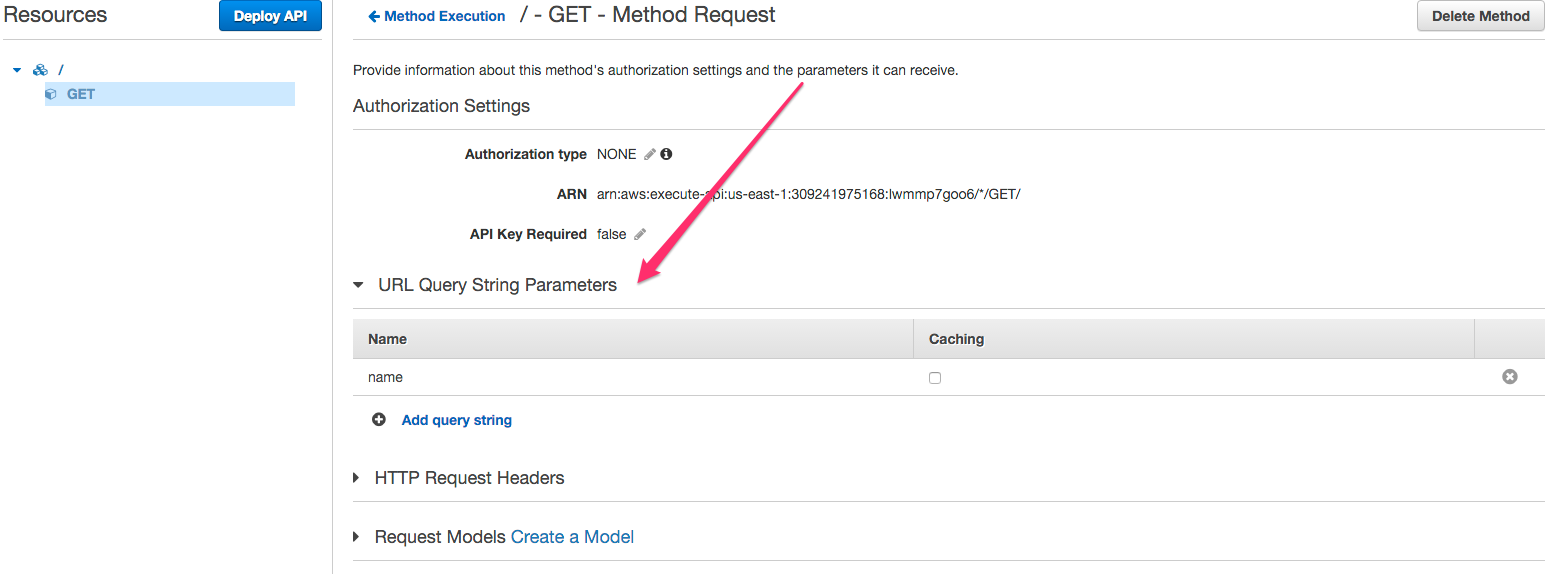
URL Query String Parameterの登録(もしかしたらこれはいらないかも)
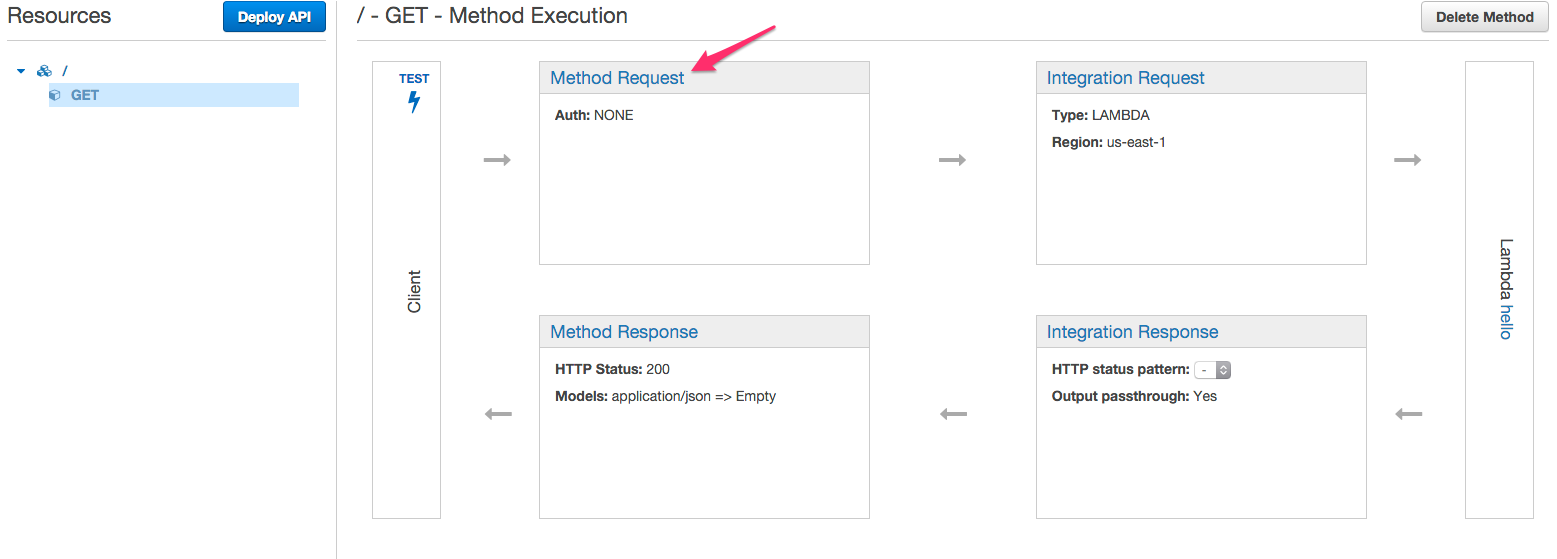
リクエストパラメータをAPI Gatewayで扱うデータオブジェクトに変換するため、"Method Request"からパラメータを追加します。
"URL Query String Parameters" -> "Add query string" を選択するとパラメータを追加できるようになる.
今回は"name"というパラメータを追加
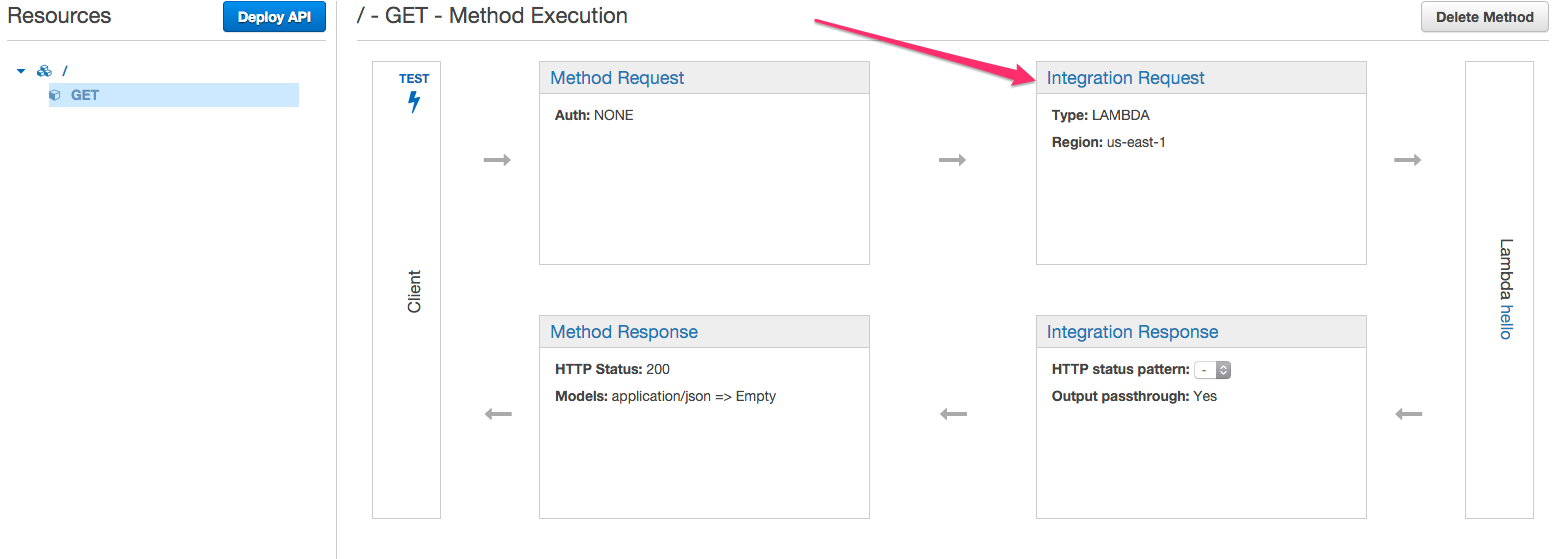
Lambda Functionに渡すパラメータのmapping定義を追加
リクエストパラメータから受け取ったパラメータをLambda Functionで扱うデータにmappingします。
"Mapping Templates" -> "Add mapping template"を選択し、"application/json"を追加。
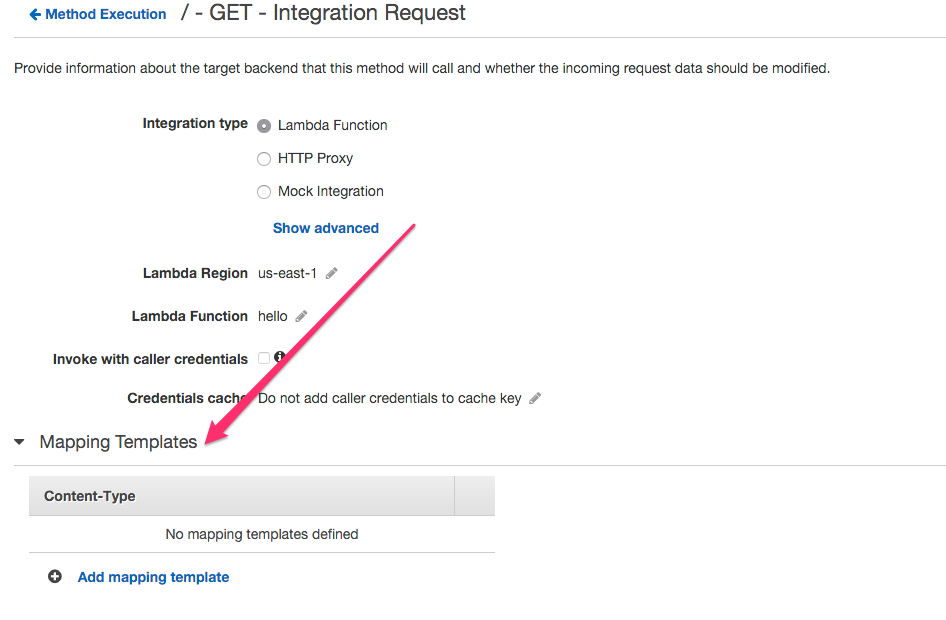
"Input passthrough"の横にあるiconをクリックして"Mapping template"に変更

Templateに下記を追加
{"name": "$input.params('name')"}
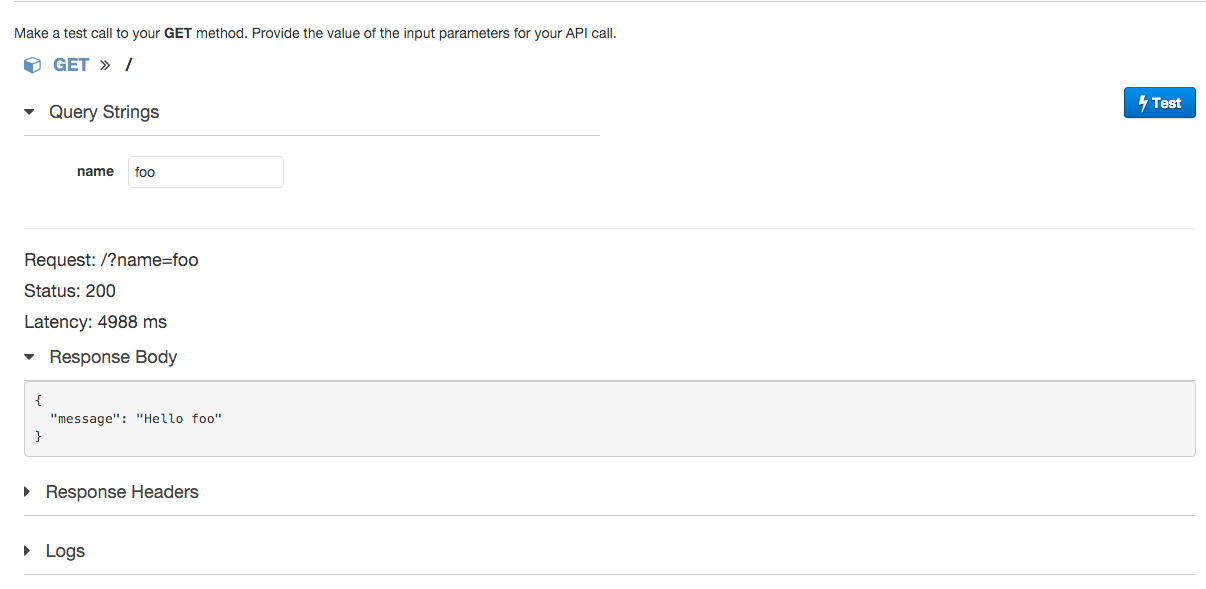
想定通りのJSONが返却されているようなので大丈夫そうです。
Deploy
作成したAPIはまだ公開されていない状態なので、これをDeployします。
画面左側の"Deploy API"をクリックしてDeploy情報を記述します。
("Deployment Stage"を"New Stage"に設定するとtest用やproduction用のAPIを分離することができるようです。)
必要な設定を記述したら"Deploy"ボタンをクリック。
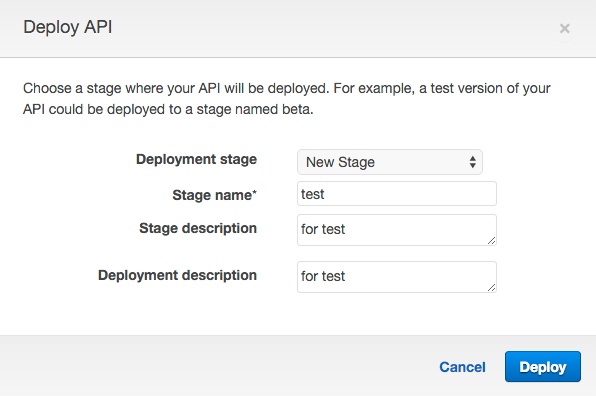
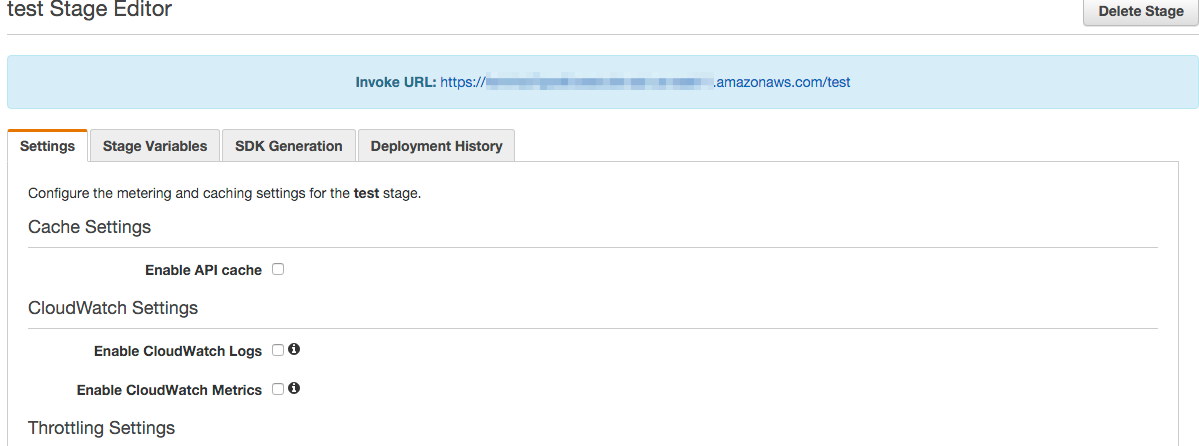
これでAPIが公開されました。
ブラウザなどから"Invoke URL"に記載されているURLにアクセスできるようになっているはずです。
参考記事
https://aws.amazon.com/jp/blogs/compute/clojure/
http://qiita.com/csakatoku/items/27bfed3cc87901fa24c7
http://qiita.com/csakatoku/items/ffe195dc871ab059e535
http://qiita.com/r7kamura/items/6420538789da95cd2f47
【追記】/hello/:nameのような形でparameterを渡す場合
API Gatewayで以下のようにResourceを追加することで可能になります
- "hello"を追加
- "hello"配下に"{name}"を追加
- "{name}"にGETメソッドを設定
これで /test/hello/hogeのようなアクセスに対して {"message" : "Hello hoge"}のようなJSONを返却することが可能になります。
(Lambdaに渡すパラメータのTemplateは変更しなくても大丈夫)

