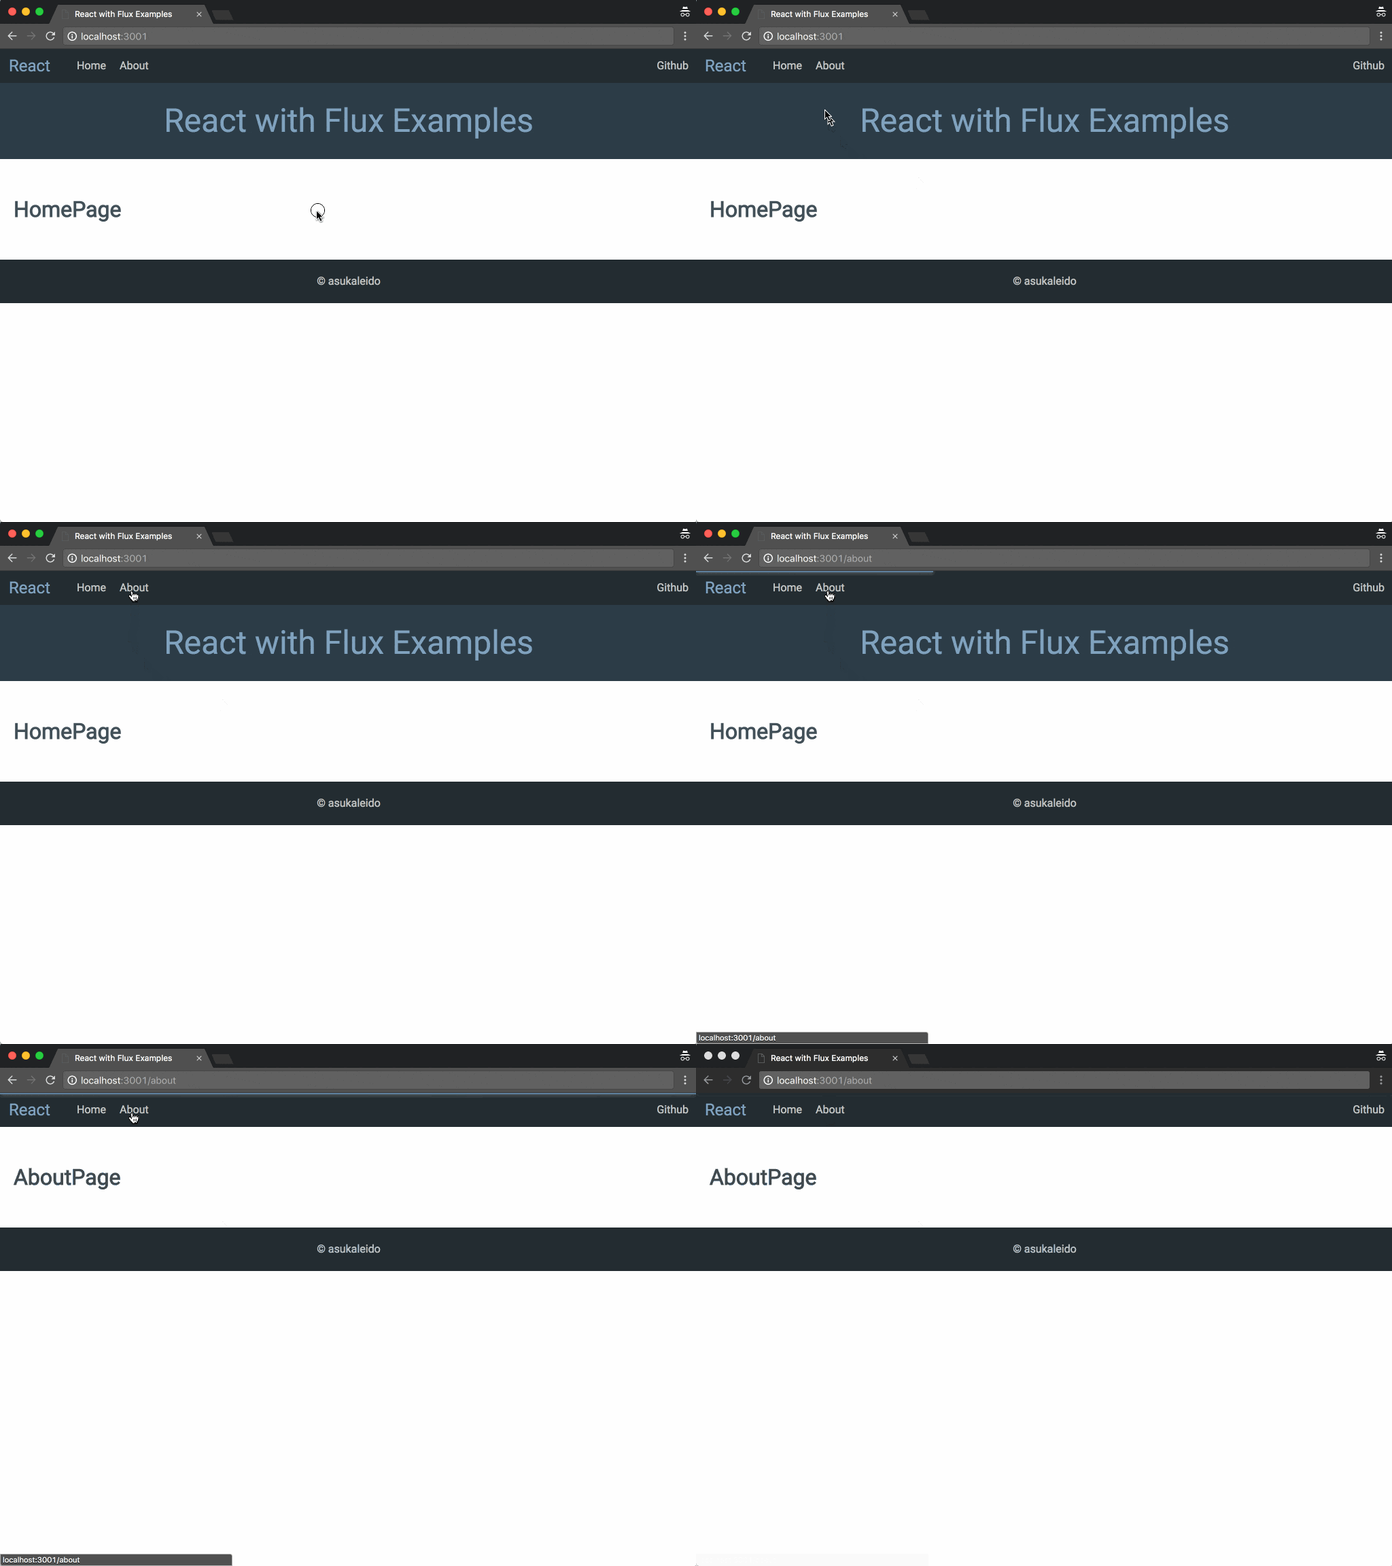
SSRが流行っている昨今ですが、SSRの導入まではな...という状況を想定して、React Routerを利用しつつGitHubのようなURL遷移時に欲しいデータを取得しきるまで表示を遅延する機能を実装してみます。
実装リポジトリ
備考
- ESNextで記述
- Fluxはデザインパターンのみの採用でFrameworkless
- actions, dispatchers stores全てRxJS駆動で設計
- React Routerはv3
前提
React RouterのRouteコンポーネントのonEnterにフックさせます。
onEnter(nextState, replace, callback?)とは
第3引数が存在する関数にフックさせると、callbackが呼ばれるまでRouteのcomponentに設定したReactComponentの描画を遅延させることができる機能です。
設計
Router
Routeのcomponentに設定したReactComponentにstaticな関数(ロード関数と呼称)を足し、そのロード関数をonEnterにフックさせます。
  <Router history={browserHistory}>
    <Route component={App} path="/">
      <IndexRoute component={HomePage} />
      <Route component={AboutPage} onEnter={AboutPage.load} path="about" />
    </Route>
  </Router>
※onEnter={AboutPage.load}の部分。
ロード関数
waitForLoadingというアクションを発火し、取得しておきたいデータを取得できるアクションも適宜発火します。
AboutPage.load = function load(params, replace, callback) {
  const props = { callback, params, replace };
  const observables = ['title', 'descripiton', 'items'].map(key => AboutStore[key]);
  PageAction.waitForLoading(AboutPage, observables, props);
  AboutAction.fetchTitle();
  AboutAction.fetchDescription();
  AboutAction.fetchItems();
};
waitForLoadingアクション
waitForLoading(component, observables, { callback, params, replace })
- 第1引数はRouteのcomponentに設定するReactComponentです。
- 第2引数は取得しておきたいデータが取得されたあとに発行されるstoreのobservableを配列で指定します。
- 第3引数にロード関数の引数をまとめて格納しておきます。
action自体はそのままdispatchしてしまいます。
// action
function waitForLoading(page, observables, { callback, params, replace }) {
  PageDispatcher.waitForLoading.next({ complete: callback, observables, page, params, replace });
}
dispatcherでobservablesをsubscribe(take(1))し、すべてのobserverにストリームが流れたら、readyToDisplayというdispatcherを発火します。
readyToDisplayでは、waitForLoadingの第1引数と第2引数をまとめてストリームに流します。
// dispatcher
waitForLoading.subscribe(({ complete, observables, page, params, replace }) => {
  Observable
    .zip(...observables.map(observable => observable.take(1)))
    .subscribe(() => {
      readyToDisplay.next({ complete, page, params, replace });
    });
});
readyToDisplay
ストアにreadyToDisplayというobservableを用意し、上述したreadyToDisplayというdispatcherの内容をそのままストリームで流します。
PageDispatcher.readyToDisplay.subscribe(readyToDisplay.next.bind(readyToDisplay));
最後
Routeのcomponentに設定したReactComponentが書かれているファイルで、storeのreadyToDisplayをsubscribeし、渡ってきたロード関数の引数のcallbackを呼びます。
するとレンダリングされます。
PageStore.readyToDisplay
  .filter(({ page }) => page === AboutPage)
  .subscribe(({ complete }) => {
    complete();
  });
利点
ストアのreadyToDisplayを購読すれば、routerの情報と次に表示されるコンポーネントをどこでも把握することができます。
そのため、dispatcherを拡張すれば、progressも簡単に実装できます。
import { Observable, Subject } from 'rxjs';

export const waitForLoading = new Subject();
export const readyToDisplay = new Subject();
export const loadingProgress = new Subject();

waitForLoading.subscribe(({ complete, observables, page, params, replace }) => {
  Observable
    .zip(...observables.map(observable => observable.take(1)))
    .subscribe(() => {
      readyToDisplay.next({ complete, page, params, replace });
    });
  Observable
    .merge(...observables.map(observable => observable.map(() => 1).take(1)))
    .scan((x, y) => x + y)
    .startWith(0)
    .subscribe(rate => {
      loadingProgress.next({ page, percent: Math.ceil((rate / observables.length) * 100) });
    });
});
RxJSの挙動やFluxデザインパターンの理解、React Routerの癖の把握など、前提条件は多いですがSSRよりは比較的楽に似非SSRのようなことができるので、ContentPlaceholderに辟易としている方にオススメの設計です。
Fluxのフレームワークにはそこまで詳しくないですが、同じようなことをPromiseでも実装できるはずなので、比較的いろいろな構成に適用できるはずです(試したことはありませんが...)。
