初めに
遅ればせながら、そろそろ本格的に TensorFlow を始めよう、と思い立って、Mac 環境にインストールする方法を色々探っていました。
結論として、pyenv-virtualenv で仮想環境を作ってそこに入れるのが一番自分の手に馴染んだので、その手順の覚書を残しておきます。
ついでに。
Julia から、PyCall 経由で TensorFlow を動かす実験もしたのでその報告も兼ねて。
【2016/08/15 追記】Jupyter カーネル設定 に、もっとスマートな方法を追記、および一部修正。
環境
- Mac 10.11.61
- pyenv
- [New] pyenv-virtualenv
- [New] pyenv-virtualenvwrapper
- Python 2.7.9 / [New] 2.7.11
- Jupyter notebook 4.1.1
- Julia 0.4.2 → 0.4.3
pyenv-virtualenv のインストール
pyenv は過去に git clone https://github.com/yyuu/pyenv.git で ~/.pyenv にインストール済( Jupyter 環境設定補足 #pythontokai 参照)。ここに plugin として pyenv-virtualenv を追加インストール。
あとやっぱ便利なので pyenv-virtualenvwrapper も導入。どちらも git clone で導入2。
$ cd ~/.pyenv
$ git pull  # 最新に更新
$ cd ~/.pyenv/plugins
$ git clone https://github.com/yyuu/pyenv-virtualenv.git
$ git clone https://github.com/yyuu/pyenv-virtualenvwrapper.git
TensorFlow 用仮想環境作成
そもそも Python の最新を入れてなかったので、いっそのこと 2.7.11 を新しくインストールしてそこに TensorFlow 用の仮想環境を構築することに。
Python インストール時、後で Julia の PyCall から利用するために、--enable-framework オプションの指定が必要。
$ env PYTHON_CONFIGURE_OPTS="--enable-framework" pyenv install 2.7.11
$ pyenv virtualenv 2.7.11 TensorFlow
$ pyenv versions
  system
  2.7.11
  2.7.11/envs/TensorFlow
  2.7.9 (set by /path/to/user_home/.python-version)
  3.4.3
  TensorFlow
TensorFlow 環境構築
https://www.tensorflow.org/versions/master/get_started/os_setup.html#pip-installation を参考に TensorFlow を pip でインストール。
ついでに必要そうなその他諸々も。
$ cd ~/Documents
$ mkdir -p tensorflow && cd tensorflow
$ pyenv local TensorFlow
$ pyenv version
TensorFlow (set by /path/to/user_home/Documents/tensorflow/.python-version)
$ # pip install -U pip # 不要
$ pip install -U https://storage.googleapis.com/tensorflow/mac/tensorflow-0.6.0-py2-none-any.whl
《中略》
Successfully installed numpy-1.10.4 protobuf-3.0.0a3 setuptools-19.2 six-1.10.0 tensorflow-0.6.0 wheel-0.26.0
$ pip install -U matplotlib jupyter # 必要に応じて他もインストール、結果略
TensorFlow 動作確認
jupyter 入れたので ipython も入ってる。のでそちらで確認。
https://www.tensorflow.org/versions/master/get_started/os_setup.html#run-tensorflow-from-the-command-line を参考に。
$ cd ~/Documents/tensorflow
$ ipython
Python 2.7.11 (default, Jan 15 2016, 19:59:21)
Type "copyright", "credits" or "license" for more information.

IPython 4.0.2 -- An enhanced Interactive Python.
?         -> Introduction and overview of IPython's features.
%quickref -> Quick reference.
help      -> Python's own help system.
object?   -> Details about 'object', use 'object??' for extra details.

In [1]: import tensorflow as tf

In [2]: hello = tf.constant("Hello, TensorFlow!")

In [3]: sess = tf.Session()
I tensorflow/core/common_runtime/local_device.cc:40] Local device intra op parallelism threads: 4
I tensorflow/core/common_runtime/direct_session.cc:58] Direct session inter op parallelism threads: 4

In [4]: sess.run(hello)
Out[4]: 'Hello, TensorFlow!'

In [5]: a = tf.constant(10)

In [6]: b = tf.constant(32)

In [7]: sess.run(a + b)
Out[7]: 42

In [8]: exit
reactivekk 社のデモ
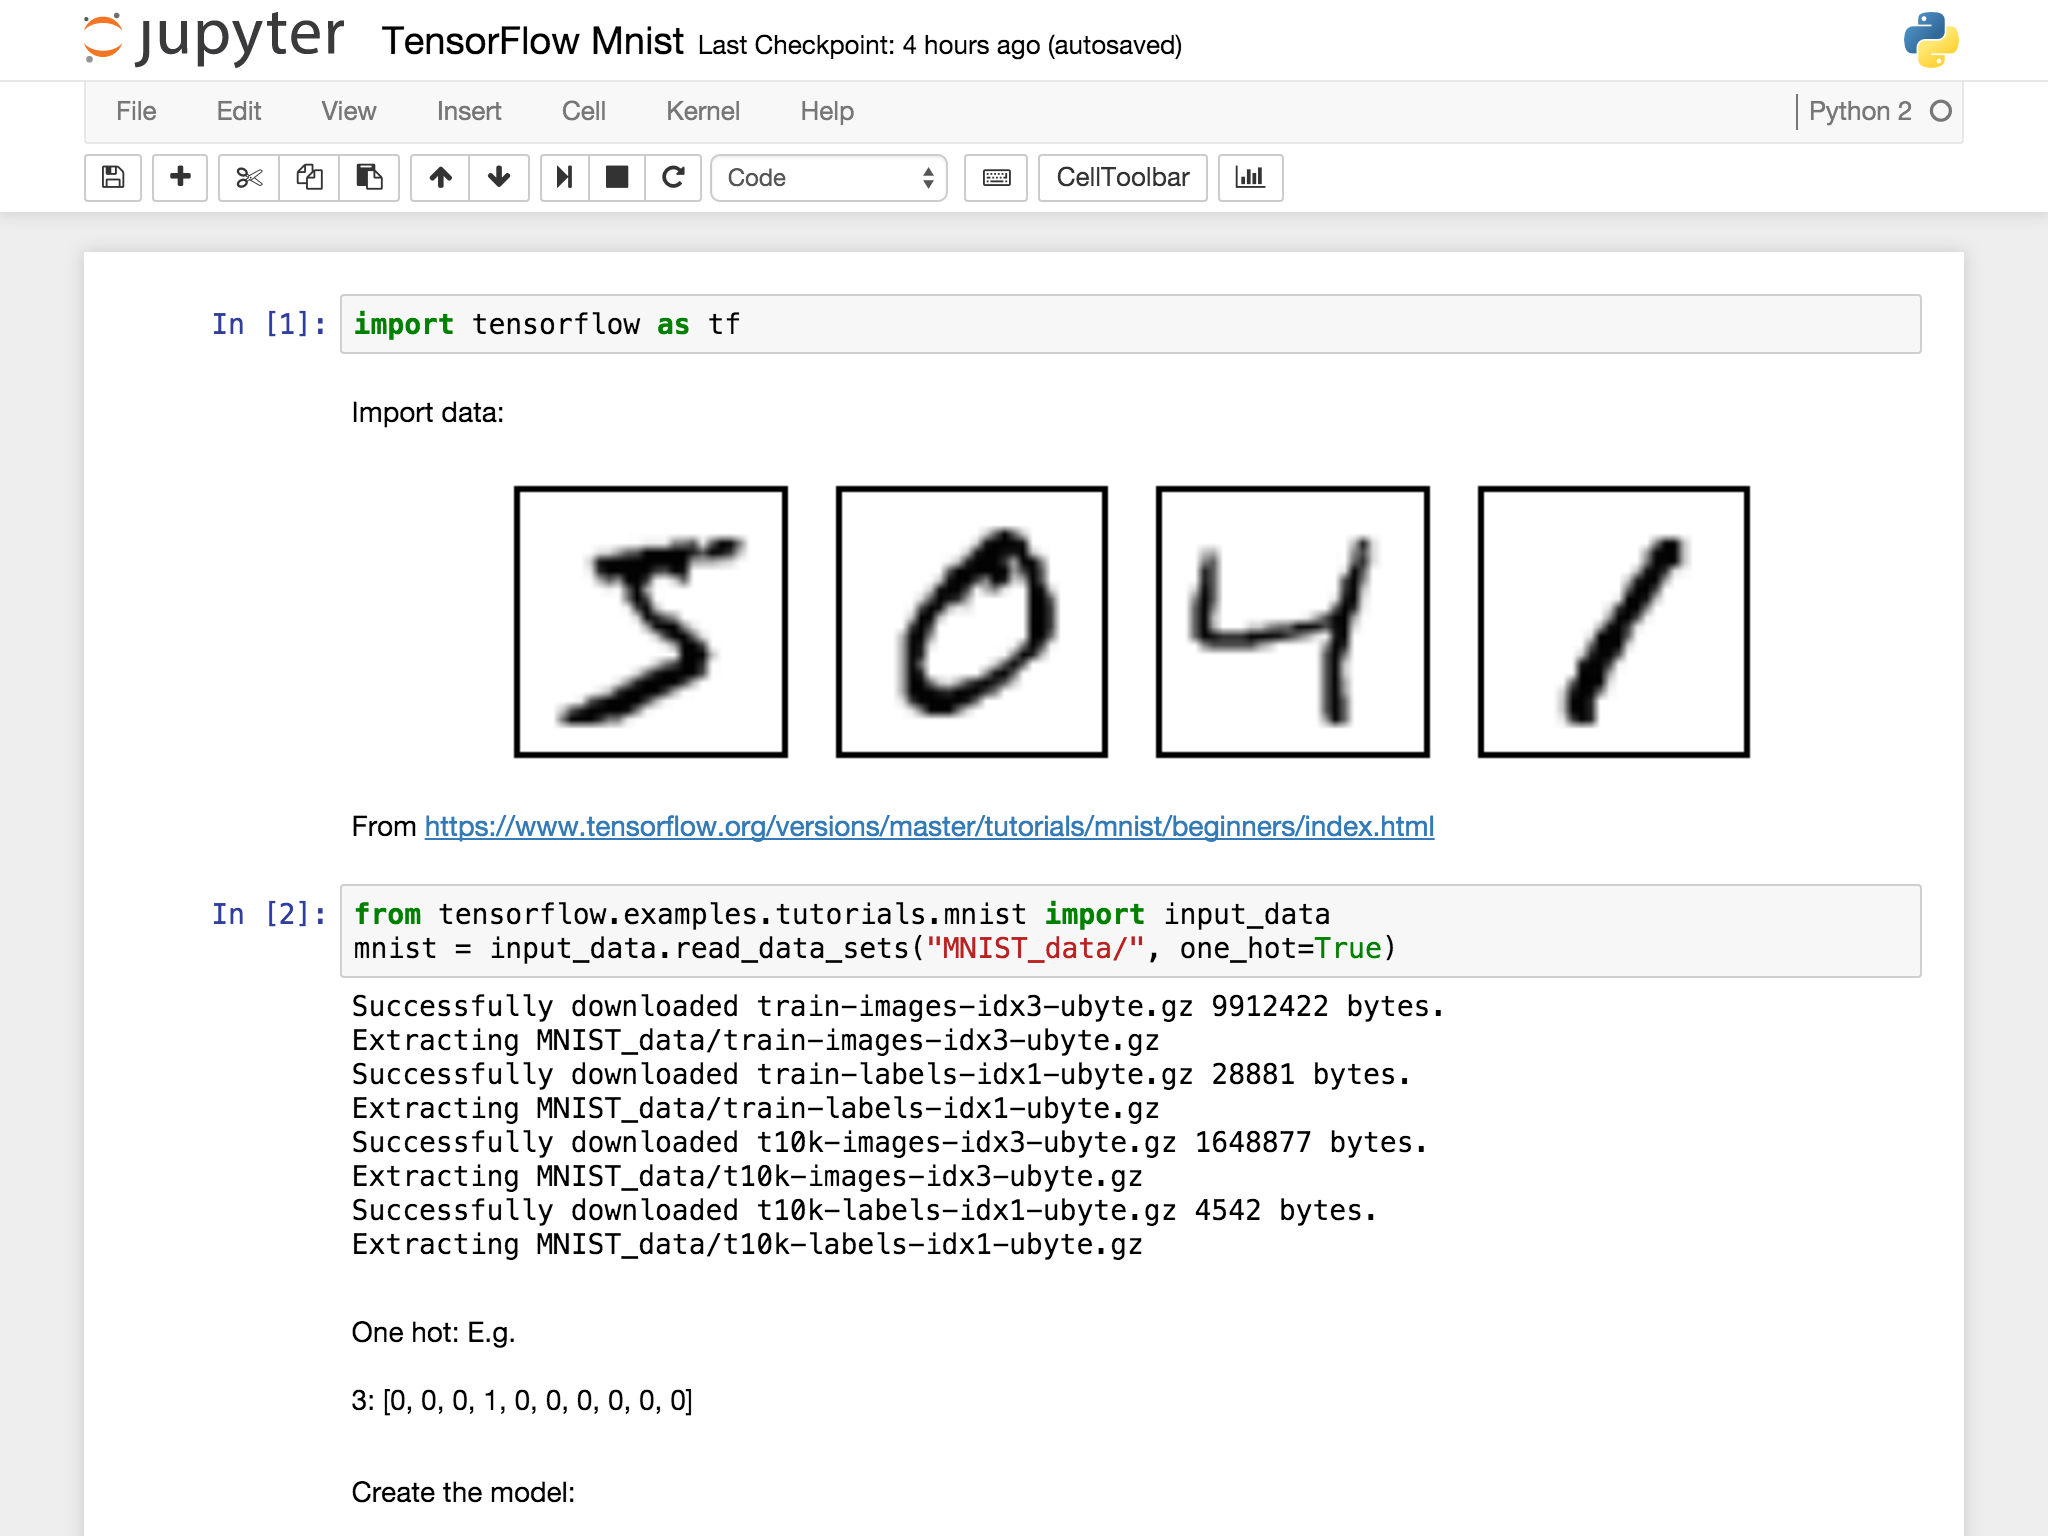
同時にインストールした Jupyter で、はじめてのテンサーフローワークショップに参加しました で紹介されていた reactivekk社 作成のデモ用 .ipynb ファイルを開いてみた。
$ cd ~/Documents/tensorflow
$ git clone https://github.com/reactivekk/tensorflow-getting-started
$ cd tensorflow-getting-started
$ jupyter notebook
ちゃんと動きました。
Jupyter カーネル設定
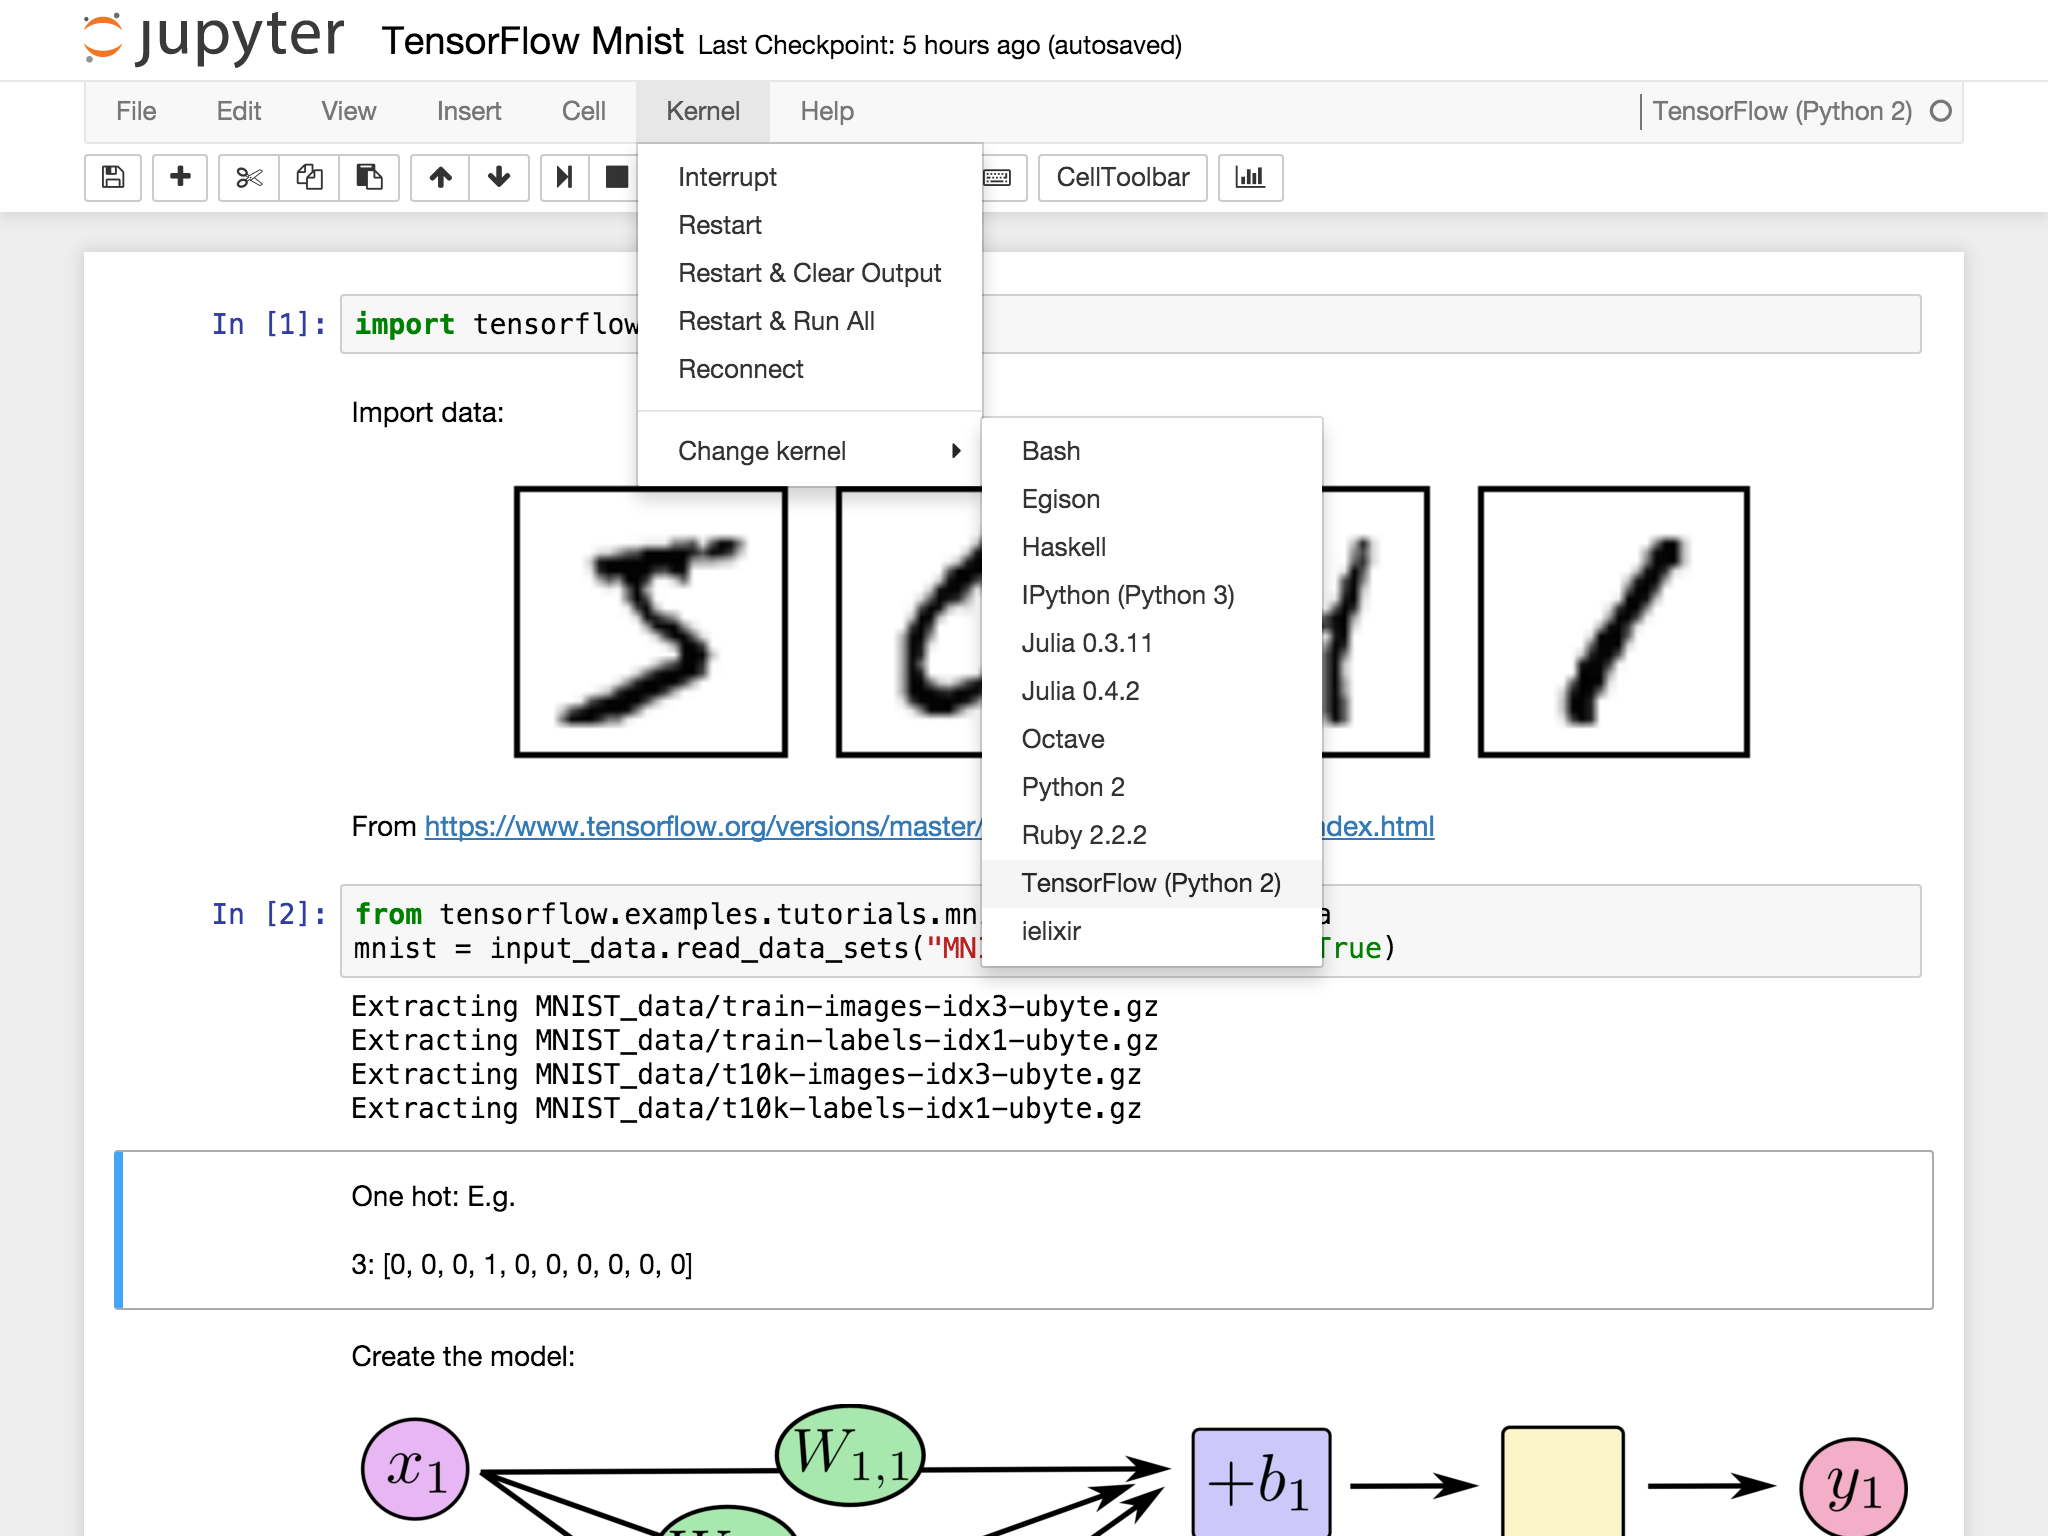
Jupyter はデフォルトの Python2.7.9 にもインストールしてあるので、そっちで起動したときにも TensorFlow 環境にアクセス出来るように、kernel として追加。
【2016/08/15 追記ここから】
最近は以下のようなコマンドを実行しています。この方が楽なので。
例として、pyenv virtualenv で構築した "TensorFlow v0.9 (Python 3)" の環境を追加(パスは例です):
$ pyenv version
TensorFlow09 (set by PYENV_VERSION environment variable)
$ pyenv versions
   : 《中略》
  3.5.1/envs/TensorFlow09
   : 《中略》
* TensorFlow09 (set by PYENV_VERSION environment variable)
   : 《中略》
$ python -m ipykernel install --user --name tensorflow09 --display-name "TensorFlow v0.9 (Python 3)"
Installed kernelspec tensorflow09 in /path/to/user_home/Library/Jupyter/kernels/tensorflow09
$ cat /path/to/user_home/Library/Jupyter/kernels/tensorflow09/kernel.json
{
 "language": "python",
 "argv": [
  "/path/to/user_home/.pyenv/versions/TensorFlow09/bin/python",
  "-m",
  "ipykernel",
  "-f",
  "{connection_file}"
 ],
 "display_name": "TensorFlow v0.9 (Python 3)"
}
【追記ここまで】
手動で設定する場合3。
$ cd ~/Library/Jupyter/kernels
$ mkdir tensorflow && cd tensorflow
$ vi kernel.json
{
  "display_name": "TensorFlow (Python 2)",
  "language": "python",
  "argv": [
    "/path/to/user_home/.pyenv/versions/2.7.11/envs/TensorFlow/bin/python",
    "-m", "ipykernel",
    "-f", "{connection_file}"
  ],
  "codemirror_mode": {
    "version": 2,
    "name": "ipython"
  }
}
$ jupyter notebook --notebook-dir ~/Documents/tensorflow/tensorflow-getting-started
ちゃんと動いてる♪
Julia アップグレード
Julia 0.4 が正式リリースになってからは、0.4.x もバイナリをインストールしています。
つい先日 0.4.3 にバージョンアップしていたのでまずはアップグレード。
- ダウンロードサイトから環境に合った最新の Current Release (command line version) をダウンロード(私の場合、"Mac OS X Package (.dmg)")。
- 然るべき場所(/Application 内)に配置(コピーするだけ)。
- シンボリックリンク設定(詳細略)
$ julia --version
julia version 0.4.3
PyCall (再)構築
https://github.com/stevengj/PyCall.jl を参考に。
julia console 上で作業:
julia> Pkg.update()
# パッケージを更新《出力略》

julia> ENV["PYTHON"] = "/path/to/user_home/.pyenv/versions/2.7.11/envs/TensorFlow/bin/python"
# TensorFlow をインストールした仮想環境の python プログラムを指定

julia> Pkg.add("PyCall")
# インストール済なら rm(Pkg.dir("PyCall","deps","PYTHON")); Pkg.build("PyCall")

julia> using PyCall
INFO: Precompiling module PyCall...

julia> # 動作確認

julia> @pyimport math

julia> math.sin(math.pi / 4) - sin(pi / 4)
0.0

julia> @pyimport numpy.random as nr

julia> nr.rand(3,4)
3x4 Array{Float64,2}:
 0.418526  0.822197  0.775527  0.69635
 0.575087  0.956249  0.442072  0.165388
 0.449567  0.989607  0.890187  0.960679

julia>
よし、ちゃんと動く。
PyCall で TensorFlow
julia> @pyimport tensorflow as tf

julia> hello = tf.constant("Hello, TensorFlow with Julia!")
PyObject <tensorflow.python.framework.ops.Tensor object at 0x31754a090>

julia> sess = tf.Session()
I tensorflow/core/common_runtime/local_device.cc:40] Local device intra op parallelism threads: 4
I tensorflow/core/common_runtime/direct_session.cc:58] Direct session inter op parallelism threads: 4
PyObject <tensorflow.python.client.session.Session object at 0x3174d91d0>

julia> # sess.run(hello) ←NG

julia> sess[:run](hello)
"Hello, TensorFlow with Julia!"

julia> a = tf.constant(10)
PyObject <tensorflow.python.framework.ops.Tensor object at 0x31754a2d0>

julia> b = tf.constant(32)
PyObject <tensorflow.python.framework.ops.Tensor object at 0x31754a790>

julia> # sess[:run](a + b) ←NG

julia> sess[:run](pyeval("a + b", a=a, b=b))
0-dimensional Array{Int32,0}:
42

julia> sess[:run](tf.add(a, b))
0-dimensional Array{Int32,0}:
42

julia>
取り敢えず動く。
reactivekk 社のデモを IJulia に移植
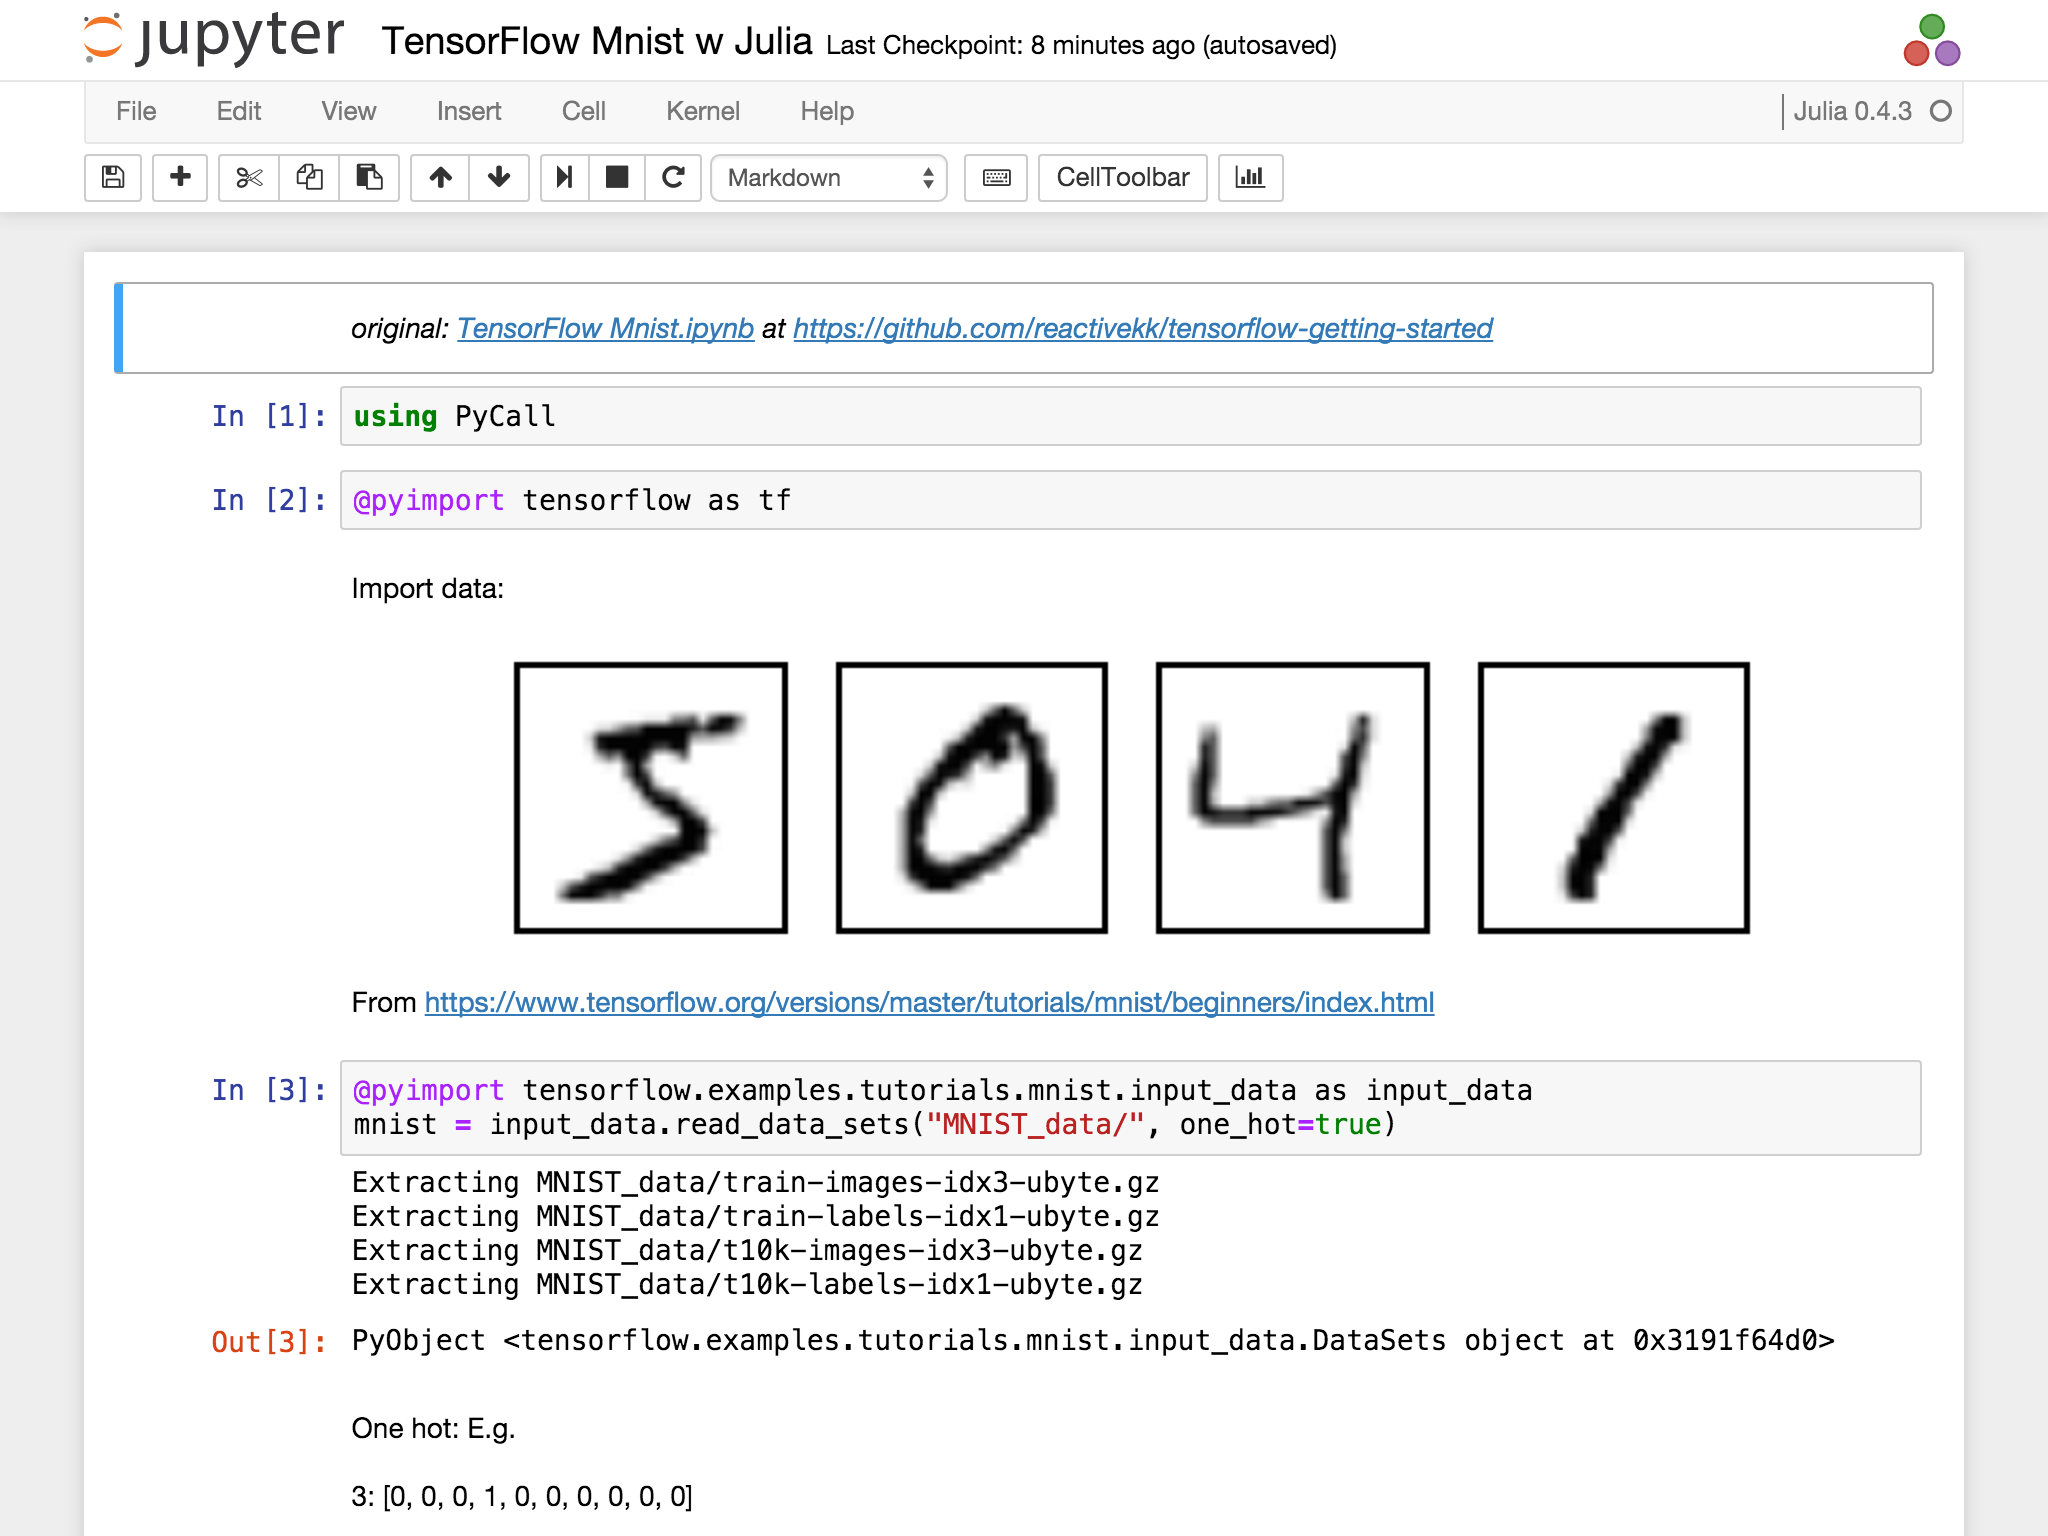
Jupyter に IJulia(Julia カーネル)入れてあるので、.ipynb ファイルを IJulia に移植することで、ちゃんと文字認識出来るか確認。
ちゃんと動いた!
Julia + tensorFlow で文字認識できました!
結果は Gist に上げておきました。 → https://gist.github.com/antimon2/8703bd343de5b51fdef4
参考
- TensorFlow: Download and Setup
- はじめてのテンサーフローワークショップに参加しました
- Jupyter 環境設定補足 #pythontokai
- pyenvで幸せになろう.py
- PyCall.jl
- PyPlot.jl
- Kernels for different environments — Installing the IPython kernel


