Squareが開発した画像ライブラリ、PicassoでActionBarのアイコンやNotification, AppWidget内の画像を設定する方法。
メソッド一覧
画像のロード先を指定するRequestCreator#intoは以下の5つのメソッドがある。
RequestCreator#into(ImageView)RequestCreator#into(ImageView, Callback)RequestCreator#into(RemoteViews, int, int, Notification)RequestCreator#into(RemoteViews, int, int[])RequestCreator#into(Target)
ImageViewに設定する方法(1, 2)
よくあるサンプル。アプリ内のImageViewは、1または2のメソッドを使用してこういった感じ。
Picasso.with(context).load("http://cdn.qiita.com/assets/siteid-reverse-6044901aace6435306ebd1fac6b7858c.png").into(imageView);
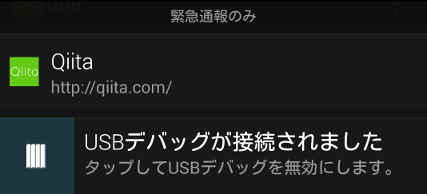
Notificationに設定する方法(3)
3のメソッドを使用してこういった感じ。
MainActivity.java
Intent intent = new Intent(Intent.ACTION_VIEW, Uri.parse("http://qiita.com/"));
PendingIntent contentIntent = PendingIntent.getActivity(this, 0, intent, PendingIntent.FLAG_UPDATE_CURRENT);
RemoteViews views = new RemoteViews(getPackageName(), R.layout.row);
views.setTextViewText(R.id.title, "Qiita");
views.setTextViewText(R.id.text, "http://qiita.com/");
Notification notification = new NotificationCompat.Builder(this)
        .setContentIntent(contentIntent)
        .setContent(views)
        .setSmallIcon(R.drawable.ic_launcher)
        .setTicker("Qiita")
        .setWhen(System.currentTimeMillis())
        .setAutoCancel(true)
        .build();
((NotificationManager) getSystemService(NOTIFICATION_SERVICE)).notify(1, notification);

Picasso.with(this).load("https://pbs.twimg.com/profile_images/1542801560/Qiita_bigger.png").into(views, R.id.icon, 1, notification);
row.xml
<RelativeLayout xmlns:android="http://schemas.android.com/apk/res/android"
    android:layout_width="match_parent"
    android:layout_height="match_parent"
    android:padding="10dp">
    <ImageView
        android:id="@+id/icon"
        android:layout_width="wrap_content"
        android:layout_height="wrap_content"
        android:layout_alignParentLeft="true"
        android:layout_centerVertical="true"/>
    <TextView
        android:id="@+id/title"
        android:layout_width="wrap_content"
        android:layout_height="wrap_content"
        android:layout_toRightOf="@id/icon"
        android:layout_alignParentTop="true"
        android:paddingLeft="10dp"
        style="@android:style/TextAppearance.StatusBar.EventContent.Title" />
    <TextView
        android:id="@+id/text"
        android:layout_width="wrap_content"
        android:layout_height="wrap_content"
        android:layout_toRightOf="@id/icon"
        android:layout_below="@id/title"
        android:paddingLeft="10dp"
        style="@android:style/TextAppearance.StatusBar.EventContent" />
</RelativeLayout>
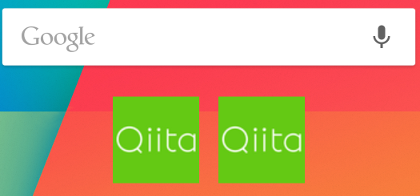
AppWidgetに設定する方法(4)
4のメソッドを使用してこういった感じ。
xml/my_app_widget_info.xml
<appwidget-provider
    xmlns:android="http://schemas.android.com/apk/res/android"
    android:initialKeyguardLayout="@layout/my_app_widget"
    android:initialLayout="@layout/my_app_widget"
    android:minHeight="40dp"
    android:minWidth="40dp"
    android:previewImage="@drawable/ic_launcher"
    android:resizeMode="horizontal|vertical"
    android:updatePeriodMillis="86400000"
    android:widgetCategory="home_screen"/>
MyAppWidget.java
@Override
public void onUpdate(Context context, AppWidgetManager manager, int[] appWidgetIds) {
    RemoteViews views = new RemoteViews(context.getPackageName(), R.layout.my_app_widget);
    for (int i = 0; i < appWidgetIds.length; i++) {
        manager.updateAppWidget(appWidgetIds[i], views);
    }

    Picasso.with(context).load("https://pbs.twimg.com/profile_images/1542801560/Qiita_bigger.png").into(views, R.id.icon, appWidgetIds);
}
layout/my_app_widget.xml
<ImageView
    xmlns:android="http://schemas.android.com/apk/res/android"
    android:id="@+id/icon"
    android:layout_width="match_parent"
    android:layout_height="match_parent"
    android:src="@drawable/ic_launcher"/>
ActionBarに設定する方法(5)
5のメソッドのパラメータであるTargetインターフェースを実装したクラスを作成して、そのクラス内でActionBarのアイコンを設定する。
注意点として、Picasso内部ではTargetをWeakReferenceとして保持している。
そのため、積極的に解放されてしまう最近のAndroidでは少なくともロード完了までアプリ側で保持しておかないとキャンセルされてしまい、表示されない。以下ではメンバーとして保持している。
ActionBarTarget.java
public class ActionBarTarget implements Target {
    private final Activity mActivity;

    public ActionBarTarget(Activity activity) {
        mActivity = activity;
    }

    @Override
    public void onPrepareLoad(Drawable placeHolderDrawable) {
        mActivity.getActionBar().setIcon(placeHolderDrawable);
    }

    @Override
    public void onBitmapLoaded(Bitmap bitmap, LoadedFrom from) {
        mActivity.getActionBar().setIcon(new BitmapDrawable(mActivity.getResources(), bitmap));
    }

    @Override
    public void onBitmapFailed(Drawable errorDrawable) {
        mActivity.getActionBar().setIcon(errorDrawable);
    }
}
MainActivity.java
private ActionBarTarget mTarget;
...
mTarget = new ActionBarTarget(this);
Picasso.with(this).load("https://pbs.twimg.com/profile_images/1542801560/Qiita_bigger.png").into(mTarget);
