はじめに
JavaでメッセージングサービスといえばJMS(Java Message Service)がありますが、Spring frameworkの中にもメッセージングサービス用のライブラリがあります。今回はRabbitMQを使った簡単なメッセージングサービスの構築をします。
(本記事は随時更新です。)
Rabbit MQのインストール
作業環境はWindows7/64bitです。
RabbitMQのダウンロードは https://www.rabbitmq.com/ から行います。本稿記載時(2016/4)の最新バージョンは3.6.1でした。2018年2月ではWindows版のrabbitmq-server-3.7.3.exeをダウンロードし、実行します。
なお、RabbitMQはErlangを利用しています。インストーラが必要に応じてErlangのインストールも促しますので、インストーラに従いダウンロードしましょう。
インストール後にプラグインを追加して Web管理コンソールを追加する
インストール完了後、スタートメニューに Rabbit MQ Server が追加されます。インストール直後はCLI(コマンドプロンプト)での実行が提供されています。これにWebの管理コンソールを追加します。
スタートメニュー>全てのプログラム>Rabbit MQ Server>RabbitMQ Command Prompt (sbin dir)を起動します。
起動後に次のコマンドを入力します。
rabbitmq-plugins enable rabbitmq_management
するとコンソールに以下が表示されます。
The following plugins have been enabled:
 rabbitmq_management
 rabbitmq_management_agent
 rabbitmq_web_dispatch
次に管理コンソールを確認します。
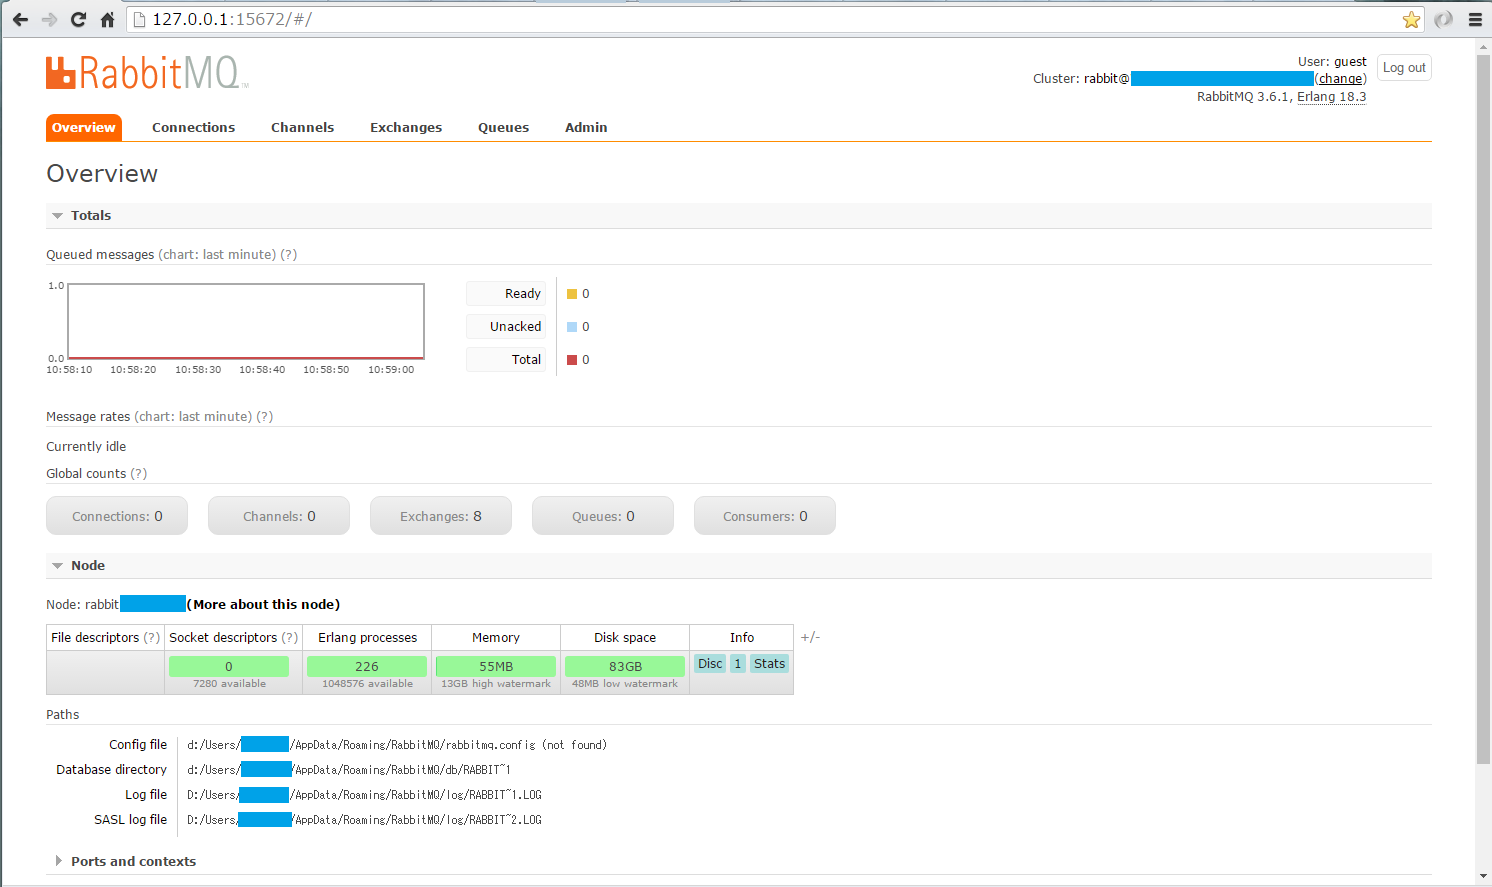
ブラウザからhttp://localhost:15672/を開きます。
初期のログインユーザとパスワードはguestです。
次の画面が出ればひとまずインストール完了です。
メッセージサーバーへメッセージを送るクラスを作る
SpringでAMQP用のメッセージを作るために必要なライブラリは、mavenないしはgradleを使ってspring-boot-starter-amqpを導入するだけです。本稿記載時(2016/4)のspring-boot-starter-amqpのバージョンは1.3.3です。
メッセージを送信するコードは、Spring framework公式:Messaging with RabbitMQに従い、ReceiverクラスとApplicationクラスを作ります。
作成後は、Applicationクラスを実行しましょう。その後管理コンソールを見ると、Queueが1つ増えています!

本来はメッセージを送るための設定がいくつか必要になりますが、spring-boot-starter-amqpから提供されるテンプレートがローカルで実行するために必要なデフォルト設定で行うので不要です。
便利ですよね(・ω・
メッセージ送信と受信を分離する
さて先ほどのサンプルソース、実際にはメッセージ送信側と受信側両方を1つのクラスで受け持っています。
実際にメッセージサーバーへ送信して即時に受信をしているので、メッセージキューを貯めこむところや、メッセージを受信して払い出す処理の見分けがつきません。一応ドキュメントにも記載してはいるのですが、それにならい、送信と受信のコードを分離をします。
package mqsample.sender;

import org.springframework.amqp.core.Queue;
import org.springframework.amqp.rabbit.core.RabbitTemplate;
import org.springframework.beans.factory.annotation.Autowired;
import org.springframework.boot.CommandLineRunner;
import org.springframework.boot.SpringApplication;
import org.springframework.boot.autoconfigure.SpringBootApplication;
import org.springframework.context.annotation.AnnotationConfigApplicationContext;
import org.springframework.context.annotation.Bean;

import java.util.HashMap;
import java.util.Map;

import mqsample.SamplePOJO;

@SpringBootApplication
public class SenderApplication implements CommandLineRunner {

  final static String queueName = "spring-boot-pojotest";

  @Autowired
  AnnotationConfigApplicationContext context;

  @Autowired
  RabbitTemplate rabbitTemplate;

  @Bean
  Queue queue() {
    return new Queue(queueName, false);
  }

  public static void main(String[] args) throws InterruptedException {
    SpringApplication.run(SenderApplication.class, args);
  }

  @Override
  public void run(String... args) throws Exception {
    System.out.println("Waiting 1 seconds...");
    Thread.sleep(1000);
    System.out.println("Sending message...");

    // rabbitmqテンプレートを使ってPOJOを送信する
    rabbitTemplate.convertAndSend(queueName, genPOJO());

    context.close();
  }

  private SamplePOJO genPOJO() {
    SamplePOJO pojo = new SamplePOJO();
    pojo.setHeaderMessage("POJOメッセージ");
    Map<String, Object> map = new HashMap<>();
    map.put("name", "崖の上のポジョ");
    map.put("age", new Integer(6));
    map.put("gender", "♀");
    pojo.setData(map);

    return pojo;
  }

}
package mqsample.receiver;

import org.springframework.amqp.core.Binding;
import org.springframework.amqp.core.BindingBuilder;
import org.springframework.amqp.core.Queue;
import org.springframework.amqp.core.TopicExchange;
import org.springframework.amqp.rabbit.connection.ConnectionFactory;
import org.springframework.amqp.rabbit.listener.SimpleMessageListenerContainer;
import org.springframework.amqp.rabbit.listener.adapter.MessageListenerAdapter;
import org.springframework.beans.factory.annotation.Autowired;
import org.springframework.boot.CommandLineRunner;
import org.springframework.boot.SpringApplication;
import org.springframework.boot.autoconfigure.SpringBootApplication;
import org.springframework.context.annotation.AnnotationConfigApplicationContext;
import org.springframework.context.annotation.Bean;

import mqsample.POJOReceiver;

@SpringBootApplication
public class ReceiverApplication implements CommandLineRunner {
  public static void main(String[] args) throws InterruptedException {
    SpringApplication.run(ReceiverApplication.class, args);
  }

  final static String queueName = "spring-boot-pojotest";
  @Autowired
  AnnotationConfigApplicationContext context;

  @Bean
  TopicExchange exchange() {
    return new TopicExchange("spring-boot-pojotest-exchange");
  }

  @Bean
  Binding binding(Queue queue, TopicExchange exchange) {
    return BindingBuilder.bind(queue).to(exchange).with(queueName);
  }

  @Bean
  Queue queue() {
    return new Queue(queueName, false);
  }

  @Bean
  SimpleMessageListenerContainer container(ConnectionFactory connectionFactory,
      MessageListenerAdapter listenerAdapter) {
    SimpleMessageListenerContainer container = new SimpleMessageListenerContainer();
    container.setConnectionFactory(connectionFactory);
    container.setQueueNames(queueName);
    container.setMessageListener(listenerAdapter);
    return container;
  }

  @Bean
  POJOReceiver receiver() {
    return new POJOReceiver();
  }

  @Bean
  MessageListenerAdapter listenerAdapter(POJOReceiver receiver) {
    return new MessageListenerAdapter(receiver, "receivePOJO");
  }

  @Override
  public void run(String... args) throws Exception {
    // 止めるまで待機
  }
}