Chef実践入門第6章 アプリケーション実行環境の自動構築 を実機にて検証したメモ
#0.環境前提
MacOSX vagrant ,virtualboxインストール済み
#1.Bundlerを導入し、chef,knife-solo,berkshelfをインストール
(Bundler = Gem管理の為のrubyツール)
#環境用ディレクトリの作成
mkdir lnmpr
cd lnmpr

#Bundlerのインストール
sudo gem install bundler

#Gemfile作成
cat <<'EOF' > Gemfile
source 'https://rubygems.org'
gem 'chef'
gem 'knife-solo'
gem 'berkshelf'
EOF

#bundleコマンドの実行
bundle install

#Vagrantfile作成
vagrant init
#2.nginxのインストール
##(1) knife-soloによるcookbook作成
bundle exec knife cookbook create nginx -o ./site-cookbooks
##(2) nginxのレシピ作成
include_recipe "yum-epel"
package "nginx" do
   action :install
end

service "nginx" do
   action [ :enable, :start ]
   supports :status =>true, :restart =>true, :reload =>true
end
##(3) Berksfileを作成し、クックブックの依存関係定義
*yum,yum-epelは、https://supermarket.getchef.com から、ローカルのsite-cookbooksに、ダウンロードして入れないと、うまくいかなかった・・ここで結構はまる。
source "https://supermarket.getchef.com"
cookbook 'yum', path: "./site-cookbooks/yum"
cookbook 'yum-epel', path: "./site-cookbooks/yum-epel"
cookbook 'nginx', path: "./site-cookbooks/nginx"
##(4) berks vendorコマンドを実行してコミュニティクックブックのダウンロード
bundle exec berks vendor ./cookbooks

#yum-epel,nginx、依存関係のあるその他のcookbooksが配置されている事を確認
ls -Rla ./cookbooks
##(5) vagrant-omnibusプラグインのインストール
vagrant plugin install vagrant-omnibus
vagrant plugin list
##(6) Vagrantfileの設定
VAGRANTFILE_API_VERSION = "2"

Vagrant.configure(VAGRANTFILE_API_VERSION) do |config|
config.vm.hostname = "guest"
config.vm.box = "centos6.5"
config.vm.box_url = "http://opscode-vm-bento.s3.amazonaws.com/vagrant/virtualbox/opscode_centos-6.5-i386_chef-provisionerless.box"

config.vm.network "private_network", ip: "192.168.33.10"

# vagrant-omnibusの有効化
config.omnibus.chef_version = :latest
# Chef solo の設定
config.vm.provision :chef_solo do |chef|
  # クックブックの配置場所
  chef.cookbooks_path = ["./cookbooks","./site-cookbooks"]
  #適用するクックブックの定義
  chef.run_list = %w[
    recipe[yum]
    recipe[yum-epel]
    recipe[nginx]
  ]
end
end
##(7) 仮想サーバの起動とプロビジョン
vagrant up --provision
##(8) 確認
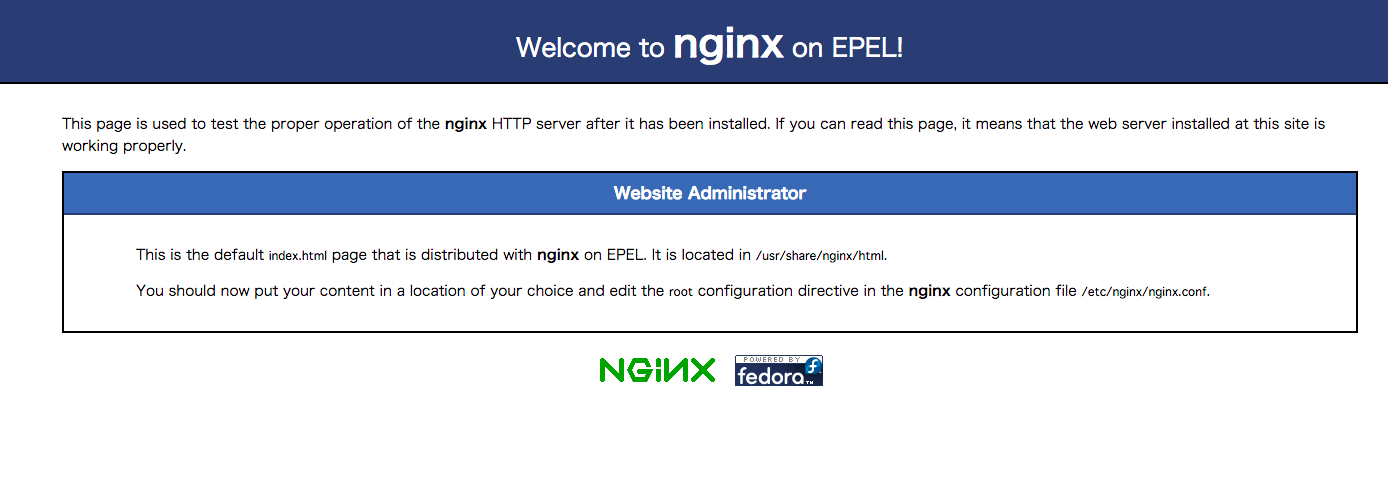
192.168.33.10にブラウザからアクセスしてnginx画面の確認
#3.PHP5.5のインストール(php,php-fpm,php-opcache)
##(1)knife-soloによるcookbook作成
bundle exec knife cookbook create php-env -o ./site-cookbooks
##(2) レシピ作成
yum_repository 'remi' do
   description 'Les RPM de Remi -Repository'
   baseurl 'http://rpms.famillecollet.com/enterprise/6/remi/x86_64/'
   gpgkey 'http://rpms.famillecollet.com/RPM-GPG-KEY-remi'
   fastestmirror_enabled true
   action :create
end

yum_repository 'remi-php55' do
   description 'Les RPM de remi de PHP5.5 pour Enterprise Linux6'
   baseurl 'http://rpms.famillecollet.com/enterprise/6/php55/$basearch/'
   gpgkey 'http://rpms.famillecollet.com/RPM-GPG-KEY-remi'
   fastestmirror_enabled true
   action :create
end

%w{php php-fpm php-opcache}.each do |pkg|
   package pkg do
   	action :install
   	notifies :restart, "service[php-fpm]"
   end
end

service "php-fpm" do
   action [:enable, :start]
end
##(3) Vagrantfile編集
    chef.run_list = %w[
      recipe[yum-epel]
      recipe[nginx]
      #以下行を追加
      recipe[php-env]
    ]
##(4) Berksfileの編集
以下を追加
cookbook "php-env", path:"./site-cookbooks/php-env"
##(5) berks vendorコマンドを実行
bundle exec berks vendor ./cookbooks
##(6) プロビジョン実行
vagrant provision
##(7) ゲストOS側でPHPがインストールされている事を確認
vagrant  ssh
yum list installed | grep php
exit
#3.nginxの設定ファイル変更 (nginxとPHP-FPM連携)
##(1)templateの作成
user nginx;
worker_processes 1;

error_log	/var/log/nginx/error.log warn;
pid	/var/run/nginx.pid;

events{
	worker_connections 1024;
}

http{
	include	/etc/nginx/mime.types;
	default_type application/octes-stream;
	log_format main '$remote_addr - $remote_user [$time_local] "$request"'
		'$status $body_bytes_sent "$http_referer"'
		'"$http_user_agent" "http_x_forwarded_for"';
	access_log	/var/log/nginx/access.log main;
	sendfile 	on;
	keepalive_timeout 65;

	server{
		listen 80 default_server;
		server_name _;

		location / {
			root	/usr/share/nginx/html;
			index	index.html index.htm index.php;
		}

		_page 404	/404.html;
		location = /404.html {
			root /usr/share/nginx/html;
		}

		# redirect server error pages to the static page /50x.html
		#
		error_page 500 502 503 504 /50x.html;
		location = /50x.html{
			root	/usr/share/nginx/html;
		}
		<% if node['nginx']['env'].include?("php") %>
		location ~ \.php$ {
			fastcgi_pass	127.0.0.1:9000;
			fastcgi_index	index.php;
			fastcgi_param	SCRIPT_FILENAME $document_root$fastcgi_script_name;
			include		fastcgi_params;

		}
		<% end %>
	}

}
##(2)nginx.conf.erbを有効とするようnginxのレシピに追記
以下を追記
 template 'nginx.conf' do
 	path	'/etc/nginx/nginx.conf'
 	source	"nginx.conf.erb"
 	owner	'root'
 	group	'root'
 	mode	'0644'
 	notifies	:reload, "service[nginx]"
 end
##(3)Attributeの初期値を設定
default['nginx']['env'] = []
##(4)Vagrantfileにプロビジョニング設定の追加
config.vm.provision :chef_solo do |chef|
ブロック内に以下を追加
 #Attributeの定義
    chef.json = {
      nginx: {
        env: ["php"]
      }
    }
##(5) berks vendorコマンドを実行
bundle exec berks vendor ./cookbooks
##(6) プロビジョン実行(ログ出力)
VAGRANT_LOG=info vagrant provision >&vagrant.log
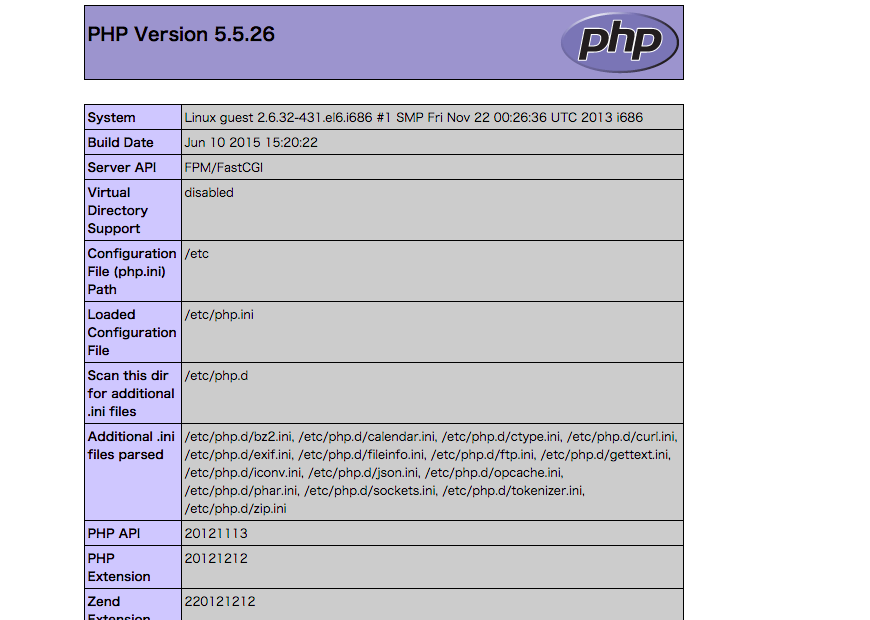
##(7) ブラウザでアクセス確認
ゲスト側に以下のファイルを作成
<?php
phpinfo();
?>
##(8) ブラウザで192.168.33.10/index.php に接続し、表示確認

#4.Ruby環境の構築
##(1)knife-soloによるcookbook作成
bundle exec knife cookbook create ruby-env -o ./site-cookbooks
##(2) Berksfileの編集
以下を追加
cookbook "ruby-env", path:"./site-cookbooks/ruby-env"
##(3) Vagrantfile編集
    chef.run_list = %w[
      recipe[yum]
      recipe[yum-epel]
      recipe[nginx]
      recipe[php-env]
      #以下行を追加
      recipe[ruby-env]
    ]
##(4) レシピ作成
レシピを作成する(やっている事:rbenvをインストールし、rbenvのプラグインruby-buildでrubyインストール)
%w{gcc git openssl-devel sqlite-devel}.each do |pkg|
   package pkg do
   	action :install
   end
end

git "/home/#{node['ruby-env']['user']}/.rbenv" do
   repository node["ruby-env"]["rbenv_url"]
   action :sync
   user node['ruby-env']['user']
   group node['ruby-env']['group']
end

template ".bash_profile" do
   source ".bash_profile.erb"
   path "/home/#{node['ruby-env']['user']}/.bash_profile"
   mode 0644
   owner node['ruby-env']['user']
   group node['ruby-env']['group']
   not_if "grep rbenv ~/.bash_profile", :environment => {:'HOME' => "/home/#{node['ruby-env']['user']}"}
end

directory "/home/#{node['ruby-env']['user']}/.rbenv/plugins" do
   owner node['ruby-env']['user']
   group node['ruby-env']['group']
   mode 0755
   action :create
end

git "/home/#{node['ruby-env']['user']}/.rbenv/plugins/ruby-build" do
   repository node["ruby-env"]["ruby-build_url"]
   action :sync
   user node['ruby-env']['user']
   group node['ruby-env']['group']
end

execute "rbenv install #{node['ruby-env']['version']}" do
   command "/home/#{node['ruby-env']['user']}/.rbenv/bin/rbenv install #{node['ruby-env']['version']}"
   user node['ruby-env']['user']
   group node['ruby-env']['group']
   environment 'HOME' => "/home/#{node['ruby-env']['user']}"
   not_if { File.exists?("/home/#{node['ruby-env']['user']}/.rbenv/versions/#{node['ruby-env']['version']}")}

end
##(5)Attributeの初期値を設定
default['ruby-env']['user'] = "vagrant"
default['ruby-env']['group'] = "vagrant"
default['ruby-env']['version'] = "2.1.1"
default["ruby-env"]["rbenv_url"] = "https://github.com/sstephenson/rbenv"
default["ruby-env"]["ruby-build_url"] = "https://github.com/sstephenson/ruby-build"
##(6)templateで環境変数を変更する
# .bash_profile

# Get the aliases and functions
if [ -f ~/.bashsrc ]; then
	. ~/.bashsrc
fi

# User specific enviroment and startup programs
PATH=$PATH:$HOME/bin
export PATH="$HOME/.rbenv/bin:$PATH"
eval "$(rbenv init -)"
##(7) berks vendorコマンドを実行
bundle exec berks vendor ./cookbooks
##(8) プロビジョン実行
VAGRANT_LOG=info vagrant provision >&vagrant.log
##(9) ゲストOS側でruby 2.1.1 がインストールされている事を確認
vagrant  ssh
rbenv versions
#2.1.1  と表示されればOK
exit
#5.Unicornのインストール
(Rails用APサーバとしてUicornをインストール)
##(1) ruby-envレシピの修正
以下を追記(Unicornのインストール)
execute "rbenv global #{node['ruby-env']['version']}" do
	command "/home/#{node['ruby-env']['user']}/.rbenv/bin/rbenv global #{node['ruby-env']['version']}"
	user node['ruby-env']['user']
	group node['ruby-env']['group']
	environment 'HOME' => "/home/#{node['ruby-env']['user']}"
end

%w{rbenv-rehash bundler}.each do |gem|
	execute "gem install #{gem}" do command "/home/#{node['ruby-env']['user']}/.rbenv/shims/gem install #{gem}"
	user node['ruby-env']['user']
	group node['ruby-env']['group']
	environment 'HOME' => "/home/#{node['ruby-env']	['user']}"
	not_if "/home/#{node['ruby-env']['user']}/.rbenv/	shims/gem list | grep #{gem}"
	end
end
##(2) nginxのdefault設定の修正(Unicornとの連携)
user nginx;
worker_processes 1;

error_log	/var/log/nginx/error.log warn;
pid	/var/run/nginx.pid;

events{
	worker_connections 1024;
}

http{
	include	/etc/nginx/mime.types;
	default_type application/octes-stream;
	log_format main '$remote_addr - $remote_user [$time_local] "$request"'
		'$status $body_bytes_sent "$http_referer"'
		'"$http_user_agent" "http_x_forwarded_for"';
	access_log	/var/log/nginx/access.log main;
	sendfile 	on;
	keepalive_timeout 65;

	#以下Unicorn連携用の記述1/2
	<% if node['nginx']['env'].include?("ruby") %>
	upstream unicorn{
		server unix:/tmp/unicorn.sock;
	}
	<% end %>
	#ここまで

	server{
		listen 80 default_server;
		server_name _;

		location / {
			root	/usr/share/nginx/html;
			index	index.html index.htm index.php;
		}

		error_page 404	/404.html;
		location = /404.html {
			root /usr/share/nginx/html;
		}

		# redirect server error pages to the static page /50x.html
		#
		error_page 500 502 503 504 /50x.html;
		location = /50x.html{
			root	/usr/share/nginx/html;
		}
		<% if node['nginx']['env'].include?("php") %>
			location ~ \.php$ {
			fastcgi_pass	127.0.0.1:9000;
			fastcgi_index	index.php;
			fastcgi_param	SCRIPT_FILENAME $document_root$fastcgi_script_name;
			include		fastcgi_params;
			}
		<% end %>
		#以下Unicorn連携用の記述2/2
		<% if node['nginx']['env'].include?("ruby") %>
			location /unicorn{
			rewrite ^/unicorn/(.+) /$1 break;
			proxy_pass http://unicorn/$1;
			}
		<% end %>
		#ここまで
	}
}
##(3) Attributeで初期値を設定
#変更前
    chef.json = {
      nginx: {
        env: ["php"]
      }
    }
#変更後
    chef.json = {
      nginx: {
        env: ["php","ruby"]
      }
    }
##(4) berks vendorコマンドを実行
bundle exec berks vendor ./cookbooks
##(5) プロビジョン実行
VAGRANT_LOG=info vagrant provision >&vagrant.log
##(6)動作確認用にRubyOnRailsのプロジェクトを作成する
###①簡単な動作確認用のRailsプロジェクトを作成
vagrant ssh
yum -y install libxml2 libxslt libxml2-devel libxslt-devel
gem install nokogiri -- --use-system-libraries
gem install rails -V
rails new test_unicorn --skip-bundle
cd test_unicorn
mkdir -p shared/{pids,log}
###②ゲスト側でGemfileを修正し、bundle install
source 'https://rubygems.org'

gem 'rails', '4.0.4'
gem 'sqlite3'
gem 'sass-rails','~>4.0.2'
gem 'uglifier', '>=1.3.0'
gem 'coffee-rails','~>4.0.0'
gem 'jquery-rails'
gem 'turbolinks'
gem 'jbuilder','~>1.2'

group :doc do
	gem 'sdoc',require: false
end

gem 'unicorn'
bundle install
##(7)Unicornの設定ファイルを作成
ゲスト側でUnicorn設定ファイルを作成
listen "/tmp/unicorn.sock"
worker_processes 2 # this should be >= nr_cpus
pid "/home/vagrant/test_unicorn/shared/pids/unicorn.pid"
stderr_path "/home/vagrant/test_unicorn/shared/log/unicorn.log"
stdout_path "/home/vagrant/test_unicorn/shared/log/unicorn.log"
##(8) Node.jsのインストール
###①cookbookの作成
bundle exec knife cookbook create nodejs -o ./site-cookbooks
###②Berksfileの修正
以下を追加
cookbook "nodejs",path:"./site-cookbooks/nodejs"
###③Node.jsインストールのcookbook作成
%w{gcc-c++}.each do |pkg|
	package pkg do
		action :install
	end
end
remote_file "tmp/#{node['nodejs']['filename']}" do
	 source "#{node['nodejs']['remote_uri']}"
end

bash "install nodejs" do
	user "root"
	cwd "/tmp"
	code <<-EOC
		tar xvzf #{node['nodejs']['filename']}
		cd #{node['nodejs']['dirname']}
		make
		make install
	EOC
end
###④Attributeの初期値を設定
default['nodejs']['version'] = "v0.10.26"
default['nodejs']['dirname'] = "node-#{default['nodejs']['version']}"
default['nodejs']['filename'] = "#{default['nodejs']['dirname']}.tar.gz"
default['nodejs']['remote_uri'] = "http://nodejs.org/dist/#{default['nodejs']['version']}/#{default['nodejs']['filename']}"
###⑤Vagrantfileのランリストに追加
以下追加
recipe[nodejs]
###⑥ berks vendorコマンドを実行
bundle exec berks vendor ./cookbooks
###⑦ プロビジョン実行
VAGRANT_LOG=info vagrant provision >&vagrant.log
##(9) Unicorn動作確認
###①Unicorn起動
vagrant ssh
cd test_unicorn
bundle exec unicorn -c config/unicorn.rb -D
###②ブラウザでhttp://192.168.33.10/unicorn にアクセス → エラー!! nginxのupstreamでエラーが発生している所までは分かったが、解決できず。トラブルシューティングを諦め一旦放置・・
解決は宿題にして先に進む・・
参考ログ:
[error] 22931#0: *28 upstream timed out (110: Connection timed out) while reading response header from upstream, client: 192.168.33.1, server: _, request: "GET /unicorn HTTP/1.1", upstream: "http://unix:/tmp/unicorn.sock:/", host: "192.168.33.10"
#6.MySQLのインストール
##(1) knife-soloによるcookbook作成
bundle exec knife cookbook create mysql -o ./site-cookbooks
##(2) Berksfileに追加
cookbook "mysql" , path:"./site-cookbooks/mysql"
##(3) Attributeで初期値設定
default['mysql']['user'] = "vagrant"
default['mysql']['group'] =  "vagrant"
default['mysql']['server_root_password'] = ""
##(4) MySQLインストールのレシピ作成
あとで
##(5) Vagrantfileの編集
VAGRANTFILE_API_VERSION = "2"

Vagrant.configure(VAGRANTFILE_API_VERSION) do |config|

  config.vm.hostname = "guest"
  config.vm.box = "centos6.5"
  config.vm.box_url = "http://opscode-vm-bento.s3.amazonaws.com/vagrant/virtualbox/opscode_centos-6.5-i386_chef-provisionerless.box"

  config.vm.network "private_network", ip: "192.168.33.10"

  # vagrant-omnibusの有効化
  config.omnibus.chef_version = :latest
  # Chef solo の設定
  config.vm.provision :chef_solo do |chef|
    # クックブックの配置場所
    chef.cookbooks_path = ["./cookbooks","./site-cookbooks"]

    # Attributeの定義
    chef.json = {
    #適当なパスワードに変えること
      mysql: {
        server_root_password: 'rootpass'
      },
      nginx: {
        env: ["php","ruby"]
      }
    }

    #適用するクックブックの定義
    chef.run_list = %w[
      recipe[yum]
      recipe[yum-epel]
      recipe[nginx]
      recipe[php-env]
      recipe[ruby-env]
      recipe[nodejs]
      recipe[mysql]
    ]
  end
end
##(6) MySQL設定ファイルの作成
[mysqld]
log-bin
datadir=/var/lib/mysql/mysql.sock
user=mysql

#Disebling symbolic-links is recommended to prevent assorted security risks
sybolic-links=0

[mysqld_safe]
log-error=/var/log/mysqld.log
pid-file=/var/run/mysqld/mysqld.pid
##(7) berks vendorコマンドを実行
bundle exec berks vendor ./cookbooks
##(8) プロビジョン実行
VAGRANT_LOG=info vagrant provision >&vagrant.log
##(9) 確認:mysqlで接続
vagrant ssh
mysql -u root -p
show databases;
#7. GitHubにコミット
今後開発環境として利用する為、今回作成したcookbook等GitHubにコミット。
