アドベントカレンダー8日目です。
今日はPhotonRealTimeとの連携について書きたいと思います。
Qiita初投稿なので見づらい部分もあると思いますがお役に立てれば幸いです。
今回用に作成したサンプルプロジェクトはこちらです。
PhotonRealTimeとは
所謂リアルタイム通信エンジンです。
photonにはざっくり言うとクラウドサービスのPhotonRealTimeとオンプレミスのPhotonServerがあります。
(PhotonRealTimeはPhotonCloudの名称が変わったもののようです)
PhotonRealTimeではサーバー側を実装することはできませんがコネクションやルームの作成、接続が簡単にできるので今回はこちらを使用します。
1.プロジェクトに組み込む
まずこちらからcocos2d-xのiOS SDKをダウンロードしてきましょう。
登録する必要がありますが無料プランがあるので、ひとまずそれにしておきます。
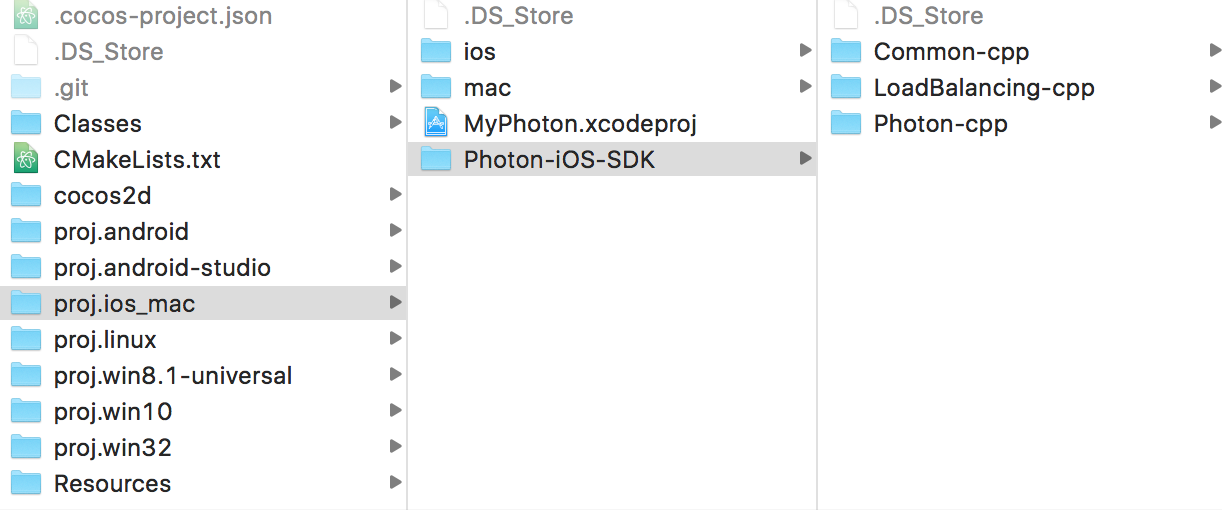
中身がいろいろありますが必要なのはCommon-cpp,LoadBalancing-cpp,Photon-cppフォルダ内のinc,libフォルダのみです。
今回これらを束ねたPhoton-iOS-SDKフォルダをproj.ios_mac下に入れました。
2.パスを通す
「Linking」>「Other Linker Flags」に下記を追加します。
-lCommon-cpp_$(CONFIGURATION)_$(PLATFORM_NAME)

-lPhoton-cpp_$(CONFIGURATION)_$(PLATFORM_NAME)

-lLoadBalancing-cpp_$(CONFIGURATION)_$(PLATFORM_NAME)
「Search Paths」>「Header Search Paths」に下記を追加します
$(SRCROOT)/Photon-iOS_SDK
「Library Paths」>「Library Search Paths」に下記を追加します
$(SRCROOT)/Photon-iOS_SDK/Common-cpp/lib

$(SRCROOT)/Photon-iOS_SDK/Photon-cpp/lib

$(SRCROOT)/Photon-iOS_SDK/LoadBalancing-cpp/lib
これでPhotonRealTimeのライブラリが使えるようになるはず。
(JStringで怒られる場合#define EG_NOSTDLIBを定義してください。暫定的ですが…)
3.Clinetの作成
今回のサンプルではDemoを参考にNetworkLogicというクラスを作成しました。
このクラスはExitGames::LoadBalancing::Listenerクラスを継承しており、メンバ変数にExitGames::LoadBalancing::Clientクラスのクライアントを持っています。
継承元のリスナーに従ってメソッドを用意しClientの初期化にthis*を渡すという形になってます。
この時アプリケーション登録で取得したAppIdを引数で渡します。
サンプルを動かしたい場合,この定数の値をご利用のものに変えてください。
static const ExitGames::Common::JString appId = L"<your appId>"; // set your app id here


// コンストラクタ
NetworkLogic::NetworkLogic():
client(*this, appId, appVersion, PLAYER_NAME+GETTIMEMS(), ExitGames::Photon::ConnectionProtocol::UDP, ExitGames::LoadBalancing::AuthenticationValues(), true, false)
{  }
    virtual void connectReturn(int errorCode, const ExitGames::Common::JString& errorString);
    virtual void disconnectReturn(void);
    virtual void createRoomReturn(int localPlayerNr, const ExitGames::Common::Hashtable& gameProperties, const ExitGames::Common::Hashtable& playerProperties, int errorCode, const ExitGames::Common::JString& errorString);
    virtual void joinRoomReturn(int localPlayerNr, const ExitGames::Common::Hashtable& gameProperties, const ExitGames::Common::Hashtable& playerProperties, int errorCode, const ExitGames::Common::JString& errorString);
    virtual void joinRandomRoomReturn(int localPlayerNr, const ExitGames::Common::Hashtable& gameProperties, const ExitGames::Common::Hashtable& playerProperties, int errorCode, const ExitGames::Common::JString& errorString);
    virtual void leaveRoomReturn(int errorCode, const ExitGames::Common::JString& errorString);
これらのメソッドを使ってコネクションを貼りルームを作ったり、ルームに入るのですがそのあたりはサンプルプロジェクトを参考にしていただけると幸いです。
4.Eventの送信
今回はタッチしたところにパーティクルを表示するということをやります。
パーティクルの種類はplayerIdに基づくようにするのでポジションだけ送れば良いわけです。
nByteはunsigned charであり引数のcodeは複数のイベントを区別するためのものです。
bool HelloWorld::onTouchBegan(cocos2d::Touch* touch, cocos2d::Event* event)
{
    if (networkLogic->getPlayerId())
    {
        this->addParticle(networkLogic->getPlayerId(), touch->getLocation().x, touch->getLocation().y);

        // イベント(タッチ座標)を送信
        ExitGames::Common::Hashtable* eventContent = new ExitGames::Common::Hashtable();
        eventContent->put<int, float>(1, touch->getLocation().x);
        eventContent->put<int, float>(2, touch->getLocation().y);
        networkLogic->sendEvent(1, eventContent);
    }

    return true;
}
void NetworkLogic::sendEvent(nByte code, ExitGames::Common::Hashtable* eventContent)
{
    this->client.opRaiseEvent(true, eventContent, 1, code);
}
5.Eventの送信
今度は送られてきたイベントを取得します。
イベントはcustomEventActionメソッドが受け取るので値を取得してqueueに詰めていきます。
一方Scene側でupdateメソッドを毎フレーム呼び,queueの中身分だけ取り出してパーティクルを描画します。
void NetworkLogic::customEventAction(int playerNr, nByte eventCode, const ExitGames::Common::Object& eventContent)
{
    switch (eventCode)
    {
        case 1:
            ExitGames::Common::Hashtable* event { ExitGames::Common::ValueObject<ExitGames::Common::Hashtable*>(eventContent).getDataCopy() };
            float x { ExitGames::Common::ValueObject<float>(event->getValue(1)).getDataCopy() };
            float y { ExitGames::Common::ValueObject<float>(event->getValue(2)).getDataCopy() };
            eventQueue.push({static_cast<float>(playerNr), x, y});
            break;
    }
}
    // HelloWorld::update(float dealt)内
    while (!networkLogic->eventQueue.empty())
    {
        std::array<float, 3> arr = networkLogic->eventQueue.front();
        networkLogic->eventQueue.pop();

        int playerNr = static_cast<int>(arr[0]);
        float x = arr[1];
        float y = arr[2];
        this->addParticle(playerNr, x, y);
    }
}
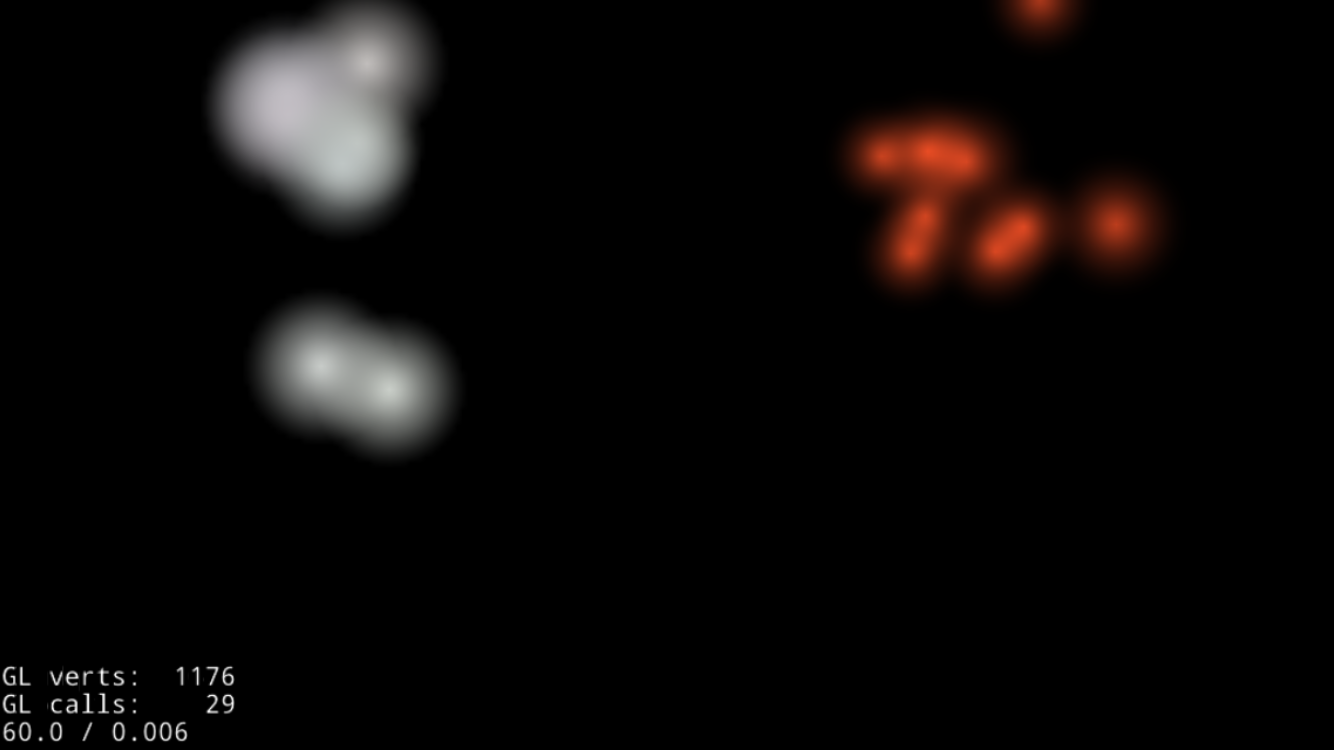
6.動かしてみた
iPadとiPhoneで通信してみたところ、このようになりました。
両方のパーティクルが出ているのが確認できます。
終わりに
省略した部分はありますが簡単に通信することができました。
Eventのタイプとデータが別に分かれているので、void*型に全部投げて1byte目の数値で分岐する…なんていう処理がいらないのが魅力的だと思います。
PhotonRealTImeではこの「コネクションを張ってルーム接続してイベント送信」ということに特化していて、ルームに何人入っているかなどは取得できません。
これらを使いたい場合は上記のPhotonServerを使うことになります。
とはいえPhotonRealTimeでも充分対戦ゲームを作ることはできると思うので、これを機に試してみてはいかがでしょうか?