はじめに
Swift Advent Calendar 2016 15日目の記事です
| 選択中 | 選択済 |
|---|---|
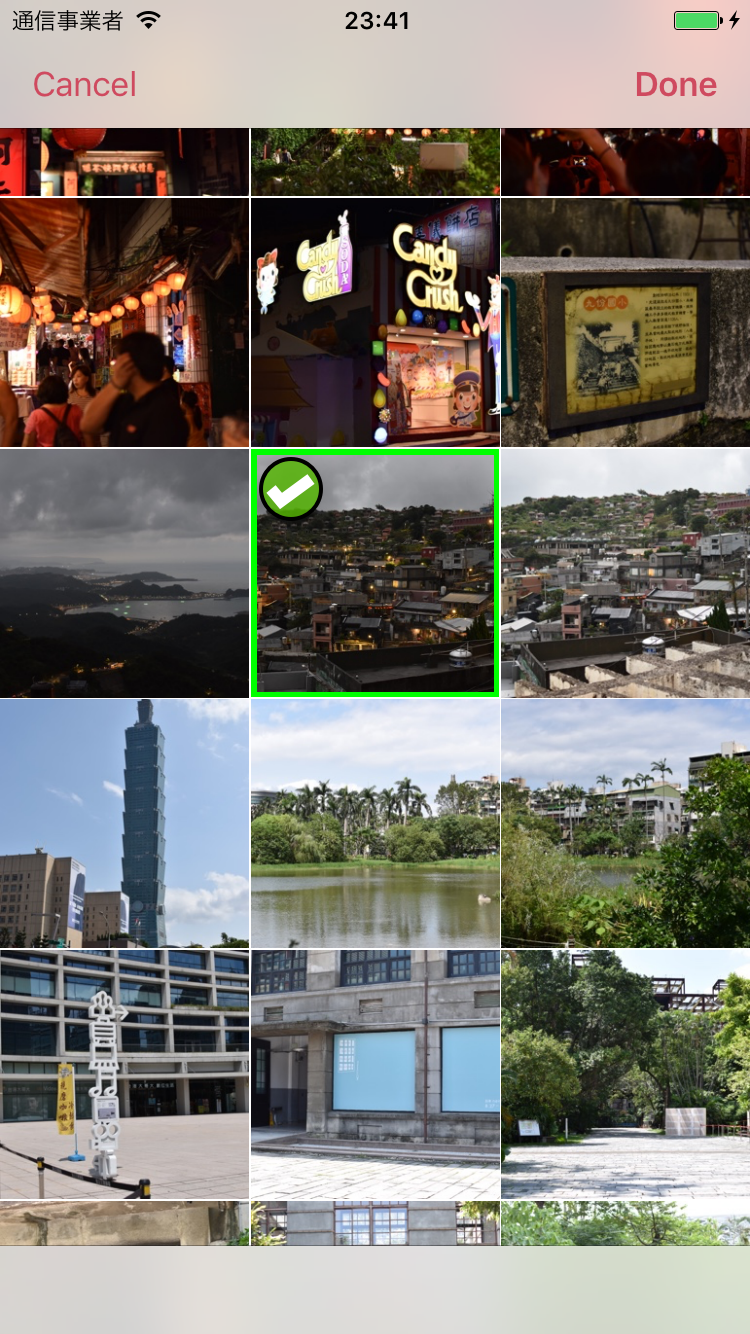 |
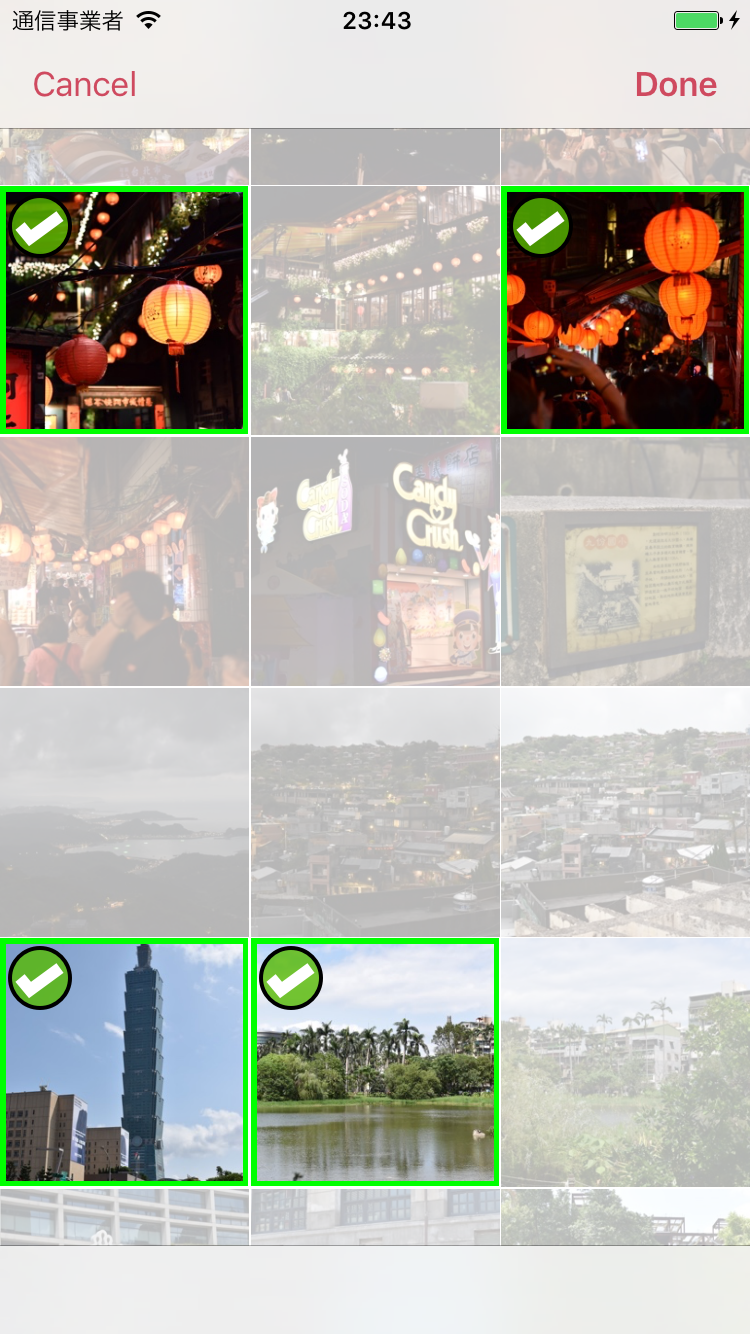 |
iOSアプリで画像選択機能を取り入れたい時
- UIImagePickerController だけで済ます
- AssetsLibrary.framework
- Photos.framework
などの方法がありましたが、AssetsLibrary.framework iOS9からはdeprecatedになりました。
UIImagePickerControllerだけでは、画像を複数選択できなかったり、制約が多いので、Photos.frameworkは避けては通れない道になりました。
Photos.frameworkはかなり大きなフレームワークで、少し大変ですが、
サンプル(Example app using Photos framework)が公開されていて、これがかなり有用です。
そのコードを読んだときに、Photos.frameworkについてはもちろんのこと、コメント文などから、他のことについても学びがあったので、それについて書きます。
- サンプルプロジェクトの概要
- Photos.frameworkに関わる部分について
- Photos.frameworkに関わらない部分について
- サンプルを拡張する話(ライブラリと言うほどまとまってないですが)
最後の章でのサンプルはこちらから確認できます
ha1f/MusubiImagePicker
一応Carthageでインストールできますが、製作中のアプリ用に作ったものの一部で、APIとか結構オレオレな感じなので、アドバイスいただきたい、というかそのへんまで変えるPRも大歓迎です・・・
サンプルプロジェクトの概要
Example app using Photos framework
からダウンロードできます。
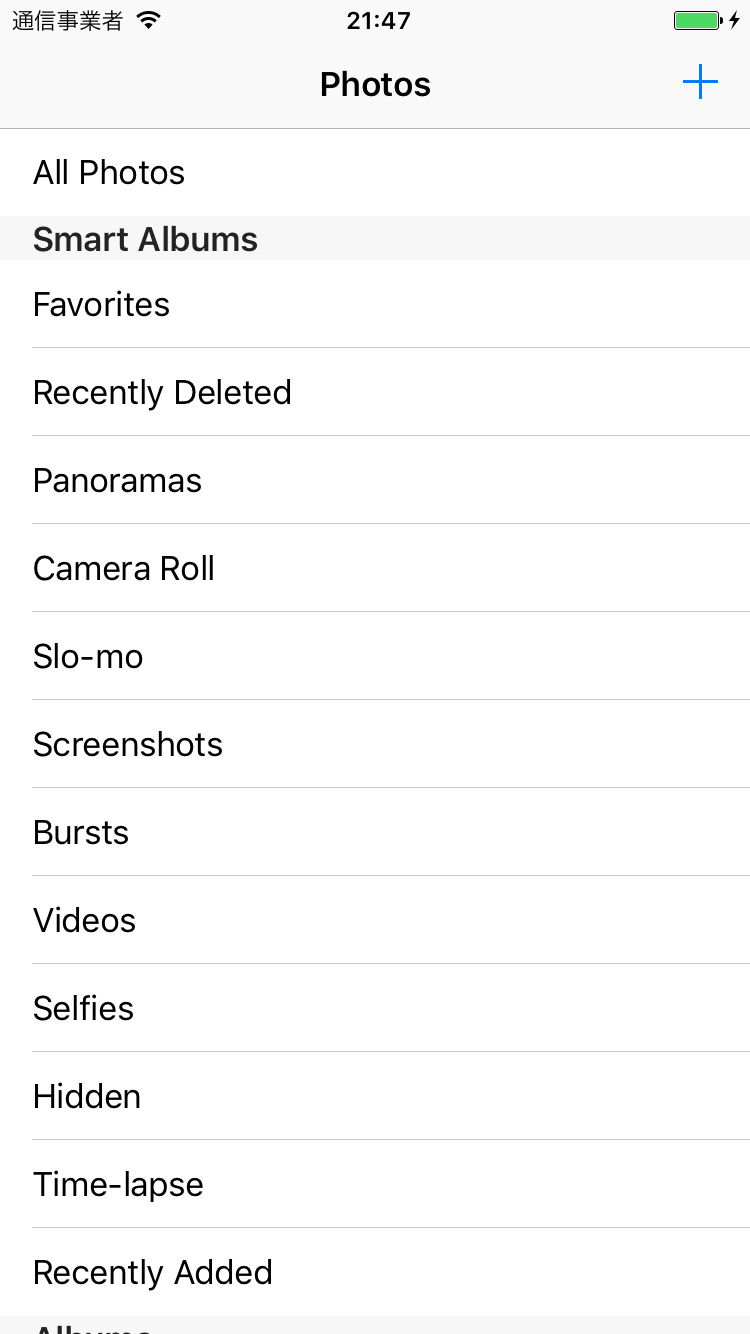
すべての写真/お気に入り/最近削除した画像/パノラマ/スクリーンショット/バースト/タイムラプス/・・・
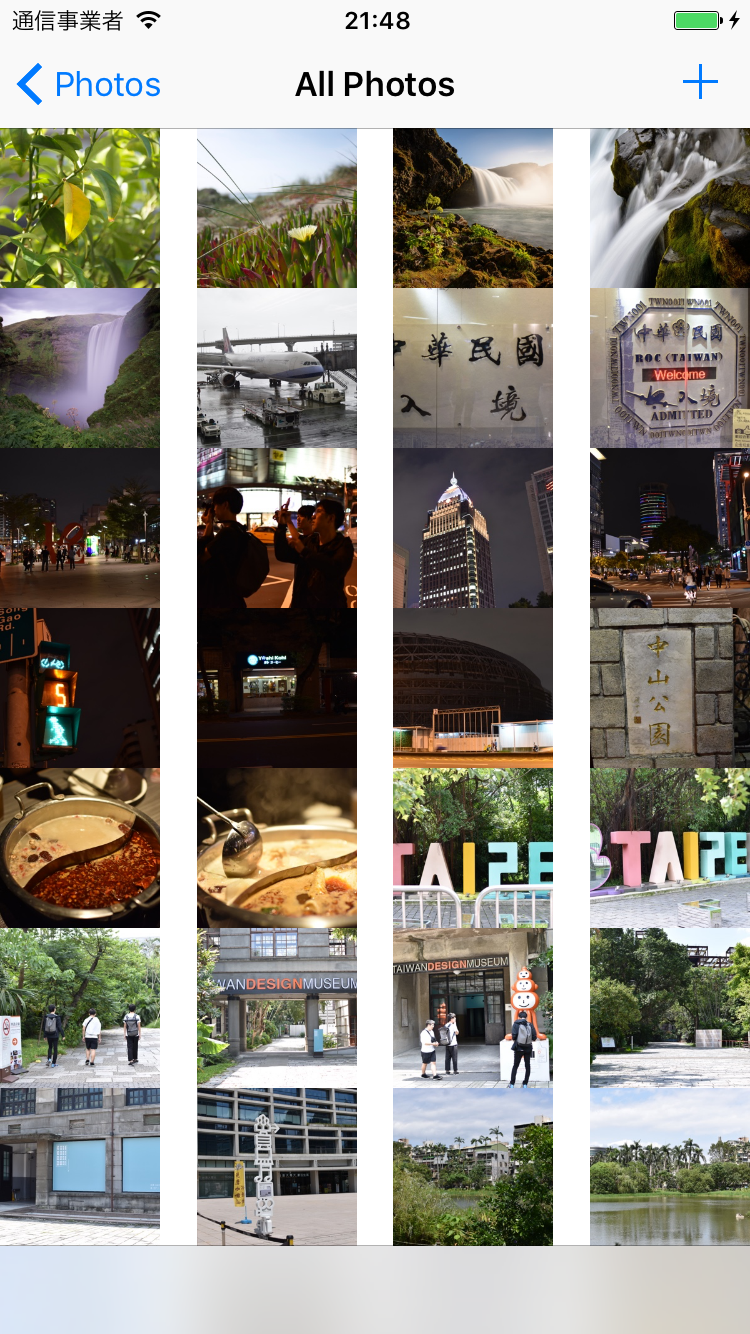
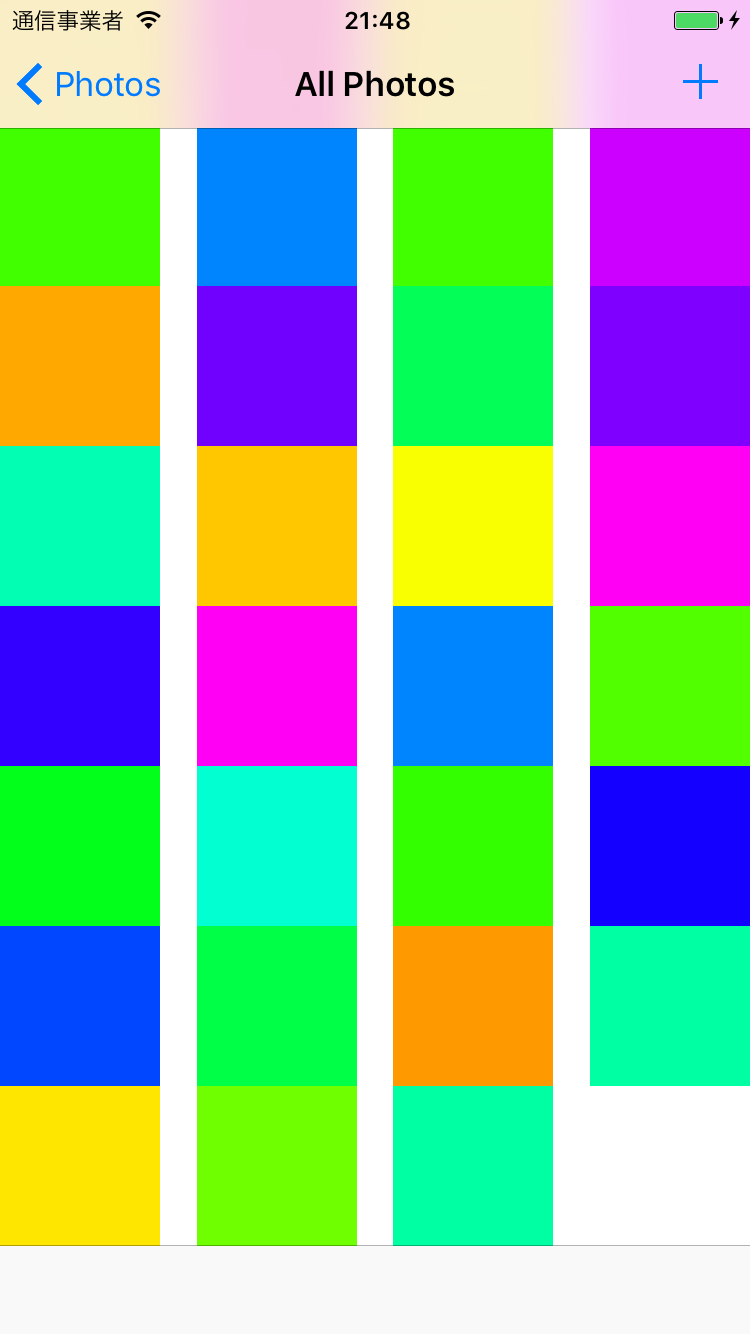
といった、いろいろなアルバム・スマートアルバムと呼ばれる画像群単位で画像を一覧表示し、各画像を削除したりお気に入り登録したりできます。
一覧画面で+ボタンを押すと、ランダムな色のランダムな形の画像が生成され、アルバムに追加されます。
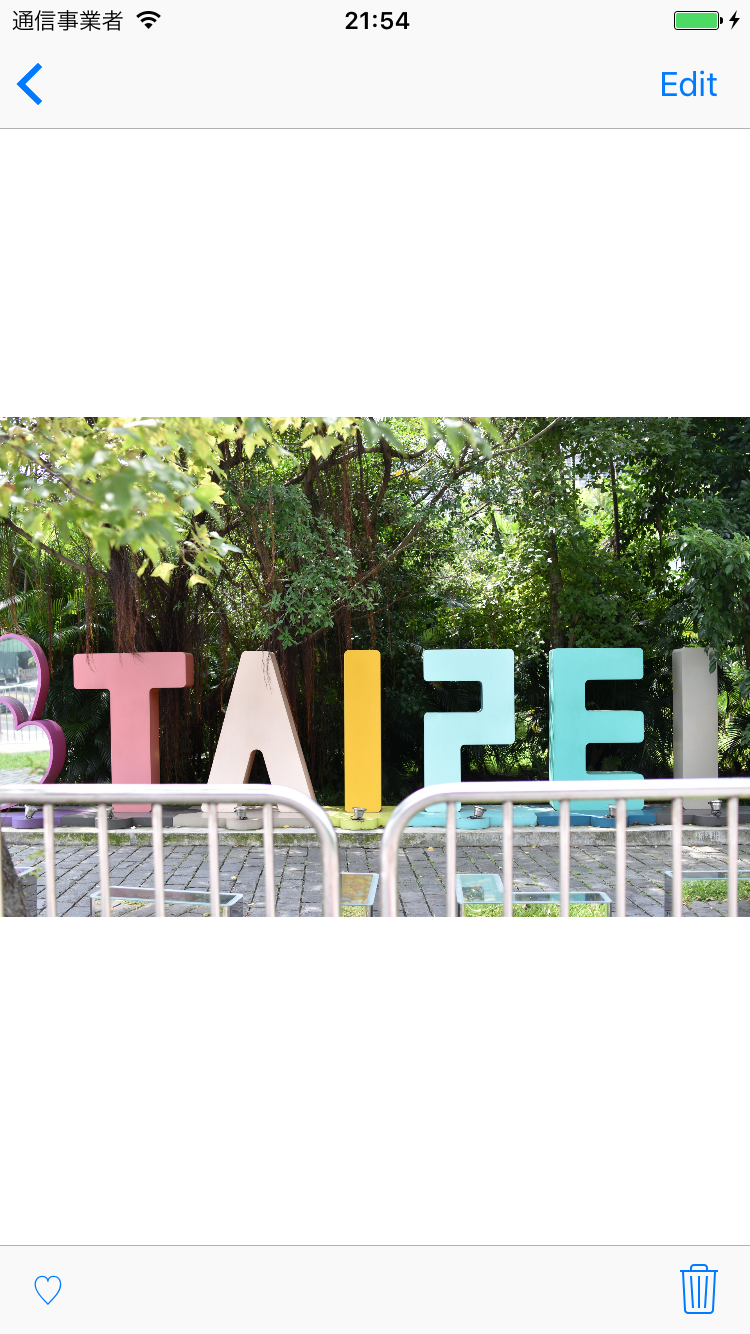
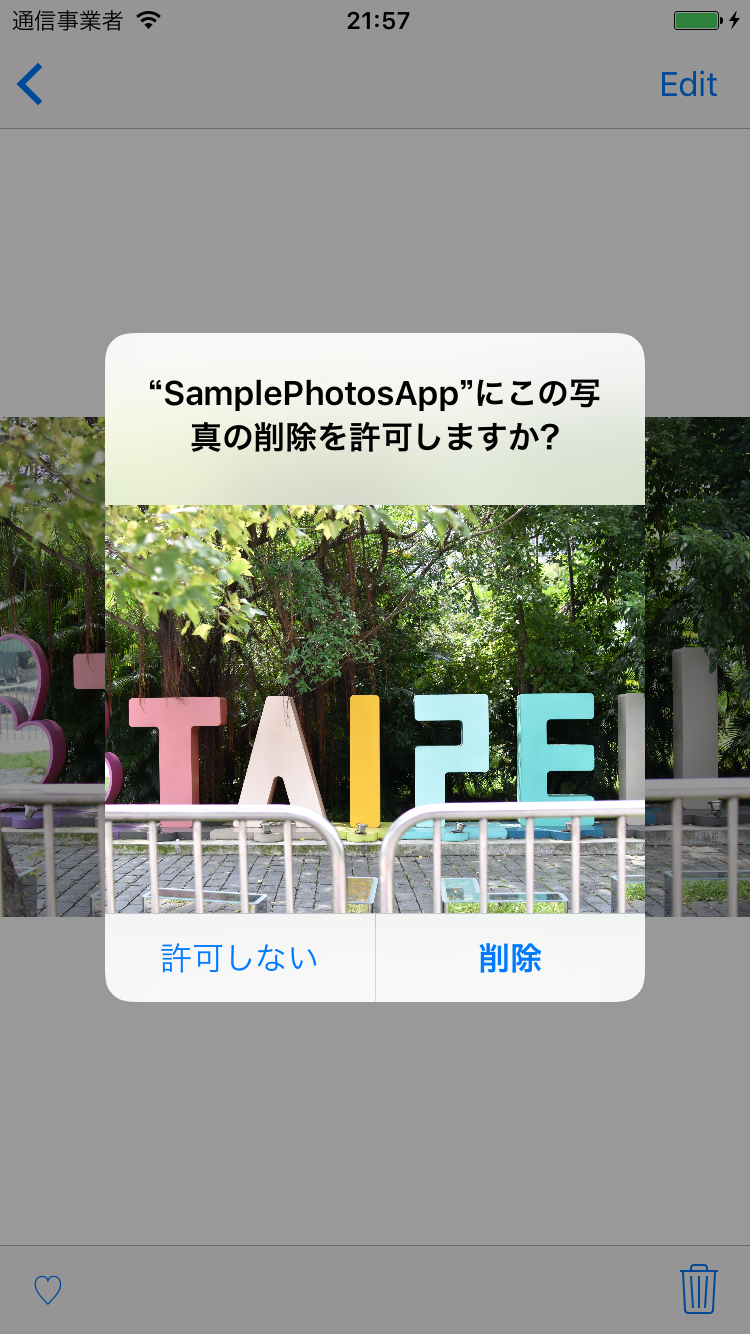
一覧画面で画像をタップすると、その画像/動画/ライブフォトをオリジナルサイズで表示する画面に遷移します。また、同画面で、その画像を編集・削除・お気に入り登録できます。
アプリ上で行った変更は、全て「写真」アプリにも反映されますし、「写真」アプリでの変更はすべてアプリにも反映されます(Observerが使われている)
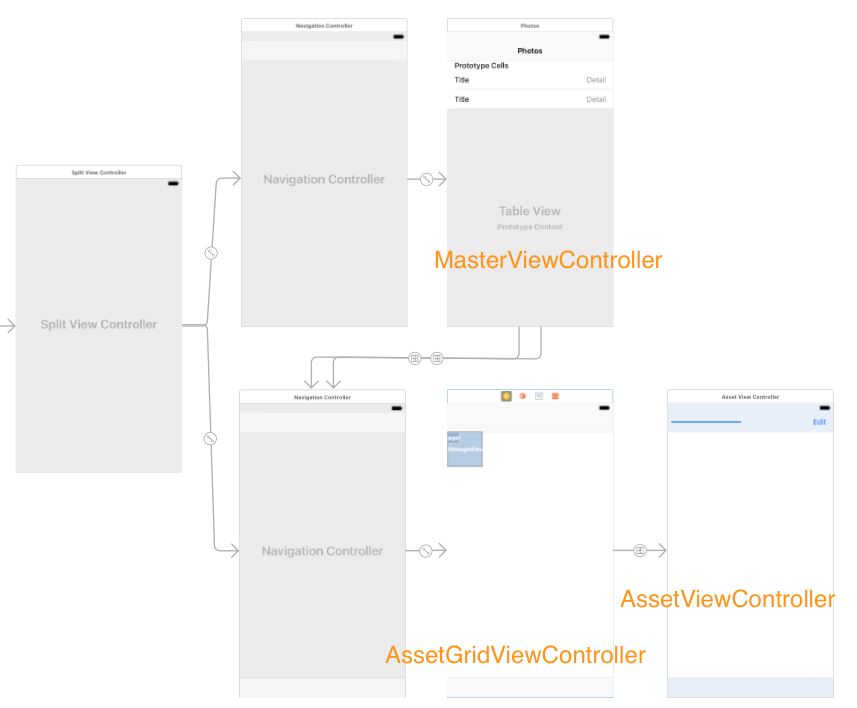
| MasterViewController | AssetGridViewController | AssetGridViewController |
|---|---|---|
 |
 |
 |
| AssetGridViewController2 | AssetViewController2 | AssetViewController3 |
|---|---|---|
 |
 |
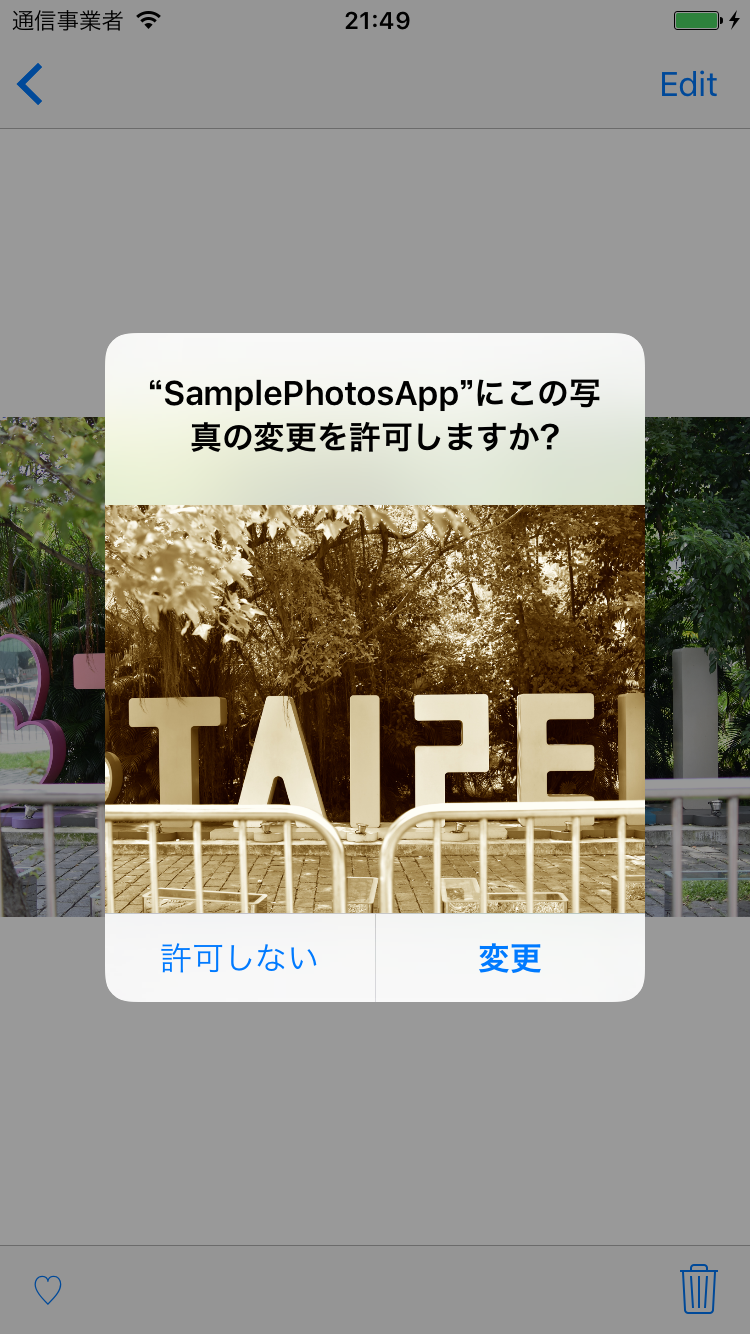 |
※添字の数字は自分がつけた番号で、画面は3つだけです
Storyboardは以下のようになっています
Photos.frameworkに関わる部分
用語
上を見て分かる通り、Photos.frameworkは、かなりiOS標準装備の「写真」アプリに即した構成になっています。
自分でPhotos.frameworkを使って作る場合でも、サンプルをベースに作ったほうがかなり楽だと思います。livePhotoのバッジや、Collection表示するときのキャッシングなども書かれているためです。
| 名前 | 意味 |
|---|---|
| albam | ユーザーが作成したアルバム |
| smartalbam | お気に入り、バースト、最近追加した項目、のような自動生成アルバム |
| クラス名 | 意味 |
|---|---|
| PHAsset | 写真・動画などに対応 |
| PHAssetCollection | アルバム、スマートアルバム、すべての写真に対応 |
| PHCollectionList | アルバム・スマートアルバムの一覧に対応 |
| クラス名 | 意味 |
|---|---|
| PHFetchResult<T> | Tの取得結果 |
| PHCollection | PHAssetCollectionとPHCollectionListの抽象クラス |
非同期実行
基本的にすべての動作が非同期(バックグラウンド)実行。完了後のハンドラを渡して繋いでいく。
PHAssetの説明の部分で、「〜に対応」というように書いたのは、PHAsset自体は画像ではないため。URLのようなもので、PHAssetから更に非同期でUIImageを取得する必要がある。このとき、リサイズとかもしれくれる。
非同期でUIImageを取得するコールバックは、サイズによって二回呼ばれる。はじめはサムネイルとして解像度の低い画像が、次は指定した解像度で、である。Gridに表示するだけならとても便利だが、取得した画像をそのまま使いたいときなどには注意。
画像加工などはかなり遅くて、待ちきれずにダブルタップとかすると落ちるので、実際に使うなら、処理中はdisableにするなどの修正の必要があると思います。
scale
基本といえば基本ですが、大抵のiPhoneはRetinaなので、表示解像度よりも高い画像を表示させる必要がある。これは UIScreen.main.scale で取得できるので、サムネイルのサイズは、以下のようにセルサイズの2xにしておく。7 Plusなどで拡大表示の設定にすると3xの場合もありますので、必ず対応したほうが良いです。
let scale = UIScreen.main.scale
let cellSize = (collectionViewLayout as! UICollectionViewFlowLayout).itemSize
let thumbnailSize = CGSize(width: cellSize.width * scale, height: cellSize.height * scale)
キャッシング
PHCachingImageManager により画像をキャッシュさせることができる。
以下はサンプル内の、スクロールごとに呼ばれるキャッシュ更新のコード。キャッシュすべき矩形を計算して、差分のキャッシュを追加したり削除したりしています
fileprivate func updateCachedAssets() {
    // Update only if the view is visible.
    guard isViewLoaded && view.window != nil else { return }

    // The preheat window is twice the height of the visible rect.
    let preheatRect = view!.bounds.insetBy(dx: 0, dy: -0.5 * view!.bounds.height)

    // Update only if the visible area is significantly different from the last preheated area.
    let delta = abs(preheatRect.midY - previousPreheatRect.midY)
    guard delta > view.bounds.height / 3 else { return }

    // Compute the assets to start caching and to stop caching.
    let (addedRects, removedRects) = differencesBetweenRects(previousPreheatRect, preheatRect)
    let addedAssets = addedRects
        .flatMap { rect in collectionView!.indexPathsForElements(in: rect) }
        .map { indexPath in fetchResult.object(at: indexPath.item) }
    let removedAssets = removedRects
        .flatMap { rect in collectionView!.indexPathsForElements(in: rect) }
        .map { indexPath in fetchResult.object(at: indexPath.item) }

    // Update the assets the PHCachingImageManager is caching.
    imageManager.startCachingImages(for: addedAssets,
        targetSize: thumbnailSize, contentMode: .aspectFill, options: nil)
    imageManager.stopCachingImages(for: removedAssets,
        targetSize: thumbnailSize, contentMode: .aspectFill, options: nil)

    // Store the preheat rect to compare against in the future.
    previousPreheatRect = preheatRect
}
めっちゃサクサク動きます。
ライブフォト関連
PHLivePhotoView
ライブフォトを表示できる
PHLivePhotoViewDelegateで、開始・終了のタイミングを受け取れる
livePhotoバッジ
ライブフォトのマークを表示させることができる。
if asset.mediaSubtypes.contains(.photoLive) {
    cell.livePhotoBadgeImage = PHLivePhotoView.livePhotoBadgeImage(options: .overContent)
}
PHPhotoLibraryChangeObserver
果たしてここまで実装する必要があるのかわからないが、フォトライブラリの更新を監視している。
PHPhotoLibrary.shared().register(self)
PHPhotoLibrary.shared().unregisterChangeObserver(self)
で登録・解除することができて、PHPhotoLibraryChangeObserver プロトコルを実装することで変更を受け取れる
たとえば、Grid画面でスクリーンショットを撮ると、即座に一覧に反映されるのを見て取れる。(アニメーションもコード内で計算されている)
「写真」への操作
編集・お気に入り・削除などの操作は
PHPhotoLibrary.shared().performChanges(changeBlock: () -> Void, completionHandler: ((Bool, Error?) -> Void)?)
によって実行します
Photos.frameworkに関わらない部分
Notificationのスレッド
UIの更新は、必ずメインスレッドで行わなければなりません。
一方、NotificationCenterからの通知は、発行されたスレッドで実行されます。よって、メインでないスレッドから発行される可能性がある時、UIの更新はGCDでメインスレッドに切り替える必要があります(GCDについてはSwiftで遊ぼう! - 302 - マルチスレッド(まとめ)が詳しいです)
サンプル内では、ライブラリ更新通知の部分で使われていました。
func photoLibraryDidChange(_ changeInstance: PHChange) {
    DispatchQueue.main.sync {
        // UI更新
    }
セルへの遅延ロード
セルの画像をロードした時に、表示するときにはすでに別のセルとして使いまわされている可能性があります。(参考:iOS10時代のCollectionView最新つかいこなし)
この対処として、セルにlocalIdentifier(URI)を持たせておいて、セット時に確認していました。
cell.representedAssetIdentifier = asset.localIdentifier
imageManager.requestImage(for: asset, targetSize: thumbnailSize, contentMode: .aspectFill, options: nil, resultHandler: { image, _ in
    // 同じか確認
    if cell.representedAssetIdentifier == asset.localIdentifier {
        cell.thumbnailImage = image
    }
})
subviewでないUIオブジェクト
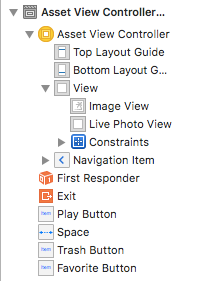
AssetViewControllerのstoryboardに、普段見ない景色があった。
これは、下図のように、どこのsubviewでもないところにUIパーツが設置されたまま、コードへの関連付けがされている。
コード側では、インスタンスを生成することはなく、
@IBOutlet var trashButton: UIBarButtonItem!
・・・
    toolbarItems = [favoriteButton, space, playButton, space, trashButton]
・・・
のようにセットしていた。
今まで使ったことなかったが、動的に変更する必要がある時などはとても便利そう
サンプルを拡張する
構成
以降は、「読む」話でなく、「作る」話になります。
以上のサンプルをもとに、「画像選択」ができるようなモジュールを作る必要があったので、各画面を継承しつつ、書き換えることにした。
以下の流れで変更を説明していく。
- 長押しで詳細画面に遷移するようにする
- 選択できるようにする
- グリッドにする
長押ししたら詳細に遷移
元のアプリでのタップ操作は「選択」に割り当てたかったので、長押しで遷移できるようにします。
CollectionView側にLongPressGestureRecognizerを置いて、CollectionView内の座標から対象セルを取得し、遷移しています。
同時に、タップによる遷移を禁止しました
func onCellPressedLong(_ recognizer: UILongPressGestureRecognizer) {
    guard recognizer.view! == collectionView! else {
        return
    }
    // press終了時も呼ばれるのでbeganを検知する
    if recognizer.state == .began {
        let point = recognizer.location(in: recognizer.view)
        let indexPath = self.collectionView!.indexPathForItem(at: point)!
        self.performSegue(withIdentifier: "showAsset", sender: indexPath)
    }
}
選択できるようにする
UICollectionView自体に、選択する機能があります。
ただし、そのままではまず「選択されたかされてないか」すらわからないので、何かしらのUXを考える必要があります。
標準でできるのは、背景のビューを変えることです。
self.selectedBackgroundView = UIView(frame: frame)
selectedBackgroundView!.backgroundColor = UIColor.green
ただし、これだけだと普段の画像サイズを小さくしなければ見えないので、チェックボックスを上に表示します。CheckBoxはisSelectedに対応させて、isHiddenを切り替えます
トリガは、isSelectedプロパティのdidSetで監視します。
override var isSelected: Bool {
    didSet {
        checkBoxView.isHidden = !isSelected
    }
}
チェックボックスは、ましろさんの記事を参考に作りました。
参考:ましろのログ/CollectionViewCellにチェックボックスをつけて選択状態を見えるようにする
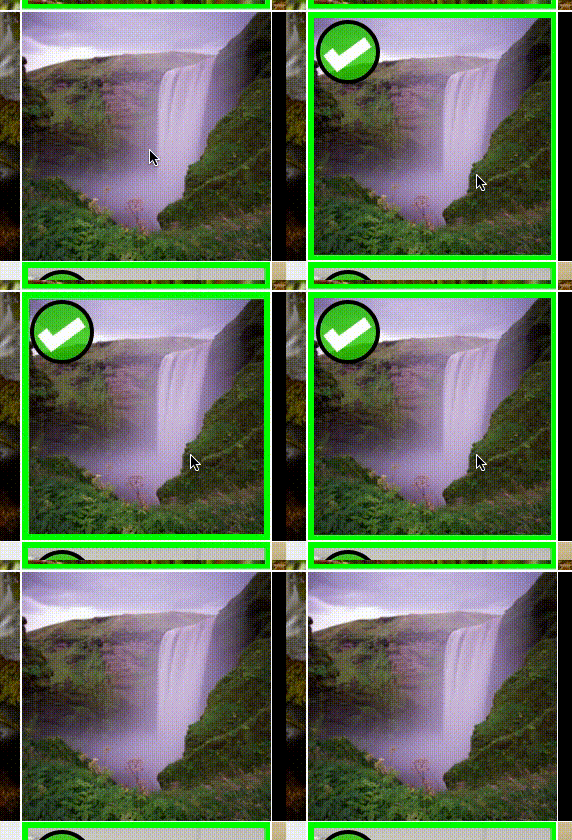
これでも物足りなかったので、さらに、画像をアニメーションさせます。
選択されたときは、タップによってしぼんで、また戻ろうとするけどすぐ捕まっちゃう、
解除のときはタップによってしぼむけどその分一気に戻る、そんなイメージです(?)
※gif作り間違えたようで、本当はもっと速いです
override var isSelected: Bool {
    didSet {
        checkBoxView.isHidden = !isSelected
        if oldValue != isSelected {
            // 変化あり
            let imageView = self.imageView
            if isSelected {
                UIView.animate(withDuration: 0.05, animations: {[weak imageView] _ in
                    imageView?.transform = CGAffineTransform(scaleX: 0.93, y: 0.93)
                    }, completion: { _ in
                        UIView.animate(withDuration: 0.03) {[weak imageView] _ in
                            imageView?.transform = CGAffineTransform(scaleX: 0.95, y: 0.95)
                        }
                })
            } else {
                UIView.animate(withDuration: 0.04, animations: {[weak imageView] _ in
                    imageView?.transform = CGAffineTransform(scaleX: 0.92, y: 0.92)
                    }, completion: { _ in
                        UIView.animate(withDuration: 0.05) {[weak imageView] _ in
                            imageView?.transform = CGAffineTransform(scaleX: 1.0, y: 1.0)
                        }
                })
            }
        }
    }
}
グリッドを作る
レイアウトは、CollectionViewFlowLayoutのDelegateを実装することで
いつも使っているコードがります。高さ、幅を計算して、UICollectionViewDelegateFlowLayoutを実装しています。
extension MusubiAssetGridViewController: UICollectionViewDelegateFlowLayout {
    // MARK: LayoutDelegates
    // 横に並ぶセルの数
    static let HORIZONTAL_CELLS_COUNT: CGFloat = 3
    // セルの間隔
    static let CELLS_MARGIN: CGFloat = 1
    // 周りの余白
    static let edgeInsets: UIEdgeInsets = UIEdgeInsets(top: 0, left: 0, bottom: 0, right: 0)

    // TODO: パフォーマンス改善したい
    fileprivate var cellSize: CGSize {
        let space = type(of: self).CELLS_MARGIN

        var boundSize = collectionView!.bounds.size
        boundSize.width -= collectionView!.contentInset.left - collectionView!.contentInset.right
        boundSize.height -= collectionView!.contentInset.top - collectionView!.contentInset.bottom

        let contentWidth: CGFloat
        if let direction = (collectionViewLayout as? UICollectionViewFlowLayout)?.scrollDirection, direction == .horizontal {
            // 横スクロールなら縦並びのセル数として計算
            contentWidth = boundSize.height - MusubiAssetGridViewController.edgeInsets.top - MusubiAssetGridViewController.edgeInsets.bottom
        } else {
            contentWidth = boundSize.width - MusubiAssetGridViewController.edgeInsets.right - MusubiAssetGridViewController.edgeInsets.left
        }

        let cellLength = (contentWidth - space * (type(of: self).HORIZONTAL_CELLS_COUNT-1)) / type(of: self).HORIZONTAL_CELLS_COUNT

        return CGSize(width: cellLength, height: cellLength)
    }

    func collectionView(_ collectionView: UICollectionView, layout collectionViewLayout: UICollectionViewLayout, sizeForItemAt indexPath: IndexPath) -> CGSize {
        return cellSize
    }

    func collectionView(_ collectionView: UICollectionView, layout collectionViewLayout: UICollectionViewLayout, insetForSectionAt section: Int) -> UIEdgeInsets {
        return MusubiAssetGridViewController.edgeInsets
    }

    func collectionView(_ collectionView: UICollectionView, layout collectionViewLayout: UICollectionViewLayout, minimumLineSpacingForSectionAt section: Int) -> CGFloat {
        let space = type(of: self).CELLS_MARGIN
        return space
    }

    func collectionView(_ collectionView: UICollectionView, layout collectionViewLayout: UICollectionViewLayout, minimumInteritemSpacingForSectionAt section: Int) -> CGFloat {
        let space = type(of: self).CELLS_MARGIN
        return space
    }
}
MusubiImagePicker
その他、「すべての写真」だけにするとか、選択上限を設定するとか、並び順を逆にするとかを経て、MusubiImagePickerができました。はじめに述べたとおり、特定のアプリ用に作ったので、APIはオレオレ感溢れていますが、ha1f/MusubiImagePickerから見られます。
Demoも付属しているので、よかったら、使ってみたり、コミットしてみたりしてください。
また、もうすぐこれを一部使ったアプリ(自分と@aritaku03の合計2人で開発)もリリース予定ですので、そちらもよろしくお願いします!
| 選択中 | 選択済 |
|---|---|
 |
 |
