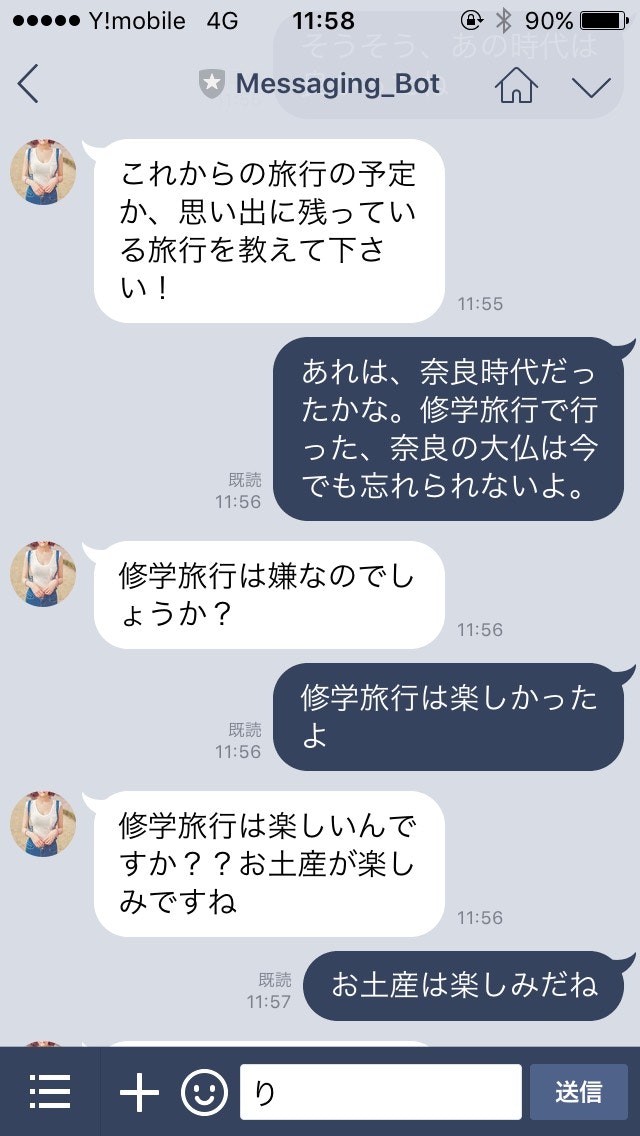
9月末にLINEから発表されたLINE BOTが作れるMessaging APIを使って、簡易的な会話ができるBOTを作ってみました。

以下の環境を用いて動かします。
-
LINE developer
-
PHP (参考資料が多かったので)
-
さくらVPS
-
docomo API
##LINE developers設定
ここが一番面倒な作業になります。(僕もここで一番つまりました...)
まずはLINE BUSINESS CENTERでアカウントを作成。 -
LINE BUSINESS CENTER
https://business.line.me/ja/
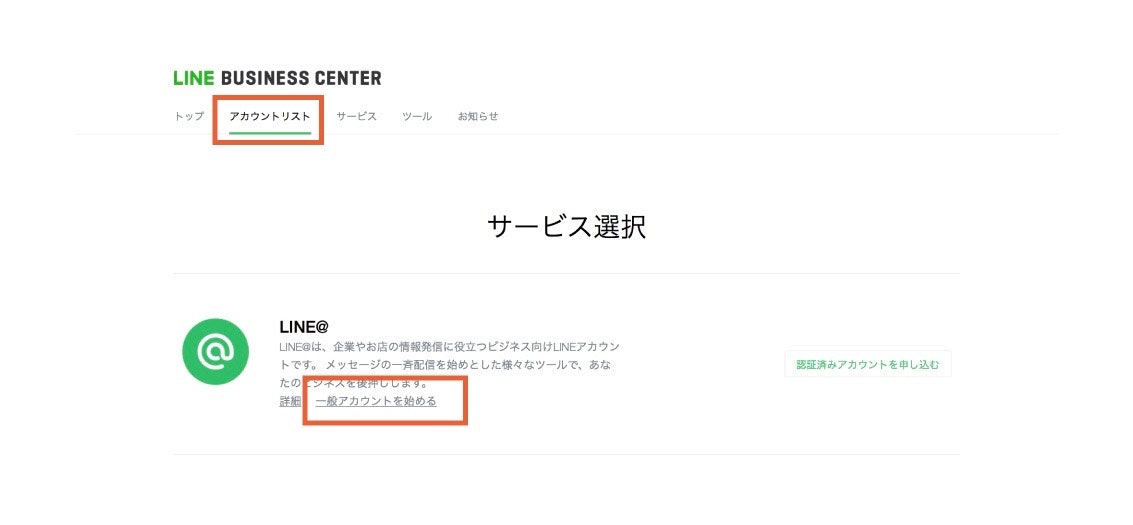
「アカウントリスト」から「ビジネスアカウントを作成」を選択。すると以下のページにいきます。ここから「一般アカウントを始める」を選択。
※僕の場合ここで「認証済みアカウントを申し込む」を選択してしまい詰まりました。今回は無料の「一般アカウント」を使用します。

そしてBotの名前と業種を選択して、アカウントを申し込み登録。
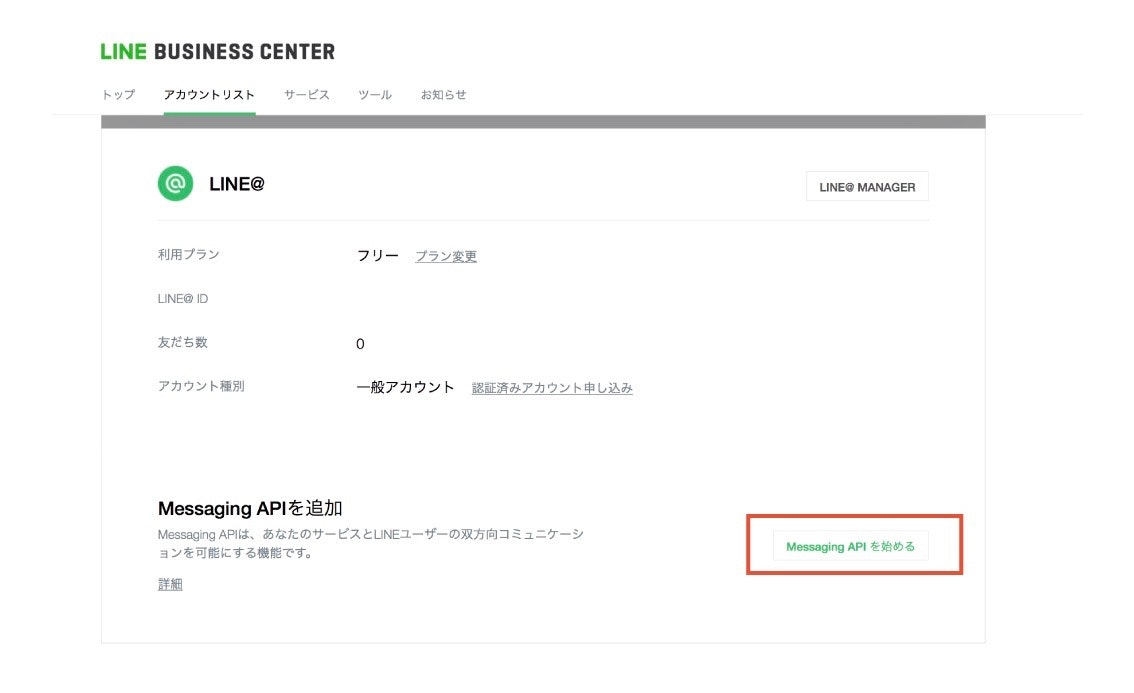
アカウントリストにて自分のアカウントができていることを確認。Messaging APIを申し込みを行います。ここから、LINE MANAGERのページへ。
###LINE MANAGER設定
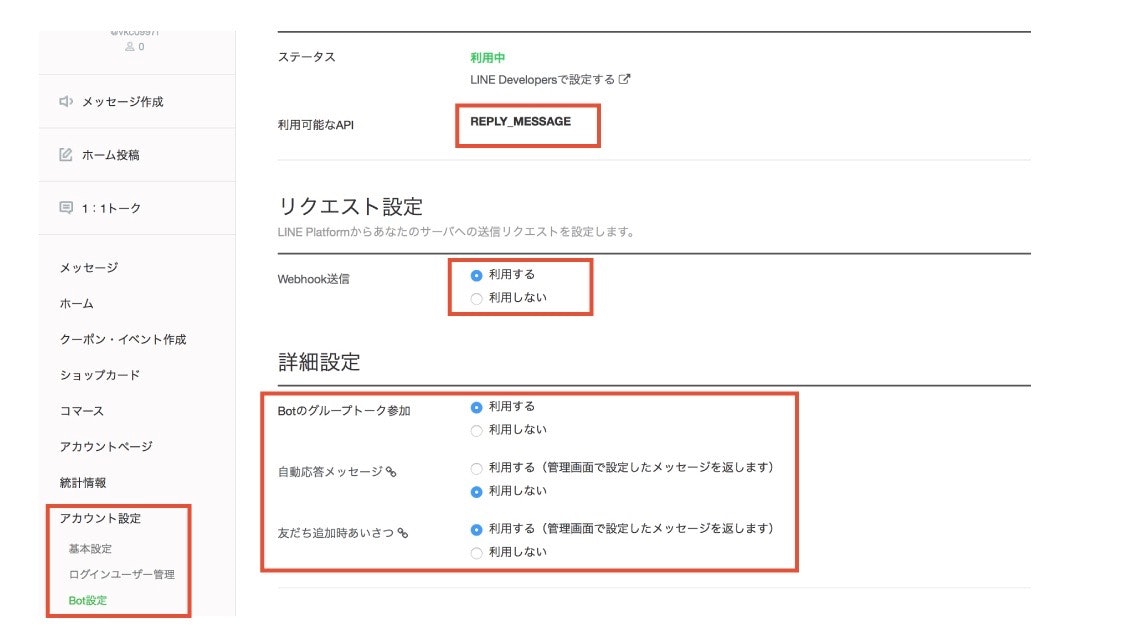
「アカウント設定」→「Bot設定」を選択し、以下の画面の設定を行ってください。
※「利用可能なAPI」がREPLY_MESSAGEになっていることを確認。もしPUSH_MESSAGEが入っている場合は有料のアカウントが必要になるため、無料のアカウントではJSONが返ってきません。
###LINE deveroper設定
①PHPを置いているサーバのURLを設定。```
https://【さくらのアカウント名】.sakura.ne.jp/LineBot/MessagingBot/callback.php
②サーバはSSL認証があるもの(さくらVPSはデフォルトで設定済)
③`Cannel Access Token`は後ほど使います。

これでLINEの設定は完了です。
##さくらVPS
さくらのサーバコントロールパネルから、ドメイン設定のペーシを開きます。サクラのVPSではデフォルトでSSLを利用できる設定になっていると思います。

もしSSLの設定が利用中になっていない場合は「変更」から、共有SSLの設定にチェックを入れればOK!

##実行ファイルを配置
さくらのファイルマネージャーを開きます。LINE developerで設定した階層に実行ファイルを配置してあげます。
https://【さくらのアカウント名】.sakura.ne.jp/LineBot/MessagingBot/callback.php

#docomo Developer登録
あと少しです...。docomoのオープン化している会話APIを使うためには、アカウント登録が必要になります。
***docomo Developer*** https://dev.smt.docomo.ne.jp/?p=index

登録完了後、`API Key`を使用して、BotがPOSTするメッセージを取得します。これであとは、PHPのプログラムを書いてあげれば完了です。
#ユーザーのメッセージに対しての返事を返すプログラム (PHP)
```callback.php
<?php
$accessToken = '【Cannel Access Tokenの値を使用する】';
//ユーザーからのメッセージ取得
$json_string = file_get_contents('php://input');
$jsonObj = json_decode($json_string);
$type = $jsonObj->{"events"}[0]->{"message"}->{"type"};
//メッセージ取得
$text = $jsonObj->{"events"}[0]->{"message"}->{"text"};
//ReplyToken取得
$replyToken = $jsonObj->{"events"}[0]->{"replyToken"};
//メッセージ以外のときは何も返さず終了
if($type != "text"){
exit;
}
//docomo返信
$response = chat($text);
//返信データ作成
$response_format_text = [
"type" => "text",
"text" => $response
];
$post_data = [
"replyToken" => $replyToken,
"messages" => [$response_format_text]
];
$ch = curl_init("https://api.line.me/v2/bot/message/reply");
curl_setopt($ch, CURLOPT_POST, true);
curl_setopt($ch, CURLOPT_CUSTOMREQUEST, 'POST');
curl_setopt($ch, CURLOPT_RETURNTRANSFER, true);
curl_setopt($ch, CURLOPT_POSTFIELDS, json_encode($post_data));
curl_setopt($ch, CURLOPT_HTTPHEADER, array(
'Content-Type: application/json; charser=UTF-8',
'Authorization: Bearer ' . $accessToken
));
$result = curl_exec($ch);
curl_close($ch);
//ドコモの雑談APIから雑談データを取得
function chat($text) {
// docomo chatAPI
$api_key = '【docomoのAPI Keyを使用する】';
$api_url = sprintf('https://api.apigw.smt.docomo.ne.jp/dialogue/v1/dialogue?APIKEY=%s', $api_key);
$req_body = array('utt' => $text);
$headers = array(
'Content-Type: application/json; charset=UTF-8',
);
$options = array(
'http'=>array(
'method' => 'POST',
'header' => implode("\r\n", $headers),
'content' => json_encode($req_body),
)
);
$stream = stream_context_create($options);
$res = json_decode(file_get_contents($api_url, false, $stream));
return $res->utt;
}
以上で完成です!さくらのVPSはすでに動いているサーバであればすんなりと設定できるのですが、アカウント作成したばかりだと設定が変更されるまでに時間がかかったりますので、注意が必要かもしれません。

