概要
EthereumのGoクライアントである「Geth」と、SmartContractの記述言語である「Solidity」を用いることにより、SmartContractを自ら作成することが出来ます。
しかし、コーディングしコンパイルし動作を確認する、という作業を試行錯誤しながらコマンドライン上で繰り返すのは非効率であり、そんな時に開発環境として便利なツールがいくつか存在しております。
その中の1つである、Browser-solidityというIDEの使い方を見ていきたいと思います。
このIDEはSolidityの開発者がMeteorで作成しており、IDEのコード自体を読むこともSmartContractやMeteorを学ぶにも良い教材となりそうです。
主な使い方
このIDEを通してEthereumと接続できるため、コーディング、コンパイルされたものをワンクリックでBlockchain上に登録することが可能です。
なので、SmartContractをこのIDEで試行錯誤しながら作成し、完成したら実際にアプリケーションに組み込んで、Dappsを作成する、といった流れが良いと思います。
IDEの準備
主に下記の方法があります。
- 公開されているクラウドIDEを利用(https://ethereum.github.io/browser-solidity/)
- GitHubからクローンしてきてローカルで立ち上げ
今回は1の方法で進めます。
gethとの接続
gethを用いてEthereumを立ち上げます。
今回はテスト用なので、下記コマンドでprivate_netを立ち上げます。
geth --networkid "11" --datadir "path_to_directory" --genesis "path_to_genesisjson" --unlock "your_account_password" --rpc --rpcaddr "localhost" --rpcport "8545" --rpccorsdomain "*" console
-
-networkid:networkIDを指定します。1,2,3以外の数字を使いましょう。 -
-genesis:genesis blockを指定します。 -
-datadir:databaseのあるディレクトリを指定します。 -
console:consoleを開くために必要です。
その他のオプションについてはこちらを参考に。
Geth command line options
そして、IDEにアクセスし、下記の画像のように右枠の左から3つ目(立方体マーク)を選択し、「Web3 Provider」にチェックを入れます。
そうすると、確認ダイアログが出てくるのでOKを押します。
(Endpointは、上記立ち上げ時に指定したrpcaddressとrpcportを入力してください)

ここでエラーが表示されなかったら無事Blockchainとの接続が完了しています。
Solidityを書いてみる
Solidity言語の記述方法は奥が深いので、今回はコピペとさせてください。
下記記事にあるコードを貼り付けます。
記事
Solidityによるコントラクトの作成(2) - オプション取引
コード
contract CallOption{
    address public buyer;
    address public seller;
    uint public btc_amount;
    uint public btc_price;
    uint public premium;
    uint public exercise_date;
    mapping (address => uint) public balanceOfJPY;
    mapping (address => uint) public balanceOfBTC;
    function CallOption(
      address _seller,
      uint _seller_jpy,
      uint _seller_btc,
      uint _btc_price,
      uint _btc_amount,
      uint _premium,
      uint _exercise_date
      ){
      seller = _seller;
      balanceOfJPY[seller] = _seller_jpy;
      balanceOfBTC[seller] = _seller_btc;
      btc_price = _btc_price;
      btc_amount = _btc_amount;
      premium = _premium;
      exercise_date = _exercise_date;
    }
    function Respond (address _buyer, uint _buyer_jpy) {
      buyer = _buyer;
      balanceOfJPY[buyer] = _buyer_jpy;
      if (balanceOfJPY[buyer] < premium + btc_amount * btc_price) throw;
      balanceOfJPY[buyer] -= premium;
      balanceOfJPY[seller] += premium;
    }
    function Expire (uint _current_btc_price, uint _current_time){
      if (_current_time < exercise_date) throw;
      if (_current_btc_price < btc_price) throw;
      balanceOfJPY[buyer] -= btc_price * btc_amount;
      balanceOfJPY[seller] += btc_price * btc_amount;
      balanceOfBTC[buyer] += btc_amount;
      balanceOfBTC[seller] -= btc_amount;
    }
    function () {
      throw;
    }
}
SmartContractの実行
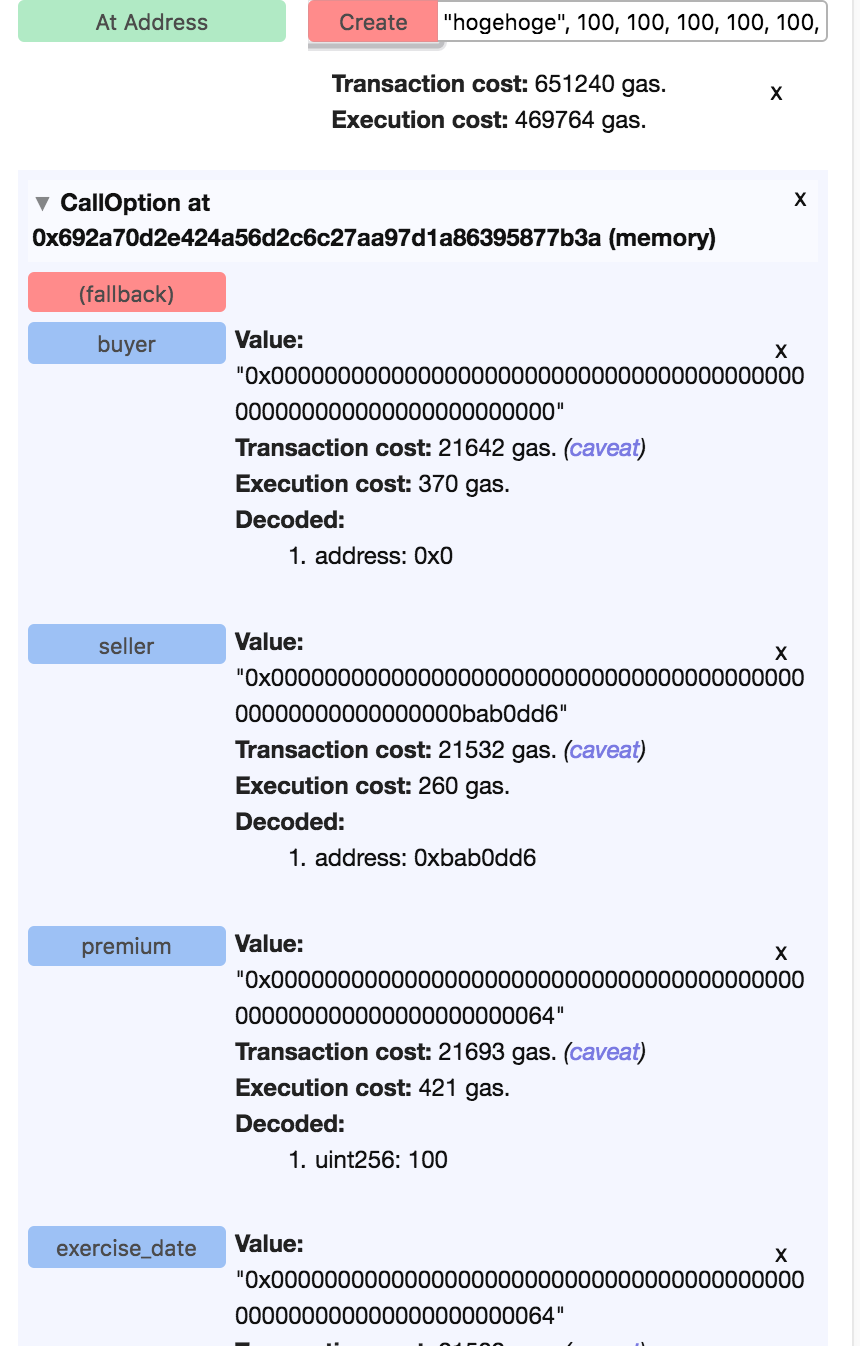
コードを貼り付けたら、下記画像1のように、コンストラクタの情報を入れて「Create」ボタンを押します。
これがContractをBlockchainに登録する作業になり、成功するとContractのアドレスや各パラメータの情報などが表示されます。
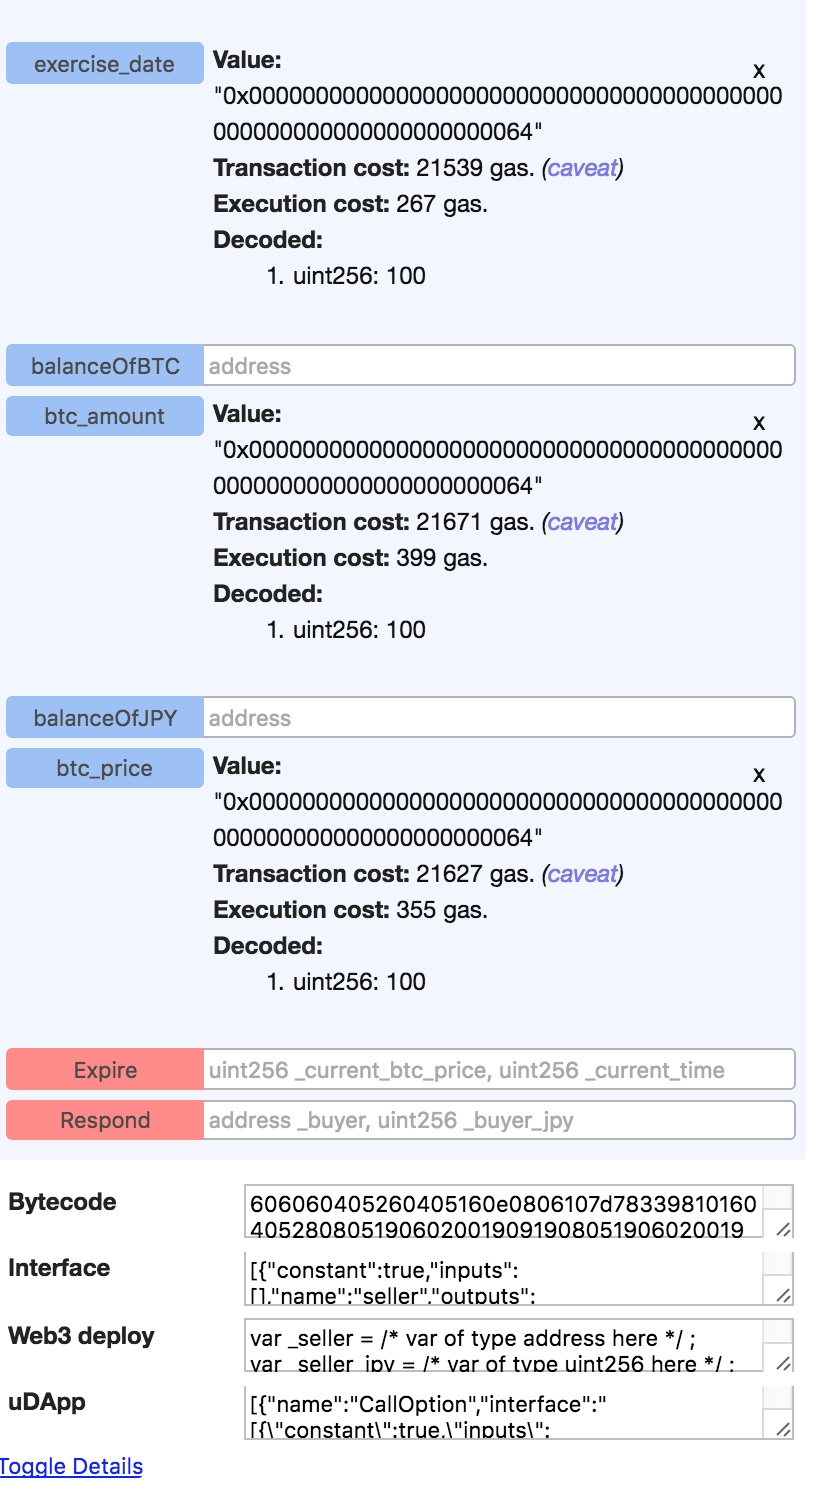
その後、下記画像2のように「Expire」や「Respond」とメソッド名が表示されているはずなので、そこに数値や文字列を入れて当該ボタンを押すことで登録されたContractにメソッドを送ることが可能になります。
またコンパイル後のByteconde等、その他の情報も下部に表示されています。
まとめ
まだまだEthereum自体が仕様の変更など多く、Browser-solidityもそれに伴って変わっていく可能性はありますが、現時点ではSmartContractを用いた開発には非常に有用なツールだと思います。
是非触って遊んでみてください。

