Raspberry Pi をwebサーバ化するための設定方法です。
なお、サーバー公開にあたっては自己責任でセキュリティ対策を十分に行ってください。
モデル : Raspberry Pi model B
OS : Raspbian GNU/Linux 8
ルータ : WHR-1166DHP2(Buffalo)
今回やること
- Apache2のインストール
- Rootへのパスワード設定
- Piユーザを削除し新たなユーザの追加
- SSHポート番号の変更
- ポートフォワーディング
Raspberry PiにSSHで接続している状態からスタートします。
Apache2を導入
apache2をインストールして起動します
$ sudo apt-get update
$ sudo apt-get upgrade
$ sudo apt-get install apache2
$ sudo /usr/sbin/apachectl start
ローカルIPから、無事にapacheが起動していることが確認できました。
rootにパスワードを設定する
簡単です。
$ sudo passwd root

# password update successfully!
新しいユーザーを追加する
# sudo adduser [username]
すると下記のメッセージがでました。
かっこいいこと言ってます。
We trust you have received the usual lecture from the local System
Administrator. It usually boils down to these three things:

  #1) Respect the privacy of others.
  #2) Think before you type.
  #3) With great power comes great responsibility.
新しいユーザーをsudoグループに加えます。
$ sudo usermod -G sudo [username]
$ cat /etc/group/ で確認したところ、sudoグループにしっかり入っている様子。
よって、piユーザからログアウトし、新しいユーザでログインします。
その状態でpiユーザの削除を実行します。
$ sudo userdel -r pi
これで削除完了しました。
sshのポート番号を変更
設定ファイルを開いて、書き換えます。
$ sudo vi /etc/ssh/sshd_config

# 以下設定ファイル
# What ports, IPs and protocols we listen for
Port [ここに入れる]
sshを再起動します。
$ sudo service ssh restart
ログアウトして再接続し、接続確認が完了しました。
ssh [username]@[IP address] -p [new port no.]
ポートフォワーディング
各自のルータ設定に従うと良いと思います。
BuffaloのWHR-1166DHP2という機器を使用しているので、公式HPを参考にしました。
BUFFALO / ポートを開放する方法
ポート設定画面
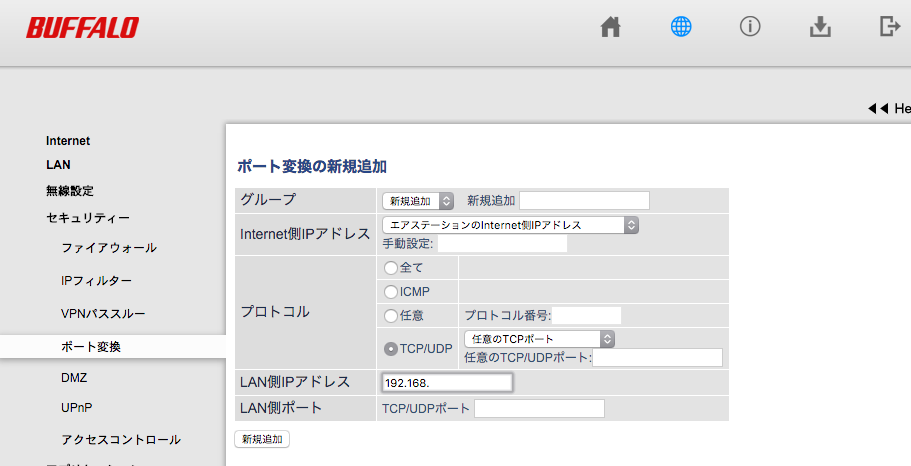
グローバルIPは、Buffalo設定画面の「ステータス」→「システム」→「Internet」から見れます。
参考
Qiita- Raspberry Piで自宅ウェブサーバ構築
Raspberry Piのセキュリティー設定 for Webサーバー用 パート1