Rancherを用いてRailsスタックを立ち上げます。
サンプルアプリ
簡単な書籍管理のRailsアプリです。

- Rails 4.2
- データベース・サーバは Postgresql
- Admin画面にThoughtBotのAdministrate
という構成です。
Rancherを使ったビルド戦略
Rancherは、同様のオーケストレーションであるDocker Cloudと違い、Rancher単体でDockerをビルドすることは出来ません。したがって、事前にビルドしたものをpullする必要があります。
Rancherを使ったDockerビルド戦略は大きくは
- DockerHubでAutomated Buildする
- Quay.ioでAutomated Buildする
- ローカルでビルドしたものをコンテナレジストリにpushする
- CircleCI等のCIツールでビルドしたものをコンテナレジストリにpushする
などがあります。今回は1. DockerHubを利用したデプロイ方法をご紹介します。後日、Amazon ECRを使った方法もご紹介します。
Rancherと相性の良い Container Registry
Dockerのコンテナを置いておく場所としてContainer Registryがあります。自前で構築することも出来ますが、セキュリティや可用性など面倒なことが多いので私は使っていません。クラウドサービスとして利用出来るContainer Registryでメジャーどころとしては:
- DockerHub→ビルドしてくれる
- Quay.io→ビルドしてくれる
- Amazon ECR→自分でビルド
- Google Container Reqistry→自分でビルド
などがあります。Rancher本家ブログのComparing Four Hosted Docker RegistriesにDockerレジストリの比較がありますが、相性の良い順としては、
DockerHub = Quay.io >> Amazon ECR >>>>>>>>> Google Container Registry
という感じでしょうか。また、DockerHubは無料プランでもプライベートリポジトリを1つもらえます。Quay.ioは高くてビルドに少し時間がかかります。加えて、DockerHubとQuay.ioは海外にホスティングしていると予想されるため、ダウンロードのレイテンシが馬鹿になりません。
したがって、本番運用で現実的なのは東京リージョンも使えるAmazon ECRでしょうか。実際私も多くのDockerコンテナをAmazon ECRに突っ込んでいます。
とりあえず立ち上げてみる
DockerHubにpublicイメージを公開していますので、これを使って手っ取り早く立ち上げてみます。
tongthedopeness/book-store
Stackを追加する

STACKS > Add Stackでスタックを追加します。
docker-compose.ymlをアップロードする
UIコンソールから一つずつサービスを起動することも出来ますが、ここでは手っ取り早くdocker-compose.ymlをアップロードします。
アップロードするdocker-compose.yml
YOUR_SECRET_KEYはrake secretで適当なsecretを入れてください。
(面倒な方は7716957d8268d38005eddb5eb5eadf39c9b0fffd3106d304447c9a1e366b61c88a05e06d144283be0d8b400a464049e297c036f0275ba00033a2e1a71daa6c1を入力してください)
rails:
  ports:
  - 3000:3000/tcp
  environment:
    RAILS_ENV: production
    RACK_ENV: production
    SECRET_KEY_BASE: YOUR_SECRET_KEY
    RAILS_SERVE_STATIC_FILES: 'true'
  labels:
    io.rancher.container.pull_image: always
  tty: true
  image: tongthedopeness/book-store
  links:
  - postgres
  stdin_open: true

postgres:
  environment:
    POSTGRES_USER: postgres
    POSTGRES_PASSWORD: postgres
  tty: true
  image: kiasaki/alpine-postgres
  stdin_open: true
参考までに、Dockerfileも載せておきます。
FROM tongthedopeness/alpine-ruby

WORKDIR /usr/src/app

COPY Gemfile Gemfile.lock ./
RUN bundle install --without test development && bundle clean

COPY . /usr/src/app

RUN RAILS_ENV=production bundle exec rake assets:precompile

EXPOSE 3000
CMD ["rails", "server", "-b", "0.0.0.0"]
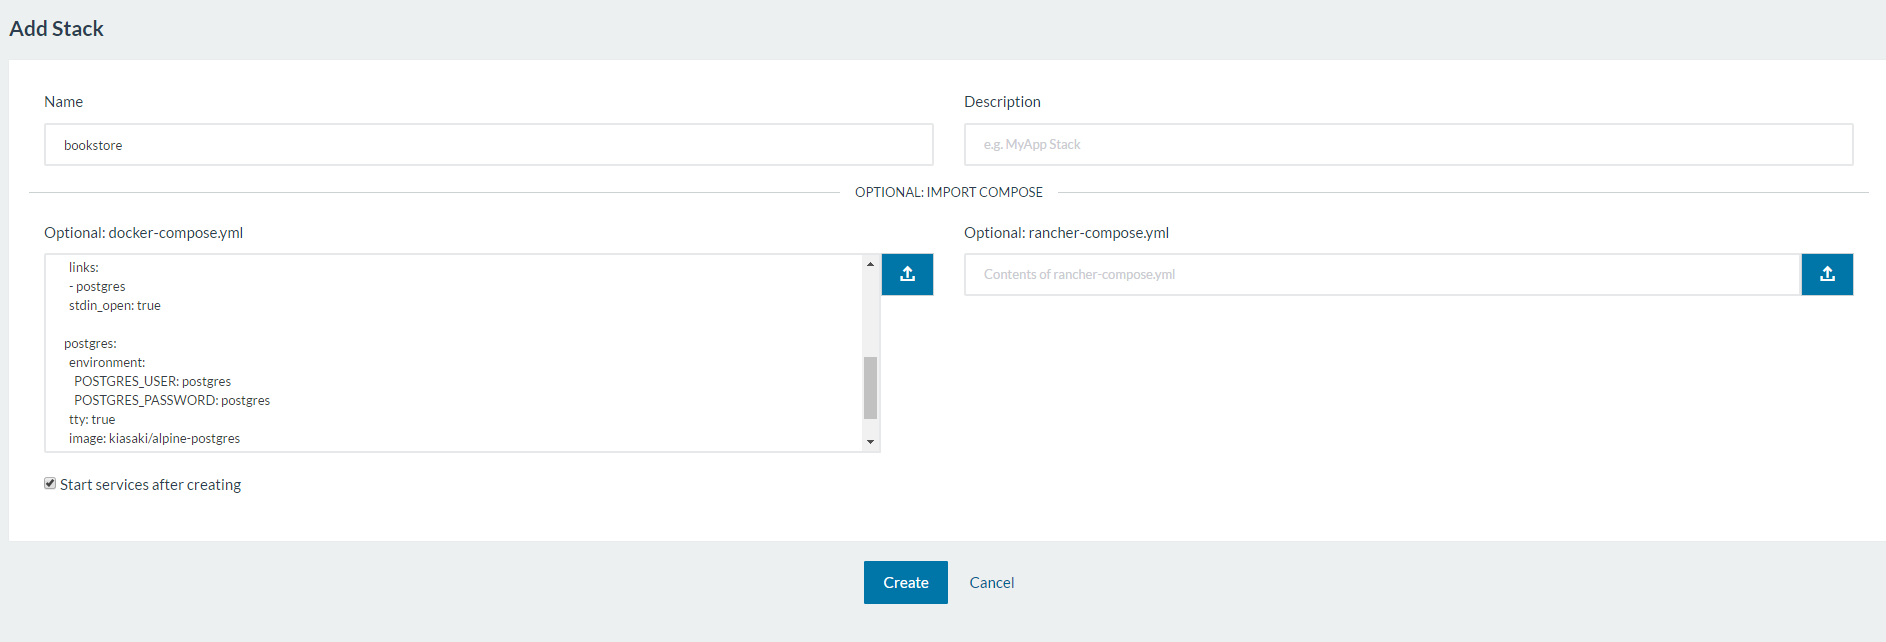
NameにStack名、docker-compose.ymlは上記のファイル(デスクトップなどに保存して選択してください)。Createするとimageをダウンロードして、Stackが起動します。

↑こうなれば成功です。
http://[VULTRのホスト]:3000/adminでアクセスします(データベースが無いのでまだエラーになります)。
Rancher式 rake db:create db:migrate
dockerを使ってて、
rake db:migrateとかどうするねん!?rails c出来ねぇ。。
と悩んだことが一度はあると思います。私もそうでした。migrateが必要になる度にググって長いコマンドを打って、また忘れて。。。。の繰り返しでした。
しかしながらRancherを使うようになってからは、何も考えずに直感的にそれが出来るようになりました。

上記の画面のrailsをクリックすると、railsサービスの詳細が表示されます。

上記画像の右下の赤枠の部分をクリックし、Execute Shellをクリックしてください。
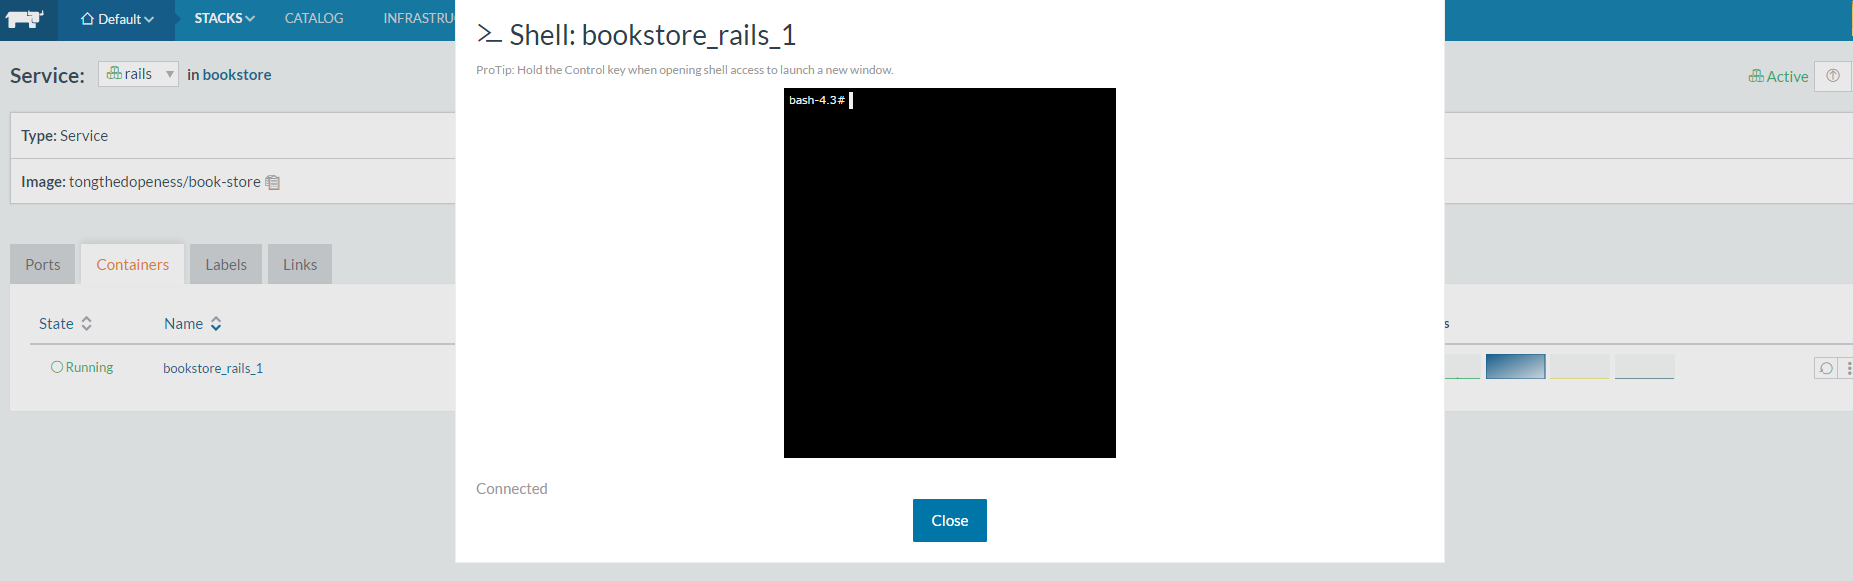
このように、shellが表示されます。このshellは
Railsのコンテナ内部に入った状態
です。したがって、Dockerでありながら、Dockerを意識することなく、普通にコマンドを打つことで出来ます。
bash-4.3# ls -la
total 180
drwxr-xr-x    1 root     root          4096 Oct 11 08:58 .
drwxr-xr-x    1 root     root          4096 Oct 11 08:57 ..
drwxr-xr-x    8 root     root          4096 Oct 11 09:02 .git
-rw-r--r--    2 root     root           864 Oct 11 08:54 .gitignore
-rw-r--r--    2 root     root           282 Oct 11 08:54 Dockerfile
-rw-r--r--    4 root     root          1568 Oct 11 08:54 Gemfile
-rw-r--r--    4 root     root          4939 Oct 11 08:54 Gemfile.lock
-rw-r--r--    2 root     root           478 Oct 11 08:54 README.rdoc
-rw-r--r--    2 root     root           249 Oct 11 08:54 Rakefile
drwxr-xr-x    9 root     root          4096 Oct 11 09:02 app
drwxr-xr-x    2 root     root          4096 Oct 11 09:02 bin
-rw-r--r--    2 root     root           519 Oct 11 08:54 circle.yml
drwxr-xr-x    5 root     root          4096 Oct 11 09:02 config
-rw-r--r--    2 root     root           153 Oct 11 08:54 config.ru
drwxr-xr-x    3 root     root          4096 Oct 11 09:02 db
-rw-r--r--    2 root     root           444 Oct 11 08:54 docker-compose.yml
drwxr-xr-x    4 root     root          4096 Oct 11 09:02 lib
drwxr-xr-x    1 root     root          4096 Oct 11 08:58 log
drwxr-xr-x    3 root     root          4096 Oct 11 08:58 public
drwxr-xr-x    8 root     root          4096 Oct 11 09:02 test
drwxr-xr-x    1 root     root          4096 Oct 11 14:58 tmp
drwxr-xr-x    3 root     root          4096 Oct 11 09:02 vendor
bash-4.3# rake db:create db:migrate
== 20161011064051 CreateBooks: migrating ======================================
-- create_table(:books)
   -> 0.0097s
== 20161011064051 CreateBooks: migrated (0.0102s) =============================
bash-4.3# rails c
Loading production environment (Rails 4.2.6)
irb(main):001:0> Book.count
   (3.6ms)  SELECT COUNT(*) FROM "books"
=> 0
irb(main):002:0> Book.create(title: "How to Win Friends and Influence People")
   (0.2ms)  BEGIN
  SQL (0.7ms)  INSERT INTO "books" ("title", "created_at", "updated_at") VALUES
($1, $2, $3) RETURNING "id"  [["title", "How to Win Friends and Influence People
"], ["created_at", "2016-10-11 15:52:19.366197"], ["updated_at", "2016-10-11 15:
52:19.366197"]]
   (3.7ms)  COMMIT
=> #<Book id: 1, title: "How to Win Friends and Influence People", isbn: nil, de
sc: nil, created_at: "2016-10-11 15:52:19", updated_at: "2016-10-11 15:52:19">
これで、もう一度
http://[VULTRのホスト]:3000/admin
にアクセスしてみてください。
DockerHubを使う
長くなりましたが、RancherでDockerHubを使う方法をご紹介します。ここまでは、私がDocker Hubに公開しているDockerイメージを使いましたが、自前のイメージをDockerHubにプライベートリポジトリとして置いておくという筋書きです。
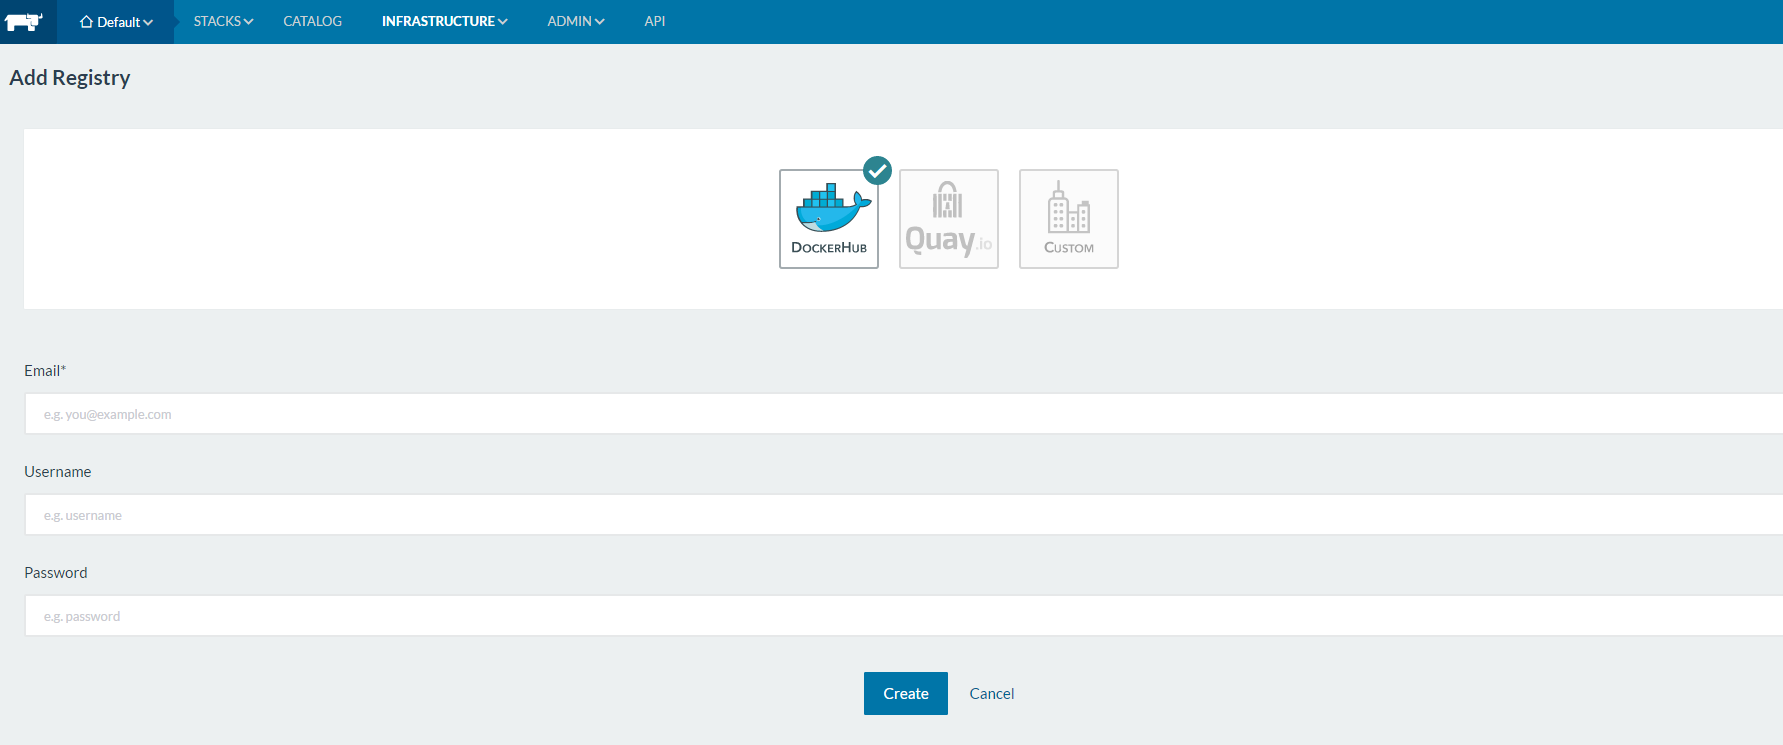
Insfrastructure > Registries > Add Registry でレジストリを追加します。
DockerHubの場合、これだけでPrivate リポジトリをpullすることが出来ます。Quay.ioも同様です。
(imageの部分は自前のimage名に変更してください)
今回はdocker-compose.ymlを使ってstackを構成しましたが、Add Serviceでサービスを是非色々立ち上げてみてください。
(参考)Dockerfileについて
今回のサンプルアプリでは、
FROM tongthedopeness/alpine-ruby

WORKDIR /usr/src/app

COPY Gemfile Gemfile.lock ./
RUN bundle install --without test development && bundle clean

COPY . /usr/src/app

RUN RAILS_ENV=production bundle exec rake assets:precompile

EXPOSE 3000
CMD ["rails", "server", "-b", "0.0.0.0"]
というDockerfileを作成しました。ベースイメージはalpine-rubyをrails仕様にしたミニマムイメージです。