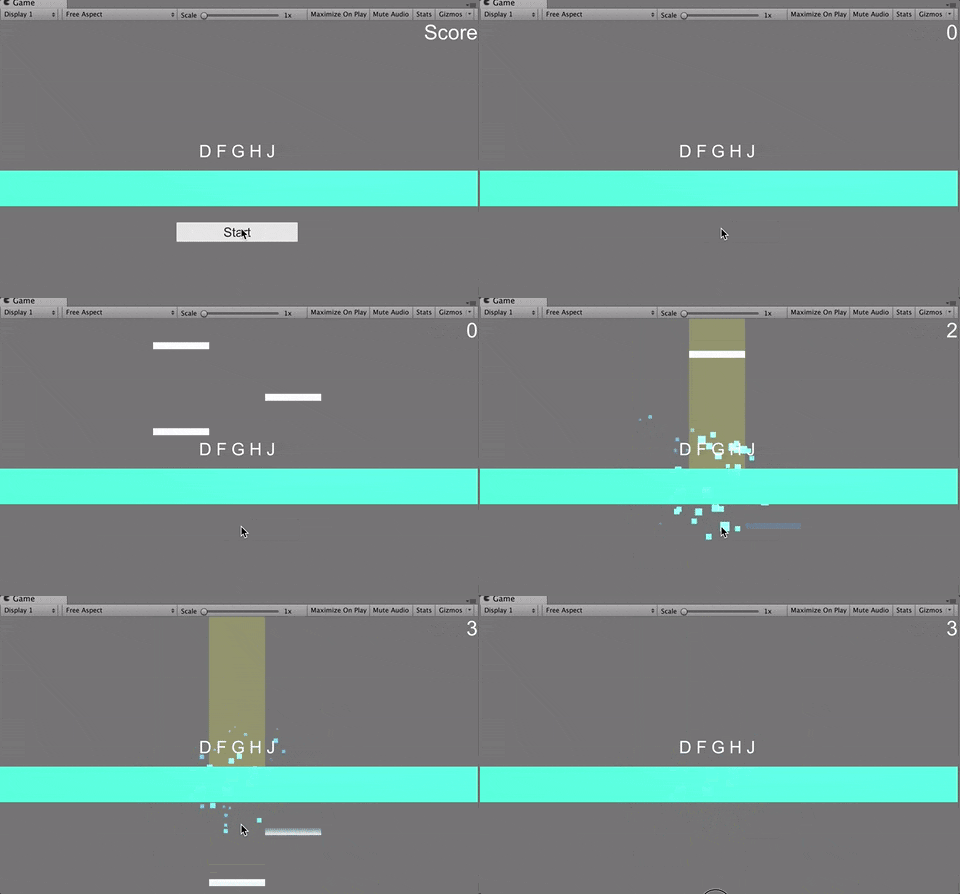
前提
あくまで,シンプルに作る方法なので実装に問題がたくさんあります!
リンク
part1
part2 : この記事
2. ゲームシーンの作成
- CSVを読み込む
- タイミングに合わせてノーツを生成
- ノーツが降ってくるようにする.
- タイミングよく押したらGoodにする.
1. CSVを読み込む
まずは新しいシーンを作成してください.ここではGameSceneと名付けました.
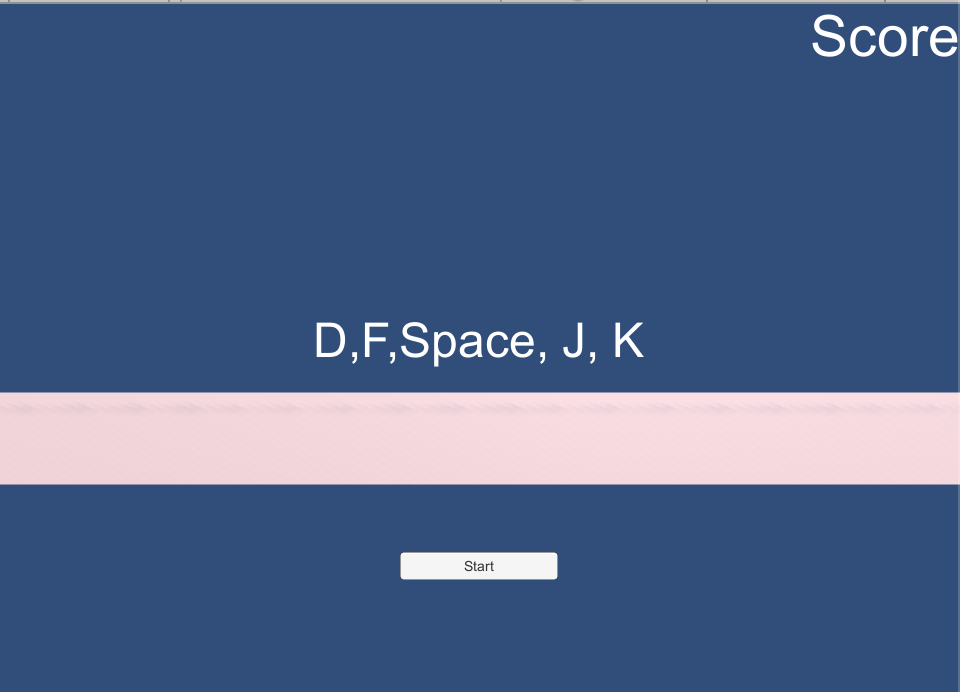
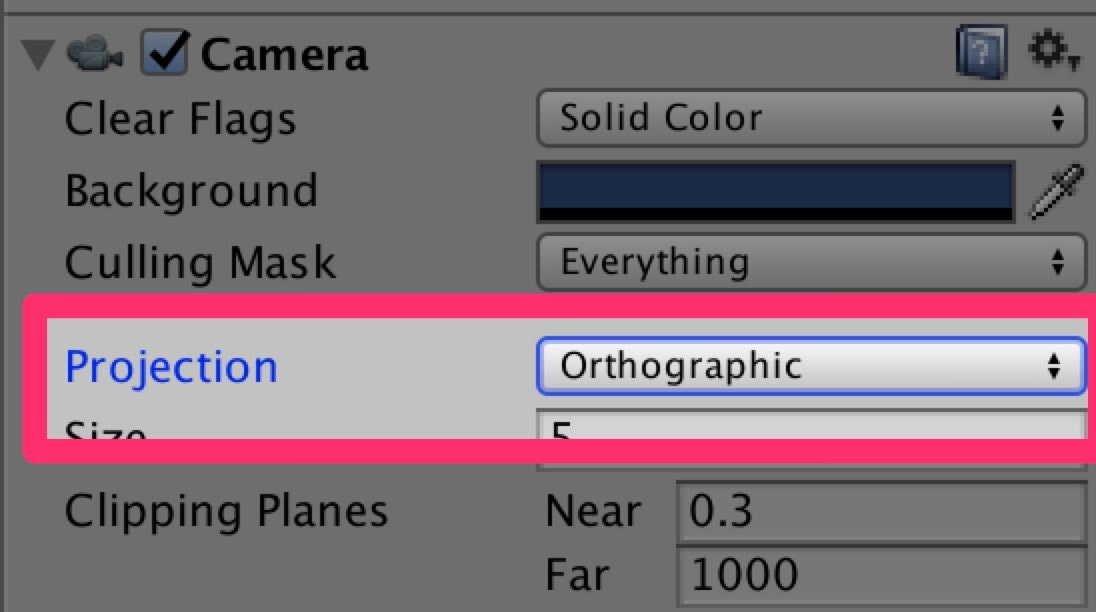
カメラのProjectionをOrthographicにすることでこのように映ります.
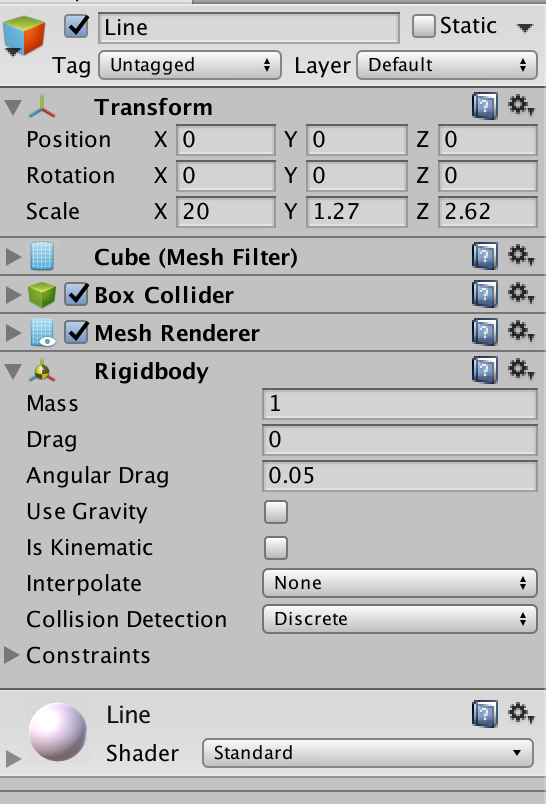
RigidBodyをアタッチして,UseGravityのチェックを外します.
(RigidBodyをアタッチしないと当たり判定とれないため)
GameControllerというScriptを作成し,以下のように入力してください.
using UnityEngine;
using System.Collections;
using System.IO;
using System;
using UnityEngine.UI;

public class GameController : MonoBehaviour {

    private float[] _timing;
    private int[] _lineNum;

    public string filePass;

    void Start(){
        _timing = new float[1024];
        _lineNum = new int[1024];
        LoadCSV ();
    }

    void LoadCSV(){

        TextAsset csv = Resources.Load (filePass) as TextAsset;
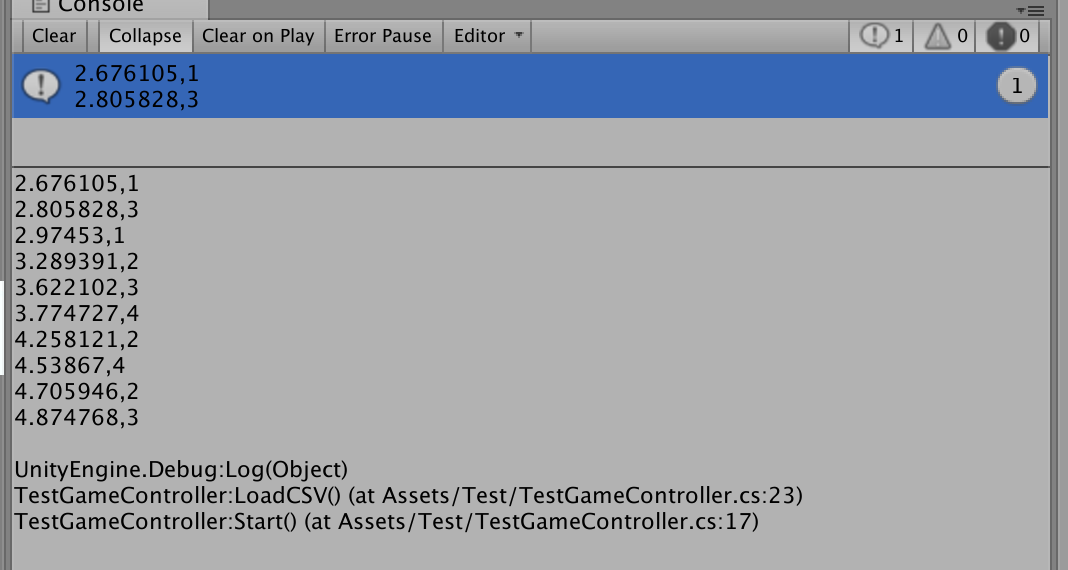
		Debug.Log(csv.text);
        StringReader reader = new StringReader (csv.text);

		int i = 0;
        while (reader.Peek () > -1) {

            string line = reader.ReadLine ();
            string[] values = line.Split (',');
            for (int j = 0; j < values.Length; j++) {
                _timing [i] = float.Parse( values [0] );
                _lineNum [i] = int.Parse( values [1] );
            }
            i++;
        }
    }
}
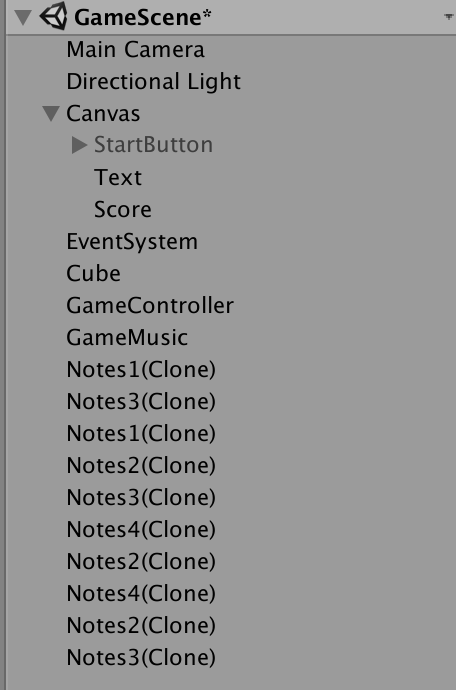
GameControllerという名前の空のオブジェクトを作成し,アタッチしてください.
FilePassには「CSV/TestTiming」と入力してください.
2. タイミングに合わせてノーツを生成
GameControllerを以下のように修正してください.
using UnityEngine;
using System.Collections;
using System.IO;
using System;
using UnityEngine.UI;

public class GameController : MonoBehaviour {

	public GameObject[] notes;
	private float[] _timing;
	private int[] _lineNum;

	public string filePass;
	private int _notesCount = 0;

	private AudioSource _audioSource;
	private float _startTime = 0;

	public float timeOffset = -1;

	private bool _isPlaying = false;
	public GameObject startButton;


	void Start(){
		_audioSource = GameObject.Find ("GameMusic").GetComponent<AudioSource> ();
		_timing = new float[1024];
		_lineNum = new int[1024];
		LoadCSV ();
	}

	void Update () {
		if (_isPlaying) {
			CheckNextNotes ();
		}

	}

	public void StartGame(){
		startButton.SetActive (false);
		_startTime = Time.time;
		_audioSource.Play ();
		_isPlaying = true;
	}

	void CheckNextNotes(){
		while (_timing [_notesCount] + timeOffset < GetMusicTime () && _timing [_notesCount] != 0) {
			SpawnNotes (_lineNum[_notesCount]);
			_notesCount++;
		}
	}

	void SpawnNotes(int num){
		Instantiate (notes[num],
			new Vector3 (-4.0f + (2.0f * num), 10.0f, 0),
			Quaternion.identity);
	}

    void LoadCSV(){

        TextAsset csv = Resources.Load (filePass) as TextAsset;
		Debug.Log(csv.text);
        StringReader reader = new StringReader (csv.text);

		int i = 0;
        while (reader.Peek () > -1) {

            string line = reader.ReadLine ();
            string[] values = line.Split (',');
            for (int j = 0; j < values.Length; j++) {
                _timing [i] = float.Parse( values [0] );
                _lineNum [i] = int.Parse( values [1] );
            }
            i++;
        }
    }

	float GetMusicTime(){
		return Time.time - _startTime;
	}
}
OnTriggerを使うのでBoxColliderのIsTriggerにチェックをいれます。
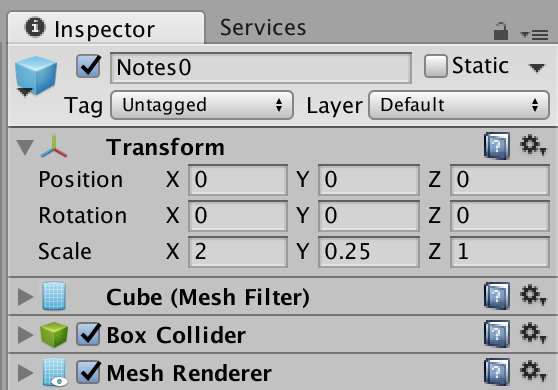
これの同じTranformのNotesを
Notes0~4まで作成し,プレハブ化してください.
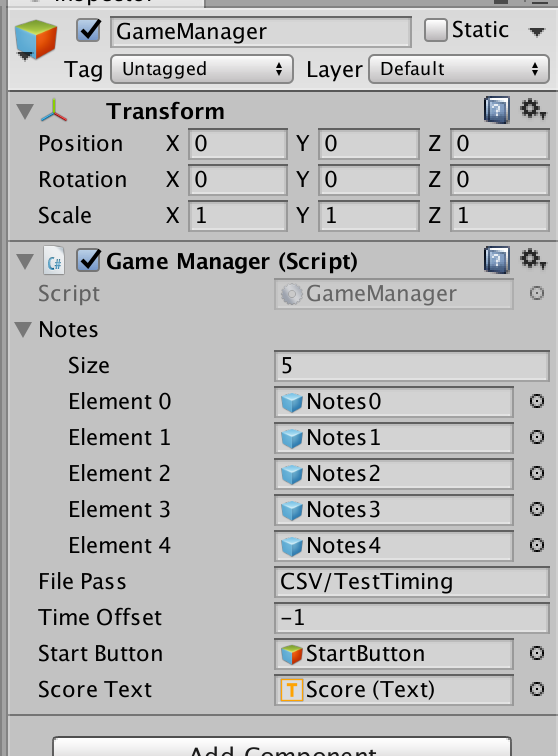
そして,それらをGameControllerにアタッチしてください.
また,startButtonのところにLineの下にあるボタンをアタッチしてください.
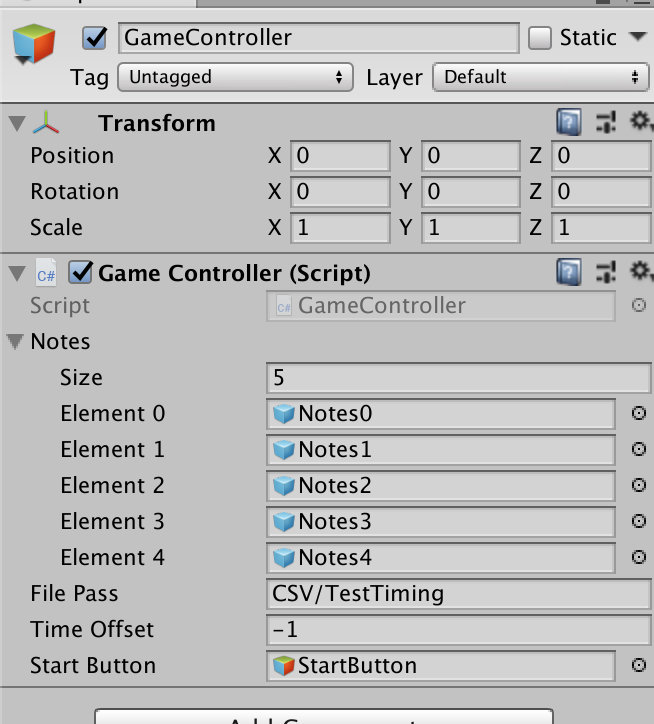
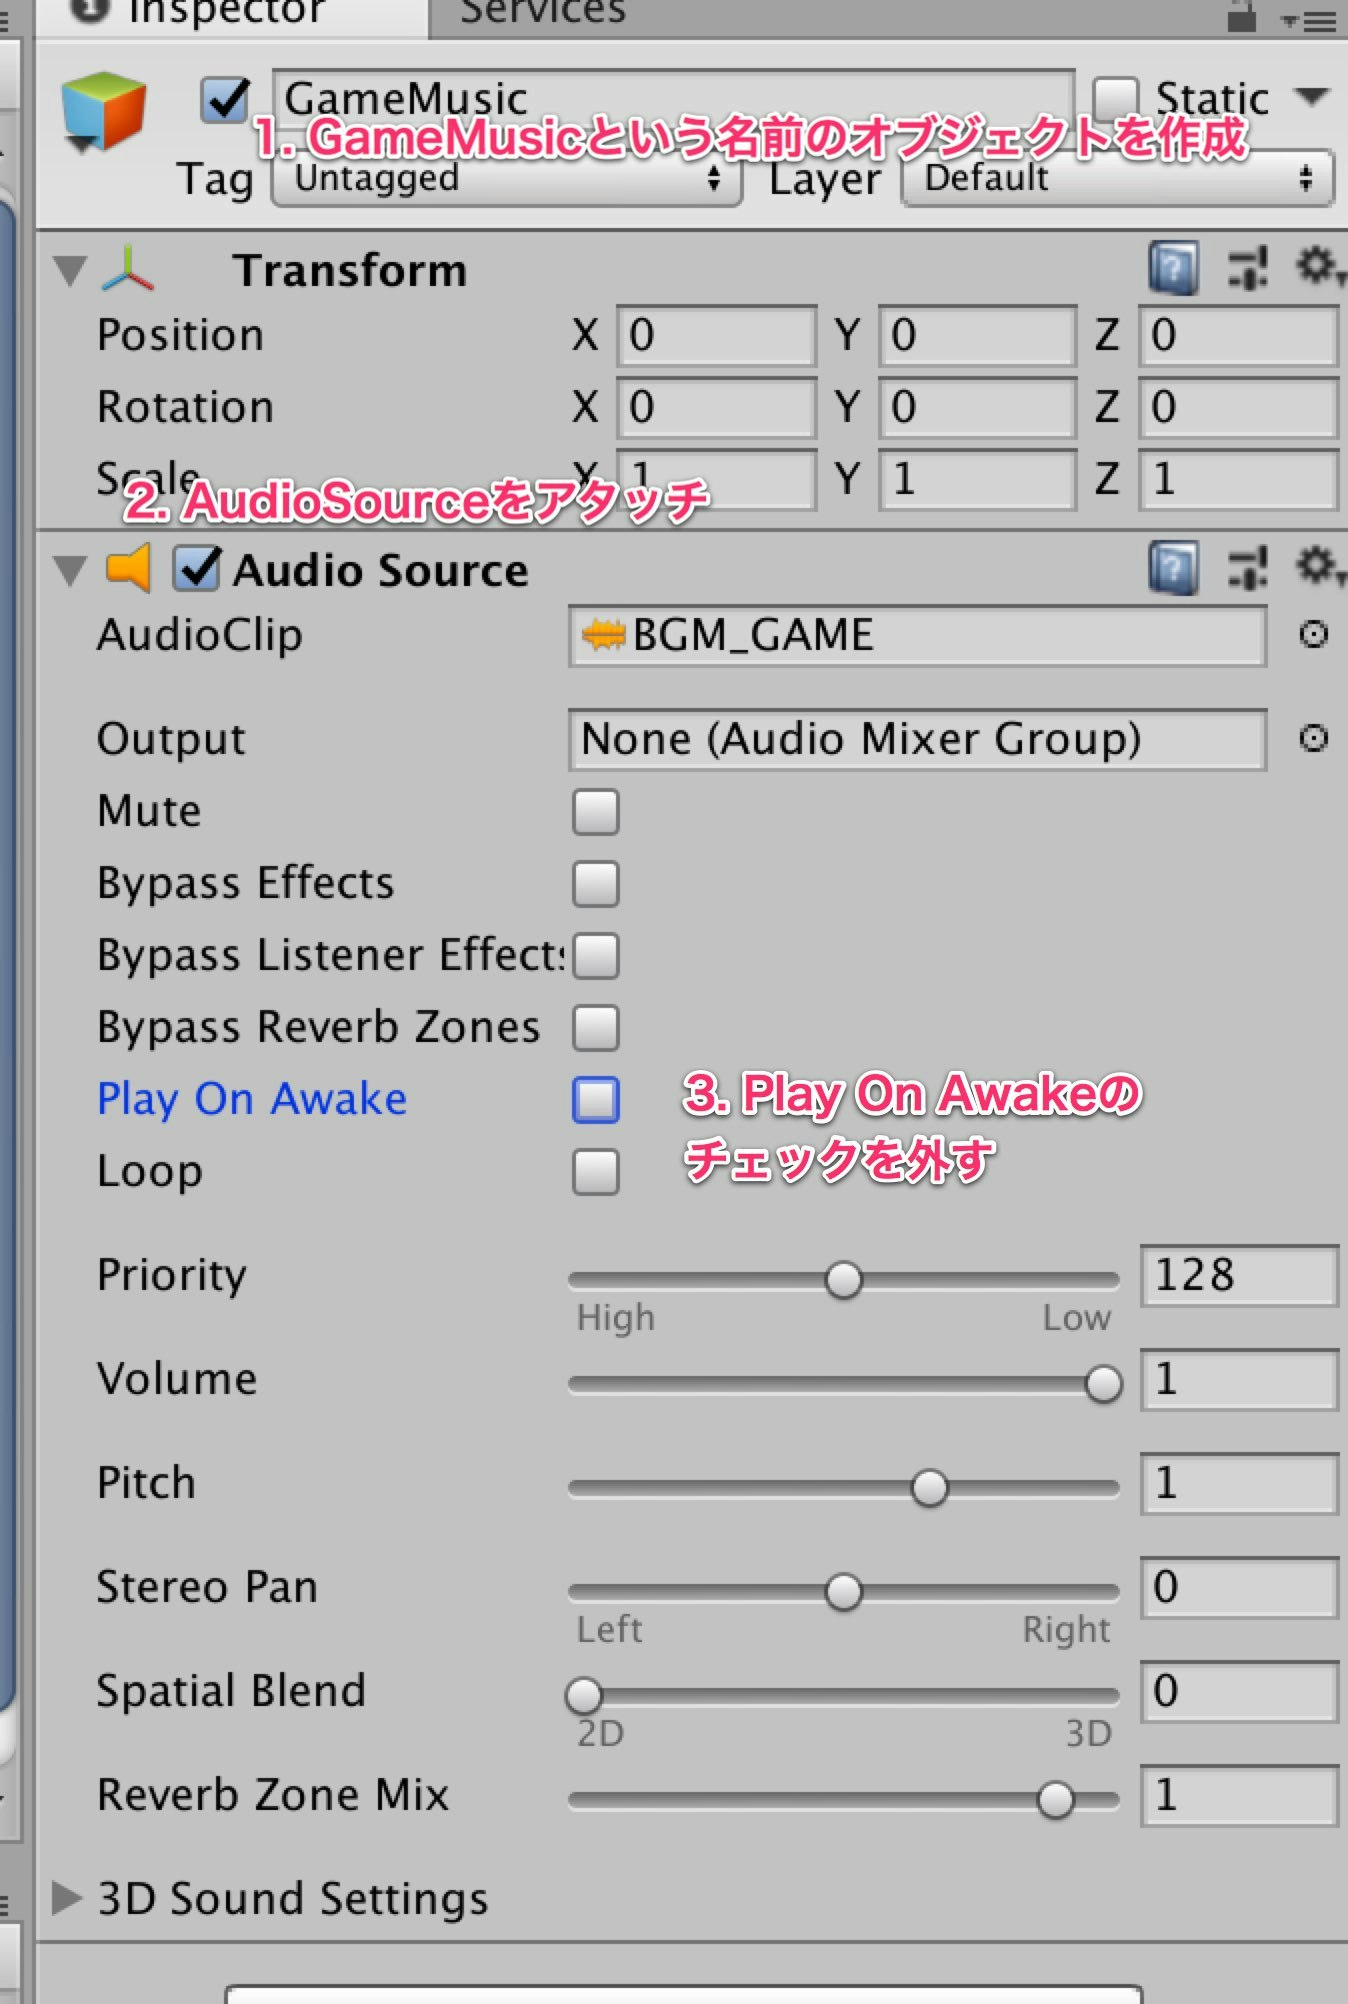
また,音源を以下のように作成します
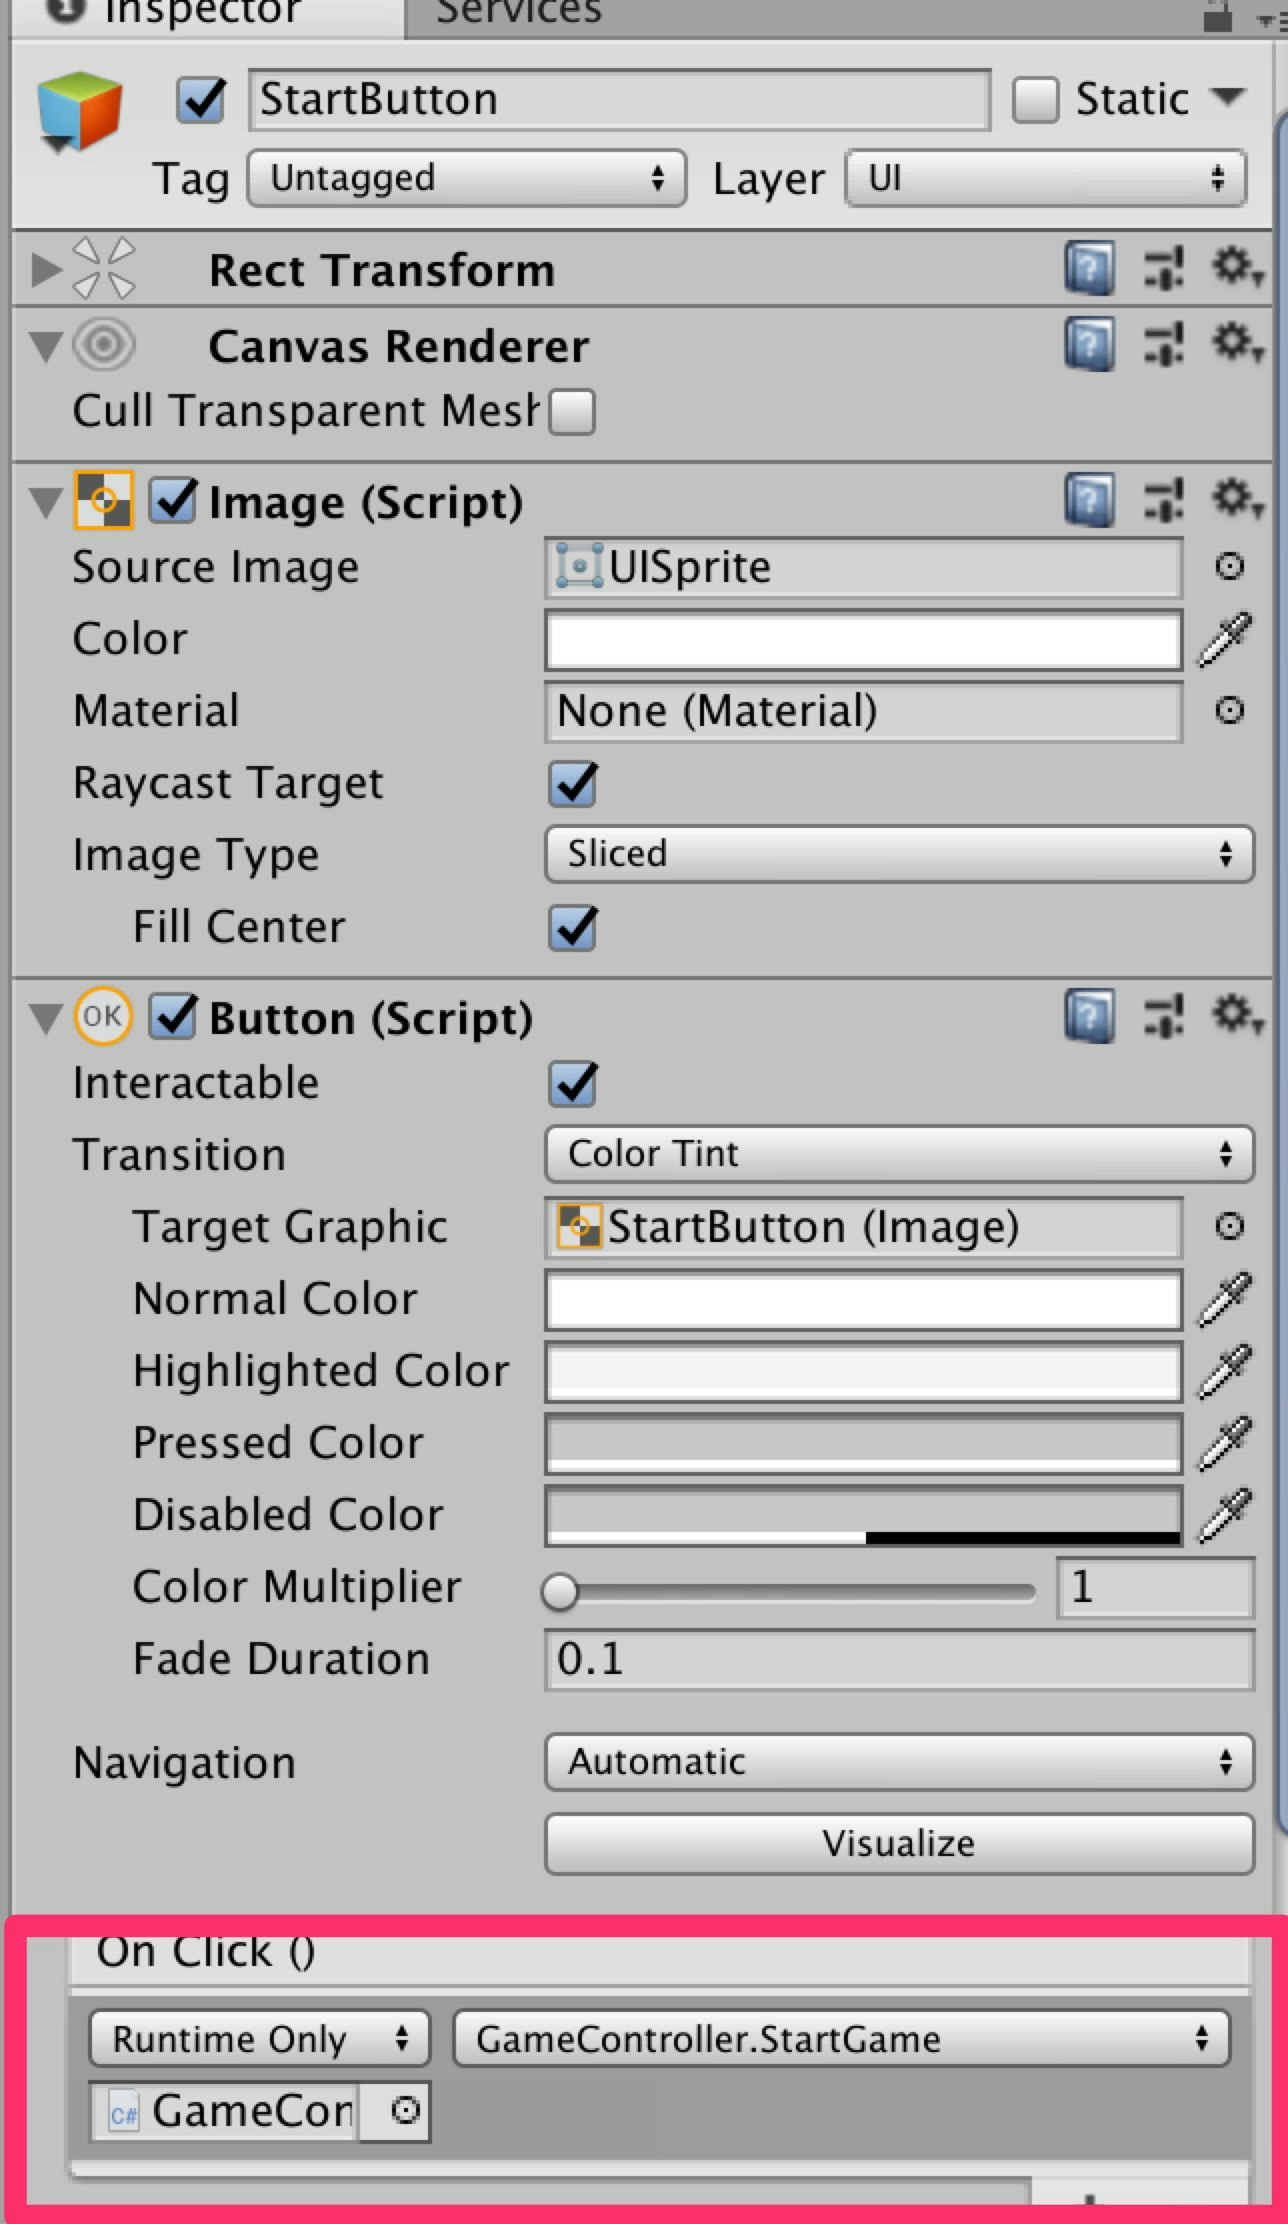
StartButtonがクリックされた時にGameControllerのStartGame()を呼ぶように設定
再生してStartボタンを押すことによって
音楽に合わせて以下のようにノーツが生成されていればOKです.
3. ノーツが降ってくるようにする.
以下のようにNotesScriptを作って5つのNotesにアタッチしてください.
using UnityEngine;
using System.Collections;

public class NotesScript : MonoBehaviour {

	void Update () {
		this.transform.position += Vector3.down * 10 * Time.deltaTime;
		if (this.transform.position.y < -5.0f) {
			Debug.Log("false");
			Destroy (this.gameObject);
		}
	}
これでStartするとノーツが降ってくるようになります.
4. タイミングよく押したらGoodにする.
まず入力キーを取得するロジックを作ります.
GameUtilクラスを以下のように作成してください.
using System.Collections;
using System.Collections.Generic;
using UnityEngine;

public static class GameUtil {

	public static KeyCode GetKeyCodeByLineNum (int lineNum) {
		switch (lineNum) {
			case 0:
				return KeyCode.D;
			case 1:
				return KeyCode.F;
			case 2:
				return KeyCode.G;
			case 3:
				return KeyCode.H;
			case 4:
				return KeyCode.J;
			default:
				return KeyCode.None;
		}
	}
}
(TimingMakerのほうのKeyCodeもGameUtilからとってきたほうがいいです.)
NotesScriptとGameControllerを以下のように修正してください.
using System.Collections;
using UnityEngine;

public class NotesScript : MonoBehaviour {

	public int lineNum;
	private GameController _gameController;
	private bool isInLine = false;
	private KeyCode _lineKey;

	void Start () {
		_gameController = GameObject.Find ("GameController").GetComponent<GameController> ();
		_lineKey = GameUtil.GetKeyCodeByLineNum(lineNum);
	}

	void Update () {
		this.transform.position += Vector3.down * 10 * Time.deltaTime;

		if (this.transform.position.y < -5.0f) {
			Debug.Log ("false");
			Destroy (this.gameObject);
		}

		if(isInLine){
			CheckInput(_lineKey);
		}
	}

	void OnTriggerEnter (Collider other) {
		isInLine = true;
	}

	void OnTriggerExit (Collider other) {
		isInLine = false;
	}

	void CheckInput (KeyCode key) {

		if (Input.GetKeyDown (key)) {
			_gameController.GoodTimingFunc (lineNum);
			Destroy (this.gameObject);
		}
	}
}
スコアを追加します.
using UnityEngine;
using System.Collections;
using System.IO;
using System;
using UnityEngine.UI;

public class GameController : MonoBehaviour {

	public GameObject[] notes;
	private float[] _timing;
	private int[] _lineNum;

	public string filePass;
	private int _notesCount = 0;

	private AudioSource _audioSource;
	private float _startTime = 0;

	public float timeOffset = -1;

	private bool _isPlaying = false;
	public GameObject startButton;

	public Text scoreText;
	private int _score = 0;

	void Start(){
		_audioSource = GameObject.Find ("GameMusic").GetComponent<AudioSource> ();
		_timing = new float[1024];
		_lineNum = new int[1024];
		LoadCSV ();
	}

	void Update () {
		if (_isPlaying) {
			CheckNextNotes ();
			scoreText.text = _score.ToString ();
		}

	}

	public void StartGame(){
		startButton.SetActive (false);
		_startTime = Time.time;
		_audioSource.Play ();
		_isPlaying = true;
	}

	void CheckNextNotes(){
		while (_timing [_notesCount] + timeOffset < GetMusicTime () && _timing [_notesCount] != 0) {
			SpawnNotes (_lineNum[_notesCount]);
			_notesCount++;
		}
	}

	void SpawnNotes(int num){
		Instantiate (notes[num],
			new Vector3 (-4.0f + (2.0f * num), 10.0f, 0),
			Quaternion.identity);
	}

	void LoadCSV(){
		int i = 0, j;
		TextAsset csv = Resources.Load (filePass) as TextAsset;
		StringReader reader = new StringReader (csv.text);
		while (reader.Peek () > -1) {

			string line = reader.ReadLine ();
			string[] values = line.Split (',');
			for (j = 0; j < values.Length; j++) {
				_timing [i] = float.Parse( values [0] );
				_lineNum [i] = int.Parse( values [1] );
			}
			i++;
		}
	}

	float GetMusicTime(){
		return Time.time - _startTime;
	}

	public void GoodTimingFunc(int num){
		Debug.Log ("Line:" + num + " good!");
		Debug.Log (GetMusicTime());

		_score++;
	}
}
Notes0~4のNotesScriptのlineNumを各番号に変えてください
例:Notes3 => lineNum に3をいれる
完成.
修正
昔書いたコードでつっこみどころがかなりありますが,とりあえず
エラーが発生してまうミスあったのでそこを含めて修正しました.
Githubの方もエフェクト含めたものがあったので更新しました.
実装はかなり適当だったので参考程度にしていただけると!
