watchを使ってReactとES6の変更を監視 + 自動ビルドするの続きです。
前回は、
- watchでディレクトリの変更を監視し、変更を検知したらシェルスクリプトを実行し、トランスパイルと依存関係の解決を自動で行う
というところをやりました。
今回は、本エントリーの目標である「書籍についてのメモや評価を記録できるアプリケーション」というところに着手していきます。まず、現在実装している「books/index」のページに表テーブルを作成します。
「Reactビギナーズガイド」では、データとなる部分を配列として定義→ローカルストレージを使って実装といったステップを踏んで表テーブルを実装しています。本エントリーでは、Railsと連携させているということで、データとなる部分を配列として定義→RailsでAPIを作成し、React側からgetするという流れで実装していきたいと思います。
1. 表テーブルを作成する
import React from 'react'
import ReactDOM from 'react-dom'

class Books extends React.Component {
  render() {
    const headers = ["タイトル", "著者", "出版年",] // ①追記
    return (
      // ②以下変更
      <div>
        <h1>BookApp</h1>
        <table>
          <thead>
            <tr>
              {headers.map((header, index) => {
                return (
                  <th key={index}>{header}</th>
                )
              })}
            </tr>
          </thead>
        </table>
      </div>
      // ②ここまで変更
    )
  }
}

ReactDOM.render(
  <Books />,
  document.getElementById("books")
)
①で表テーブルのヘッダーとなる部分を配列定義しています。
②で注意したいのは、まずheaders.map((header, index)...という部分でしょうか。
僕のような「ES5とかES6とか聞いたことはあるけど全然知らない、開発では専らJQueryさ!」みたいな感じの人は結構いるんじゃないかなと勝手に思っているんですが、ES5から実装されたメソッドだそうです。
参考資料: Array.prototype.map()
Reactは単一の要素しか返さないので、<h1>...</h1>と<table>...</table>の要素を<div></div>で囲んでいます。
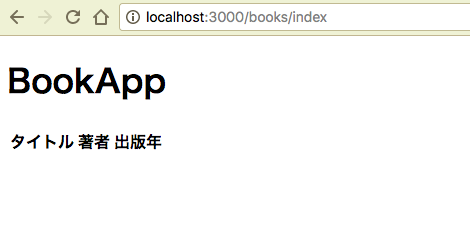
ブラウザで確認してみましょう。
開発環境ではwatch 'sh build.sh' app/frontendを実行しているので、自動ビルドが走り、表ヘッダーが表示されています。
2. APIの作成
データ部分はもちろん、ヘッダー部分もデータベースのカラム名などを表示できれば余計な変数を定義せずに済みますね。ということでデータ部分のハードコーディングは省略し、早速Rails側の実装に入っていきたいと思います。
2-1. Bookモデルの作成
まずはモデルを作成します。
$ rails g model title:string author:string published_date:date
$ rails db:migrate
2-2. API用コントローラーの作成
続いて、API用にコントローラーを作成します。
$ rails g controller api/books index
class Api::BooksController < ApplicationController
  def index
    books = Book.select(:id, :title, :author, :published_date).all
    render json: {
      books: books.as_json,
    }
  end
end
selectメソッドでcreated_at, updated_atなど余計なデータを除外しておきます。
このままではデータが存在しないため、rails consoleで2件ほど適当にデータを作成します。
$ rails console
> Book.create(title: 'Reactビギナーズガイド ―コンポーネントベースのフロントエンド開発入門', author: 'Stoyan Stefanov', published_date: '2017-3-11')
> Book.create(title: '入門 React ―コンポーネントベースのWebフロントエンド開発', author: 'Frankie Bagnardi', published_date: '2015-4-3')
3. React側からAPIにリクエストを送る
3-1. superagent
rails側での準備はひとまず整ったので、続いてReact側の準備をしていきます。
「Reactビギナーズガイド」ではローカルストレージを使っているので、APIリクエストに関する情報は記載されていません。APIリクエストを送る方法について軽く調べてみたところ、
- JQueryを使う
- Ajax関連のライブラリを使う
という選択肢がありそうでした。今回はSuperAgentというAjaxだけをやってくれるライブラリを導入し、React側からAPIリクエストを送りたいと思います。
【参考資料】
$ npm install --save superagent
3-2. APIリクエスト用のコードを書く
import React from 'react'
import ReactDOM from 'react-dom'
import request from 'superagent' // 追記

class Books extends React.Component {
  render() {
    // 以下追記
    request
      .get('/api/books/index')
      .end((error, res) => {
      if (!error && res.status === 200) {
        console.log(JSON.parse(res.text))
      } else {
        console.log(error)
      }
    })
    // ここまで追記

    const headers = ["タイトル", "著者", "出版年",]
    return (
      <div>
        <h1>BookApp</h1>
        <table>
          <thead>
            <tr>
              {headers.map((header, index) => {
                return (
                  <th key={index}>{header}</th>
                )
              })}
            </tr>
          </thead>
        </table>
      </div>
    )
  }
}

ReactDOM.render(
  <Books />,
  document.getElementById("books")
)
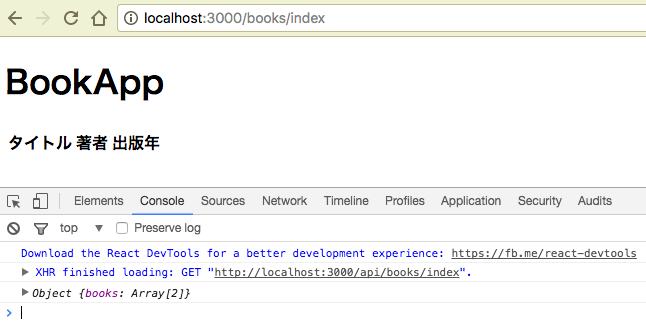
ブラウザで「http://localhost:3000/books/index」 にアクセスし、デベロッパーツールのConsoleを開きます。
3行目にObject {books: Array[2]}と表示されているのが分かります。
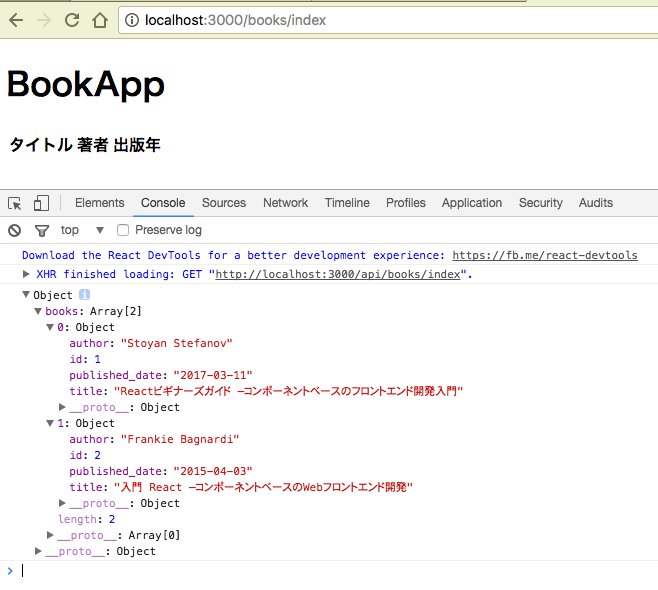
中身を見てみると、booksテーブルから取得したデータが連想配列の形で入っていることが分かります。
これでRails側、React側ともにAPI周りの実装をすることができました。
3-3. APIから取得したデータをstateにセットする
APIから取得したデータをコンポーネントで使用するために、リクエストに成功した場合はsetStateメソッドを使用し、stateにセットします。また、コンポーネントが描画される直前にデータを取得するためにcomponentWillMount内でAPIリクエストを送信します。
APIを叩くためのコードはgetState()メソッドを定義し、その中に書いていきます。
import React from 'react'
import ReactDOM from 'react-dom'
import request from 'superagent'

class Books extends React.Component {
  // 追記
    constructor() {
    super()
    this.state = {
      books: [],
    }
  }

  // 追記
  componentWillMount() {
    this.getState()
  }

  // render()からコピー
  getState() {
    request
      .get('/api/books/index')
      .end((error, res) => {
      if (!error && res.status === 200) {
        // console.log()部分を変更
        const json = JSON.parse(res.text)
        this.setState({
          books: json.books,
        })
      } else {
        console.log(error)
      }
    })
  }

  render() {
    // APIリクエストのコードをgetState()に移動

    const headers = books[0] != null ? Object.keys(books[0]) : [] // 変更
    return (
      <div>
        <h1>BookApp</h1>
        <table>
          <thead>
            <tr>
              {headers.map((header, index) => {
                return (
                  <th key={index}>{header}</th>
                )
              })}
            </tr>
          </thead>
        </table>
      </div>
    )
  }
}

ReactDOM.render(
  <Books />,
  document.getElementById("books")
)
const headers = books[0] != null ? Object.keys(books[0]) : []という1行で、データがnullでないときに、連想配列のキー部分(カラム名にあたる部分)をheadersに代入しています。
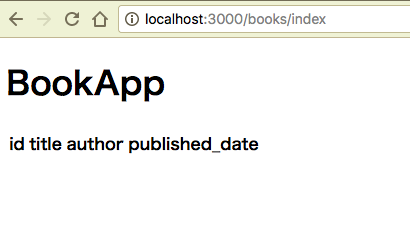
この状態でブラウザを確認すると、カラム名がヘッダーとして表示されています。
3-4. データを表示する
最後に書籍データを表示していきます。
import React from 'react'
import ReactDOM from 'react-dom'
import request from 'superagent'

class Books extends React.Component {
    constructor() {
    super()
    this.state = {
      books: [],
    }
  }

  componentWillMount() {
    this.getState()
  }

  getState() {
    request
      .get('/api/books/index')
      .end((error, res) => {
      if (!error && res.status === 200) {
        const json = JSON.parse(res.text)
        this.setState({
          books: json.books,
        })
      } else {
        console.log(error)
      }
    })
  }

  render() {
    const {books} = this.state
    const headers = books[0] != null ? Object.keys(books[0]) : []
    return (
      <div>
        <h1>BookApp</h1>
        <table>
          <thead>
            <tr>
              {headers.map((header, index) => {
                return (
                  <th key={index}>{header}</th>
                )
              })}
            </tr>
          </thead>
          // 以下追記
          <tbody>
            {books.map((book, index) => {
              return (
                <tr key={index}>
                  {Object.values(book).map((row, index) => {
                    return (
                      <td key={index}>{row}</td>
                    )
                  })}
                </tr>
              )
            })}
          </tbody>
          // ここまで追記
        </table>
      </div>
    )
  }
}

ReactDOM.render(
  <Books />,
  document.getElementById("books")
)
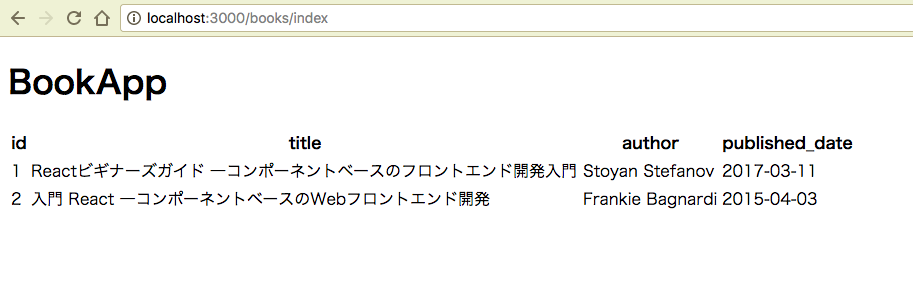
ブラウザで確認してみます。
これでAPI連携部分と表テーブルは完成しました。
次回は「Reactビギナーズガイド」に沿って、表テーブルのデータを編集する機能を作っていきます。
