はじめに
やりたかったこと
heroku上でWebページのスクリーンショットを取得して、HTML要素でクロップしたい。
問題点
seleniumでPhantomJSを動かす場合、要素の位置のロケーションを取得するメソッドが用意されていない。
解決策
selenium.webdriver.PhantomJSクラスに用意されているexecute_script関数でJavascriptを実行する。
環境
- PhantomJS 2.1.1
- Python 3.6.1
Pythonライブラリ
- Pillow 4.2.0
- selenium 3.4.3
最低限のコード
from PIL import Image
from selenium import webdriver

driver = webdriver.PhantomJS()
driver.get("https://www.yahoo.co.jp")  # (1)
driver.save_screenshot("screenshot.png")  # (2)


element_type = "Id"  # (3)
element_name = "topicsboxbd"  # (4)

before_script = """
                var element = document.getElementBy""" + element_type + "('" + element_name + """');
                var rect = element.getBoundingClientRect();
                """  # (5)
left = driver.execute_script(before_script + "return rect.left;")  # (6)
top = driver.execute_script(before_script + "return rect.top;")  # (6)

right = driver.execute_script(before_script + "return rect.width;") + left  # (7)
bottom = driver.execute_script(before_script + "return rect.height;") + top  # (7)

im = Image.open("screenshot.png")  # (8)
im = im.crop((left, top, right, bottom))  # (9)
im.save("screenshot_crop.png")  # (10)
im.close()
解説
(1) - スクリーンショットを取得するURLを指定する。
(2) - ページ全体のスクリーンショットを保存する。
(3) - element_typeには要素の属性名(IdとかClassとか)を指定する。JavascriptのgetElementBy〇〇の丸に入るなら何でも可。なので代入する文字列は大文字から始まらなければならない。
(4) - element_nameには要素の(3)で指定した属性の属性値(id="main"等のmainの部分)を指定する。
(5) - 実行するJSコードの共通部分
(6)(7) - driver.execute_script関数でJavascriptコードを実行し、要素の左上と右下の座標を取得している。
(8) - (1)で保存したスクリーンショットを開く。
(9) - (6),(7)で取得した座標を用いて元のスクリーンショットをクロップする。
(10) - クロップしたスクリーンショットを保存する。
実行結果
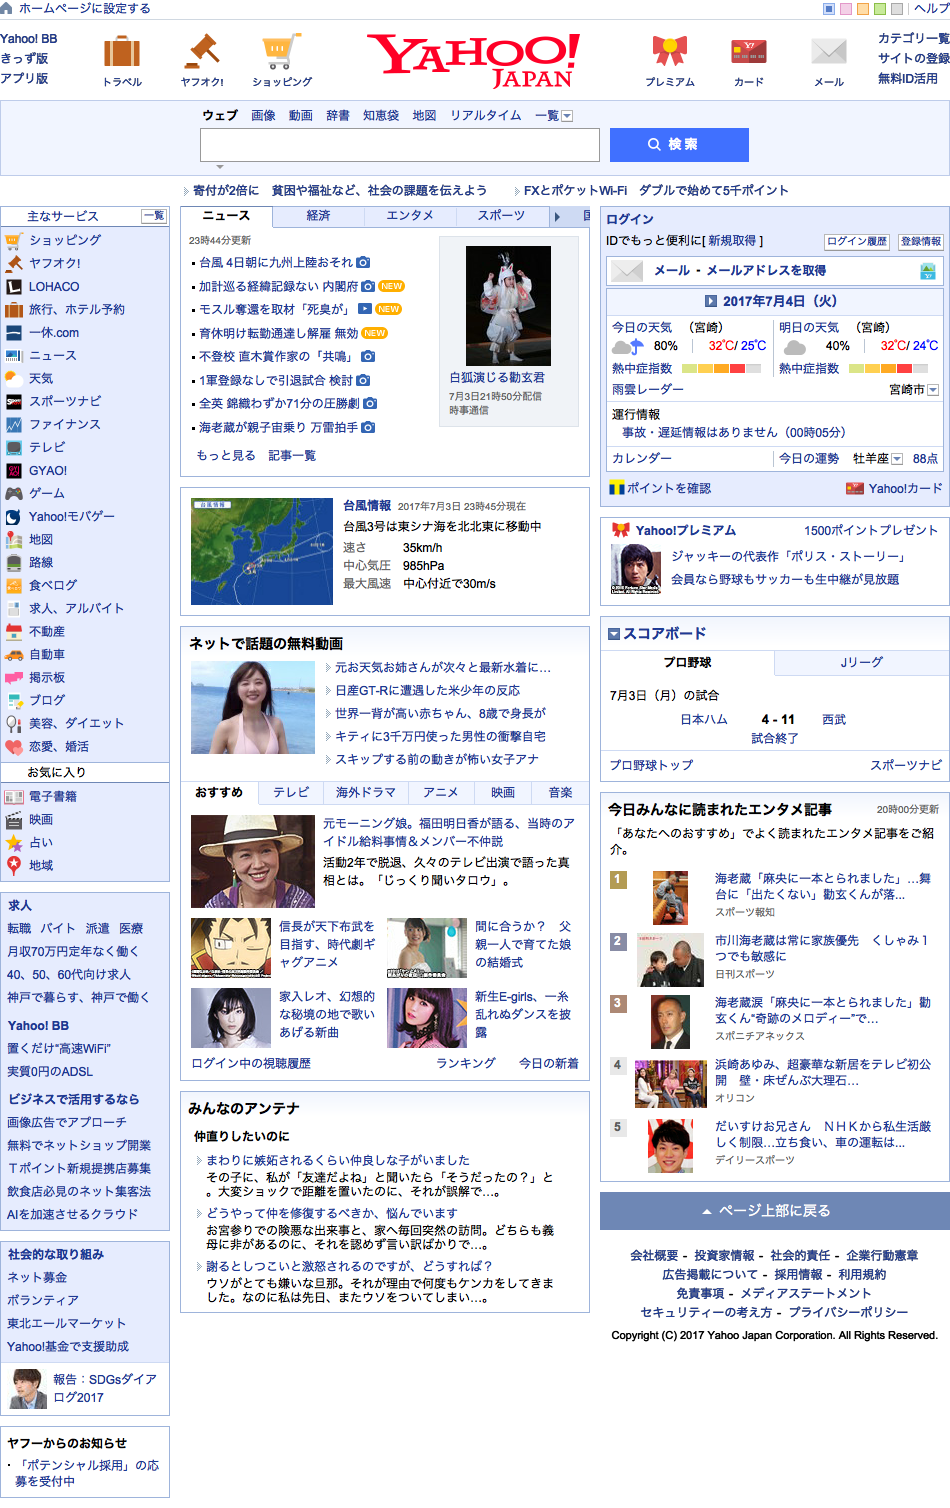
screenshot.png
ページ全体のスクリーンショット
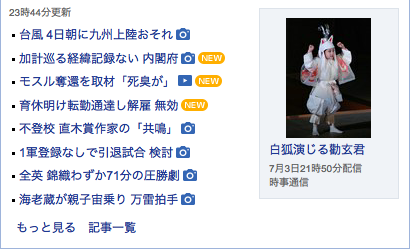
screenshot_crop.png
screenshot.pngをid="topicsboxbd"の要素でクロップしたスクリーンショット
heroku上で実行する場合
herokuにPhantomJSを置いてスクリーンショットを撮る場合、そのままでは保存した画像に日本語が表示されていない。
ルートディレクトリに.fontディレクトリを作成し日本語に対応したttfファイル(otf)を入れることで、日本語が表示されるようになる。
自作のモジュールを作成した
from PIL import Image
from selenium import webdriver


class ScreenShot:
    def __init__(self, file_name_: str = "screenshot.png"):
        """
        :type file_name_: str
        """
        self._filename = file_name_
        self._driver = webdriver.PhantomJS()
        self._driver.set_window_size(1024, 768)
        self._crop_margin = 0

    def screen_shot(self, url_: str) -> bool:
        """
        Take a screenshot of the specified url.
        :return: Success is True, Fail is False
        :param url_: the webpage to save screenshot
        """
        try:
            self._driver.get(url_)
            self._driver.save_screenshot(self._filename)
        except Exception as e:
            print(e)
            return False
        return True

    def screen_shot_crop(self, url_: str, search_element_name: str, search_element_type: str = "Id") -> bool:
        """
        Take a screenshot of the specified class of the specified url destination.
        :return: Success is True, Fail is False
        :param url_: the webpage to save screenshot
        :param search_element_name: search to element name
        :param search_element_type: search to element type
        """
        self.screen_shot(url_)
        before_script = """
                        var element = document.getElementBy""" + search_element_type + "('" + search_element_name + """');
                        var rect = element.getBoundingClientRect();
                        """
        try:
            left = self._driver.execute_script(before_script + "return rect.left;") - self._crop_margin
            top = self._driver.execute_script(before_script + "return rect.top;")
            right = self._driver.execute_script(before_script + "return rect.width;") + left + self._crop_margin
            bottom = self._driver.execute_script(before_script + "return rect.height;") + top + self._crop_margin
        except Exception as e:
            print(e)
            return False
        im = Image.open(self._filename)
        im = im.crop((left, top, right, bottom))
        im.save(self._filename)
        im.close()
        return True

    def set_file_name(self, filename_: str):
        self._filename = filename_

    def set_window_size(self, width_: int, height_: int):
        self._driver.set_window_size(width=width_, height=height_)

    def get_window_size(self) -> object:
        return self._driver.get_window_size()

    def set_crop_margin(self, crop_margin_: int):
        self._crop_margin = crop_margin_

    def ger_crop_margin(self) -> object:
        return self._crop_margin

    def __del__(self):
        self._driver.close()


if __name__ == "__main__":
    # スクリーンショットを撮るURLを指定
    screen_url = "https://www.yahoo.co.jp"
    # クロップする要素の属性を指定
    element_type = "Id"
    # クロップする要素名を指定
    element_name = "topicsboxbd"
    # インスタンスを生成するときに保存先ファイル名を指定
    ss = ScreenShot("screenshot.png")
    # screen_urlのスクリーンショットを保存
    ss.screen_shot(screen_url)
    # 保存先ファイル名を変更
    ss.set_file_name("screenshot_crop.png")
    # screen_urlのelement_type属性のelement_nameという要素のスクリーンショットを保存
    ss.screen_shot_crop(screen_url, element_name, element_type)
    # インスタンスの削除
    del ss
実際に使った例
【非公式】宮大支援課お知らせBOT
参考
python selenium phantomJS element.location returns wrong location - Stack Overflow