VMWare Fusionで動かすUbuntu 16.04上のEmacsでもmacOS Sierra上のEmacsと同じように使いたいと思い至った。特にVMWareを使う場合は⌘や⌥などの修飾キーが奪われたりとなにかと面倒なためメモして共有する。
Spacemacs (![]()
![]() 12664 - 2017/09/02) とは何かというと、各人が長い年月をかけてWebに点在する設定を書きためた秘伝のソースのようなものを書かずとも、Emacsを便利につかえるようにした設定&パッケージ集。Vimと同様の操作方法であるEvilを使うのかEmacsの操作方法(Holy?)を使うかを最初に問われる。そのためVimを使う人にもおすすめできる。
12664 - 2017/09/02) とは何かというと、各人が長い年月をかけてWebに点在する設定を書きためた秘伝のソースのようなものを書かずとも、Emacsを便利につかえるようにした設定&パッケージ集。Vimと同様の操作方法であるEvilを使うのかEmacsの操作方法(Holy?)を使うかを最初に問われる。そのためVimを使う人にもおすすめできる。
追記: 2017/09/13
Emacs 25.3より前のバージョンには任意のLispコードを実行される脆弱性があります。
25.3以降のバージョンを使うもしくは、リンク先のコードを設定ファイルに書く必要があります。
[ANNOUNCE] Emacs 25.3 released
Prerequisite
- macOS Sierra 10.12.6
- VMware Fusion 8.5 Pro
ProじゃなくてもOK。現時点ではバージョン10が発表されているため今購入すると無料アップデートの対象になる。 -
Ubuntu 16.04.3 LTS
本家版。日本語版では試していない。リンクはこちら Ubuntu 16.04 LTS 日本語 Remix
Setup Ubuntu (with VMWare Tools)
... UbuntuのTerminalが操作可能になるまでは省略する ...
まずはパッケージを最新の状態へ
sudo apt update
sudo apt upgrade
ウィンドウのリサイズ、macOSとUbuntu間でコピペやファイル移動などをするためVMWare Toolsをインストールしておく。
1. VMWareのmacOS側ステータスバーからVirtual Machine > Install VMWare Tools (Reinstall VMWare Toolsとなっていた場合はすでにインストールされているので以下の作業は不要)。
2. ダイアログが表示されるのでInstallを押す。
3. 表示されるフォルダ内のVMWareTools-10.1.6-xxxxxxx.tar.gzをダブルクリックして解凍。
4. 解凍されたvmware-tools-distribフォルダをDesktopに移動させる。
5. Terminalで以下のとおり操作する。
cd ~/Desktop/vmware-tools-distrib/
sudo ./vmware-install.pl
最初に "Do you still want to proceed with this installation? [no]"
(インストールを続けますか?)と聞かれるので yes を入力して enter
その後はすべてデフォルト値で enter してもOK
最後にUbuntuを再起動。![]()
reboot
Key Settings for VMWare
UbuntuのLauncherにデフォルトで当てられている⌘キーを無効にしてEmacsで使えるようにする。
Emacs内で⌘-SPACEで入力を切り替えたり、⌘-jなどの操作に当てたい。
sudo apt install unity-tweak-tool
unity-tweak-tool
Unity Tweak Toolウィンドウ表示されるので、右上のアイコンAdditionalを開き<Super>(⌘)をダブルクリックしてキーボードのdeleteキーを押してDisabledにする。
<Alt>(⌥)も同様に無効化する。
次にVMWareのmacOS側ステータスバーからVMWare Fusion > Preferences... > Keyboard & Mouseと進む。
Key MappingsタブのControl - Option - Deleteにチェックが付いていたらはずしておく(EmacsでAltキーを2回押さないと反応しない場合があったため)。
そしてMac Host ShortcutsタブのEnable Mac OS Host Keyboard Shortcutsにチェックが付いていたらはずす。
Emacs上で⌥単体で押すとメニューが出てしまうためこれを無効化するためには、System Settings > Keyboard > Shortcuts > Launchers > Key to show the HUDを無効にする。
Setup Emacs & Spacemacs
Emacs 25.2をインストールしSpacemacsの設定と日本語入力設定をする。
sudo apt install emacsとするとEmacs 24.5が入ってしまうため、レポジトリを追加してEmacs 25.2をインストール。
sudo add-apt-repository ppa:kelleyk/emacs
# 途中で enter の入力を求められる
sudo apt update
sudo apt install emacs25
Spacemacs(Emacsの設定)をインストール。
sudo apt install git
git clone https://github.com/syl20bnr/spacemacs ~/.emacs.d
Emacsを通常起動する。
emacs
Spacemacsから初回にいくつか質問されるので答えていく。
(File error: Cannot open load file, No such file or directory, bind-mapのエラーが出た場合はパッケージサーバーのタイムアウトが考えられるため、~/.spacemacs.d/init.elのdotspacemacs-elpa-timeout設定を次のように変更して再起動する。dotspacemacs-elpa-timeout 300)
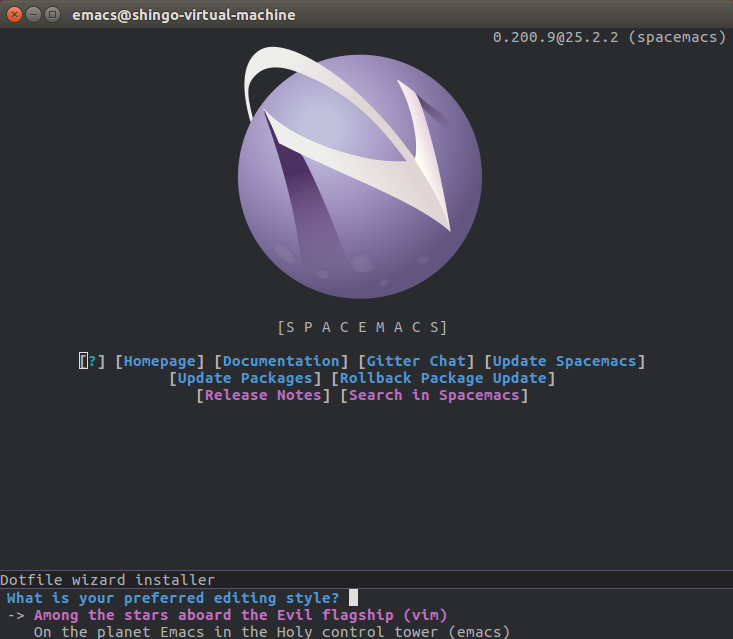
まずは操作方法について。ここではvimではなくemacsを選ぶ。![]() 矢印で選択を変えられる。
矢印で選択を変えられる。
What is your preferred editing style?
-> On the planet Emacs in the Holy control tower (emacs)
   Among the stars abord the Evil flagship (vim)
標準か最小の構成かどうか。標準が推奨されているので標準にしておく。
What distribution of spacemacs would you like to start with?
-> The standard distribution, recommended (spacemacs)
   A minimalist distribution that you build on (spacemacs-base)
強力なナビゲーションツールのhelmもしくはivyを選ぶ。自作のhelm拡張 helm-swoop(![]()
![]() 428 - 2017/09/02)も標準で
428 - 2017/09/02)も標準でSpacemacsへ組み込まれているためhelm推し。ivyはまだ試したことがない。
What type of completion framework do you want?
-> A heavy one but full-featured (helm)
   A lighter one but still very powerful (ivy)
   None (not recommended)
パッケージ群のインストールがしばらく続き、問題なく完了すると再びSpacemacsのロゴ画面が表示される。
ホームフォルダに.spacemacsという設定ファイルが構築される。今後のためにこれを.spacemacs.d/init.elに置き換えておく。
いったんEmacsを閉じてから移動。
mkdir ~/.spacemacs.d
mv ~/.spacemacs ~/.spacemacs.d/init.el
もし~/.spacemacsと~/.spacemacs.d/init.elが同時に存在した場合、優先されるのは前者。
日本語入力設定
... Ubuntu側の日本語入力設定は省略(fcixt-mozcを使用) ...
Emacs用にmozcを使う。emacs-mozc-binのみを指定する(emacs-mozcとするとemacs 24.5が入ってしまうため)。
sudo apt install emacs-mozc-bin
設定ファイル~/.spacemacs.d/init.elを開く。
emacs ~/.spacemacs.d/init.el
57行目あたりのdotspacemacs-additional-packagesにmozcのパッケージをいくつか指定する。
   dotspacemacs-additional-packages
   '(
     mozc
     mozc-im
     mozc-popup
     )
310行目あたりにdotspacemacs/user-configがあれば以下のとおりに変更する。なければ関数ごと追加する。
(defun dotspacemacs/user-config ()
  "Configuration function for user code..."

  ;; mozc
  (when (require 'mozc nil t)
    (setq default-input-method "japanese-mozc")
    (global-set-key (kbd "s-j") 'toggle-input-method) ;; [⌘ + j]
    (defvar mozc-candidate-style) ;; avoid compile error
    (if (require 'mozc-popup nil t)
        (setq mozc-candidate-style 'popup)
      (setq mozc-candidate-style 'echo-area)))

  )
保存しらたEmacsを再起動する。![]()
ロゴ画面で以下の通りmozcがインストールされたことがわかる。
Found 3 new package(s) to install...
--> refreshing package archive: gnu... [3/3]
--> installing package: mozc-popup@dotfile... [3/3]
(global-set-key (kbd "s-j") 'toggle-input-method)の部分で⌘ + jで言語を切り替えるようにしている。
ここを⌘ + SPACEにしたい場合は
1. (global-set-key (kbd "s-SPC") 'toggle-input-method)に変更。
2. UbuntuのSystem Settings > Text Entry > Switch to next source usingがSuper+Spaceになっているのでここをクリックしてdeleteし空にする。
ここまでの設定ファイルはGistにおいておく。
https://gist.github.com/ShingoFukuyama/ab8b201e6f150b4954f8d21508c58782
おまけ
フォント指定
等幅や一定比率のフォントを指定しておくと可読性が増すのでおすすめ。
候補
* ![]() Source Han Code JP
Source Han Code JP
* ![]() Ricty Diminished
Ricty Diminished
Source Han Code JPの場合ならリンク先のGitHubからzipをダウンロードして解凍、OTFフォルダのSourceHanCodeJP-Regular.oftあたりをダブルクリックしてでるウィンドウの右上のInstallで導入。
~/.spacemacs.d/init.elの140行目あたりにあるdotspacemacs-default-fontの"Source Code Pro"部分を"Source Han Code JP R"としてEmacsを再起動すると反映される。