2015/03/01 アルデバラン・アトリエ秋葉原 Pepper開発タッチ&トライの記録
Pepperの目である3Dカメラ(XtionのDepthセンサ)を使って、3次元点群を取得するボックスを作成してみました。
参考記事:thorikawaさんのPepperくんでPoint Cloud
getPointCloudボックスの作成
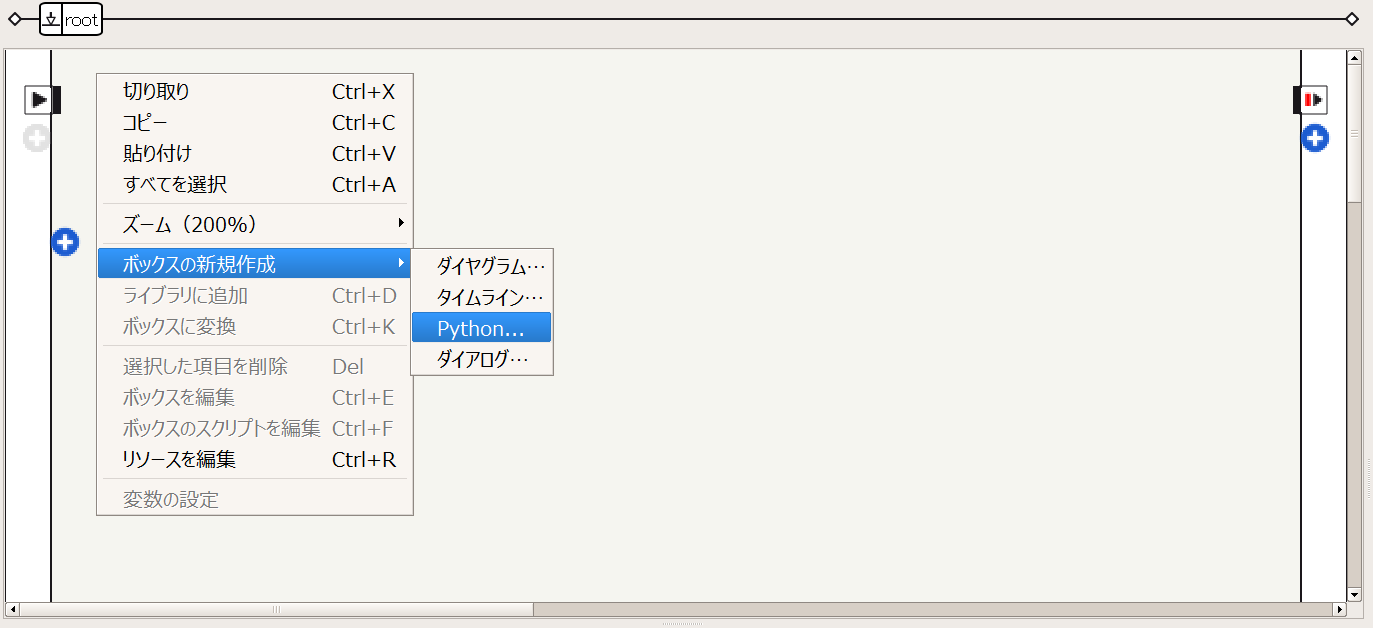
Choregraphe 2.1.2を起動し、Pythonスクリプトのボックスを作成します。右クリック→ボックスの新規作成→Pythonスクリプト、または、ボックスライブラリのstandard→Templates→Python Script。
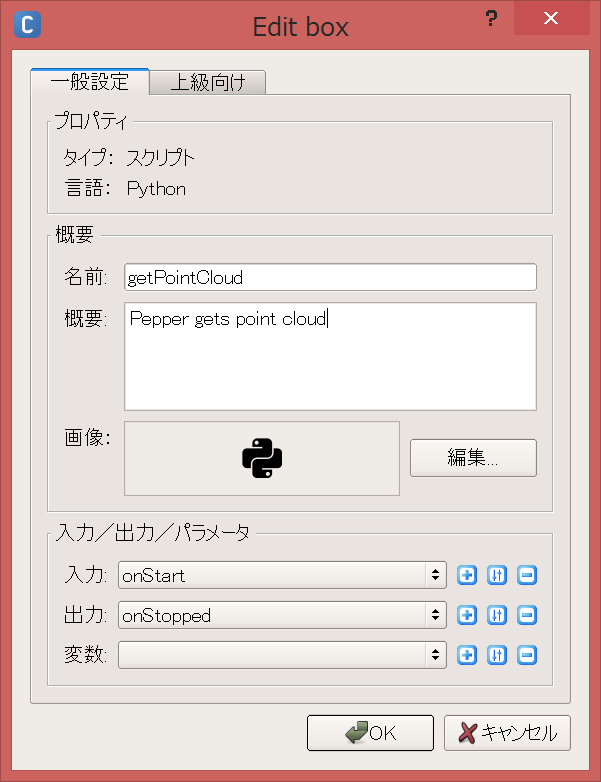
ボックスの名前と概要を記述し、OKボタンを押してください。
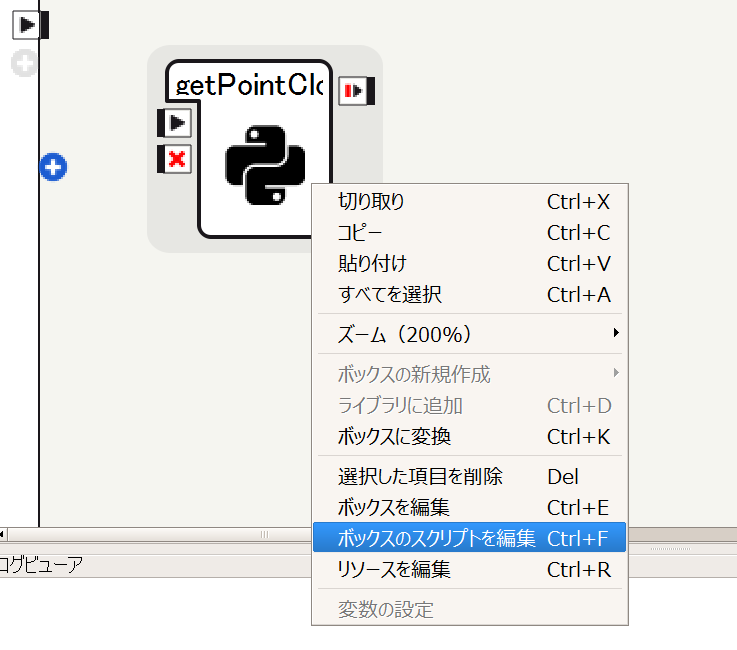
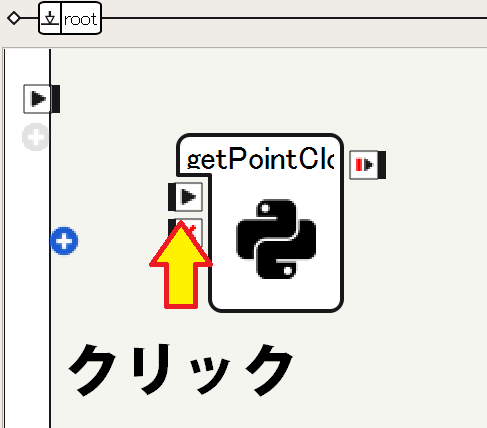
ボックスを右クリックし、Pythonスクリプトを編集します。
次のように、getPointCloud関数を定義します。
class MyClass(GeneratedClass):
    def __init__(self):
        GeneratedClass.__init__(self)

    def onLoad(self):
        #put initialization code here
        pass

    def onUnload(self):
        #put clean-up code here
        pass

    def getPointCloud(self):
        import argparse
        import Image
        import time

        # Camera parameters (only tested on Pepper)
        # Focal length
        FX = 525.0 / 2
        FY = 525.0 / 2
        # Optical center
        CX = 319.5 / 2
        CY = 239.5 / 2

        # millimeter to meter
        UNIT_SCALING = 0.001

        NAME = "depth_camera"
        CAMERA_ID = 2 # depth
        RESOLUTION = 1 # 320*240
        FRAMERATE = 15
        COLOR_SPACE = 17 # mono16 Note: this is not documented as of Dec 14, 2014

        video = ALProxy('ALVideoDevice')
        client = video.subscribeCamera(NAME, CAMERA_ID, RESOLUTION, COLOR_SPACE, FRAMERATE)

        try:
            image = video.getImageRemote(client)

            if image is None:
                print 'Cannot obtain depth image.'
                exit()

            width = image[0]
            height = image[1]
            array = image[6]

            cloud = []
            for v in range(height):
                for u in range(width):
                    offset = (v * width + u) * 2
                    depth = ord(array[offset]) + ord(array[offset+1]) * 256
                    x = (u - CX) * depth * UNIT_SCALING / FX
                    y = (v - CY) * depth * UNIT_SCALING / FY
                    z = depth * UNIT_SCALING
                    cloud.append((x, y, z))
        finally:
            video.unsubscribe(client)

        fileName = '/home/nao/recordings/cameras/cloud%f.ply' % time.time()

        f = open(fileName, 'w')
        num = len(cloud)
        header = '''ply
 format ascii 1.0
 comment Pepper 3D generated
 element vertex %d
 property float x
 property float y
 property float z
end_header
'''

        f.write(header % (width*height))
        f.write("\n")
        for c in cloud:
            f.write('%f %f %f' % (c[0], c[1], c[2]))
            f.write("\n")
        f.close()
        pass

    def onInput_onStart(self):
        #self.onStopped() #activate the output of the box
        self.getPointCloud()
        pass

    def onInput_onStop(self):
        self.onUnload() #it is recommended to reuse the clean-up as the box is stopped
        self.onStopped() #activate the output of the box
実行
ロボットにアップロードして再生(F5)し、
3次元点群をply形式でPepperのローカルへ保存します。
線で繋いだものが最初に実行される。
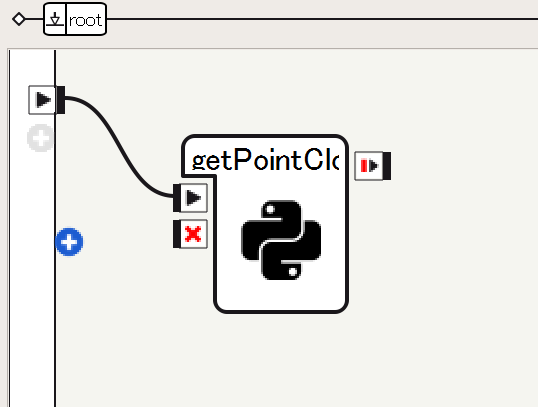
線で繋がなくてもロボットにアップロードされたあとは、入力のところ(再生ボタン)をクリックすると、単体で実行できる。
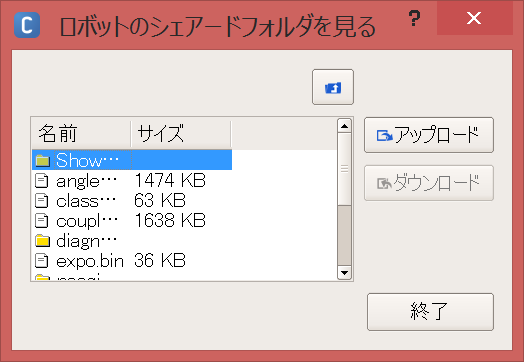
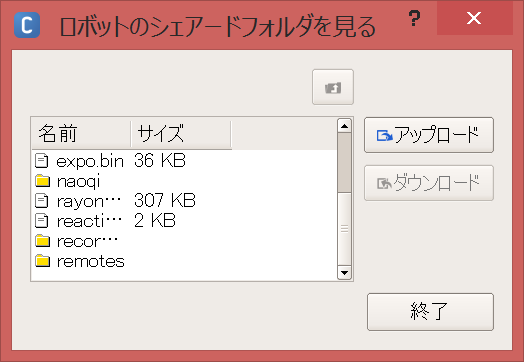
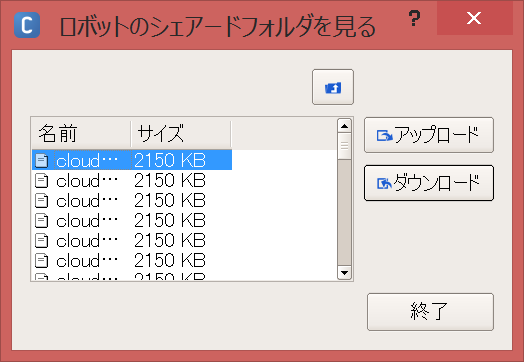
点群ファイルのダウンロード
メニューバーから接続→上級者向け→ファイルの転送をクリック
ID:nao Password:nao
でPepperのローカルフォルダが見れます。
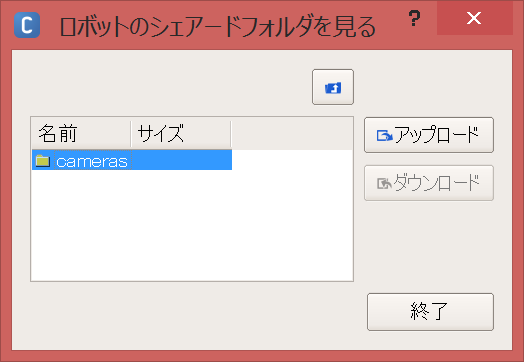
recordings/cameras/の中に、点群のファイルが保存されているので、ダウンロードしましょう。
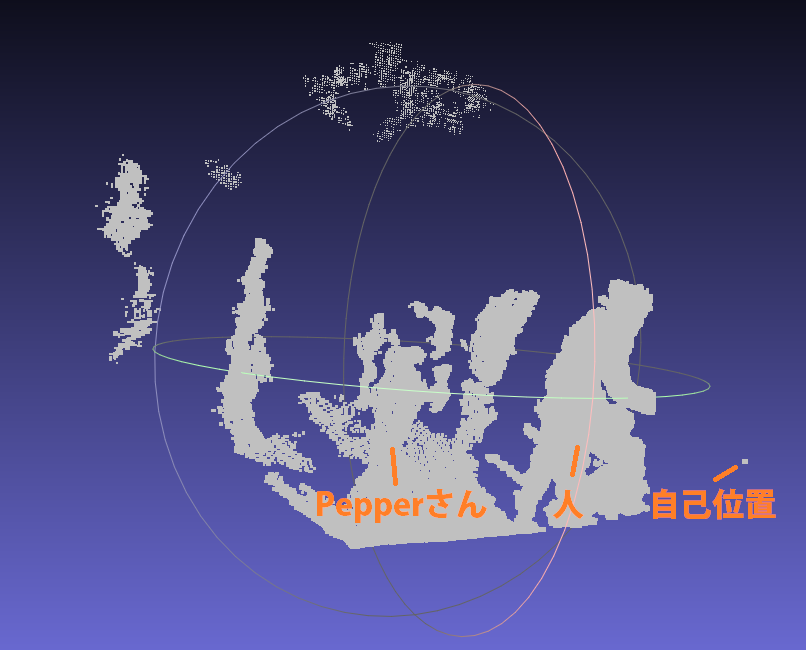
点群の表示
Meshlabで開くと、3次元点群が確認できます。
まとめ
Pepperの3Dカメラを使って、3次元点群をplyで保存、ローカルからダウンロード、Meshlabで表示できました。
次は、Depthの生データ(16bit, png画像)を利用し、地図作成と自己位置推定を同時に行うSLAMをしたい。
目標軌道(move_traj.pmt)を走行時のオドメトリ(加速度)やRGB(カラー)、Depth(深度)のデータセットを作る。
補足
SLAMは、ロボットをある軌道で自律移動させたいときや走行環境を理解させたいときに用います。エンコーダや加速度センサなどの内界センサよりも精度がよく、信頼できます。
3Dカメラは、平面抽出や物体検出、顔認識などにも応用できます。
Pepperには2台の2Dカメラ(RGBカメラ)があるので、ステレオカメラにすれば点群も得られますし(共通に見えている部分のみ、あるかな?w)、3Dカメラから得られる点群に色づけしたりもできます。
※Pepperさんを使わないときはいつもRestしておきましょう。延命のために。笑