Fastly CDN の特徴のひとつに、Instant purge(コンテンツの即時削除)があります。通常、CDN では更新の多いコンテンツはキャッシュすることができませんが、Fastly では Purge を即座に行うことが可能であるため、更新の多いコンテンツでもキャッシュすることが可能です。
ただし、コンテンツが変更されるたびに Instant purge を手動で行うのは理想的な運用とはいえません。ここでは AWS Lambda を利用して、S3 でのファイル更新を検知して、自動的に Instant purge を実行する方法を紹介します。
Lambda の設定
- Services から Lambda を選択し、Create a Lambda function をクリックします
- blueprint が表示されますが、ここでは
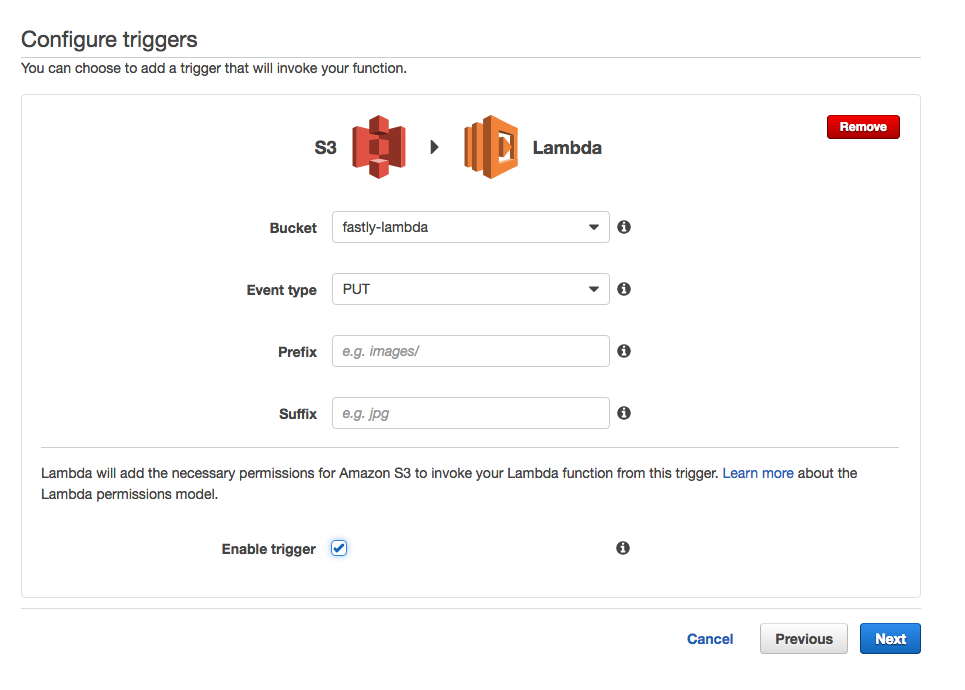
Blank Functionを選択します - トリガーの設定画面が表示されるので、
S3を選択し、Bucket にコンテンツが配置される S3 バケットを選択し、Event type を PUT とします

- Name / Description を入力し、Runtime はデフォルトの
Node.jsを選択します。

- Code は下記のように設定します。hostname を Instant purge を行うドメインに変更してください。
下記のコードでは、アップデートされたパスをkeyに格納し、options にドメイン、ポート番号、method(purge のため、PURGE) と共に設定し、http.requestで Instant purge のリクエストを送信しています。
console.log('Loading event');
var aws = require('aws-sdk');
var s3 = new aws.S3({apiVersion: '2006-03-01'});
var http = require('http');

exports.handler = function(event, context) {
   console.log('Received event:');
   console.log(JSON.stringify(event, null, '  '));
   // Get the object from the event and show its content type
   const bucket = event.Records[0].s3.bucket.name;
   const key = event.Records[0].s3.object.key;
   s3.getObject({Bucket:bucket, Key:key},
      function(err,data) {
        if (err) {
           console.log('error getting object ' + key + ' from bucket ' + bucket +
               '. Make sure they exist and your bucket is in the same region as this function.');
           context.done('error','error getting file'+err);
        }
        else {
           console.log('CONTENT TYPE:' + data.ContentType + ' bucket: ' + bucket + ' path: ' + key);
           context.done(null,'');
        }
      }
   );

  var options = {
    hostname: 'www.example.com',
    port: 80,
    path: '/' + key,
    method: 'PURGE',
  };

  callback = function(response) {
  var str = '';

    //another chunk of data has been recieved, so append it to `str`
    response.on('data', function (chunk) {
      str += chunk;
    });

    //the whole response has been recieved, so we just print it out here
    response.on('end', function () {
      console.log(options.hostname + ':' + options.port + options.path + ' method:' + options.method);
      console.log(str);
    });
  }

  http.request(options, callback).end();
};
6 . Role は Choose an existing role を選択し、Existing role を選択します。

以上で設定は完了です。
動作確認
ここでは index.html ファイルを更新し、パージによりキャッシュ MISS となることを確認します。
- curl コマンドでキャッシュヒットになることを確認します。
$ curl -svo /dev/null http://www.example.com/lambda
...
< Age: 3
...
< X-Cache: MISS, HIT
< X-Cache-Hits: 0, 1
2 . s3 上の lambda ファイルを更新します
3. curl コマンドでキャッシュミスになることを確認します。
$ curl -svo /dev/null http://www.example.com/lambda
...
< Age: 0
...
< X-Cache: MISS, MISS
< X-Cache-Hits: 0, 0
